

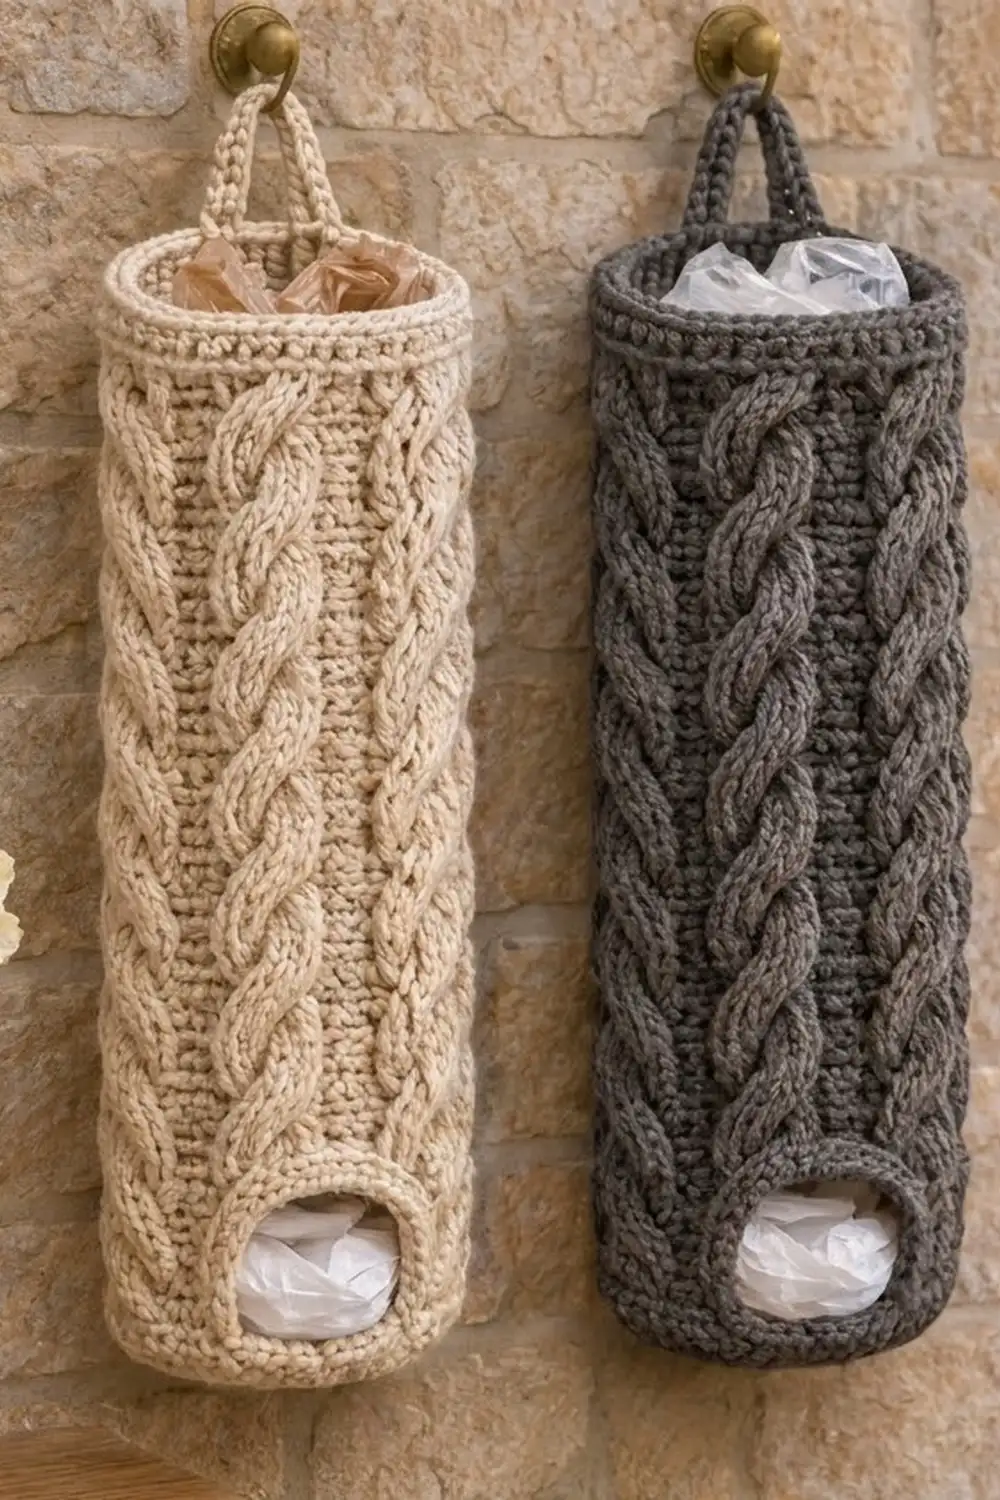
Plastic bags tend to pile up in a drawer. This holder stores them neatly instead. It’s a tall cabled tube that hangs on a hook. You push bags in at the top and pull them out through a small opening near the bottom.
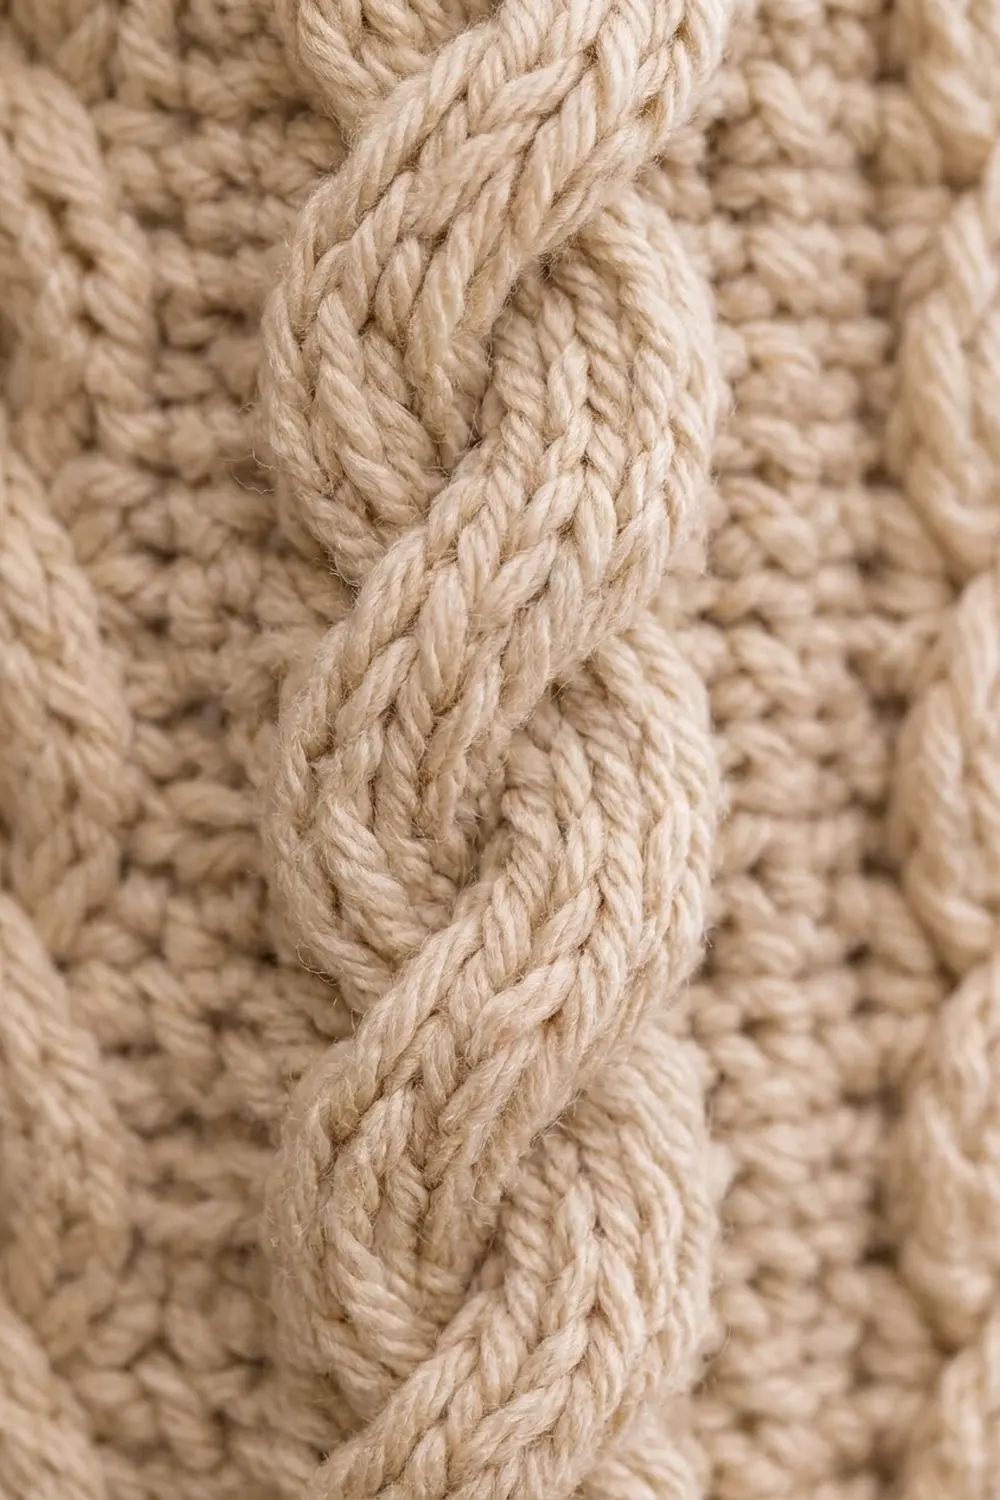
The sample is a warm cream that suits stone, wood and farmhouse-style kitchens. A charcoal gray version works well in modern rooms. Six rope cables run up the tube, separated by narrow plain columns, so it looks like a chunky knit while being crocheted throughout.
The pattern uses US crochet terms. The finished holder measures about 5 in (12.7 cm) across and 16 in (40.6 cm) tall, not including the hanging loop.
The construction is simple. You crochet a flat circle base, turn the edge up with a back-loop round, then work the cabled tube in joined rounds. For four rows near the bottom you work back and forth, which leaves the dispensing opening. A single crochet rim and a covered hanging loop finish the top.
Finished Size and Construction
- Finished size: 5 in (12.7 cm) diameter x 16 in (40.6 cm) tall; the loop adds 3 in (7.6 cm)
- Skill level: Intermediate (post stitches and cables)
- Terminology: US
- Yarn weight: Worsted / medium #4
- Hook: 5.0 mm (US H-8)
- Number of pieces: 1 (the hanging loop is worked directly onto the rim)
- Layout: Closed cylinder with 6 cable repeats of 10 stitches each
- Piece size: 60 stitches around, which is 16 in (40.6 cm) of circumference
- Size before rim: 15.25 in (38.7 cm) tall, from the bottom of the base to the top of the body
- Rim depth: 0.75 in (1.9 cm)
Materials
Choose a smooth worsted-weight yarn in cotton, a cotton blend or acrylic. Cables look clearest in tightly plied, light-to-medium colors. Avoid fuzzy or very splitty yarns, because post stitches will catch on them.
- Cream (main sample): 130 g / 260 m
- Charcoal gray (optional, for a second holder): 130 g / 260 m
Each holder uses one color only. These amounts include a margin of about 15% for your gauge swatch and any small differences in tension.
Tools:
- 5.0 mm (US H-8) crochet hook
- 4 locking stitch markers
- Tapestry needle
- Scissors
- Measuring tape
- A rolled towel or a 5 in (12.7 cm) cylinder (for example, an oatmeal tube) for blocking
Abbreviations (US Terms)
- ch – chain
- sl st – slip stitch
- sc – single crochet
- sc2tog – single crochet 2 together
- dc – double crochet
- FPdc – front post double crochet
- BPdc – back post double crochet
- FPtr – front post treble crochet
- BLO – back loop only
- st(s) – stitch(es)
- RS / WS – right side / wrong side
Special stitch – C6F (6-stitch front cable): Skip the next 3 sts. Work 1 FPtr around each of the next 3 sts. Then, working in front of the 3 stitches you just made, work 1 FPtr around each of the 3 skipped sts. This uses 6 sts and makes 6 sts.
Gauge and Checkpoints
Gauge: 15 sts and 8 rounds = 4 in (10.2 cm) in the body pattern. In single crochet, 15 sts and 4 rounds = 4 in x 1 in (10.2 cm x 2.5 cm).
Make the base first and use it as your gauge test. If the base is the right size, the tube will be too.
- After Base Round 5: The circle measures 5 in (12.7 cm) across and lies flat.
- After Body Round 10: The body is 5 in (12.7 cm) tall, measured from the turning ridge.
- After Body Round 20: 10 in (25.4 cm).
- After Body Round 30: 15 in (38.1 cm).
- After the rim: 16 in (40.6 cm) in total height.
If your base is too big: go down half a hook size. If it’s too small: go up half a size. Don’t change the stitch counts, because the cable repeat needs exactly 60 stitches.
Base
Work in joined rounds with the RS facing. The ch 2 at the start of a round does not count as a stitch. Join each round with a sl st to the first stitch.
Round 1: Make a magic ring. Ch 2, then work 12 dc into the ring. Join. (12 sts)
Round 2: Ch 2, work 2 dc in each st around. Join. (24 sts)
Round 3: Ch 2, dc in next st, 2 dc in next st; repeat from * around. Join. (36 sts)
Round 4: Ch 2, dc in next 2 sts, 2 dc in next st; repeat from * around. Join. (48 sts)
Round 5: Ch 2, dc in next 3 sts, 2 dc in next st; repeat from * around. Join. (60 sts)
Checkpoint: the base should be 5 in (12.7 cm) across.
Round 6 (turning round): Ch 1, sc in BLO of each st around. Join. (60 sts)
This round leaves a ridge on the outside, so the edge folds upward and becomes the bottom corner of the holder. It adds 0.25 in (0.6 cm) of height.
Body
Number the stitches 1 to 60, starting from the join. Each 10-stitch repeat has 4 background stitches followed by 6 cable stitches.
Round 1: Ch 2, dc in each st around. Join. (60 sts)
Dispensing Opening (Rows 2–5)
For the next four rows, work back and forth over sts 1–50 only. Sts 51–60 are left unworked, and that gap becomes the opening. Place markers in st 1 and st 50.
Row 2 (RS): Ch 2 and don’t turn. Dc in next 4 sts, FPdc around next 6 sts; repeat from * 4 more times. Leave the last 10 sts unworked. (50 sts)
Row 3 (WS): Ch 2, turn. BPdc around next 6 sts, dc in next 4 sts; repeat from * 4 more times. (50 sts)
On the WS, the BPdc stitches keep the cables raised on the outside.
Row 4 (RS): Ch 2, turn. Dc in next 4 sts, C6F; repeat from * 4 more times. (50 sts)
Row 5 (WS): Repeat Row 3. (50 sts)
Round 6 (RS): Ch 2, turn. Dc in next 4 sts, FPdc around next 6 sts; repeat from * 4 more times. Ch 10 to bridge the gap, then join with a sl st to the first dc. (50 sts + ch-10)
Round 7: Ch 2, dc in next 4 sts, FPdc around next 6 sts; repeat from * 4 more times. Then work 1 dc in each of the 10 chains. Join. (60 sts)
The opening is now closed above. It is about 2.7 in (6.9 cm) wide and 2 in (5.1 cm) tall, and starts 0.75 in (1.9 cm) above the bottom of the holder.
Cable Pattern
Round 8 (cable round): Ch 2, dc in next 4 sts, C6F; repeat from * around. Join. (60 sts, 6 cables)
The repeat above the opening also crosses in this round. Its FPtr stitches wrap around the plain dc stitches from Round 7.
Rounds 9–11: Ch 2, dc in next 4 sts, FPdc around next 6 sts; repeat from * around. Join. (60 sts)
Rounds 12–30: Repeat Rounds 8–11. Every fourth round is a cable round: Rounds 12, 16, 20, 24 and 28. Finish with Rounds 29–30 as plain pattern rounds. (60 sts)
There are 7 crossings in total. Checkpoint: the body is 15 in (38.1 cm) tall from the turning ridge.
Opening Edging
Round 1: With the RS facing, join yarn at the bottom right corner of the opening. Work around the opening as follows:
- 10 sc along the bottom edge, into the unworked sts 51–60 of Round 1
- 8 sc up the side, 2 in each of the 4 row-ends
- 10 sc along the top, into the free loops of the ch-10
- 8 sc down the other side
Join. (36 sts)
Round 2: Ch 1. Sc around, working sc2tog at each of the 4 corners. Join. (32 sts)
Fasten off. The sc2tog corners round off the shape, and the opening ends up about 2.25 in (5.7 cm) wide and 1.5 in (3.8 cm) tall, with a firm edge.
Rim and Hanging Loop
Rim gauge: 15 sc = 4 in (10.2 cm), and 4 rounds = 1 in (2.5 cm).
Rim Round 1: Ch 1, sc in each st around. Join. (60 sts)
Rim Round 2: Ch 1, sc in each st around. Join. (60 sts)
Rim Round 3: Ch 1, sc in each st around. Join. Fasten off. (60 sts)
For placement, think of the rim as four quarters of 15 sts: sts 1–15, 16–30, 31–45 and 46–60. Each of the 3 rounds has exactly 15 sc per quarter. The body has 6 repeats of 10 sts (60), and the rim works 1 sc into each of those stitches, so the rim also has 60. The circumference stays at 16 in (40.6 cm). Single crochet is a little firmer than the cabled fabric, so the rim holds the top round instead of letting it flare.
Hanging loop: Join yarn in st 24 of Rim Round 3. This is directly opposite the opening, which is centered over sts 51–60.
- Ch 24. Sl st into st 27. The two ends of the loop are now 3 sts, or 0.8 in (2.0 cm), apart.
- Turn and work 30 sc over the chain loop.
- Sl st into st 24 and fasten off.
The extra sc pack tightly around the chain, so the loop is stiff and stands at about 3 in (7.6 cm) tall.
Weave in all ends on the WS. Run each tail through post stitches, where it won’t show.
Final Blocking
- Lightly spritz the holder with water, or hold a steam iron 1 in (2.5 cm) above it. Don’t press the cables flat.
- Slide a rolled towel or a 5 in (12.7 cm) cylinder into the tube.
- Push the base flat from the inside and line up the turning ridge.
- Run your fingers up each cable so they all lean the same way.
- Pull the opening into a smooth rounded rectangle, 2.25 in x 1.5 in (5.7 cm x 3.8 cm).
- Pin the loop upright and let the holder dry completely, standing up.
- Measure again: 5 in (12.7 cm) across and 16 in (40.6 cm) tall.
Final Quality-Control Checklist
- [ ] The base lies flat and the turning ridge is even all the way around.
- [ ] All 6 cables cross in the same direction on Rounds 4, 8, 12, 16, 20, 24 and 28.
- [ ] Each round has exactly 60 sts, except Rows 2–6.
- [ ] The opening has a smooth edge with 4 rounded corners and no holes.
- [ ] The rim is level and has 60 sts in every round.
- [ ] The loop is centered directly above the back of the holder, opposite the opening.
- [ ] All ends are hidden and secure.
Troubleshooting
- The cables look flat: You may have worked into the top of a stitch instead of around its post. Insert the hook from front to back to front around the stitch’s vertical post.
- The base cups or ruffles: If it cups, your hook is too small. If it ruffles, your increases are uneven. Count each round before joining.
- The joins drift diagonally: Always start the next round in the same stitch you joined into, and keep the ch 2 from counting as a stitch.
- There’s a gap at the top corners of the opening: Work the first and last dc of Round 7 tightly into the chain. The sc2tog stitches in the edging round will also close any loose spots.
- The C6F looks too tight: FPtr is tall on purpose. If it puckers, make your yarn-overs slightly looser rather than changing the stitch.
- The holder sags when full: Stuff it no fuller than the body. If it still stretches, work a fourth rim round.
Care
Hand wash in cool water and lay flat to dry, then reshape over a towel roll. Acrylic and cotton versions can go in a laundry bag on a gentle machine cycle.
Final Notes
Everything in this holder follows from one measurement chain. The base reaches 60 sts and 5 in (12.7 cm). Those 60 sts give 6 cable repeats of 10. The body adds 15 in (38.1 cm) over 30 rounds, and the rim adds the final 0.75 in (1.9 cm). Check your base, count your 60, and the rest will line up.
Happy crocheting!