

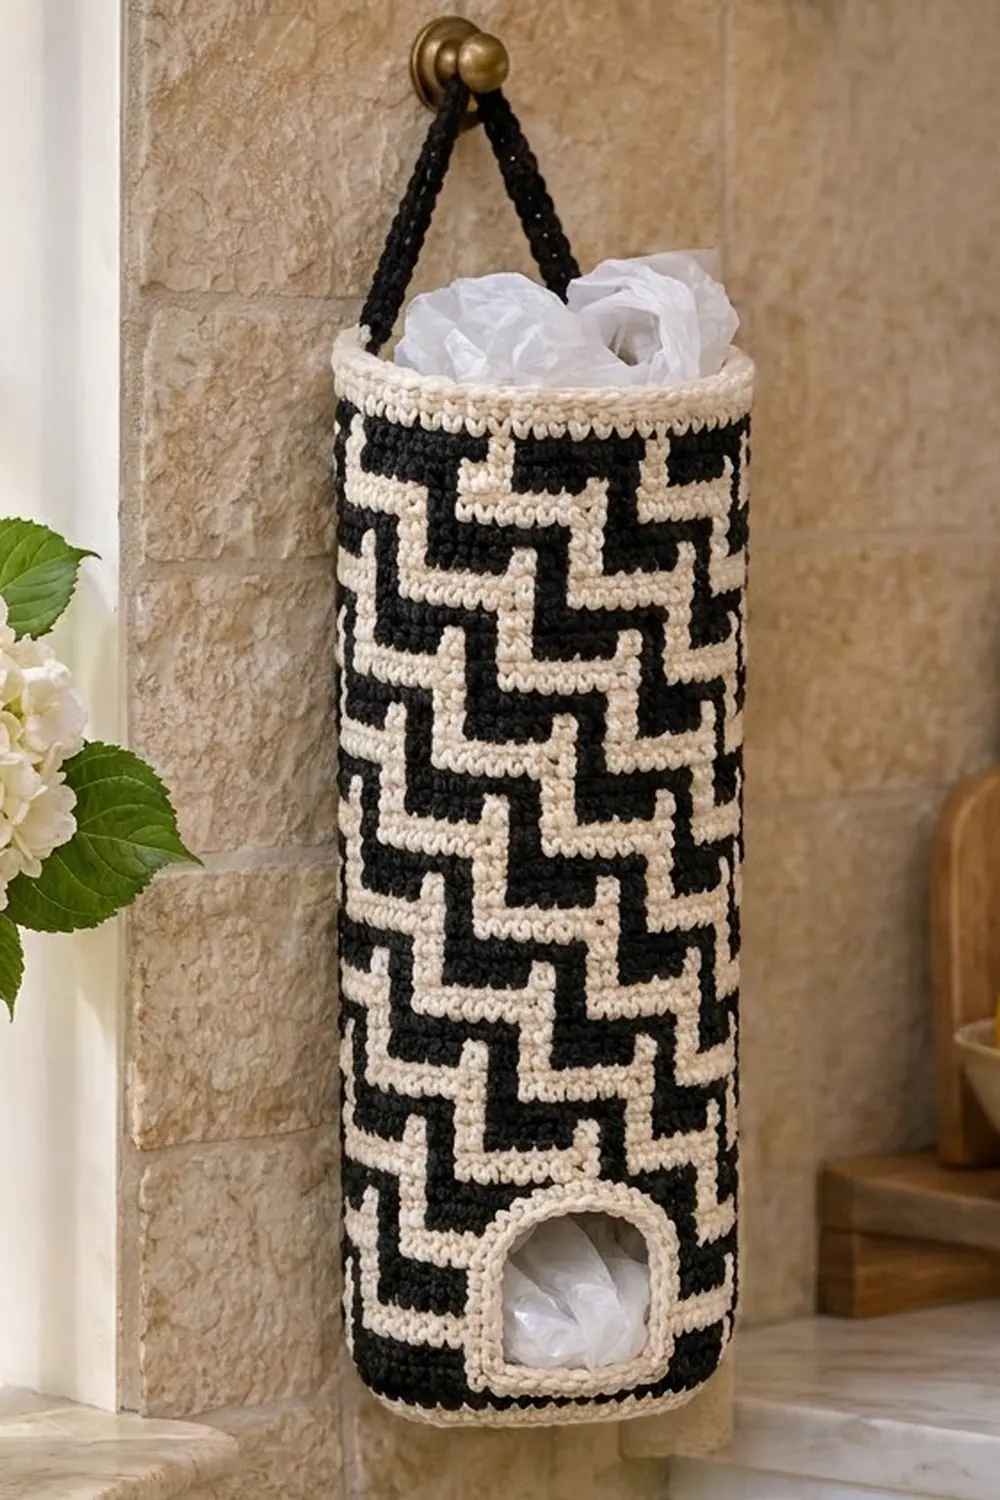
This hanging bag holder is a tidy, graphic way to tame a pile of plastic grocery bags. Push the bags in at the top and pull them out one at a time through the rounded opening near the bottom.
The sample is in black and cream. Stair-step bands climb diagonally all the way around the tube. A cream ring marks the base edge, a wide cream band finishes the rim, and a slim black strap loops over a wall hook. The same pattern looks just as sharp in royal blue and cream.
The pattern uses US crochet terms. The finished holder is 15 in (38.1 cm) tall without the strap, 16½ in (41.9 cm) around, and about 5¼ in (13.3 cm) across. The strap adds a loop that rises about 3½ in (8.9 cm) above the rim.
Construction is continuous. First you make a double crochet oval base, then work joined rounds of single crochet tapestry colorwork up the tube. For a short stretch you switch to turned rows to leave the dispensing opening, and a chain closes the gap above it. Rim rounds, the opening edging and a strap worked off the rim finish the piece.
Finished Size and Construction
- Finished size: 15 in (38.1 cm) tall × 16½ in (41.9 cm) circumference, about 5¼ in (13.3 cm) diameter
- Skill level: Intermediate
- Terminology: US crochet terms
- Yarn weight: Worsted (#4) cotton or cotton blend
- Hook: 4.5 mm (US 7)
- Number of pieces: 1 (the base, body, rim and strap are worked continuously, and the strap end is sewn down)
- Layout: Single cylinder; the opening sits low on the front and the strap runs from side to side
- Base size: about 6 × 4 in (15.2 × 10.2 cm) oval
- Size before border: 14¼ in (36.2 cm) tall after Body Rnd 57
- Border depth: 3 rim rounds = ¾ in (1.9 cm); the opening edging is 2 rounds = ½ in (1.3 cm)
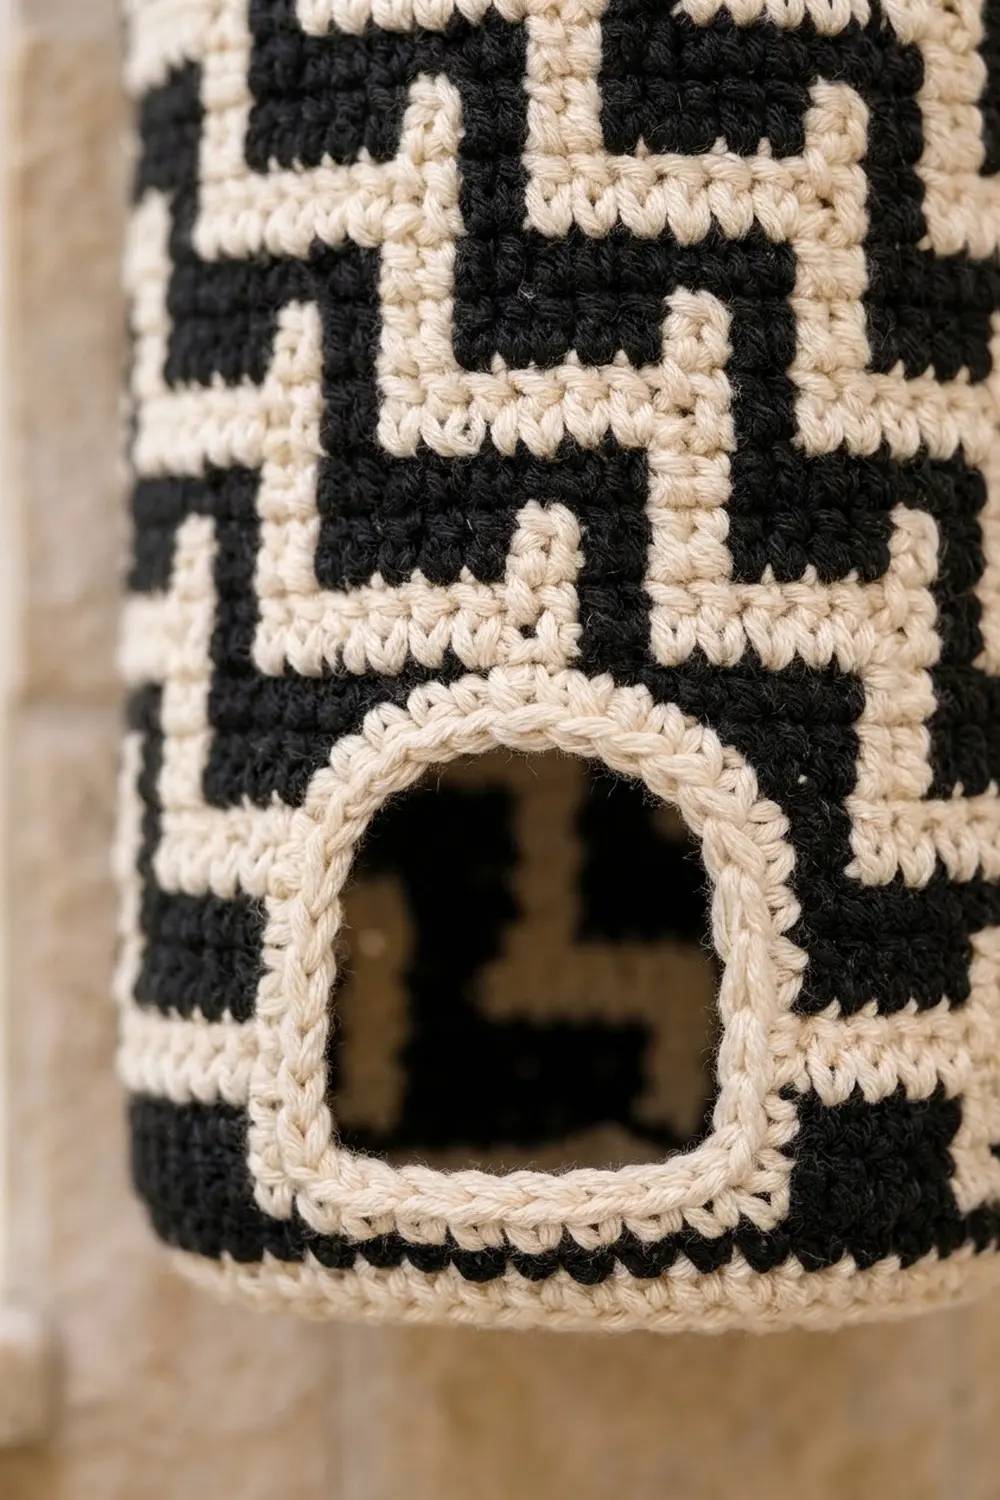
- Opening: 4½ × 3½ in (11.4 × 8.9 cm) before edging, about 3½ × 2½ in (8.9 × 6.4 cm) after
Materials
Choose a smooth, firm cotton. Cotton holds the tube’s shape and keeps the stair-steps crisp. Acrylic works too, but the tube will slump more. Avoid fuzzy yarns because they blur the color changes.
- Color A – Black: 150 g, about 300 m (328 yd)
- Color B – Cream: 130 g, about 260 m (284 yd)
Tapestry crochet carries both colors through every stitch, so it uses roughly twice the yarn of plain single crochet. These quantities include a margin of about 15%.
Tools:
– 4.5 mm (US 7) crochet hook
– 4 locking stitch markers
– Tapestry needle
– Scissors
– Measuring tape
– Rolled towel or a 5 in (12.7 cm) wide cardboard tube for blocking
Abbreviations (US Terms)
- ch – chain
- sl st – slip stitch
- sc – single crochet
- hdc – half double crochet
- dc – double crochet
- BLO – back loop only
- st(s) – stitch(es)
- rnd(s) – round(s)
- RS / WS – right side / wrong side
- A / B – black / cream
Tapestry sc (special stitch): Lay the unused color along the tops of the stitches you are working into and work every sc over it, so the strand is enclosed. To change color, work the last sc of the old color until 2 loops remain on the hook, then yarn over with the new color and pull through. Keep the carried strand snug but not tight.
Pattern lines (6-st repeat):
– Line A: 4 B, 2 A
– Line B: 2 B, 4 A
– Line C: 2 B, 2 A, 2 B
– Line D: 4 A, 2 B
– Line E: 2 A, 4 B
– Line F: 2 A, 2 B, 2 A
Worked in order A to F, these lines make a cream staircase. Each step has a flat run 4 sts long, then rises over 2 rnds and shifts 2 sts to the side.
Gauge and Checkpoints
Gauge: 16 tapestry sc × 16 rnds = 4 in (10.2 cm). Double crochet in the base has the same stitch width, 4 sts per 1 in (2.5 cm).
This holder is one piece, so the base works as your gauge swatch. Make the base and the first 6 body rnds, then measure.
- After base Rnd 4: the oval measures about 6 × 4 in (15.2 × 10.2 cm) and lies flat.
- After Body Rnd 6: the tube measures 16½ in (41.9 cm) around and 1½ in (3.8 cm) high from the base edge.
- After Body Rnd 21: 5¼ in (13.3 cm) high, and the opening is 4½ in (11.4 cm) wide.
- After Body Rnd 57: 14¼ in (36.2 cm) high.
- After the rim: 15 in (38.1 cm) high.
If the tube measures more than 17 in (43.2 cm) around, change to a 4 mm (US G-6) hook. If it measures less than 16 in (40.6 cm), change to a 5 mm (US H-8) hook. Pulling the carried strand too tight shrinks the circumference and puckers the fabric, so check your tension before you change hooks.
Base
Work in joined rnds with A only. The starting ch-2 does not count as a st.
Ch 13.
Rnd 1: 3 dc in 3rd ch from hook (end A), dc in next 9 ch, 6 dc in last ch (end B). Working along the opposite side of the foundation ch, dc in next 9 ch, then 3 dc in the same ch as the first 3 dc. Join with sl st to the first dc. (3 + 9 + 6 + 9 + 3 = 30 dc)
Rnd 2: Ch 2, 2 dc in each of next 3 sts, dc in next 9, 2 dc in each of next 6, dc in next 9, 2 dc in each of last 3. Join. (6 + 9 + 12 + 9 + 6 = 42 dc)
Rnd 3: Ch 2, [dc in next st, 2 dc in next] 3 times, dc in next 9, [dc, 2 dc in next] 6 times, dc in next 9, [dc, 2 dc in next] 3 times. Join. (9 + 9 + 18 + 9 + 9 = 54 dc)
Rnd 4: Ch 2, [dc in next 2 sts, 2 dc in next] 3 times, dc in next 9, [dc in next 2, 2 dc in next] 6 times, dc in next 9, [dc in next 2, 2 dc in next] 3 times. Join. (12 + 9 + 24 + 9 + 12 = 66 dc)
The straight sts of the first long side are sts 13–21. Check that the oval is about 6 × 4 in (15.2 × 10.2 cm) and lies flat.
Body
From here on, every rnd is joined. Ch 1 at the start of each rnd (it does not count) and sl st to the first sc at the end. Carry the unused color in every rnd, including the solid ones, so the fabric stays the same thickness all the way up.
Rnd 1 (base edge): Join B with sl st. Ch 1, sc in BLO of each st around, carrying A. (66 sc) This conversion rnd turns the base edge up and makes the thin cream ring.
Rnd 2: With A, sc in each st around, carrying B. (66 sc)
Rnds 3–6: Work Lines A, B, C and D, one line per rnd, repeating the 6-st line 11 times around. (66 sc each rnd)
Dispensing Opening (Rows 7–20)
Sts 7–24 of the round will become the opening. These 18 sts (3 repeats) sit roughly centered over the front long side. You now work in turned rows over the other 48 sts (8 repeats). On WS rows the color sequence within each repeat is reversed.
Row 7 (RS): Ch 1, beginning in st 25, work Line E across sts 25–66 and 1–6, leaving sts 7–24 unworked. Turn. (48 sc)
Row 8 (WS): Ch 1, work Line F reversed (2 A, 2 B, 2 A) across. Turn. (48 sc)
Row 9 (RS): Line A. Row 10 (WS): Line B reversed (4 A, 2 B).
Row 11 (RS): Line C. Row 12 (WS): Line D reversed (2 B, 4 A).
Rows 13–20: Repeat Rows 7–12 once more, then work Rows 7–8 once more. Row 20 is a WS row and ends at the edge next to st 25. Turn. (48 sc each row)
At each row end, bring both strands around to the new working side and keep enclosing the carried strand.
Rnd 21 (closing rnd, RS): Ch 1, work Line A over the 48 sts, then with A ch 18 across the gap. Join with sl st to the first sc of the rnd. (48 sc + 18 ch = 66 sts) The rnd now begins at old st 25, which is also the start of a repeat, so the pattern stays aligned.
Rnd 22: Work Line B, working into the 48 sc and the back bumps of the 18 ch. Enclose the carried B over the chain. (66 sc) Check that the tube measures 5½ in (14.0 cm) high.
Rnds 23–56: Work Lines C, D, E and F, then work Lines A to F 5 more times. (66 sc each rnd)
Rnd 57: With A, sc in each st around, carrying B. (66 sc) Check that the tube is 14¼ in (36.2 cm) high.
Border: Rim, Opening Edging and Strap
Border gauge: The border is sc at 4 sts per 1 in (2.5 cm), the same as the body. Each rim rnd has exactly 1 sc per st, 66 sc. Flattened, that is 33 sts across the front and 33 across the back, so each half is 8¼ in (21.0 cm) wide. Because the stitch count and gauge match the body, the rim cannot flare or pull in.
Top Rim
Rnds 58–60: With B, sc in each st around, carrying A. (66 sc each rnd: 33 front + 33 back) At the end of Rnd 60, cut A and fasten off B.
Opening Edging
With RS facing, join B at the bottom right corner of the opening.
Rnd 1: Ch 1. Work 18 sc across the bottom (1 in each skipped st), 14 sc up the first side (1 per row end), 18 sc across the top (1 in each free loop of the ch), and 14 sc down the second side. Join. (18 + 14 + 18 + 14 = 64 sc)
Rnd 2 (arch shaping): Ch 1. Work sc in each of 18 bottom sts. Up the first side, sc in 12, hdc in 1, dc in 1 (14). Across the top, dc in 1, hdc in 1, sc in 14, hdc in 1, dc in 1 (18). Down the second side, dc in 1, hdc in 1, sc in 12 (14). Join. (18 + 14 + 18 + 14 = 64 sts) Fasten off.
The taller sts fill the two top corners and round them into an arch, while the bottom corners stay square.
Strap
Fold the holder flat with the opening centered on the front. Mark the 3 center sts of Rnd 60 at each side fold.
Row 1: With RS facing, join A in the first marked st on one side. Ch 1, sc in the 3 marked sts. Turn. (3 sc)
Rows 2–36: Ch 1, sc in each st. Turn. (3 sc each row)
The strap measures 9 in (22.9 cm). Fasten off, leaving a 12 in (30.5 cm) tail. Sew the last row to the inside of the rim, behind the 3 marked sts at the opposite fold. The strap should arch about 3½ in (8.9 cm) above the rim.
Final Blocking
- Weave in all ends inside the tube, running each tail through the carried strands.
- Soak the holder in cool water for 10 minutes and press out the water in a towel. Do not wring it.
- Slide in a rolled towel or a 5 in (12.7 cm) wide tube so that the fabric is smooth but not stretched.
- Check that the tube is 16½ in (41.9 cm) around and 15 in (38.1 cm) tall.
- Flatten the base and ease the stair-steps so that they run level.
- Shape the opening arch with your fingers, and pin the strap straight to dry.
- Let it dry completely standing upright, then remove the form.
Final Quality-Control Checklist
- The base is flat and the cream base-edge ring is unbroken.
- Every rnd has 66 sts and the stair-steps line up all the way around.
- No carried strands show on the RS.
- The opening is centered on the front with straight sides and a rounded top.
- The rim is smooth and level at 15 in (38.1 cm) high.
- The strap is centered at the side folds, sewn securely and untwisted.
Troubleshooting
- The stair-steps lean or drift: Joined rnds jog slightly. Keep the joins at the back and recount each repeat.
- The carried strand peeks through: Tighten your tension slightly and hold the carried strand flatter on top of the sts.
- The tube cones outward or inward: Your tension has changed. Count the sts (always 66) and check the circumference.
- The opening rows look different: This is normal for turned tapestry rows. Snug tension minimizes it, and blocking evens it out.
- The top corners of the opening stay square: Repeat the hdc/dc corner sts in a third edging rnd.
- The strap stretches: Add a row of sl sts along both long edges.
Care
Hand wash cool and lay flat or stand upright to dry. Keep it out of the dryer to protect the shape and colors.
Final Notes
Everything follows from one measurement chain. At 16 sc per 4 in (10.2 cm), 66 sts give a 16½ in (41.9 cm) circumference, so the 66-dc base matches the body exactly. At 4 rnds per 1 in (2.5 cm), 57 body rnds reach 14¼ in (36.2 cm), and 3 rim rnds bring the holder to 15 in (38.1 cm). The 18-st opening is 3 exact pattern repeats. That keeps the colorwork aligned when the 18-ch closing round bridges the gap. Check your gauge at the first checkpoint and the rest will fall into place.
Happy crocheting!