

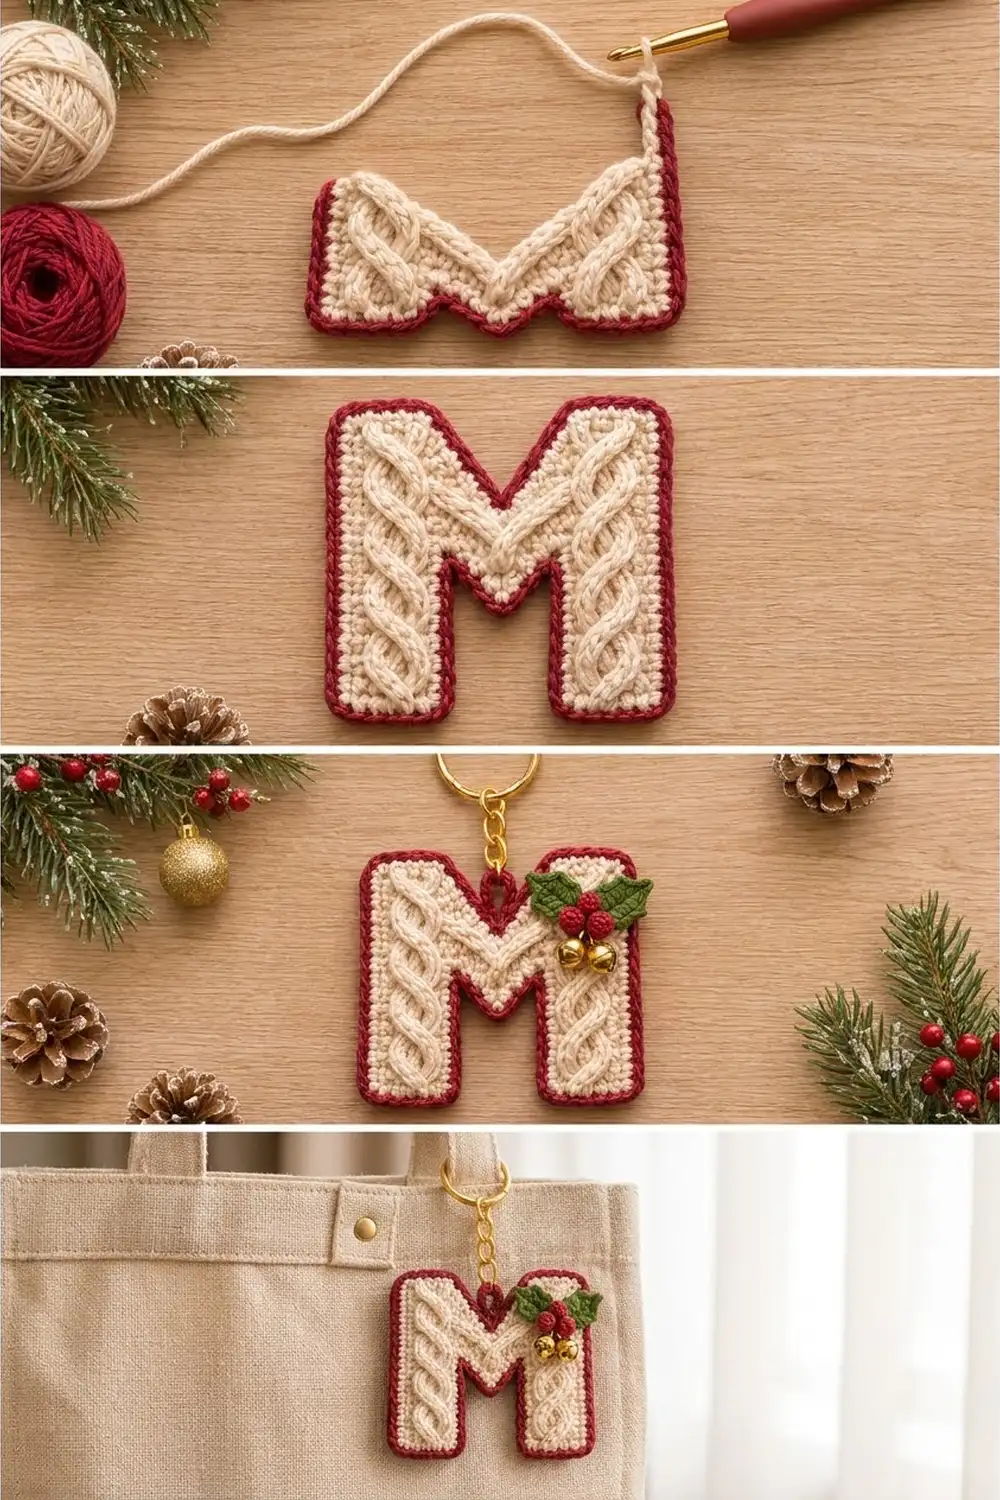
This letter M is a cozy holiday keychain that looks like a little sweater. The cream body is single crochet with raised front post cables. A twisted rope cable runs up each leg, and two short cable arms make a V across the middle. A cranberry red corded border goes around the whole shape.
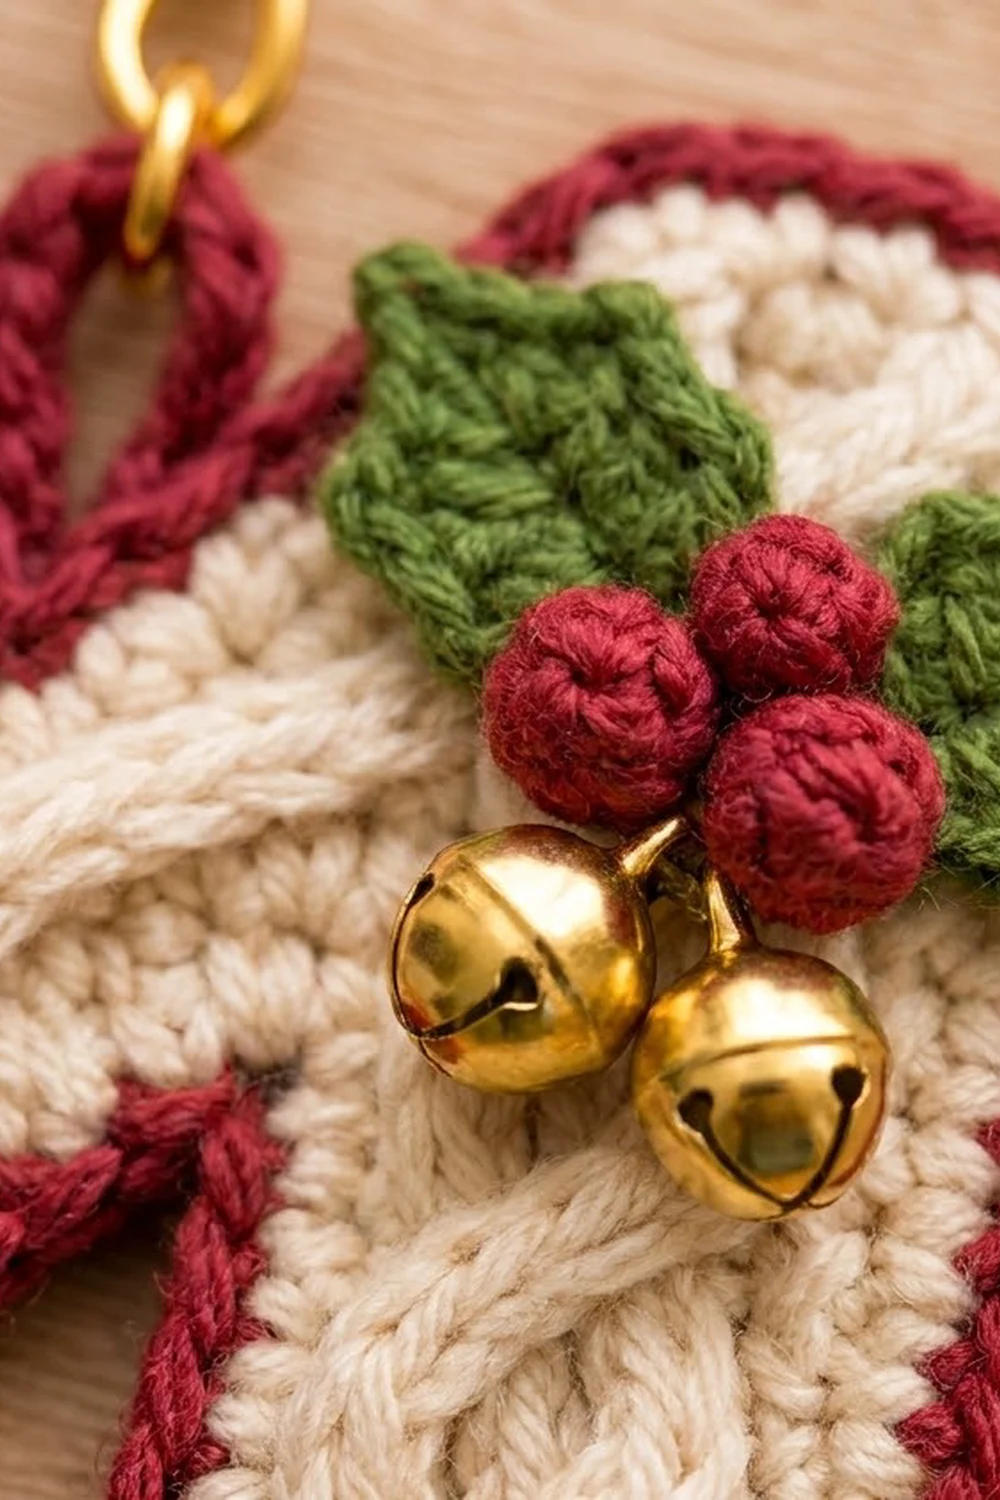
A holly cluster sits on the upper right corner. It has two green leaves, three round red berries and two small gold jingle bells. A red loop at the center top holds a gold chain and split ring, so you can hang the keychain on a bag handle, a zipper or your keys.
This pattern uses US crochet terms. The finished keychain is 3.5 in (8.9 cm) wide x 3.5 in (8.9 cm) tall, not counting the hardware. You work the body flat in rows from the bottom up. First you make the two legs separately. Then a joining row connects them, and the top splits into two halves to form the V notch. Two red border rounds go around the outline. The appliqué and hardware go on last.
The body is a single piece. The leaves and berries are small appliqués that you sew onto the front.
Finished Size and Construction
- Finished size: 3.5 in (8.9 cm) x 3.5 in (8.9 cm), not counting the loop and hardware
- Skill level: Intermediate (post-stitch cables and edge shaping)
- Terminology: US crochet terms
- Yarn weight: Sport weight (#2) mercerized cotton
- Hook: 3.25 mm (US D/3)
- Number of pieces: 1 cable body, plus 2 leaves and 3 berries
- Layout: one letter M, worked in rows
- Piece size before border: 3 in (7.6 cm) x 3 in (7.6 cm), 18 sts x 21 rows
- Border depth: 0.25 in (0.6 cm) on every edge, 2 rounds
Materials
Choose a smooth, tightly plied yarn. Crisp mercerized cotton shows the cables best. It also keeps the letter’s shape on a keychain that gets handled often. Avoid fuzzy yarns, because they hide the twists.
- Cream (body): 8 g, about 24 m
- Cranberry red (border, loop, berries): 5 g, about 15 m
- Holly green (leaves): 2 g, about 6 m
These amounts include about 25 percent extra for your gauge test and yarn tails.
Tools and notions:
- 3.25 mm (US D/3) crochet hook
- Tapestry needle
- 2 gold jingle bells, 10 mm
- 1 gold split ring, 25 mm (1 in, 2.5 cm), with a short chain and jump ring
- A pinch of fiberfill or yarn scraps
- Stitch markers, pins and a blocking mat
- Optional: felt cut to the M shape, for a backing
Abbreviations (US Terms)
- ch – chain
- sl st – slip stitch
- sc – single crochet
- hdc – half double crochet
- dc – double crochet
- sc2tog – single crochet 2 together
- st(s) – stitch(es)
- RS / WS – right side / wrong side
- FPdc / FPtr – front post double / treble crochet
- rev sc – reverse single crochet (crab stitch), worked from left to right
- picot – ch 2, sl st in 2nd ch from hook
Special stitches
- Post stitches on this fabric: Work every FPdc or FPtr around the post of the stitch 2 rows below. Skip the sc behind it on the current row, so the stitch count stays the same.
- Cr4 (4-stitch cable cross): Skip the next 2 post sts. FPtr around each of the next 2 post sts. Then, working in front of those, FPtr around each of the 2 skipped post sts. (4 sts)
- FPdc2tog: Yarn over, insert the hook around the next post st, pull up a loop, yarn over, pull through 2 loops. Repeat once around the following post st. Yarn over and pull through all 3 loops. (1 st)
All post stitches are worked on RS rows. On WS rows, sc in every stitch.
Gauge and Checkpoints
Gauge: 6 sc and 7 rows = 1 in (2.5 cm) in plain sc.
Make the left leg first and use it as your test piece. Check your size at these points:
- After Row 7 (leg): 6 sts x 7 rows = 1 in (2.5 cm) x 1 in (2.5 cm).
- After Row 10 (leg): 9 sts across the top = 1.5 in (3.8 cm).
- After Row 14: 3 in (7.6 cm) wide x 2 in (5.1 cm) tall.
- After Row 21: 3 in (7.6 cm) x 3 in (7.6 cm).
- After the border: 3.5 in (8.9 cm) x 3.5 in (8.9 cm).
If the leg is wider than 1 in (2.5 cm), switch to a 3.0 mm hook. If it is narrower, switch to a 3.5 mm hook. Measure it relaxed, without stretching the cables.
Left Leg
With cream, ch 7.
Row 1 (RS): Sc in 2nd ch from hook and in each ch across, turn. (6 sts)
Row 2 (WS): Ch 1, sc in each st across, turn. (6 sts)
Row 3: Ch 1, sc 1, FPdc around each of the next 4 sc on Row 1, sc 1, turn. (6 sts)
Row 4: Ch 1, sc in each st across, turn. (6 sts)
Row 5: Ch 1, sc 1, Cr4, sc 1, turn. (6 sts)
Row 6: Repeat Row 4. (6 sts)
Row 7: Ch 1, sc 1, FPdc around each of the next 4 post sts, sc 1, turn. (6 sts)
On this leg, RS rows start at the inner edge and WS rows end there. The inner edge is the one that faces the gap.
Row 8 (growth): Ch 1, sc 5, 2 sc in last st, turn. (7 sts)
Row 9 (growth): Ch 1, 2 sc in first st, sc 1, Cr4, sc 1, turn. (8 sts)
Row 10 (growth): Ch 1, sc 7, 2 sc in last st. (9 sts)
Fasten off. The inner edge now slants, forming one side of the pointed bottom notch.
Right Leg
Work Rows 1–7 the same as for the left leg. (6 sts)
On this leg, RS rows end at the inner edge and WS rows start there.
Row 8 (growth): Ch 1, 2 sc in first st, sc 5, turn. (7 sts)
Row 9 (growth): Ch 1, sc 1, Cr4, sc 1, 2 sc in last st, turn. (8 sts)
Row 10 (growth): Ch 1, 2 sc in first st, sc 7, turn. (9 sts)
Do not fasten off.
Joining Row and Center
Row 11 (RS): Ch 1. Across the right leg: sc 1, FPdc around each of the next 4 post sts, sc 4. Place the left leg RS up beside the right leg, with the inner edges touching. Starting in the inner-edge st of the left leg’s Row 10: sc 4, FPdc around each of the next 4 post sts, sc 1, turn. (18 sts)
The inner edges meet at a single point. This gives the bottom notch a pointed top, about 1.4 in (3.6 cm) high.
Row 12: Ch 1, sc in each st across, turn. (18 sts)
Row 13: Ch 1, sc 1, Cr4, sc 2, FPdc around each of the 4 center sts on Row 11 (sts 8–11), sc 2, Cr4, sc 1, turn. (18 sts)
These 4 center post sts are the start of the two V arms.
Row 14: Ch 1, sc in each st across, turn. (18 sts)
Right Top Half
Row 15 (RS): Ch 1, sc 1, FPdc around each of the next 4 post sts, sc 1. Next, FPdc around each of the 2 arm post sts below sts 8 and 9, but work them as sts 7 and 8. This moves the arm 1 st outward. Sc 1 in st 9, turn. Leave the other 9 sts unworked. (9 sts)
Row 16 (WS): Ch 1, sc2tog, sc 7, turn. (8 sts)
Row 17: Ch 1, sc 1, Cr4, sc 1, FPdc around each of the 2 arm post sts, turn. (8 sts)
Row 18: Ch 1, sc2tog, sc 6, turn. (7 sts)
Row 19: Ch 1, sc 1, FPdc around each of the next 4 post sts, sc 1, FPdc2tog around the 2 arm post sts, turn. (7 sts)
Row 20: Ch 1, sc2tog, sc 5, turn. (6 sts)
Row 21: Ch 1, sc 1, FPdc around each of the next 4 post sts, sc 1. (6 sts)
Fasten off.
Left Top Half
With RS facing, join cream in the first unworked st of Row 14, at the center.
Row 15 (RS): Ch 1, sc 1 in the same st. FPdc around each of the 2 arm post sts below sts 1 and 2, but work them as sts 2 and 3. This moves the arm outward. Then sc 1, FPdc around each of the next 4 post sts, sc 1, turn. (9 sts)
Row 16: Ch 1, sc 7, sc2tog, turn. (8 sts)
Row 17: Ch 1, FPdc around each of the 2 arm post sts, sc 1, Cr4, sc 1, turn. (8 sts)
Row 18: Ch 1, sc 6, sc2tog, turn. (7 sts)
Row 19: Ch 1, FPdc2tog around the 2 arm post sts, sc 1, FPdc around each of the next 4 post sts, sc 1, turn. (7 sts)
Row 20: Ch 1, sc 5, sc2tog, turn. (6 sts)
Row 21: Ch 1, sc 1, FPdc around each of the next 4 post sts, sc 1. (6 sts)
Fasten off and weave in the cream ends on the WS.
Checkpoint: The body is 3 in (7.6 cm) x 3 in (7.6 cm). The top V notch is 7 rows, or 1 in (2.5 cm), deep. It is 6 sts, or 1 in (2.5 cm), wide at the top. The leg cables cross on Rows 5, 9, 13 and 17. The V arms rise from the center along the edges of the notch.
Border
Border gauge: Each round adds about 0.125 in (0.3 cm) to each edge. Two rounds add 0.25 in (0.6 cm) per edge, so 3 in (7.6 cm) + 0.5 in (1.3 cm) = 3.5 in (8.9 cm).
Counting rule: On the top and bottom edges, work 1 sc in each st. On the side edges, work 1 sc in each row end. A corner group is 3 sc worked in one corner st. Each segment count below already includes its corner groups. The M has 8 outer corners and 2 inner points.
Rnd 1 (red, RS): Join red in the first foundation st of the left leg, at the outer corner. Work around in this order:
- Left leg bottom (6 sts): corner group, sc 4, corner group = 10 sts
- Bottom notch (20 row ends): sc 9 up the left leg, sc2tog over the last left row end and the first right row end, sc 9 down the right leg = 19 sts
- Right leg bottom (6 sts): corner group, sc 4, corner group = 10 sts
- Right outer side (21 row ends): sc 21
- Right top (6 sts): corner group, sc 4, corner group = 10 sts
- Top V notch (14 row ends): sc 6, sc2tog at the V point, sc 6 = 13 sts
- Left top (6 sts): corner group, sc 4, corner group = 10 sts
- Left outer side (21 row ends): sc 21
Sl st in the first sc. (114 sts: 10 + 19 + 10 + 21 + 10 + 13 + 10 + 21)
Rnd 2: Ch 1, rev sc in each st around, sl st in the first st. (114 sts) Do not fasten off.
Why the math works: The fabric has 6 sts for every 7 rows, so 1 sc per row end keeps the side edges flat. Each outer corner needs 2 extra sts to turn, and the 3-sc corner group adds exactly 2. Each inner point needs to lose 1 st to stay sharp, and the sc2tog takes away 1. Rnd 2 is worked 1 st into each st, so it doesn’t change the shape. It only rolls the edge into a cord.
Hanging loop: Sl st along Rnd 2 to the st above the V point. Ch 8, then sl st in the same st. Fasten off. The loop is about 0.75 in (1.9 cm) tall.
Holly Appliqué
Leaves (make 2, green): Ch 8. Starting in the 2nd ch from hook, work: sl st, sc, hdc, picot, dc, dc, picot, hdc, sc. Make a picot for the tip. Then, working in the free loops of the chain: sc, hdc, picot, dc, dc, picot, hdc, sc, sl st. (7 sts + 2 picots per side) Fasten off, leaving an 8 in (20.3 cm) tail. Each leaf is about 1 in (2.5 cm) long, with 5 points.
Berries (make 3, red): Make a magic ring and work 6 sc into it. Sc in each st around. (6 sts) Add a pinch of fiberfill. Thread the tail through the front loops and pull tight. Each berry is about 0.35 in (0.9 cm) across.
Assembly: Pin the leaves on the upper right corner in a shallow V, overlapping the inner corner of the right top. Sew them down along the center vein. Sew the berries in a cluster where the leaves meet. Then sew both bells side by side, just below the berries. Open the jump ring, slip it through the red loop and close it.
Final Blocking
- Lightly mist the body before you add the appliqué.
- Pin it RS up at 3.5 in (8.9 cm) x 3.5 in (8.9 cm).
- Pin both legs straight and both notch points sharp.
- Don’t flatten the cables. Shape them with your fingers so they stay raised.
- Let it dry completely, for at least 4 hours.
- Attach the appliqué, bells and hardware.
- Optional: cut felt 0.125 in (0.3 cm) inside the outline and whipstitch it to the WS.
Final Quality-Control Checklist
- Body: 18 sts x 21 rows, 3 in (7.6 cm) x 3 in (7.6 cm).
- Each leg is 6 sts, or 1 in (2.5 cm), wide at the bottom and the top.
- The cables cross on Rows 5, 9, 13 and 17, all in the same direction.
- Both notch points are sharp and centered.
- Rnds 1 and 2 each have 114 sts.
- Finished size: 3.5 in (8.9 cm) x 3.5 in (8.9 cm).
- The loop is centered above the V point.
- The leaves, berries and bells stay put when tugged.
Troubleshooting
- Fabric curls toward the RS: Your post stitches are too tight. Pull up taller loops.
- Stitch count grows on RS rows: You forgot to skip the sc behind a post stitch.
- Cables look flat: Work around the posts 2 rows below, not 1 row below.
- Border ruffles: Check that each outer side has 21 sts, and tighten your tension.
- Border cups: Use a 3.5 mm hook for Rnd 1.
- Notch points look rounded: Place each sc2tog exactly at the point.
- Bells twist: Sew through each bell’s shank twice and anchor it to the border.
Care
Hand wash in cool water with mild soap. Roll the keychain in a towel to remove water, then dry flat. Take off the split ring first if it might tarnish.
Final Notes
Here is the measurement chain. 6 sts and 7 rows make 1 in (2.5 cm). Each leg is 6 sts, or 1 in (2.5 cm), wide. The joined body is 18 sts x 21 rows, a 3 in (7.6 cm) square. The 114-st border adds 0.25 in (0.6 cm) to every edge, for a finished letter M of 3.5 in (8.9 cm). If you check each stage, the cables, notches and border will line up.
Happy crocheting!