

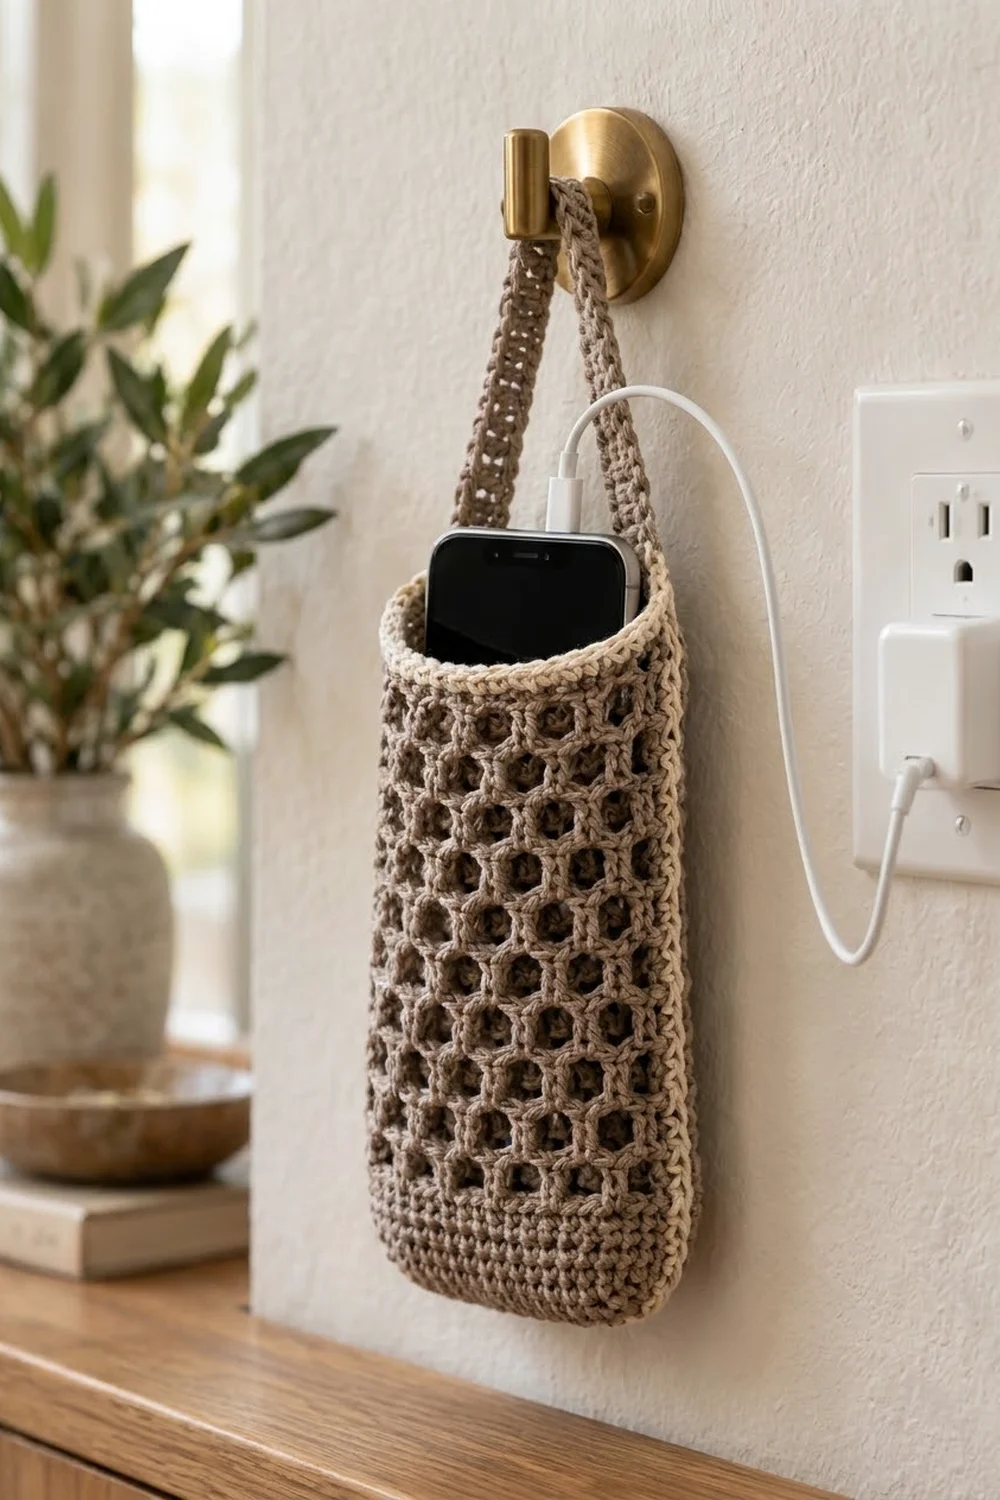
This little holder gives your phone somewhere to sit while it charges, instead of lying on the floor or dangling from the cord. It hangs from a wall hook or knob by one strap, and the open honeycomb mesh lets the cable and the phone’s heat get out easily.
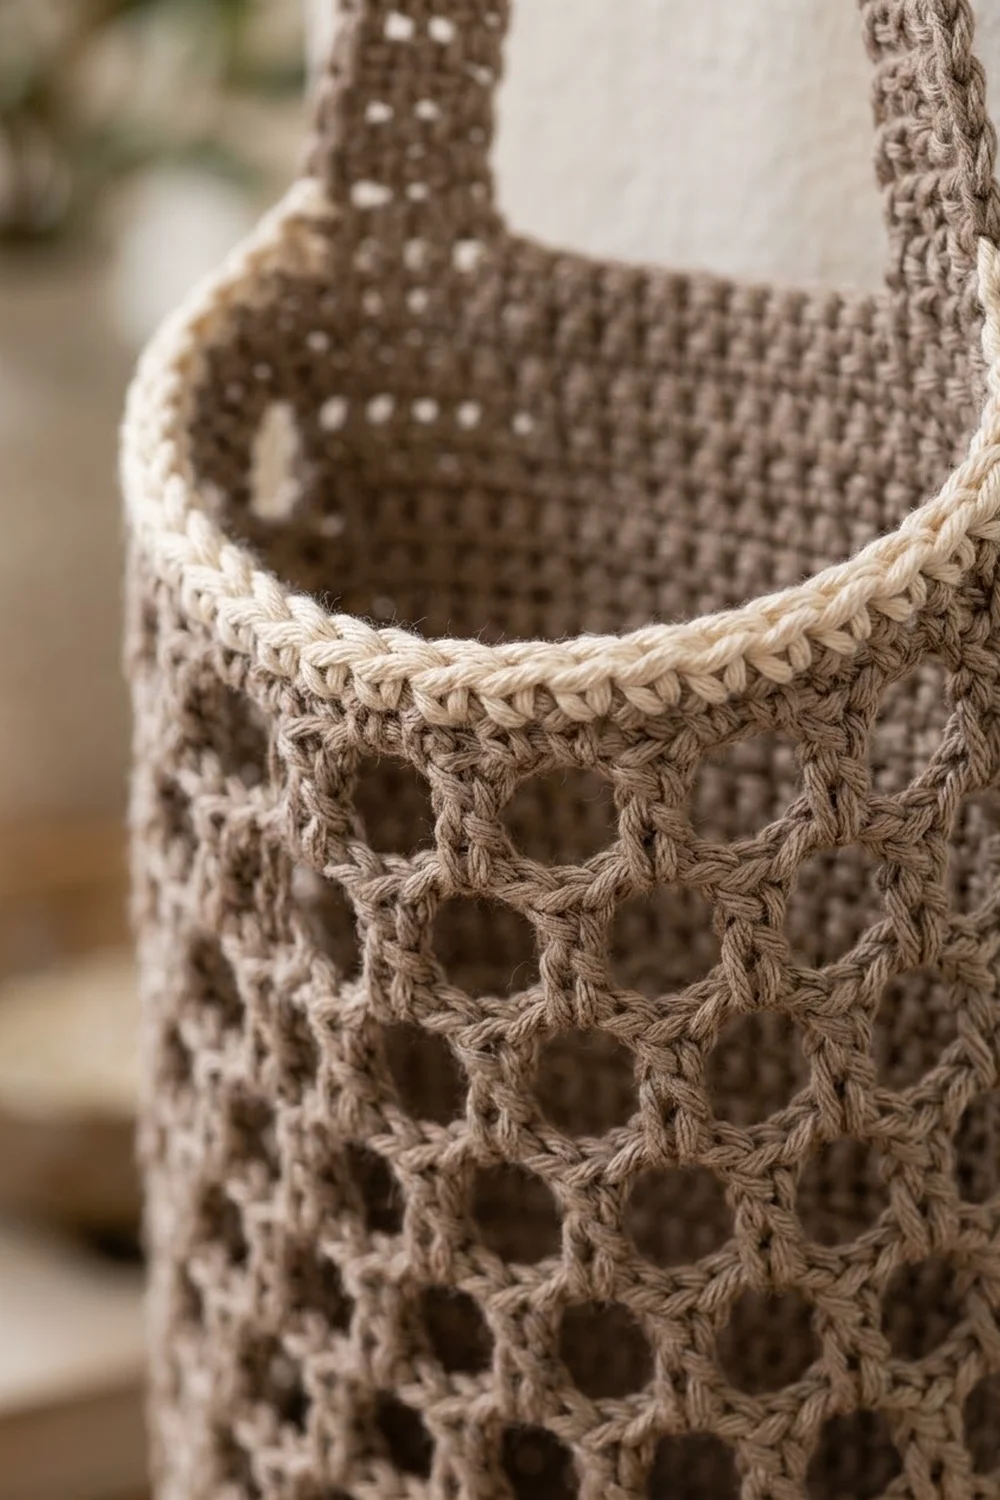
The design uses two colors. Warm taupe forms the base, the mesh body and the strap. Cream makes a rolled, corded rim around the opening and a thin outline at the bottom edge. The look is calm and natural, and it suits a neutral, Scandinavian or farmhouse room.
The pattern uses US crochet terms. The finished pouch measures 4.2 in (10.7 cm) wide when laid flat and 8 in (20.3 cm) tall. The strap is 1 in (2.5 cm) wide and 10 in (25.4 cm) long. It fits most phones up to 3 in (7.6 cm) wide, with or without a slim case.
Here is how it is built. You start with an oval base, work a solid band of single crochet, change to honeycomb mesh rounds, close the top with a solid round, and add the cream rim. You then work the strap in rows off one side of the rim and sew its end to the opposite side. The whole piece is worked in the round, so there are no side seams.
Finished Size and Construction
- Finished size: 4.2 in (10.7 cm) wide flat × 8 in (20.3 cm) tall, plus the strap
- Skill level: Easy / advanced beginner
- Terminology: US crochet terms
- Yarn weight: DK (weight 3) cotton or cotton blend
- Hook: 4.0 mm (G-6)
- Number of pieces: 1 (pouch and strap worked together; one short sewn join)
- Layout: Single standalone piece, no assembly of motifs
- Piece size: 42 stitches around (21 stitches per flattened face)
- Size before border: 7.25 in (18.4 cm) tall after the last mesh round
- Border depth: 0.75 in (1.9 cm) of solid rounds and rim at the top; strap edges 1 sc deep
Materials
Yarn: Use a smooth, firmly plied DK cotton or a cotton/linen blend. Cotton keeps the mesh crisp and doesn’t stretch much under a phone’s weight. Avoid fuzzy or very stretchy acrylic, because the honeycomb holes will close up and the strap will grow.
- Color A – Taupe: 55 g, about 127 m (139 yd)
- Color B – Cream: 10 g, about 23 m (25 yd)
These amounts assume a yarn of about 115 m per 50 g. They include a margin of roughly 15% for your gauge swatch and weaving in ends.
Tools:
– 4.0 mm (G-6) crochet hook
– 4 locking stitch markers
– Tapestry needle
– Scissors
– Measuring tape
– Spray bottle and pins for blocking
– A rolled towel or a phone-sized block of foam (optional, for shaping)
Abbreviations (US Terms)
- ch – chain
- sl st – slip stitch
- sc – single crochet
- dc – double crochet
- BLO – back loop only
- sk – skip
- sp – space
- st(s) – stitch(es)
- rnd(s) – round(s)
- tch – turning chain
- 2 sc in next – increase: 2 single crochet in the same stitch
Special stitch: Reverse single crochet (rev sc / crab stitch). Do not turn. Working from left to right (right to left if you crochet left-handed), insert the hook into the next stitch to the right, yarn over, pull up a loop, yarn over and pull through both loops. This makes a corded, rolled edge.
Gauge and Checkpoints
Solid sc gauge: 20 sc × 22 rnds = 4 in (10.2 cm).
Mesh gauge: 5 ch-3 loops = 3 in (7.6 cm) wide; 5 mesh rnds = 2 in (5.1 cm) tall, which is 0.4 in (1.0 cm) per mesh round.
Strap gauge: 1 dc row = 0.4 in (1.0 cm).
The pouch itself works as your test piece. Make Rnds 1–10 and measure before you start the mesh. Checkpoints:
- After Rnd 3 (base): the oval measures about 3.5 in × 1.25 in (8.9 cm × 3.2 cm).
- After Rnd 10 (solid band): flattened width is 4.2 in (10.7 cm), and the band is 1.25 in (3.2 cm) tall from the base edge.
- After Rnd 25 (mesh): total height is 7.25 in (18.4 cm).
- After Rnd 29 (rim): total height is 8 in (20.3 cm).
- Strap: 10 in (25.4 cm) long and 1 in (2.5 cm) wide before sewing.
If the piece is too big: go down to a 3.75 mm hook, or tighten your chains in the mesh. If it’s too small: go up to a 4.5 mm hook. A difference of 0.25 in (0.6 cm) in flat width is fine. More than that changes how the phone fits, so change hooks and start again.
Pattern
Base (Color A, Taupe)
Ch 15.
Rnd 1: 2 sc in 2nd ch from hook, sc in next 12 ch, 3 sc in last ch. Rotate and work along the other side of the chain: sc in next 12 ch, sc in the same ch as the first 2 sc. Join with sl st to first sc. (30 sts)
Each curved end now has 3 sts, and each long side has 12 sts.
Rnd 2: Ch 1. 2 sc in each of next 2 sts, sc in next 12, 2 sc in each of next 3 sts, sc in next 12, 2 sc in last st. Join. (36 sts)
Rnd 3: Ch 1. (2 sc in next, sc in next) twice, sc in next 12, (2 sc in next, sc in next) 3 times, sc in next 12, 2 sc in next, sc in last. Join. (42 sts)
Checkpoint 1: the oval should be about 3.5 in × 1.25 in (8.9 cm × 3.2 cm) and lie flat.
Solid Band (Color A)
Rnd 4: Ch 1, sc in BLO of each st around. Join. (42 sts)
Working in the back loops turns the work up into the walls. It also leaves a ring of unused front loops, which you’ll use for the cream base outline later.
Rnds 5–10: Ch 1, sc in each st around. Join. (42 sts each round)
Checkpoint 2: flatten the tube with the base’s curved ends at the side folds. Each face should measure 21 sts, or 4.2 in (10.7 cm). The band is 1.25 in (3.2 cm) tall.
Honeycomb Mesh Body (Color A)
Rnd 11 (mesh setup): Ch 1, sc in first st, ch 3, sk 2 sts. Sc in next st, ch 3, sk 2 sts. Repeat from * around. Join with sl st to first sc. (14 sc + 14 ch-3 loops)
Math check: each repeat uses 3 sts (1 sc + 2 skipped), and 14 × 3 = 42.
Rnd 12: Sl st into the first ch-3 sp. Ch 1, sc in the same sp, ch 3. Sc in next ch-3 sp, ch 3. Repeat from * around. Join with sl st to first sc. (14 sc + 14 ch-3 loops)
Each sc sits in the middle of a loop from the round below. That shifts the openings half a loop each round, so they stack in an offset pattern and read as hexagons.
Rnds 13–25: Repeat Rnd 12. (14 loops each round)
That gives 15 mesh rounds in total (Rnd 11 plus Rnds 12–25), and 15 × 0.4 in = 6 in (15.2 cm).
Checkpoint 3: total height is 7.25 in (18.4 cm). The mesh tends to drift slightly in a spiral. Gently pulling the piece straight is normal and blocking will fix it.
Closing Round (Color A)
Rnd 26 (conversion round): Ch 1. Sc in each sc and 2 sc in each ch-3 sp around. Join. 14 sc worked into existing sc + 28 sc worked into ch-3 sps = 42 sts.
This brings you back to exactly 42 sts, so the rim matches the base band. Fasten off Color A.
Border
The border has three parts: the cream rim, the cream base outline and the taupe strap with its edging. The border gauge is the same as the solid sc gauge, 20 sc = 4 in (10.2 cm), so 5 sc per inch (2 sc per cm).
Cream Rim (Color B)
Rnd 27: Join Color B in any st of Rnd 26. Ch 1, sc in each st around. Join. (42 sts: 21 per flattened face)
Rnd 28: Ch 1, sc in each st around. Join. (42 sts)
Rnd 29: Ch 1, rev sc in each st around. Join. (42 rev sc)
Fasten off. Why the math works: 21 sts per face at 5 sts per inch gives 4.2 in (10.7 cm), the same as the band and the mesh. The opening won’t flare or pull in. Rnds 26–29 add 0.75 in (1.9 cm), bringing the total height to 8 in (20.3 cm). Checkpoint 4 is complete.
Cream Base Outline (Color B)
Turn the pouch upside down. Join Color B with a sl st in any unused front loop of Rnd 3. Work 1 sl st in each front loop around. (42 sl sts) Join and fasten off. Keep this round loose so the base edge doesn’t pucker. The result is a thin cream line around the bottom.
Strap (Color A)
Flatten the pouch with the base’s curved ends at the side folds. On one fold, place markers in the 5 rim sts centered on that fold; call them sts 1–5. On the opposite fold, mark the matching 5 sts, which are exactly 21 sts away (sts 22–26). This keeps the strap centered on both sides.
Row 1: With the outside facing, join Color A in the first marked rev sc st. Ch 3 (counts as dc), dc in next 4 marked sts. Turn. (5 sts)
Row 2: Ch 4 (counts as dc + ch 1), sk next st, dc in next st, ch 1, sk next st, dc in top of tch. Turn. (3 dc + 2 ch-1 sps = 5 sts)
Rows 3–24: Ch 4 (counts as dc + ch 1), sk next ch-1 sp, dc in next dc, ch 1, sk next ch-1 sp, dc in 3rd ch of tch. Turn. (5 sts each row)
Row 25: Ch 3 (counts as dc), dc in next ch-1 sp, dc in next dc, dc in next ch-1 sp, dc in 3rd ch of tch. (5 dc)
Don’t fasten off yet. Checkpoint 5: 25 rows × 0.4 in = 10 in (25.4 cm) long and 5 sts = 1 in (2.5 cm) wide.
Strap Edging (Color A)
Edge Row: Ch 1. Rotate and work down the long edge of the strap: 2 sc in each row-end. (25 rows × 2 = 50 sc) Sl st into the rim at the base of the strap, then fasten off.
Join Color A at the first row-end of the other long edge, at the rim. Work 2 sc in each row-end. (50 sc) Fasten off, leaving a 12 in (30.5 cm) tail.
Why the math works: each dc row is 0.4 in tall, and 2 sc at 5 sc per inch also covers 0.4 in. So 50 sc fill exactly 10 in (25.4 cm), and the edge won’t ruffle or cup.
Attach the Strap
Check that the strap isn’t twisted. Using the long tail, whipstitch the 5 dc of Row 25 to the 5 marked rim sts on the opposite fold (sts 22–26). Go through both loops of each st, one stitch to one stitch. Sew around twice for strength, because this seam carries the weight of the phone. Weave in all ends inside the solid band or the rim, not in the mesh, where they would show.
Final Blocking
- Lightly spray the whole piece with water until it’s damp but not dripping.
- Slide in a rolled towel or a foam block about 4 in (10.2 cm) wide and 7 in (17.8 cm) tall.
- Straighten the mesh columns so the honeycomb openings line up vertically and any spiral drift is gone.
- Pinch the side folds so they sit over the base’s curved ends, and the faces measure 4.2 in (10.7 cm).
- Roll the cream rim slightly outward with your fingers to round the corded edge.
- Pin the strap flat to 10 in × 1 in (25.4 cm × 2.5 cm), checking that the ladder openings are even.
- Let everything dry completely, at least 12 hours, before hanging.
Final Quality-Control Checklist
- Base oval is flat, with 42 sts in Rnd 3
- Cream base outline is even and not tight
- Solid band is 1.25 in (3.2 cm) tall
- 15 mesh rounds, each with 14 loops, and offset openings
- Rnd 26 has exactly 42 sts
- Rim has 2 cream sc rounds plus 1 rev sc round, 21 sts per face
- Pouch is 4.2 in (10.7 cm) wide and 8 in (20.3 cm) tall
- Strap is 25 rows, 5 sts wide, with 50 edge sc per long side
- Strap is centered on both side folds and not twisted
- Strap seam is sewn twice and all ends are hidden in solid areas
Troubleshooting
Mesh openings look like diamonds, not hexagons. Your ch-3 loops are too loose. Tighten your chains or use 2.5 ch-equivalents by snugging the last chain.
The pouch is spiraling badly. Make sure each mesh sc goes into the center of the loop, not off to one side. Block it straight as described above.
The rim flares. Check that Rnd 26 has 42 sts. If you’re still at 42 and it flares, work the rev sc round with a 3.5 mm hook.
The strap stretches when the phone is in. Use a cotton/linen blend, or work the strap with a hook one size smaller.
The base cups or puckers. Recount Rnds 2 and 3. Increases must fall only at the curved ends.
The phone won’t fit. For wider phones, add a 3-st repeat (one more loop) by starting with ch 18. That gives 45 sts and 15 loops.
Care
Hand wash in cool water with mild soap, press out the water in a towel, and dry flat over a rolled towel to keep the shape. Don’t wring the mesh or tumble dry.
Final Notes
The measurement chain is simple, and every stage builds on the one before it. The base and band set 42 sts, or 4.2 in (10.7 cm) flat. Fourteen mesh loops keep that width over 6 in (15.2 cm). The conversion round returns to exactly 42 sts. The rim finishes at 8 in (20.3 cm) tall, and the strap matches the sc gauge at 2 sc per 0.4 in row. If you check at each checkpoint, the holder will fit your phone on the first try.
Happy crocheting!