
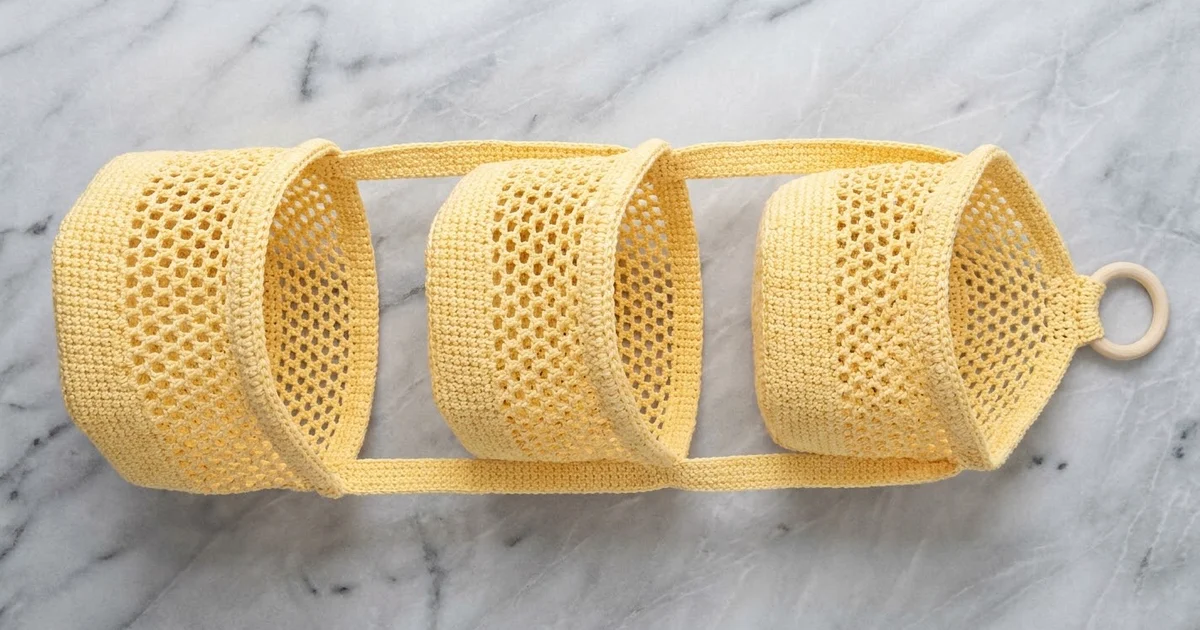
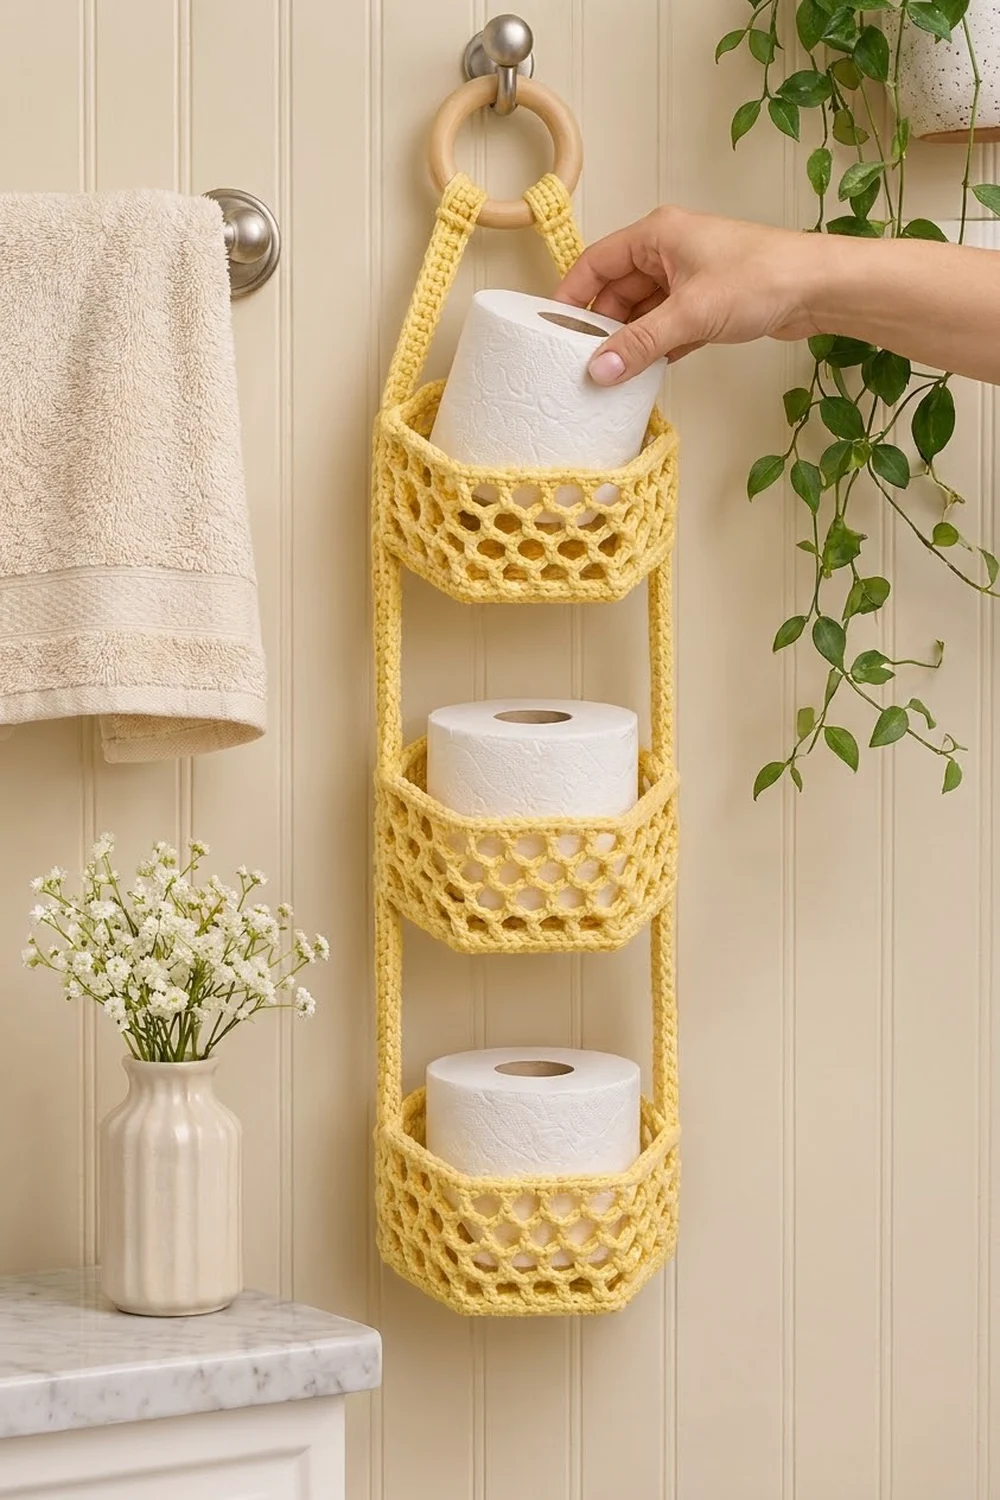
This three-tier hanging basket brings a soft, sunny look to a bathroom, nursery, or craft corner. Three hexagonal baskets with open honeycomb walls hang one above the other on two solid straps, all gathered onto a single wooden ring.
The whole piece is worked in one butter-yellow cotton, so the texture does the work: solid hexagon bases, airy mesh walls, and a firm rolled rim that keeps each basket crisp. The style is clean and modern, with just enough lace to show what is stored inside. Each tier holds one standard toilet paper roll, a stack of washcloths, or small toiletries.
This pattern uses US crochet terms. The finished organizer measures about 7.25 in (18.4 cm) wide and about 27 in (68.6 cm) long, including the ring. Each basket is about 6 in (15.2 cm) across flat-to-flat and 4.25 in (10.8 cm) tall.
Construction is simple. You crochet each basket from the center of the base outward, turn up the wall, work the mesh, then finish with a three-round rim border. Two straps are worked lengthwise, looped over the ring, and sewn to opposite points of each basket. There is very little finishing beyond weaving in ends and sewing the straps.
Finished Size and Construction
- Finished size: about 7.25 in (18.4 cm) wide x 27 in (68.6 cm) long
- Skill level: Intermediate
- Terminology: US crochet terms
- Yarn weight: Worsted (#4), 100% cotton
- Hook: 5.0 mm (H-8)
- Number of pieces: 3 baskets, 2 straps, 1 wooden ring
- Layout: 3 baskets stacked vertically (1 column x 3 tiers), 2 in (5.1 cm) apart
- Basket base: 6 in (15.2 cm) flat-to-flat, 6.86 in (17.4 cm) point-to-point, 3.43 in (8.7 cm) per side
- Wall height before border: 3.5 in (8.9 cm)
- Border (rim) depth: 0.75 in (1.9 cm)
- Finished wall height: 4.25 in (10.8 cm)
- Strap size: 26 in (66.0 cm) long x 0.75 in (1.9 cm) wide
Materials
Choose a smooth, firm worsted cotton or cotton blend. Cotton holds the hexagon shape, does not stretch much under the weight of stored items, and handles humid rooms well. Avoid acrylic or very soft blends, because the baskets will sag.
- Butter Yellow: 200 g (about 340 m / 372 yd) of worsted cotton
Each basket uses about 50 g (85 m) and each strap uses about 12 g (20 m), for about 174 g in total. The quantity listed includes a margin of about 15% for your gauge swatch and differences in tension.
Tools:
- 5.0 mm (H-8) crochet hook
- 1 wooden ring, 3 in (7.6 cm) outer diameter
- 6 locking stitch markers, plus 1 for the start of the round
- Tapestry needle
- Scissors
- Tape measure
- Rust-proof pins and a spray bottle for blocking
Abbreviations (US Terms)
- ch – chain
- sl st – slip stitch
- sc – single crochet
- hdc – half double crochet
- dc – double crochet
- BLO – back loop only
- sk – skip
- st(s) – stitch(es)
- rep – repeat
- rev sc – reverse single crochet (crab stitch)
Special stitch – reverse single crochet (rev sc): Work from left to right (right to left if you are left-handed). Insert the hook into the next stitch to the right, yarn over, pull up a loop, yarn over, and pull through both loops on the hook. This makes the rounded, corded rim.
Note: At the start of the base rounds, ch 3 counts as the first dc. At the start of sc rounds, ch 1 does not count as a stitch.
Gauge and Checkpoints
Gauge: 14 sts and 8 rows of dc = 4 in (10.2 cm). 14 sts and 16 rows of sc = 4 in (10.2 cm). One dc round is about 0.5 in (1.3 cm) tall. One sc round is about 0.25 in (0.6 cm) tall.
Make one complete basket before you start the others. It is your real gauge swatch, and it shows how your tension behaves in both solid and mesh sections.
Checkpoints:
- After base Round 3: 3 in (7.6 cm) flat-to-flat.
- After base Round 6: 6 in (15.2 cm) flat-to-flat, 3.43 in (8.7 cm) per side.
- After wall Round 8: wall is 0.75 in (1.9 cm) tall.
- After wall Round 14: wall is 3.5 in (8.9 cm) tall.
- After the rim border: wall is 4.25 in (10.8 cm) tall.
- Strap: 91 sts = 26 in (66.0 cm).
If the base is too big, go down 0.5 mm in hook size. If it is too small, go up 0.5 mm. A standard toilet paper roll is about 4.5 in (11.4 cm) across, so the base must be at least 5.5 in (14.0 cm) flat-to-flat for one to fit. Do not continue with the walls until the base checkpoint is right. Every later number depends on it.
Basket (Make 3)
Base
Round 1: Make a magic ring. Ch 3 (counts as dc), 11 dc in ring. Pull the ring closed. Join with sl st to top of ch-3. (12 dc)
Round 2: Ch 3 (counts as dc), 3 dc in next st, dc in next st, 3 dc in next st; rep from * 4 more times. Join. (24 dc: 6 corner groups of 3 dc + 6 single dc)*
Place a marker in the center dc of each 3-dc group. These are your six corners.
Round 3: Ch 3 (counts as dc), dc in each st to the marked corner st, 3 dc in corner st, move marker to the center dc just made, dc in each st to the next marked st; rep from * around, ending with dc in any remaining sts. Join. (36 dc)*
Round 4: Rep Round 3. (48 dc)
Round 5: Rep Round 3. (60 dc)
Round 6: Rep Round 3. (72 dc – 12 sts per side)
Each round adds 2 sts at each of the 6 corners, so each side grows by 2 sts per round: 2, 4, 6, 8, 10, 12 sts per side. Check: 12 sts per side x 6 sides = 72 sts. These 12 sts include the corner st. Keep the corner markers in place.
Wall
Round 7 (turning round): Ch 1, working in BLO, sc in each st around. Join. (72 sc)
The unworked front loops make a sharp fold, so the wall turns up cleanly. Move each corner marker up into the sc above its corner.
Round 8 (solid band): Ch 3 (counts as dc), dc in each st around. Join. (72 dc)
Round 9 (first mesh round): Ch 1, sc in first st (a corner st), ch 3, sk 2 sts, sc in next st; rep from * to the last 2 sts, ch 1, hdc in first sc. (24 ch-3 loops, counting the hdc join as the last loop)*
Every side has 12 sts, and 12 ÷ 3 = 4 loops per side, so each corner lands on an sc anchor. This keeps the mesh hexagonal.
Rounds 10–13: Ch 1, sc around the post of the hdc, ch 3, sc in next ch-3 loop; rep from * around, ending ch 1, hdc in first sc. (24 loops each round)*
Each round shifts by half a loop, which makes the honeycomb openings. A very slight spiral is normal.
Round 14 (conversion round): Ch 1, 3 sc around the hdc post, then 3 sc in each remaining ch-3 loop around. Join to first sc. (24 loops x 3 sc = 72 sc)
Every loop gets 3 sc, so the count goes back to 72 sts, matching the base. Re-mark the six corners directly above the base corners, so each side has 12 sts again.
Checkpoint: The wall is now 3.5 in (8.9 cm) tall: 0.25 in (0.6 cm) sc band, 0.5 in (1.3 cm) dc band, 2.5 in (6.4 cm) of mesh, and 0.25 in (0.6 cm) conversion round.
Straps (Make 2)
Row 1: Ch 92. Sc in 2nd ch from hook and in each ch across. (91 sc)
Rows 2–3: Ch 1, turn, sc in each st across. (91 sc)
Fasten off, leaving a 24 in (61.0 cm) tail for sewing. The strap is 26 in (66.0 cm) long and 0.75 in (1.9 cm) wide. Lay both straps side by side and compare. They must match exactly.
Make All Pieces
- Baskets: 3, all in Butter Yellow, each finished with the rim border below
- Straps: 2, in Butter Yellow
- Ring: 1 wooden ring
Layout grid (front view):
          ( RING )
          /      \
     strap        strap     <- 7.14 in (18.1 cm) free
     |  [ BASKET 1 ]  |     <- 4.25 in (10.8 cm)
     |                |     <- 2 in (5.1 cm) gap
     |  [ BASKET 2 ]  |     <- 4.25 in (10.8 cm)
     |                |     <- 2 in (5.1 cm) gap
     |  [ BASKET 3 ]  |     <- 4.25 in (10.8 cm)
Rim Border (Each Basket)
Work the border on each basket before joining.
Border gauge: 1 sc round = 0.25 in (0.6 cm). 1 hdc round = 0.375 in (1.0 cm). 1 rev sc round = 0.125 in (0.3 cm).
Round 15: Ch 1, sc in each st around. Join. (72 sc – 12 per side)
Round 16: Ch 2 (does not count), hdc in each st around. Join. (72 hdc – 12 per side)
Round 17: Ch 1, rev sc in each st around. Join and fasten off. (72 rev sc – 12 per side)
Why the math works: The rim starts on the 72 sts from Round 14, which equal 6 sides x 12 sts. These 12 sts already include the corner sts, so no extra corner sts are added. The rim does not increase, so it stays the same size as the base and the wall stands straight. If you add sts, the rim will flare. If you skip sts, it will pull inward.
Checkpoint: 0.25 + 0.375 + 0.125 = 0.75 in (1.9 cm) of border, for a finished wall of 4.25 in (10.8 cm).
Joining
Method: Whipstitch with the strap tail and a tapestry needle.
Step 1 – Ring: Fold the first 5 sts of a strap over the wooden ring, right side out. Sew the strap end flat to the strap below it, catching both layers. This uses 1.43 in (3.6 cm). Repeat with the second strap, placing it beside the first on the ring.
Step 2 – Free section: Count 25 sts down from the ring fold. This is 7.14 in (18.1 cm) of free strap.
Step 3 – Basket 1: Choose two opposite corners, corner 1 and corner 4. Lay a strap flat against the outside of the wall at each corner. Sew the next 15 strap sts to the wall, from the top of the rim down to the base fold. The strap sts run along its length, so 15 sts = 4.29 in (10.9 cm), which matches the 4.25 in (10.8 cm) wall. Sew along both long edges of the strap, going into one wall st or mesh anchor for each strap st.
Step 4 – Gap: Skip 7 strap sts, 2 in (5.1 cm).
Step 5 – Baskets 2 and 3: Sew 15 sts to Basket 2, skip 7 sts, then sew 15 sts to Basket 3. Use the same corners each time.
Step 6 – Tail: Fold the last 2 sts, about 0.6 in (1.5 cm), under the base of Basket 3. Sew them flat.
Stitch check: 5 + 25 + 15 + 7 + 15 + 7 + 15 + 2 = 91 sts, the full strap.
Tension: Pull each whipstitch snug, but do not pucker the strap or the mesh. On the mesh, sew into the sc anchors and the solid bands rather than the chain loops, which can stretch. Pin both straps in place before you sew, so the baskets hang level.
Size checkpoint: Hang it up. From the bottom of the ring to the base of Basket 3 is about 24 in (61.0 cm). Add the 3 in (7.6 cm) ring, for about 27 in (68.6 cm) in total.
Final Blocking
- Lightly spray each basket until damp, not soaking wet.
- Stuff each basket with a rolled towel or a hexagonal box to push out the walls.
- Pinch each corner into a sharp point along its marker line.
- Pin the straps flat and straight on a towel.
- Let everything dry completely, about 24 hours.
- Remove the stuffing, hang the organizer, and check that it is level.
Final Quality-Control Checklist
- Each base is 6 in (15.2 cm) flat-to-flat.
- Each basket has 72 sts in Rounds 6, 7, 8, 14, 15, 16, and 17.
- Each mesh round has 24 loops.
- Corners are sharp and line up from base to rim.
- Each wall is 4.25 in (10.8 cm) tall.
- Both straps are 91 sts long and sewn at matching points.
- Both gaps between baskets are 2 in (5.1 cm).
- All ends are woven in securely.
Troubleshooting
The base cups or ruffles. Cupping means your tension is tight. Ruffling means you have too many sts. Recount 12 sts per side.
The walls lean outward. Your mesh is too loose. Use ch 2 instead of ch 3 for the loops, or go down a hook size for the wall.
The basket looks round instead of hexagonal. Re-mark the corners and block with the corners pinched.
The organizer hangs crooked. One strap section is longer. Count the 25 free sts on both straps.
The mesh spirals strongly. Make sure each round starts with an sc around the hdc post, not in the next loop.
The rim waves. Your Round 16 hdc is loose. Rework it with a smaller hook.
Care
Hand wash in cool water with mild soap and lay flat to dry, reshaping the corners while damp. If you can, remove the wooden ring before washing.
Final Notes
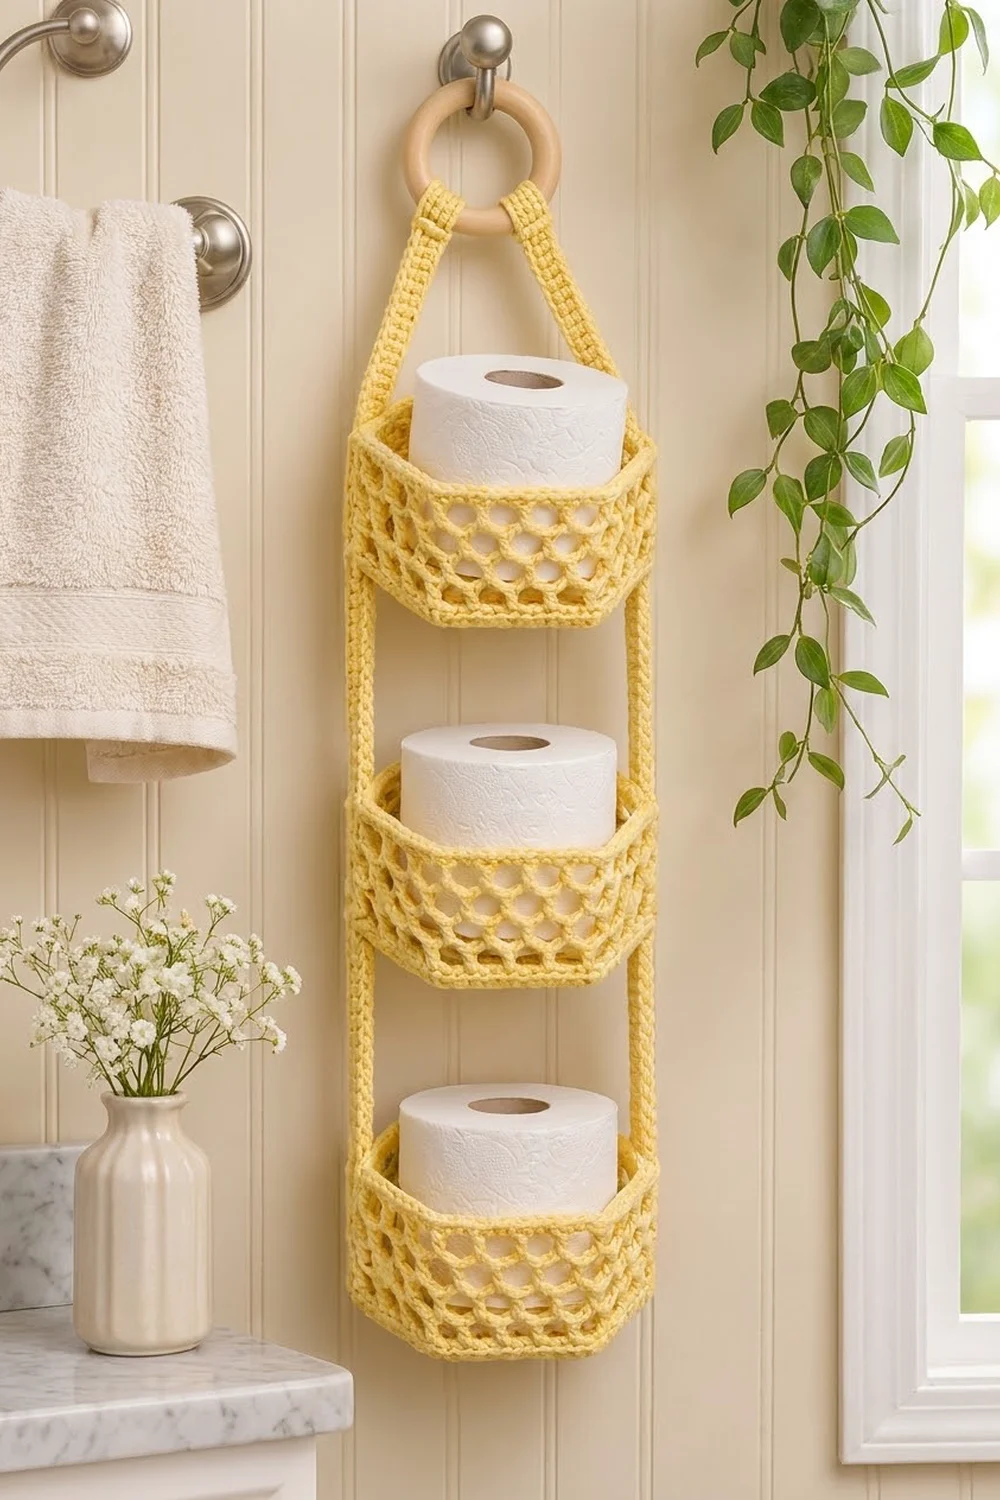
The measurement chain is simple. The base has 72 sts, or 12 sts per side, which gives a 6 in (15.2 cm) hexagon. The wall keeps those 72 sts, reaches 3.5 in (8.9 cm) before the border, and 4.25 in (10.8 cm) after it. Each 91-st strap divides exactly into the ring fold, the free section, three basket attachments, two gaps, and a tail. Check each stage, and the finished organizer will hang straight and level.
Happy crocheting!