
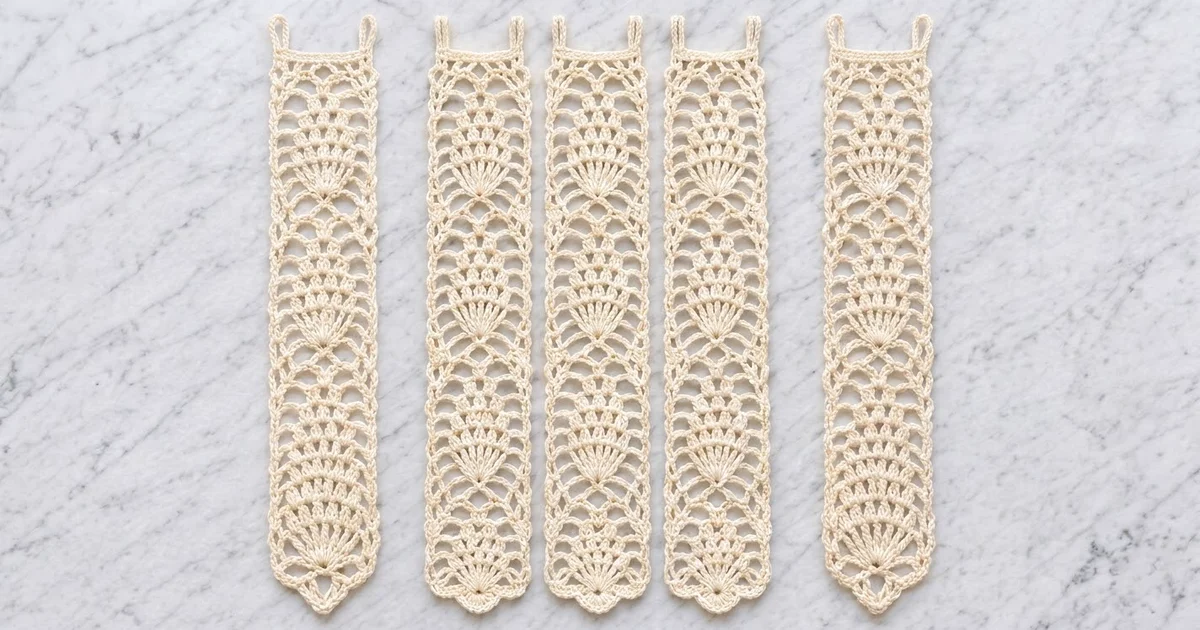
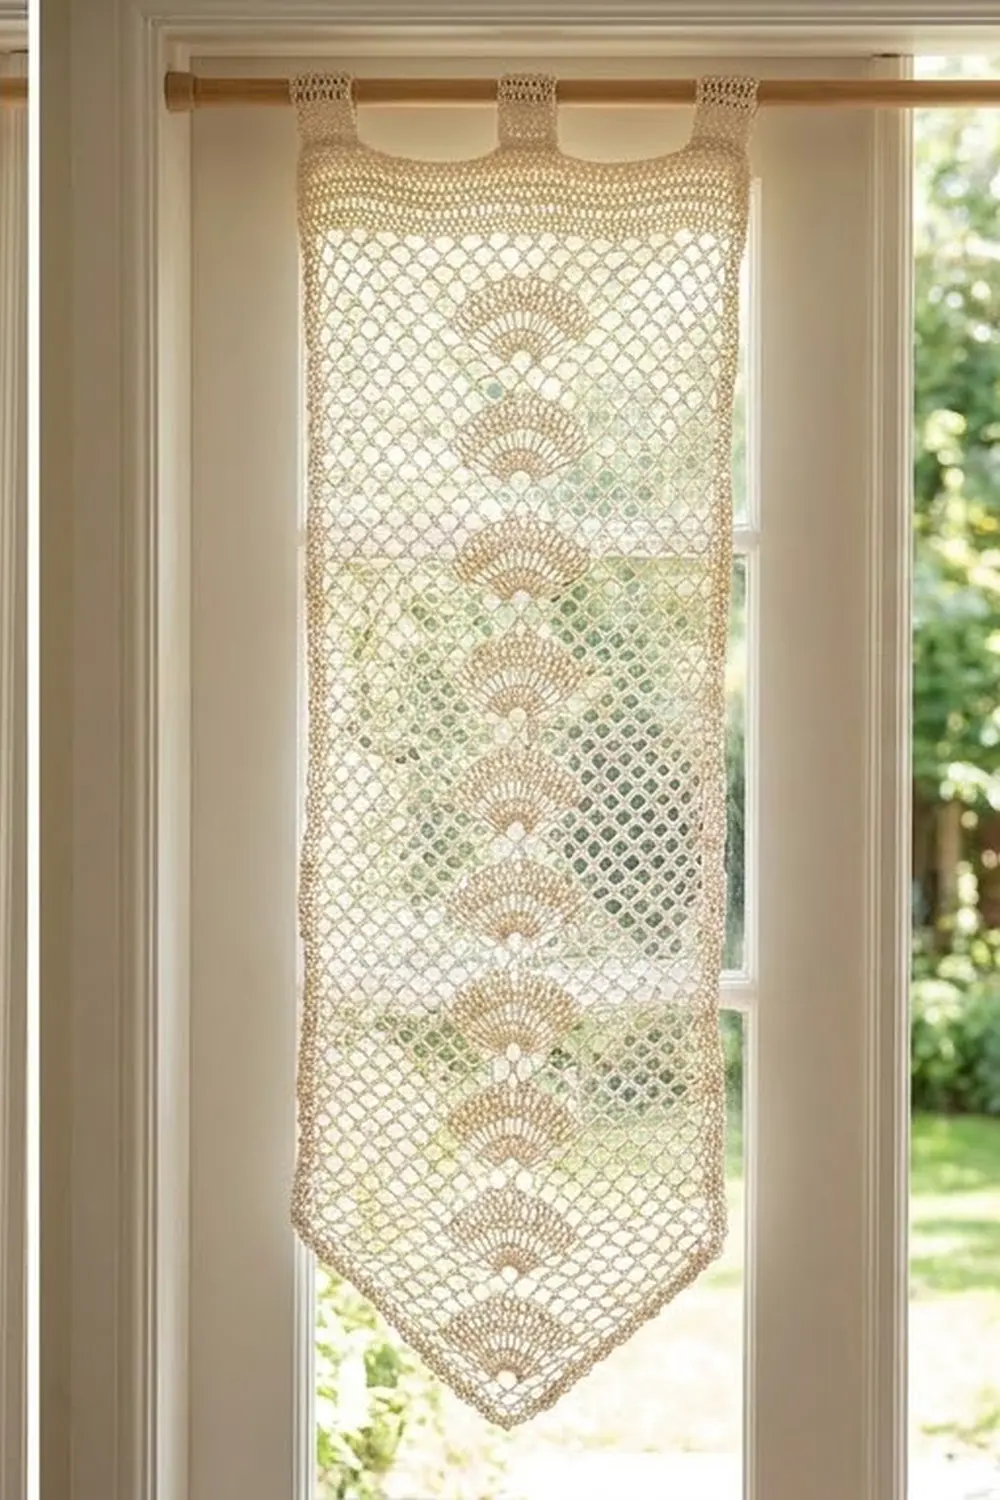
These cream lace curtain panels let light through while still giving a doorway or window some soft cover. Each panel is a narrow strip of open chain arches with one column of upward-opening fans down the center. The bottom of each panel ends in a gentle point, and two small arched loops at the top slide onto a curtain rod.
The set is three identical panels in one color: a warm ivory cotton. The panels stay separate, so you can push one aside, launder them one at a time, or rearrange them. The style is vintage cottage lace without the fiddly thread work, because it uses worsted-weight yarn and a 5.5 mm hook.
All instructions use US crochet terms. Each finished panel measures 10 in (25.4 cm) wide by 69.5 in (176.5 cm) long, not counting the tabs. With the tabs, it hangs about 72 in (182.9 cm) from the rod.
Construction is bottom-up. Start at the pointed tip with a fan worked into a ring, then widen to full width over five rows of arches. Work an 8-row lace repeat eight times, close the top with a solid band, add a two-row border around the sides and point, and finish with two loop tabs.
Finished Size and Construction
- Finished panel size: 10 in × 69.5 in (25.4 cm × 176.5 cm), excluding tabs
- Hanging length with tabs: about 72 in (182.9 cm)
- Skill level: Easy-Intermediate
- Terminology: US crochet terms
- Yarn weight: Worsted (#4), cotton or cotton blend
- Hook: 5.5 mm (I-9)
- Number of pieces: 3 separate panels (not joined)
- Layout: 3 panels side by side on one rod, about 1 in (2.5 cm) apart, 32 in (81.3 cm) total width
- Panel size before border: 9 in × 69 in (22.9 cm × 175.3 cm)
- Border depth: 0.5 in (1.3 cm) on each side and at the tip
Materials
Yarn: Use a smooth worsted-weight mercerized cotton or a cotton blend. Cotton holds the arches open after blocking and drapes well. Avoid fuzzy yarns, because they hide the lace.
- Cream / Ivory: 600 g, about 930 m (1,017 yd) total, or 200 g / 310 m (339 yd) per panel
These quantities include a margin of about 15% for gauge swatching and blocking differences.
Tools:
– 5.5 mm (I-9) crochet hook
– Tapestry needle
– Scissors
– Stitch markers (2–3)
– Blocking mats long enough for a 70 in (177.8 cm) panel, or a clean carpet with a towel on top
– Rust-proof pins
– Spray bottle
– Measuring tape
Abbreviations (US Terms)
- ch – chain
- sl st – slip stitch
- sc – single crochet
- dc – double crochet
- tr – treble crochet
- sk – skip
- sp(s) – space(s)
- st(s) – stitch(es)
- RS / WS – right side / wrong side
Special stitch – Fan: 11 dc worked into the same space or ring.
Row types: “Tr-edge rows” begin with ch 7 (counts as tr + ch 3) and end with ch 3, tr. “Sc-edge rows” begin with ch 1 and a sc in the edge stitch. These two row types alternate, which keeps the side edges straight.
Gauge and Checkpoints
Single crochet gauge: 14 sc and 16 rows = 4 in (10.2 cm).
Lace gauge (blocked): In a sc-edge row, 5 ch-7 arches = 9 in (22.9 cm) wide. One 8-row repeat = 8 in (20.3 cm) tall.
Work the point and one full repeat as your test piece. Pin it out flat without stretching, mist it, and measure it once it is dry.
Checkpoints:
– After Row P6: about 4 in (10.2 cm) tall from the tip and 9 in (22.9 cm) wide when pinned.
– After the first repeat: 12 in (30.5 cm) total length.
– After 4 repeats: 36 in (91.4 cm).
– After 8 repeats: 68 in (172.7 cm).
– After the top band: 69 in (175.3 cm).
– After the border: 10 in × 69.5 in (25.4 cm × 176.5 cm).
Too big? Go down to a 5 mm (H-8) hook. Too small? Go up to a 6 mm (J-10) hook. Lace length depends heavily on blocking, so judge the blocked piece, not the piece fresh off the hook.
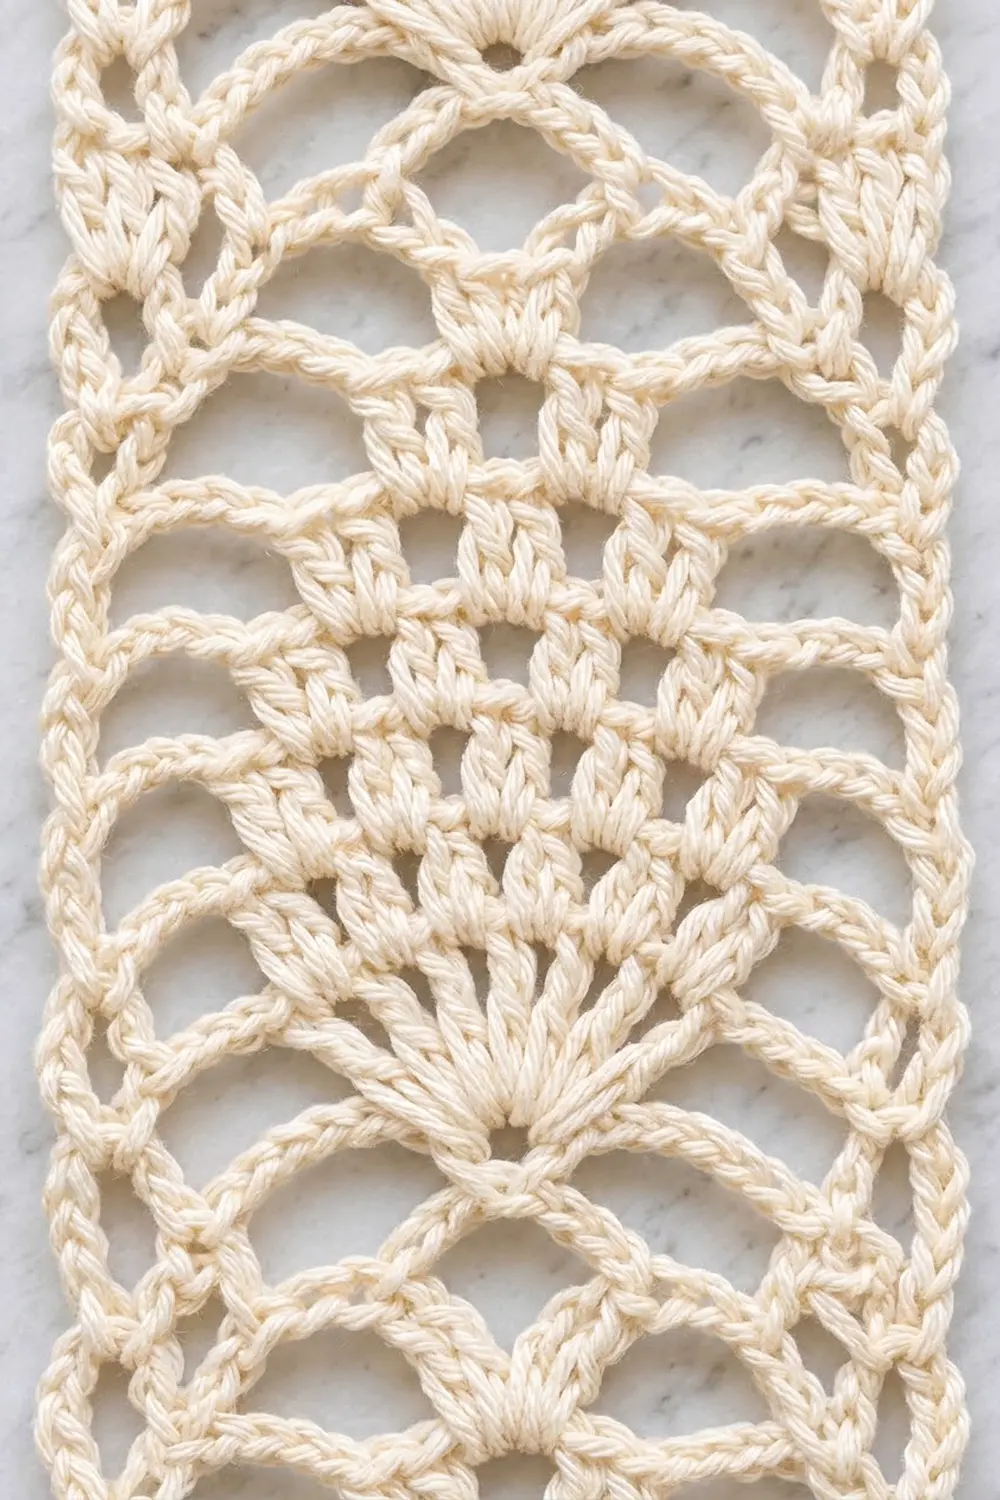
Pointed Tip (Rows P1–P6)
Foundation: Ch 5, sl st in first ch to form a ring.
Row P1 (RS): Ch 3 (counts as dc), 10 dc in ring. Turn. (11 dc – the first fan)
Row P2: Ch 1, sc in first dc, [ch 3, sk next dc, sc in next dc] 5 times, working the last sc in top of the beginning ch-3. Turn. (6 sc, 5 ch-3 sps)
Row P3: Ch 1, sc in first sc, ch 7, sc in 3rd (center) ch-3 sp, ch 7, sc in last sc. Turn. (3 sc, 2 ch-7 sps) These two arches frame the fan in a small triangle.
Row P4: Ch 1, sc in first sc, [ch 7, sc in next ch-7 sp] 2 times, ch 7, sc in last sc. Turn. (4 sc, 3 ch-7 sps)
Row P5: Ch 1, sc in first sc, [ch 7, sc in next ch-7 sp] 3 times, ch 7, sc in last sc. Turn. (5 sc, 4 ch-7 sps)
Row P6: Ch 1, sc in first sc, [ch 7, sc in next ch-7 sp] 4 times, ch 7, sc in last sc. Turn. (6 sc, 5 ch-7 sps)
In each P row, you work into the edge sc and into every arch, so each row has one more arch than the last. That extra arch is what spreads the point out to full width. Row P6 is a full-width sc-edge row with a center arch (the 3rd of 5), which is where the next fan goes.
Main Lace Body (8-Row Repeat)
Row 1 (Fan row, RS, tr-edge): Ch 7 (counts as tr + ch 3), sc in first ch-7 sp, ch 7, sc in next ch-7 sp, ch 3, Fan (11 dc) in next (center) ch-7 sp, ch 3, sc in next ch-7 sp, ch 7, sc in next ch-7 sp, ch 3, tr in last sc. Turn. (2 tr, 4 sc, 11 dc; 2 ch-7 sps, 4 ch-3 sps)
Row 2 (Arch row, sc-edge): Ch 1, sc in first tr, ch 7, sc in next ch-7 sp, ch 7, sc in first dc of Fan, [ch 3, sk next dc, sc in next dc] 5 times, ch 7, sc in next ch-7 sp, ch 7, sc in 4th ch of beginning ch-7. Turn. (10 sc; 4 ch-7 sps, 5 ch-3 sps) Skip all the ch-3 sps from Row 1.
Row 3 (Converge row, tr-edge): Ch 7, sc in first ch-7 sp, ch 7, sc in next ch-7 sp, ch 7, sc in 3rd (center) ch-3 sp, ch 7, sc in next ch-7 sp, ch 7, sc in next ch-7 sp, ch 3, tr in last sc. Turn. (2 tr, 5 sc; 4 ch-7 sps, 2 edge ch-3 sps) The two arches that meet at the center ch-3 sp form the V above each fan.
Row 4 (Mesh row, sc-edge): Ch 1, sc in first tr, [ch 7, sc in next ch-7 sp] 4 times, ch 7, sc in 4th ch of beginning ch-7. Turn. (6 sc, 5 ch-7 sps)
Row 5 (Mesh row, tr-edge): Ch 7, sc in first ch-7 sp, [ch 7, sc in next ch-7 sp] 4 times, ch 3, tr in last sc. Turn. (2 tr, 5 sc; 4 ch-7 sps, 2 edge ch-3 sps)
Row 6: Repeat Row 4. (6 sc, 5 ch-7 sps)
Row 7: Repeat Row 5. (2 tr, 5 sc; 4 ch-7 sps)
Row 8: Repeat Row 4. (6 sc, 5 ch-7 sps)
Rows 1–8 complete one repeat. Every sc-edge row ends with 5 arches and a center arch, so the next Fan row always lands in the middle.
Work Rows 1–8 eight times in total (64 rows). Including the tip fan, the panel now has 9 fans. Each fan row is a RS row.
Top Band
Row T1 (RS): Ch 3 (counts as dc), [7 dc in next ch-7 sp] 5 times, dc in last sc. Turn. (37 dc: 1 + 35 + 1)
Row T2: Ch 1, sc in each dc across, working the last sc in top of the beginning ch-3. (37 sc) Fasten off.
The band adds about 1 in (2.5 cm), bringing the panel to 69 in (175.3 cm).
Make All Pieces
Make 3 identical panels, each worked through Row T2. All three use Cream: about 200 g / 310 m (339 yd) each.
Layout on the rod, viewed from the front:
|------------------------- rod -------------------------|
  [ Panel 1 ]   gap   [ Panel 2 ]   gap   [ Panel 3 ]
    10 in       1 in    10 in       1 in    10 in
   25.4 cm     2.5 cm  25.4 cm     2.5 cm  25.4 cm
Joining (Hanging Layout)
The panels are not sewn or crocheted together. That is how the design is meant to be, so each panel can move and fall freely. Thread all six tabs onto a rod up to 1.25 in (3.2 cm) in diameter, two tabs per panel, in panel order. Leave a 1 in (2.5 cm) gap between panels, and don’t pull the panels sideways, or the side arches will distort.
Size checkpoint: The three panels plus two gaps cover 32 in (81.3 cm), which fits a standard 30 in (76.2 cm) doorway.
Border
Work the border on each panel after the top band and before the tabs. It runs down one long side, around the point, and up the other long side. The top edge is already finished by Row T2.
Border gauge: 3.5 sc per inch (14 sc = 4 in / 10.2 cm), which matches the sc gauge.
Row B1 (RS): With RS facing, join Cream at the top corner at the end of Row T2. Ch 1, then work:
– Long side: 1 sc in the end of Row T2 and 3 sc around the end of Row T1. Then, for each pair of body rows, work 4 sc around the edge tr and 3 sc over the edge of the sc-edge row. 32 pairs × 7 = 224, so the side total is 1 + 3 + 224 = 228 sc.
– Diagonal: 4 sc over the edge of each of Rows P6, P5, P4 and P3 (16), 2 sc over Row P2 and 3 sc around Row P1, for 21 sc.
– Tip: 3 sc in the bottom of the foundation ring.
– Second diagonal: 21 sc, mirroring the first.
– Second long side: 228 sc, ending at the top corner.
Row B1 total: 228 + 21 + 3 + 21 + 228 = 501 sc. Turn.
Row B2: Ch 1, sc in each sc to the center sc of the tip, 3 sc in the center tip sc, then sc in each sc to the end. Fasten off. (503 sc: 228 + 21 + 5 + 21 + 228)
Why the math works: Each pair of body rows is 2 in (5.1 cm) tall, and 7 sc at 3.5 sc per inch also covers 2 in (5.1 cm). The long side covers 64 in of body plus 1 in of band, which is 65 in (165.1 cm), and 228 ÷ 3.5 = 65.1 in. That means the edge lies flat without ruffling or pulling in. Each diagonal is about 6 in (15.2 cm), and 21 sc ÷ 3.5 = 6.0 in. The 3-sc tip increases in Rows B1 and B2 keep the point sharp. Two sc rows add 0.5 in (1.3 cm) to each side, so the 9 in (22.9 cm) panel becomes 10 in (25.4 cm) wide.
Loop Tabs
Tab 1: With RS facing, join Cream with a sl st in st 1 of Row T2. Ch 20, then sl st in st 6. Turn, work 26 sc into the ch-20 loop, and sl st in st 1. Fasten off.
Tab 2: Repeat Tab 1 on sts 32–37, joining in st 32 and slipping into st 37.
Each tab is a firm arch about 2.5 in (6.4 cm) tall. Weave in all ends securely along solid stitches, not through the chains.
Final Blocking
- Soak all three panels in cool water for 15 minutes, then press out the water. Do not wring.
- Roll each panel in a towel to remove excess moisture.
- Lay one panel flat and pin the top band straight at 10 in (25.4 cm) wide, including the border.
- Pin both long edges straight and parallel, 10 in (25.4 cm) apart, every 4 in (10.2 cm).
- Pull the tip down until the panel measures 69.5 in (176.5 cm) from Row T2 to the tip. Pin the two diagonals straight.
- Open each fan into an even half-circle and round each arch with a pin at its peak.
- Let it dry completely, then repeat for the other two panels using the same measurements.
Final Quality-Control Checklist
- All three panels measure 10 in × 69.5 in (25.4 cm × 176.5 cm).
- Each panel has 9 fans, all centered.
- Every sc-edge row has 5 ch-7 arches.
- Row T1 has 37 dc and Row T2 has 37 sc.
- Border Row B2 has 503 sc and a sharp tip.
- Both tabs are firmly attached and the same height.
- All ends are woven in and invisible from the RS.
Troubleshooting
The fan isn’t centered: You probably skipped or added an arch in a sc-edge row. Count 5 arches before every Fan row.
The side edges wave: The edge tr is too short or too tall. Keep “ch 7 = tr + ch 3” at the start and “ch 3, tr” at the end of every tr-edge row.
The panel is too short: Block it longer, or add one more 8-row repeat, which adds 8 in (20.3 cm).
The border ruffles: Your sc gauge is tighter than 3.5 per inch. Use a smaller hook for the border only.
Care
Hand wash cool or machine wash gentle in a mesh bag, then lay flat and pin to shape. Avoid hanging the panels wet, because the weight will stretch the lace.
Final Notes
The measurement chain is simple. A 4 in (10.2 cm) point opens into a 9 in (22.9 cm) mesh. Eight repeats of 8 in (20.3 cm) bring the panel to 68 in (172.7 cm), and the top band takes it to 69 in (175.3 cm). The border adds 0.5 in (1.3 cm), for a 10 in × 69.5 in (25.4 cm × 176.5 cm) panel. Three panels with two 1 in (2.5 cm) gaps fill 32 in (81.3 cm). If you check each stage as you go, all three panels will match.
Happy crocheting!