

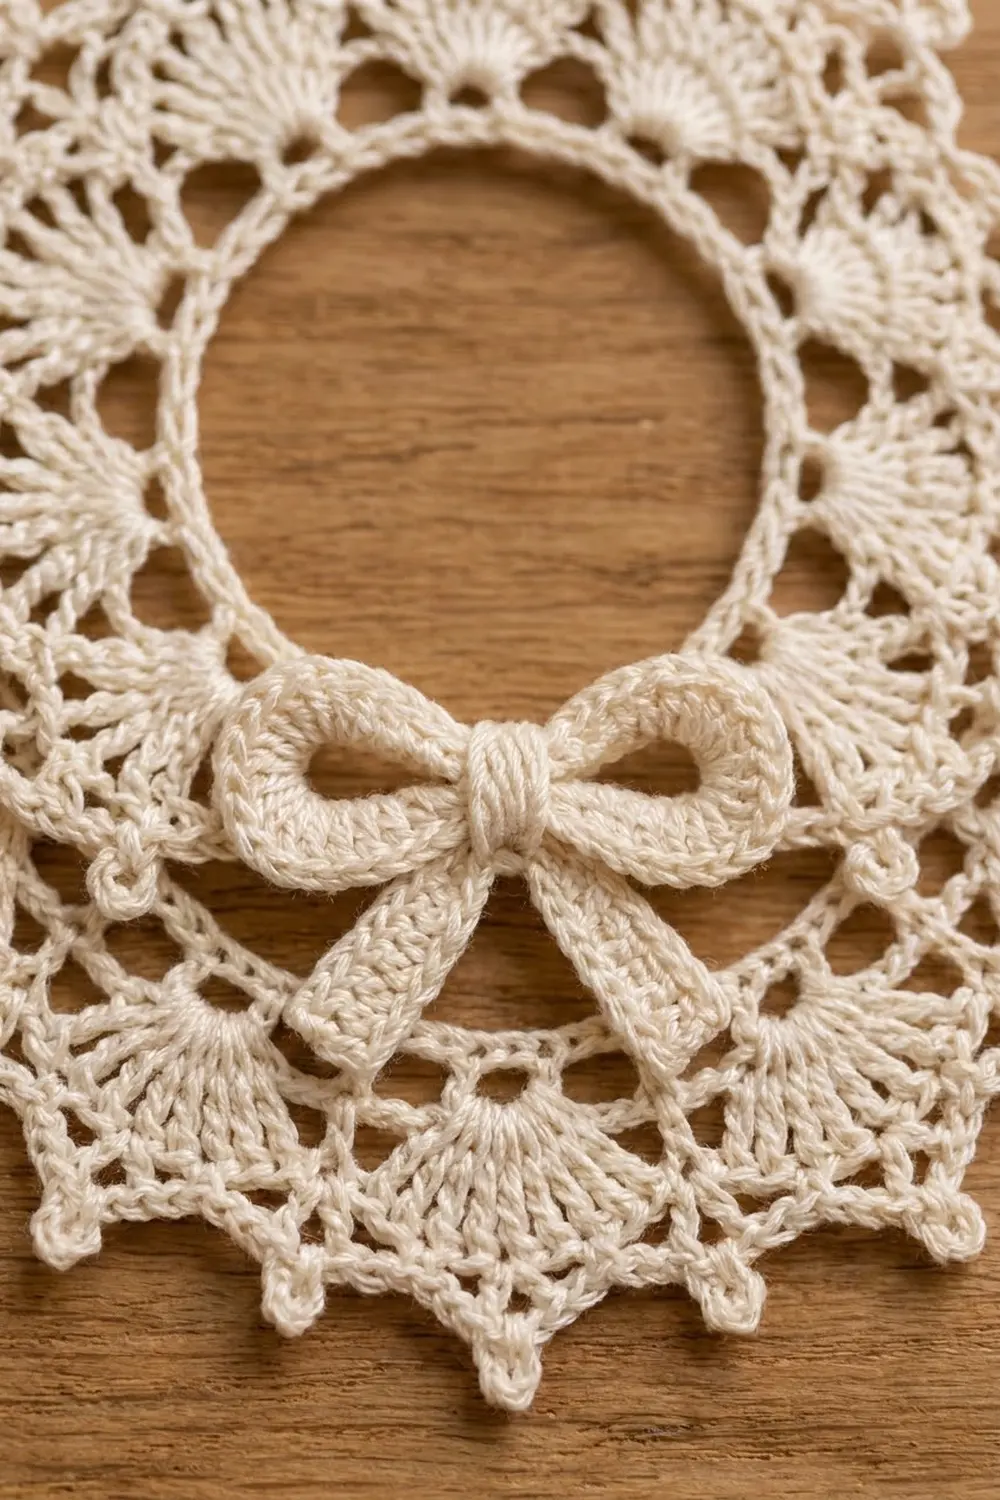
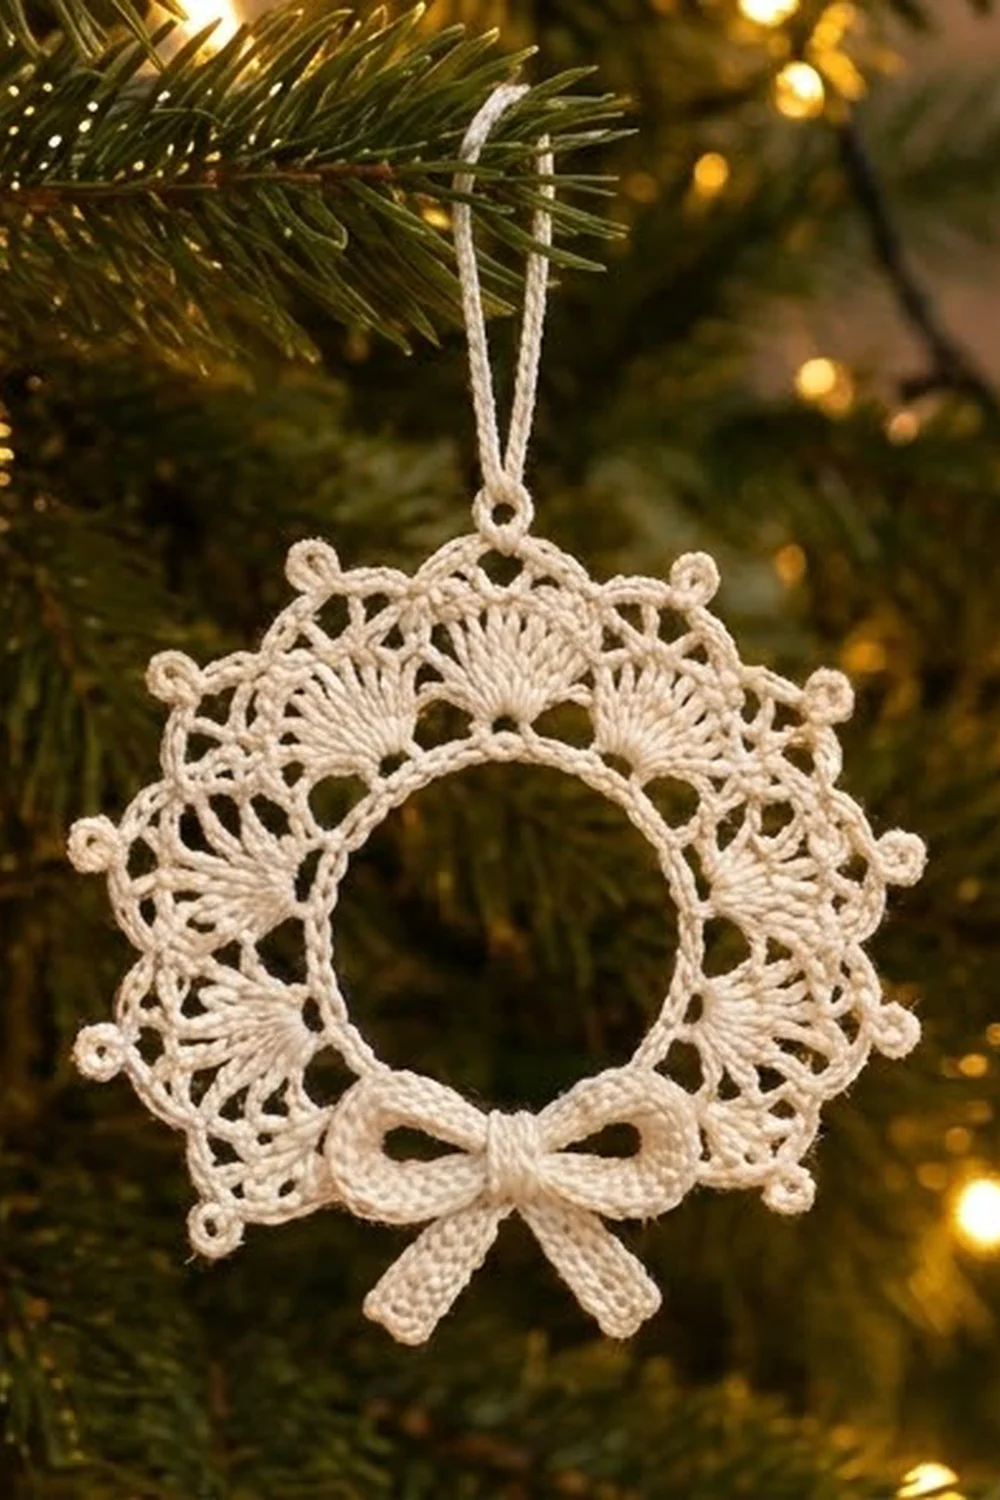
The Ivory Frost Lace Wreath is a small, delicate Christmas ornament worked in cream cotton thread. It has a solid center ring, two rounds of fan shells, a picot-pointed outer edge and a little bow sewn at the bottom. Once starched, it holds its shape and looks like a snowflake and a wreath at the same time.
The design uses one color only. The ivory thread keeps the focus on the stitch texture, and it looks good on green branches, in a window or tied onto a gift. The style is classic thread lace: openwork, symmetry and crisp points.
This pattern is written in US crochet terms. The finished ornament measures about 4 in (10.2 cm) across, and the center opening is about 1.5 in (3.8 cm) wide. The hanging loop and bow tails are not included in that measurement.
The wreath is worked in seven joined rounds from a chain ring outward, without turning. The bow is made separately from two short strips and a center wrap, then sewn on. A chain hanging loop finishes the piece. Starching and blocking flat give the final crisp shape.
Finished Size and Construction
- Finished size: 4 in (10.2 cm) diameter after blocking
- Center opening: about 1.5 in (3.8 cm)
- Skill level: Intermediate (thread work, counting shells)
- Terminology: US crochet terms
- Yarn weight: Size 10 cotton crochet thread (Lace / 0)
- Hook: 1.75 mm (US steel 6)
- Number of pieces: 1 wreath plus 1 bow appliqué (sewn on), forming one ornament
- Layout: single round motif; bow centered at the bottom, loop centered at the top
- Piece size: 4 in (10.2 cm) across
- Size before border: 3.5 in (8.9 cm) across after Round 6
- Border depth: 0.25 in (0.6 cm) all around (Round 7)
Materials
Use a mercerized cotton thread in size 10. Mercerized cotton has a slight sheen and takes starch well, and it keeps the fan shells sharp. Avoid acrylic thread: it will not hold a stiffened shape.
- Ivory / cream, size 10 cotton thread: 10 g, about 40 m (44 yd)
Quantities include a margin of roughly 30% for a test swatch, the bow pieces, the hanging loop and tails for sewing. One standard ball of size 10 thread will make many ornaments.
Tools:
– 1.75 mm (US steel 6) crochet hook
– Fine tapestry needle or sharp sewing needle with an eye large enough for size 10 thread
– Small sharp scissors
– Locking stitch marker
– Fabric stiffener or heavy spray starch
– Blocking foam board or corkboard, plastic wrap and rust-proof pins
– Ruler or tape measure
Abbreviations (US Terms)
- ch – chain
- sl st – slip stitch
- sc – single crochet
- dc – double crochet
- sk – skip
- sp – space
- st(s) – stitch(es)
- rep – repeat
Special stitch – Picot spike: ch 5, sl st in 3rd ch from hook (this makes a small picot), ch 2. The spike becomes one pointed tip on the outer edge.
Fan: a group of dc all worked into the same chain space (7 dc in Round 4, 9 dc in Round 6).
Gauge and Checkpoints
Thread work depends heavily on tension, so check your measurements on the first ornament before making a batch. Measure on a flat surface with each round gently laid out, not stretched.
- After Round 2 (solid ring): outer diameter 2.25 in (5.7 cm), opening 1.5 in (3.8 cm)
- After Round 4 (small fans): 2.75 in (7.0 cm) across
- After Round 6 (large fans): 3.5 in (8.9 cm) across
- After Round 7 (border), blocked: 4 in (10.2 cm) across
If too big by more than 0.25 in (0.6 cm) at Round 2, change to a 1.5 mm hook. If too small, change to a 2.0 mm hook. Keep the stitch counts the same, because the shell spacing depends on them.
If the ring ruffles at Round 4, your chain ring is too tight. If it cups, the dc are too short. Fix tension early, since every later round builds on Round 2.
Wreath Pattern
Foundation Ring
Ch 48, sl st in first ch to form a ring, taking care not to twist the chain.
The ring should have a circumference of about 5.25 in (13.3 cm) before Round 1.
Round 1 (sc ring)
Ch 1, sc in each ch around, sl st in first sc to join. (48 sc)
Round 2 (dc ring)
Ch 3 (counts as first dc), dc in each st around, sl st in top of beginning ch-3. (48 dc)
Checkpoint: 2.25 in (5.7 cm) outer diameter, 1.5 in (3.8 cm) opening. Rounds 1 and 2 form the solid, rope-like ring around the center.
Round 3 (chain spaces)
Ch 1, sc in same st as join, ch 5, sk 3 sts, sc in next st; rep from * 10 more times, ch 5, sk 3 sts, sl st in first sc. (12 sc, 12 ch-5 sps)*
Check: 12 repeats × 4 stitches used = 48 stitches, so the spacing comes out even.
Round 4 (small fans)
Ch 1, sc in same st as join, 7 dc in next ch-5 sp, sc in next sc, 7 dc in next ch-5 sp; rep from * 10 more times, sl st in first sc. (12 fans; 12 sc + 84 dc = 96 sts)*
Checkpoint: 2.75 in (7.0 cm) across. The fans should lie flat around the ring like small scallops.
Round 5 (lattice)
Sl st in next 4 dc (you are now in the 4th, center dc of the first fan). Ch 1, sc in same st, ch 7, sc in 4th dc of next fan; rep from * 10 more times, ch 7, sl st in first sc. (12 sc, 12 ch-7 loops)*
Each sc sits at the center of a small fan, and each ch-7 loop spans the gap between two fan centers. This offsets the next round so the large fans sit between the small ones.
Round 6 (large fans)
Ch 1, sc in same st as join, 9 dc in next ch-7 loop, sc in next sc, 9 dc in next ch-7 loop; rep from * 10 more times, sl st in first sc. (12 fans; 12 sc + 108 dc = 120 sts)*
Checkpoint (size before border): 3.5 in (8.9 cm) across. The large fans should overlap the lattice loops and stand out clearly from the small fans underneath.
Border (Round 7: Picot Edge)
Border gauge: each repeat (one large fan plus one picot spike) covers about 1.05 in (2.7 cm) of the outer edge after blocking. 12 repeats × 1.05 in = 12.6 in (32.0 cm), which matches the circumference of a 4 in (10.2 cm) circle (4 × 3.1416 = 12.57 in / 31.9 cm).
Round 7
Sl st in first dc of the first fan. Ch 1, sc in same dc, (ch 3, sk 1 dc, sc in next dc) 4 times, picot spike, *sk next sc, sc in first dc of next fan, (ch 3, sk 1 dc, sc in next dc) 4 times, picot spike; rep from * 10 more times, sl st in first sc. Fasten off and weave in the end.
Counts per repeat (per fan): 5 sc (on dc 1, 3, 5, 7 and 9) + 4 ch-3 loops + 1 picot spike.
Totals for the round: 60 sc, 48 ch-3 loops, 12 picot spikes.
Why the math works: each Round 6 fan has 9 dc. Working sc in every other dc (1, 3, 5, 7, 9) uses all 9 stitches, with 4 skipped dc covered by the 4 ch-3 loops. The Round 6 sc between fans is skipped, and the picot spike sits over it. 12 fans × (9 dc + 1 sc) = 120 stitches, which matches the Round 6 count exactly. The spikes land above the lattice sc of Round 5, which are directly above the centers of the small fans, so the points line up evenly around the ornament.
Checkpoint: 4 in (10.2 cm) across before blocking, or slightly less. Blocking opens the loops to full size. The border adds 0.25 in (0.6 cm) on every side.
Bow Appliqué
The bow has three parts. Leave a 6 in (15.2 cm) tail at the start of each part for sewing.
Bow Loops Strip
Ch 36.
Row 1: Sc in 2nd ch from hook and in each ch across, turn. (35 sc)
Row 2: Ch 1, sc in each st across. (35 sc) Fasten off.
The strip is about 3.25 in (8.3 cm) long and 0.2 in (0.5 cm) wide.
Shaping: Lay the strip flat. Fold both ends to the center so they overlap by about 0.125 in (0.3 cm), forming two equal loops. Tack the ends together at the center with a few stitches. The bow should be about 1.75 in (4.4 cm) wide.
Tails Strip
Ch 16.
Row 1: Sc in 2nd ch from hook and in each ch across, turn. (15 sc)
Row 2: Ch 1, sc in each st across. (15 sc) Fasten off.
The strip is about 1.4 in (3.6 cm) long. Fold it at the middle into an upside-down V. Place the fold behind the center of the bow loops, with the tails angled down and outward. Tack it in place.
Center Wrap
Ch 7.
Row 1: Sc in 2nd ch from hook and in each ch across. (6 sc) Fasten off.
Wrap this small strip around the center of the bow, covering the tacked ends. Sew the two short ends together at the back.
Attaching the Bow
Place the bow at the bottom of the wreath, centered over the large fan directly opposite the top. The bow center should sit over Rounds 4–6. The loops spread across the fans on either side, and the tails extend about 0.3 in (0.8 cm) below the outer edge.
Sew the bow on through the back of the center wrap and at the inner edge of each loop, catching only the back loops of the wreath stitches so the stitching is hidden from the front.
Hanging Loop
Find the large fan directly opposite the bow. Join thread with a sl st in the center sc of that fan (the sc worked in its 5th dc). Ch 30, sl st in the same sc. Fasten off and weave the ends back along the loop.
The loop hangs about 1.5 in (3.8 cm) above the edge.
Final Blocking
- Weave in all ends securely before you stiffen. Starch locks loose tails in place.
- Mix fabric stiffener according to the bottle, or use undiluted stiffener for a firmer ornament.
- Soak the ornament fully, then press out the excess between paper towels. Do not wring it.
- Cover the blocking board with plastic wrap. Draw or mark a 4 in (10.2 cm) circle, and a 1.5 in (3.8 cm) circle inside it.
- Lay the ornament face up, centered on the circles. Pin the center ring to the inner circle at 4 evenly spaced points.
- Pin each of the 12 picot spikes to the outer circle, working in opposite pairs (top/bottom, left/right) to keep the shape round.
- Gently open each ch-3 loop with a pin tip. Straighten each fan so its dc radiate evenly.
- Shape the bow loops into rounded arches, then lay the tails flat.
- Let it dry completely for 12–24 hours before unpinning.
Final Quality-Control Checklist
- Center ring is smooth, round and 1.5 in (3.8 cm) across
- 12 small fans with 7 dc each, all lying flat
- 12 large fans with 9 dc each, set between the small fans
- 48 ch-3 loops and 12 picot spikes in the border
- Diameter is 4 in (10.2 cm), measured spike to spike
- Bow is centered at the bottom, and the hanging loop is directly opposite it
- No visible tails or sewing threads on the front
- Ornament is fully dry and holds its shape when held upright
Troubleshooting
The ring twists or curls. The foundation chain was twisted when joined. Restart and lay the chain flat before the sl st.
Round 4 ruffles. The ring is too tight or the dc are too tall. Loosen the foundation chain slightly, or try a smaller hook for the fans only.
The large fans cup upward. The ch-7 loops in Round 5 are too short. Chain more loosely or use a 2.0 mm hook for that round only.
Spikes are uneven. You may have missed the skipped sc between fans. Count 5 sc per fan in Round 7.
Bow is lopsided. Unpick the center tack, re-measure both loops, then re-fold so they match before wrapping.
Ornament softens over time. Re-starch with a light spray and re-pin the spikes.
Care
Hand wash in cool water only if necessary, then re-stiffen and re-block. Store flat in a box between layers of tissue paper so the spikes and bow keep their shape.
Final Notes
The size of this ornament is built step by step from the inside out. A 48-chain ring becomes a 2.25 in (5.7 cm) solid ring with a 1.5 in (3.8 cm) opening. Twelve small fans bring it to 2.75 in (7.0 cm), and twelve large fans to 3.5 in (8.9 cm). The picot border adds 0.25 in (0.6 cm) per side, for a finished 4 in (10.2 cm) wreath.
If each checkpoint matches, the final shape will too. Make one, check the numbers, and then make as many as you like for your tree.
Happy crocheting!