

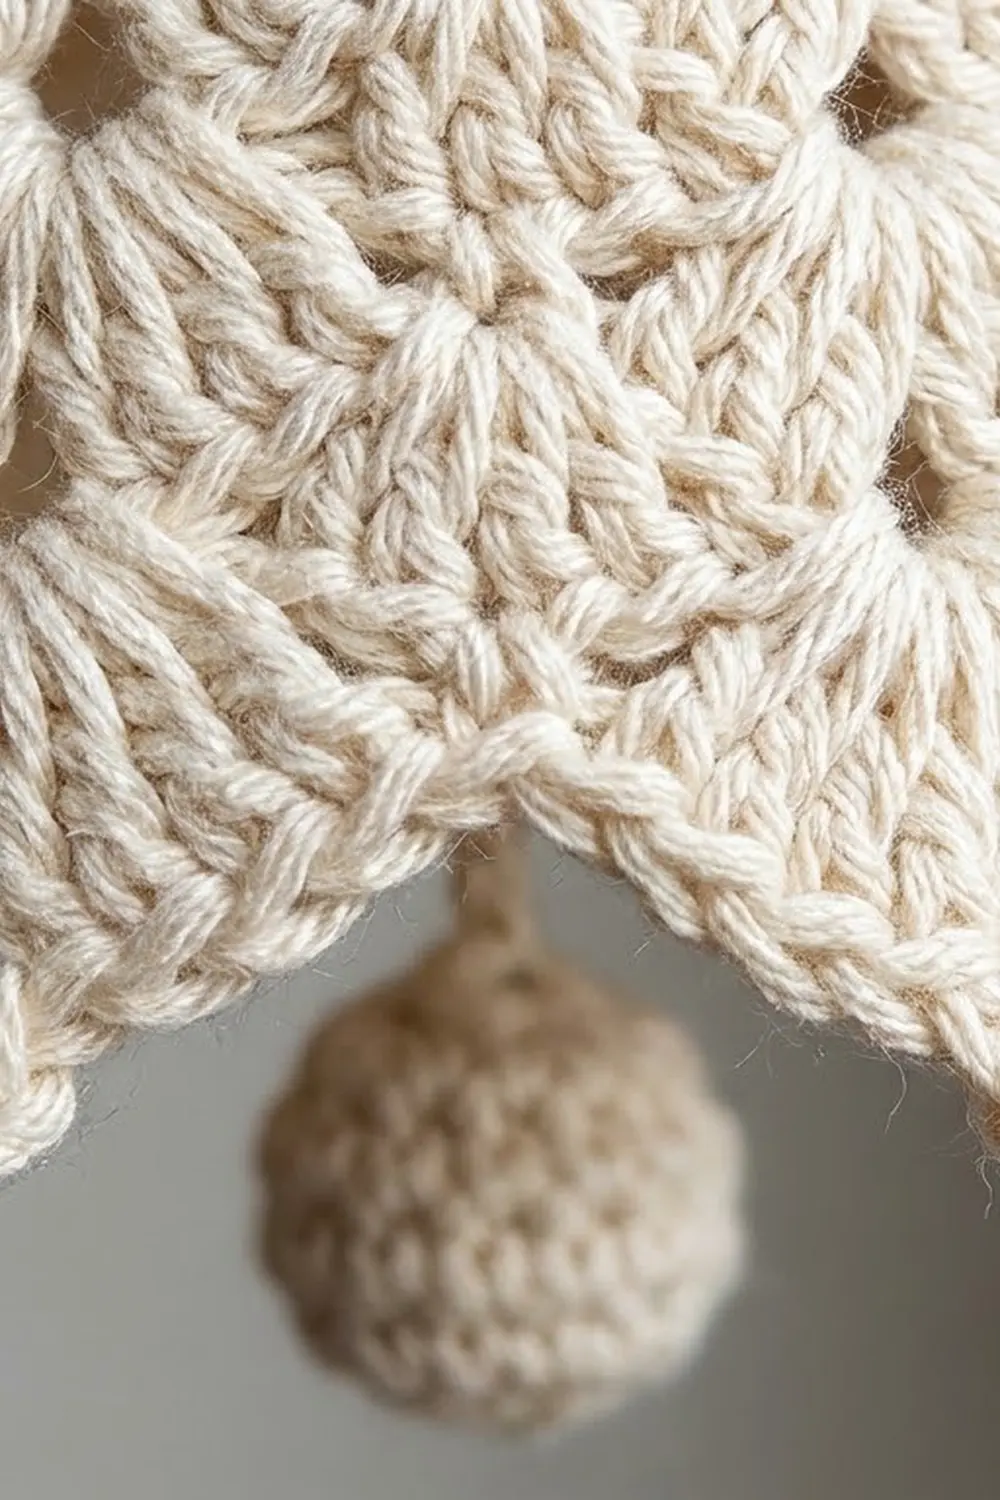
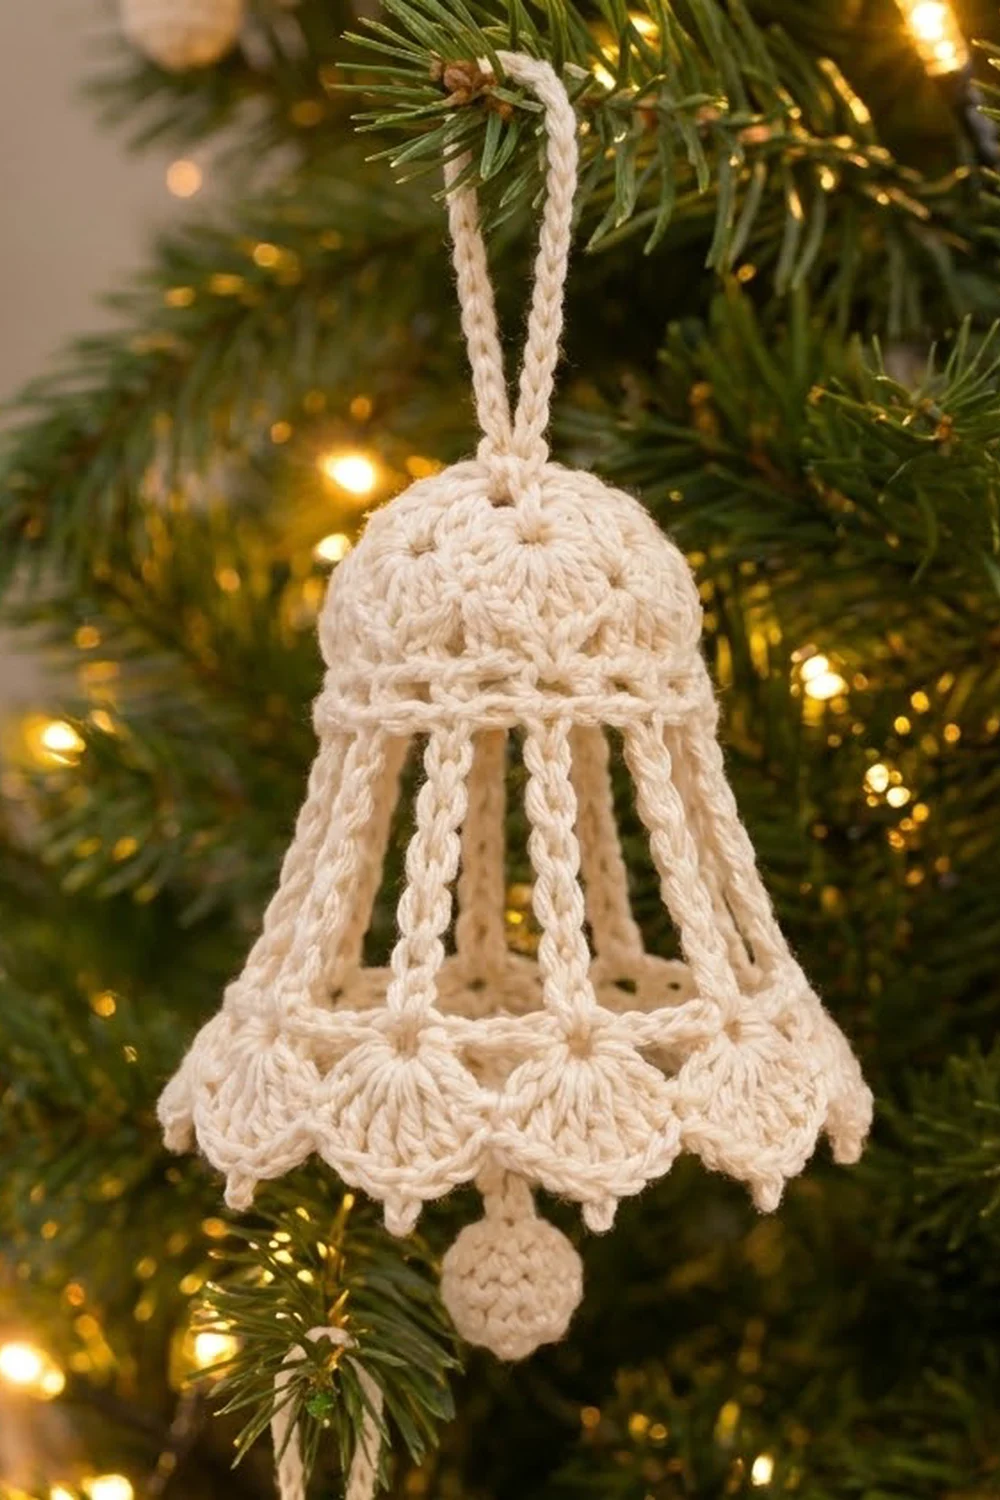
The Ivory Lantern Bell is a small 3D Christmas ornament with a textured dome, airy chain ribs, and a scalloped shell hem. A little stuffed clapper ball hangs just below the edge. It looks like delicate vintage lace but is made with sturdy cotton and simple stitches.
The sample uses one color, a soft cream, which suits rustic, Scandinavian, and farmhouse trees. Make a single bell as a gift topper, or a batch to hang together on the tree.
This pattern uses US crochet terms. The finished bell body measures 3.75 in (9.5 cm) tall and about 4 in (10.2 cm) wide at the hem when flattened. With the hanging loop and clapper, the full ornament measures 6 in (15.2 cm) from top to bottom.
You start the bell at the top with a magic ring. You work the dome and band in joined rounds, then make eight long chain loops that become the ribs. Next you link the bottoms of the ribs into a ring and finish with a shell-and-picot border. Last, you make the clapper, add the hanging loop, and starch the bell into shape.
Finished Size and Construction
- Finished size: 3.75 in (9.5 cm) tall bell body; 4 in (10.2 cm) flat width at hem; 6 in (15.2 cm) overall with loop and clapper
- Skill level: Intermediate
- Terminology: US crochet terms
- Yarn weight: Sport (2) mercerized cotton
- Hook: 2.75 mm (US C-2)
- Number of pieces: 1 bell body worked in one piece, plus 1 small clapper ball
- Layout: Single standalone ornament (not joined to other pieces)
- Size before border (through Rnd 9): 3 in (7.6 cm) tall; ring circumference 7.4 in (18.8 cm)
- Border depth: 0.75 in (1.9 cm)
Materials
Yarn: Use a smooth, mercerized sport-weight cotton. It shows the cluster texture clearly and holds its shape after starching. Avoid fuzzy or very soft acrylics, because the ribs will sag.
- Cream: 12 g / 36 m (39 yd) per bell
This amount includes about a 30% margin. One bell uses roughly 9 g (27 m / 30 yd), and the extra covers the gauge swatch and longer tails.
Tools:
– 2.75 mm (US C-2) crochet hook
– Tapestry needle
– Small pinch of fiberfill for the clapper
– Stitch marker
– Fabric stiffener or homemade starch (sugar or cornstarch)
– A small paper cone or plastic cup about 2.5 in (6.4 cm) across at the base, for shaping
– Plastic wrap and rust-proof pins
Abbreviations (US Terms)
- ch – chain
- sl st – slip stitch
- sc – single crochet
- dc – double crochet
- sc2tog – single crochet 2 together
- BLO – back loop only
- MR – magic ring
- sp(s) – space(s)
- st(s) – stitch(es)
Special stitches:
– CL (3-dc cluster): Yarn over, insert hook in stitch, pull up a loop, yarn over, pull through 2 loops. Repeat from * to * 2 more times in the same stitch (4 loops on hook). Yarn over and pull through all 4 loops.
– Beg CL (beginning cluster): Ch 2, then work a 2-dc cluster in the same stitch (the same steps, done 2 times instead of 3).
– Picot: Ch 3, worked between 2 sc in the same stitch as written.
Gauge and Checkpoints
Gauge: 13 sc and 14 rounds = 2 in (5.1 cm). 8 ch = 1 in (2.5 cm).
Make one full bell before planning a batch. Gauge matters most for the band and the ribs, because together they set the flare.
Checkpoints:
– After Rnd 1: The disc measures about 1 in (2.5 cm) across.
– After Rnd 2: The disc lies flat and measures about 1.5 in (3.8 cm) across.
– After Rnd 6: The band circumference is about 4.9 in (12.4 cm), and the top section (dome plus band) is 1.25 in (3.2 cm) tall.
– After Rnd 7: Each rib loop hangs 1.5 in (3.8 cm) below the band.
– After Rnd 9: The ring circumference is 7.4 in (18.8 cm), and the bell is 3 in (7.6 cm) tall.
– After Rnd 11: The bell is 3.75 in (9.5 cm) tall.
If your bell is too big: Go down one hook size, to 2.5 mm. Loose chains are the most common cause, so chain more firmly.
If your bell is too small: Go up to 3.0 mm, or relax your chain tension. If only the dome is tight, use the larger hook for Rnds 1–4 only.
Bell Body Pattern
Join every round with a sl st to the first stitch (or to the top of the beginning ch or cluster). Do not turn. The right side faces out the whole time.
Dome
Rnd 1: MR, ch 3 (counts as dc), 15 dc in ring. Join. (16 dc)
Pull the ring fully closed, leaving a 6 in (15.2 cm) tail on the outside. You will use this tail later to attach the clapper.
Rnd 2: Beg CL in the same st, ch 1, CL in next st, ch 1; repeat from * 14 more times. Join to the top of the Beg CL. (16 CL + 16 ch-1 sps = 32 sts)
This is a growth round. The 16 clusters create the raised texture on top of the dome.
Rnd 3: Sl st into the first ch-1 sp, ch 3 (counts as dc), dc in the same sp, 2 dc in each remaining ch-1 sp around. Skip the clusters. Join. (16 sps × 2 dc = 32 dc)
The count does not grow from here on, so the fabric starts to curve down into a dome.
Rnd 4: Beg CL in the same st, ch 1, skip next st, CL in next st, ch 1, skip next st; repeat from * 14 more times. Join. (16 CL + 16 ch-1 sps = 32 sts)
Band
Rnd 5: Ch 1, sc in each CL and in each ch-1 sp around. Join. (16 + 16 = 32 sc)
Rnd 6: Ch 1, sc in BLO of each st around. Join. (32 sc)
The unused front loops from Rnd 5 form the ridge line around the band.
Checkpoint: Band circumference 4.9 in (12.4 cm); top section 1.25 in (3.2 cm) tall.
Ribs
Rnd 7: Ch 1, (sc, ch 25, sc) in next st, sc in next 3 sts; repeat from * 7 more times. Join to the first sc. (40 sc + 8 ch-25 rib loops)
Each repeat uses 4 band stitches, and 8 × 4 = 32, so the ribs are spaced evenly about 0.6 in (1.5 cm) apart. Each ch-25 loop hangs down as two side-by-side chain strands, which gives the doubled-cord look of the ribs. The 13th chain of each loop is its bottom point.
Rnd 8: Sl st in each of the first 13 ch of the first rib loop, to reach its bottom point. Ch 1, sc in the same (13th) ch, ch 5, sc in the 13th ch of the next rib loop, ch 5; repeat from * 6 more times. Join to the first sc. (8 sc + 8 ch-5 sps = 48 sts)
Before each sc, check that the rib loop is not twisted and that you are working the loops in order around the bell.
Rnd 9: Ch 1, sc in each sc and 5 sc in each ch-5 sp around. Join. (8 sc worked 1-per-stitch + 40 sc in spaces = 48 sc)
At the ring, the ribs are now about 0.9 in (2.3 cm) apart, compared with 0.6 in (1.5 cm) at the band. That difference creates the bell’s flare.
Checkpoint: Ring circumference 7.4 in (18.8 cm); bell height 3 in (7.6 cm).
Border
Border gauge: Each 6-stitch shell repeat measures about 0.9 in (2.3 cm) along the ring, and the finished border is 0.75 in (1.9 cm) deep.
In Rnd 9, the first stitch sits directly above rib 1. Every 6th stitch after it sits above the next rib.
Rnd 10 (shells): Ch 1, sc in the first st, skip 2 sts, 7 dc in next st, skip 2 sts, sc in next st. Repeat from * 7 more times, but on the last repeat skip the final sc and join to the first sc instead. (8 shells of 7 dc + 8 sc = 64 sts)
Rnd 11 (scallop edge): Sl st in the first dc of the first shell. Ch 1, sc in the same dc, sc in next 2 dc, (sc, ch 3, sc) in the center (4th) dc, sc in next 3 dc, skip the sc. Sc in next 3 dc, (sc, ch 3, sc) in next dc, sc in next 3 dc, skip the sc; repeat from * 6 more times. Join. Fasten off and weave in the end. (56 sc worked 1-per-dc + 8 extra sc at the shell centers = 64 sc, plus 8 ch-3 picots)
Why the math works: Rnd 9 has 48 stitches, and each shell repeat uses exactly 6, so 48 ÷ 6 = 8 shells. That is one shell for each of the 8 spaces between the ribs. Each sc in Rnd 10 lands on a rib, and each 7-dc shell is centered in the space between two ribs. In Rnd 11, each shell gets 7 sc plus 1 extra at its center, for 8 sc per repeat. The sc between shells is skipped, which keeps the dips between scallops sharp. 8 repeats × 8 sc = 64 sc.
Clapper Ball
Rnd 1: MR, 6 sc in ring. (6 sc)
Rnd 2: 2 sc in each st. (12 sc)
Rnd 3: Sc in each st. (12 sc)
Rnd 4: Sc2tog 6 times. (6 sc)
Stuff the ball firmly with a small pinch of fiberfill. Fasten off, leaving an 8 in (20.3 cm) tail. Weave the tail through the front loops of the last 6 stitches and pull tight to close. The finished ball is about 0.6 in (1.5 cm) across.
Hanging Loop and Assembly
- Clapper: Thread the clapper tail onto a tapestry needle. Pass it up through the inside of the bell and out through the center of the Rnd 1 magic ring. Adjust it so the bottom of the ball hangs 0.5 in (1.3 cm) below the scalloped hem. The thread inside the bell will be about 3.6 in (9.1 cm) long. Knot this tail firmly to the magic-ring tail on top of the bell.
- Loop: Join the yarn at the center top of the dome. Ch 28, then sl st into the same spot to form a loop. Sl st in each of the 28 ch around the loop to make a firm cord. Sl st into the dome again and fasten off. The loop stands about 1.75 in (4.4 cm) tall.
- Hide all knots and tails under the loop’s base or inside the dome.
Final Blocking
- Mix fabric stiffener as the label directs. For sugar starch, dissolve 2 parts sugar in 1 part hot water and let it cool.
- Cover the paper cone or cup with plastic wrap.
- Soak the bell completely, then gently squeeze out the extra liquid. Do not wring it.
- Lift the clapper ball out of the way. Turn the bell upside down and slide it over the form so the band sits snugly at the top.
- Pull each rib straight and keep them evenly spaced, about 0.9 in (2.3 cm) apart at the ring.
- Fan out each shell and pin the 8 picots so they point down and slightly outward.
- Shape the dome by hand into a smooth, rounded top.
- Let it dry completely, at least 24 hours. Remove it from the form and let the clapper hang free.
Final Quality-Control Checklist
- [ ] The bell body measures 3.75 in (9.5 cm) tall.
- [ ] The hem measures about 4 in (10.2 cm) across when flattened.
- [ ] There are exactly 8 ribs, none twisted, all the same length.
- [ ] There are 8 shells, each centered between two ribs.
- [ ] All 8 picots point down evenly.
- [ ] The ridge line on the band is visible all the way around.
- [ ] The clapper hangs centered, 0.5 in (1.3 cm) below the hem.
- [ ] The hanging loop is firm, centered, and 1.75 in (4.4 cm) tall.
- [ ] All ends are secured and hidden.
Troubleshooting
The dome is flat, like a coaster: Rnds 3–4 are too loose. Use a smaller hook for those rounds.
The dome ruffles: Check that Rnd 3 has 2 dc in each space, not 3.
The ribs are different lengths: You chained a different number on some loops. Count each ch-25 before you work the closing sc.
The ribs are twisted: In Rnd 8, check that each loop is flat before you work into its 13th chain.
The shells don’t line up between the ribs: Count Rnd 9 again. It needs exactly 48 sc, with the first sc above a rib.
The bell won’t keep its shape: Starch it again with a stronger mix and let it dry fully on the form.
The clapper hangs to one side: Re-thread the tail through the exact center of the magic ring.
Care
Spot clean only with a damp cloth. Store the bell in a box with tissue so the starched shape doesn’t get crushed. If it softens over time, starch and shape it again.
Final Notes
The measurement chain is simple. Your sc gauge sets the band at 4.9 in (12.4 cm) around. The 8 ribs carry the shape down 1.5 in (3.8 cm) to a 7.4 in (18.8 cm) ring. The 48-stitch ring divides evenly into 8 shells for a 0.75 in (1.9 cm) border. The result is a 3.75 in (9.5 cm) bell that hangs 6 in (15.2 cm) overall with its loop and clapper. Check each stage as you go and every bell in your batch will match.
Happy crocheting!