
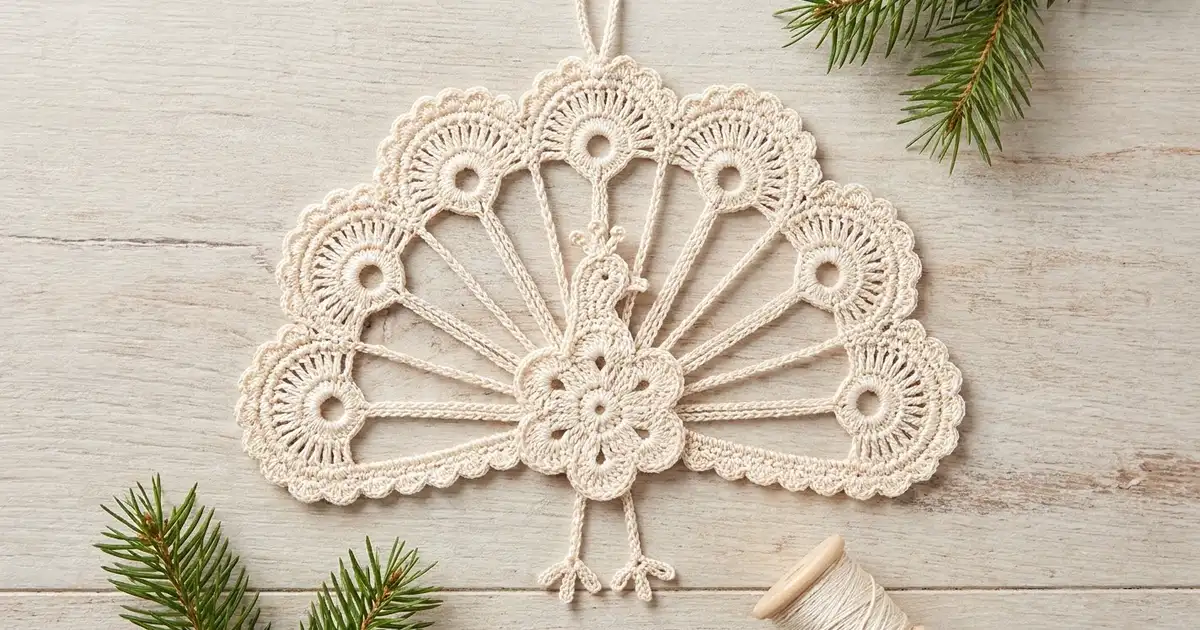
This peacock ornament is made in fine cream thread. Seven scalloped tail feathers open in a half circle around a small flower medallion. A little teardrop body with a crested head sits in the center, and two tiny legs with looped feet hang below. Chain feather lines connect every tail fan to the medallion, which leaves open lace windows between the fans that let the tree lights show through.
The design is a single color, ivory or cream, so the texture does all the work. Dense spokes, solid medallion petals and the scalloped rim stand out against the open chain lines. It looks like heirloom thread lace but needs no special techniques.
The pattern uses US crochet terms. The finished ornament measures 5¼ in (13.3 cm) wide by 4 in (10.2 cm) tall, not counting the hanging loop, which adds about 1½ in (3.8 cm).
For construction, you make seven identical fans, one flower medallion and one teardrop body. Chain feather lines join the fans to the medallion. Then you add the legs, work a two-row scalloped border across the whole arc, attach the body and finish with a covered hanging loop.
Finished Size and Construction
- Finished size: 5¼ in (13.3 cm) wide x 4 in (10.2 cm) tall, plus a 1½ in (3.8 cm) loop
- Skill level: Intermediate (thread work, small motifs)
- Terminology: US
- Thread: Size 10 mercerized cotton crochet thread (Lace, weight 0)
- Hook: 1.5 mm (US steel 8)
- Number of pieces: 9 (7 fans, 1 medallion, 1 body)
- Layout: 7 fans in a half-circle arc above and beside the central medallion
- Fan size: 1 in (2.5 cm) across the straight edge
- Size before border: 4¾ in (12.1 cm) wide x 3¾ in (9.5 cm) tall
- Border depth: ¼ in (0.6 cm)
Materials
Use a smooth, mercerized size 10 cotton. It holds crisp stitch definition and blocks well. Avoid fuzzy or matte threads, because the spokes and chain lines will blur.
- Cream / ivory: 10 g, about 80 m (87 yd)
One ornament uses about 6 g. The quantity above includes a margin for your test motif and for weaving in the many short tails. A 50 g ball will make several ornaments.
Tools:
– 1.5 mm (US steel 8) crochet hook
– Fine tapestry needle that fits size 10 thread
– Stitch markers, 7 small removable markers
– Rust-proof pins and a blocking board or foam mat
– Spray starch or diluted fabric stiffener (optional)
– Paper and pencil for a layout template
– Sharp scissors
Abbreviations (US Terms)
- ch – chain
- sl st – slip stitch
- sc – single crochet
- hdc – half double crochet
- dc – double crochet
- tr – treble crochet
- sk – skip
- sp – space
- st(s) – stitch(es)
- RS / WS – right side / wrong side
Special stitch – picot: ch 3, sl st in the 3rd ch from the hook.
Gauge and Checkpoints
Gauge matters with thread, because small differences add up across seven fans. Make one medallion and one fan first and measure them before you go on.
- Chain gauge: 14 ch = 1 in (2.5 cm)
- Medallion after Round 3: 1¼ in (3.2 cm) across, petal tip to petal tip
- Fan after Row 4: 1 in (2.5 cm) across the straight edge, and about ½ in (1.3 cm) from the eye center to the top of the arc
- Body: 1 in (2.5 cm) long, ½ in (1.3 cm) wide
- Before border: 4¾ in (12.1 cm) x 3¾ in (9.5 cm)
- After border: 5¼ in (13.3 cm) x 4 in (10.2 cm)
A tolerance of ⅛ in (0.3 cm) on each motif is fine. If your fan is larger than 1⅛ in (2.9 cm), switch to a 1.25 mm hook. If it is smaller than ⅞ in (2.2 cm), switch to a 1.75 mm hook. Make sure every fan comes out the same size, because uneven fans make the arc lopsided.
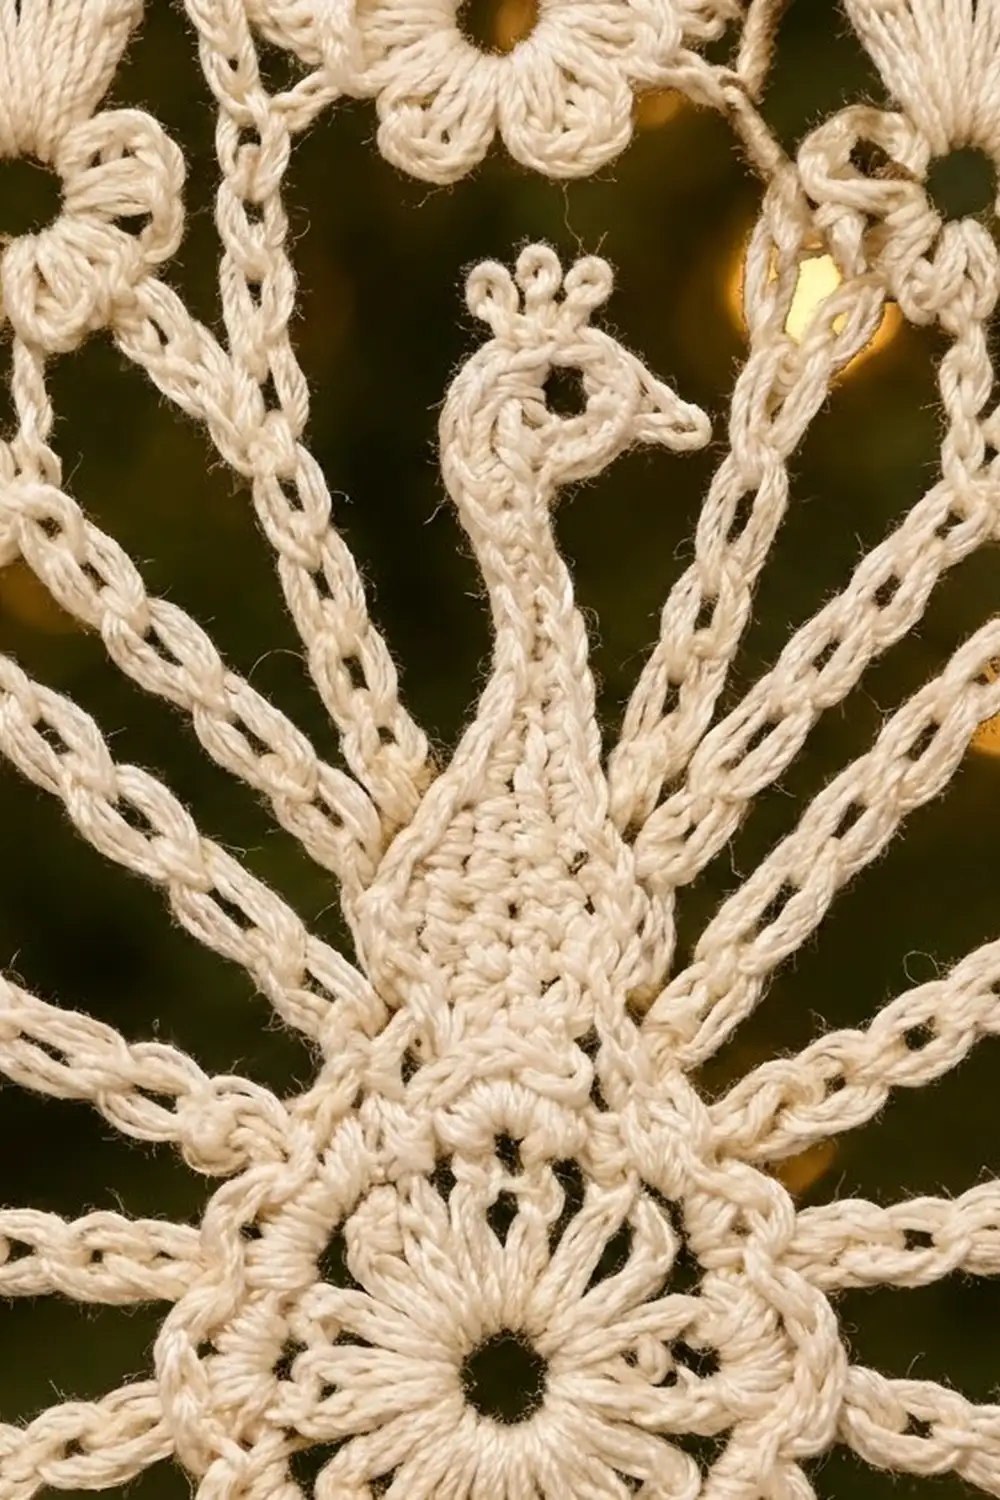
Tail Fan (make 7)
The fan starts with a closed ring eye. The spokes and outline rows are worked across only the upper half of the ring, and the lower half stays plain so a feather line can attach there.
Ch 6, sl st in the first ch to form a ring.
Round 1 (RS): Ch 1, 15 sc in the ring, sl st in the first sc. (15 sc)
Number these sts 1 to 15. Sts 1–8 carry the fan. Sts 9–15 stay as the lower half of the eye, and st 12 is its bottom center.
Row 2 (RS, spokes): Ch 4 (counts as first tr), [ch 2, tr in next sc] 7 times. Turn. (8 tr, 7 ch-2 sps)
Row 3 (WS): Ch 1, sc in first tr, [3 sc in next ch-2 sp, sc in next tr] 7 times, working the last sc in the top of the ch-4. Turn. (29 sc)
Row 4 (RS, outline): Ch 1, sc in first sc, [sc in next 3 sc, 2 sc in next sc] 7 times. (36 sc)
Check: 1 + (7 x 4) = 29 sts used, and 1 + (7 x 5) = 36 sts made.
Fasten off, leaving an 8 in (20.3 cm) tail for tacking. Place a marker in st 12 of Round 1.
Flower Medallion (make 1)
Ch 5, sl st in the first ch to form a ring.
Round 1: Ch 1, 12 sc in the ring, sl st in the first sc. (12 sc)
Round 2: Ch 1, sc in first sc, ch 3, sk next sc, [sc in next sc, ch 3, sk next sc] 5 times, sl st in the first sc. (6 sc, 6 ch-3 sps)
Round 3: Sl st in the first ch-3 sp, ch 1, (sc, hdc, 3 dc, hdc, sc) in each ch-3 sp around, sl st in the first sc. (6 petals, 42 sts)
Each petal has 7 sts: sc, hdc, dc, center dc, dc, hdc, sc. Fasten off and weave in the ends.
Choose one petal as Petal 1 (top) and mark it. Number the rest clockwise as you look at the RS: Petal 2 is at 2 o’clock, Petal 3 at 4, Petal 4 at 6, Petal 5 at 8 and Petal 6 at 10.
Body and Head (make 1)
Ch 10.
Round 1: Sc in 2nd ch from hook, sc in next ch, hdc in next 2 ch, dc in next 4 ch, 7 dc in last ch. Working along the opposite side of the foundation chain: dc in next 4 ch, hdc in next 2 ch, sc in next ch, sc in the same ch as the first sc. Sl st in the first sc. (23 sts)
The narrow sc end is the neck. The 7-dc end is the rounded breast.
Head: Ch 2, 3 dc in the same st, ch 2, sl st in the same st. This makes a small rounded head.
Beak: Sl st into the top of the 3rd dc of the head, ch 3, sl st in 2nd ch from hook, sl st in next ch, sl st in the same dc.
Crest: Sl st back into the top of the 2nd (center) dc of the head, work 3 picots, then sl st in the same dc.
Fasten off, leaving a 6 in (15.2 cm) tail for sewing.
Make All Pieces
All pieces are cream.
- Fans: 7
- Medallion: 1
- Body: 1
Draw a 5¼ in (13.3 cm) x 4 in (10.2 cm) rectangle on paper. Place the medallion center 1¼ in (3.2 cm) above the bottom edge, at the horizontal center. Arrange the pieces like this:
              [F4]
        [F3]        [F5]
   [F2]                  [F6]
[F1]       ( MEDALLION )      [F7]
               legs
Each fan’s eye points toward the medallion, and its scalloped arc faces outward. The straight-edge corners of neighboring fans just touch. Number the fans 1 to 7 from left to right.
Joining
The fans are joined to the medallion with doubled-chain feather lines. These lines are what make the lace windows. Each line is ch 16, about 1⅛ in (2.9 cm) long, which spans the gap from the medallion edge to the eye.
The join points are on Medallion Round 3. Work in back loops only on the medallion so the traveling sl sts sit on the back:
- J1: first sc of Petal 6 (Fan 1)
- J2: center dc of Petal 6 (Fan 2)
- J3: last sc of Petal 6 (Fan 3)
- J4: center dc of Petal 1 (Fan 4)
- J5: first sc of Petal 2 (Fan 5)
- J6: center dc of Petal 2 (Fan 6)
- J7: last sc of Petal 2 (Fan 7)
Feather lines: With RS facing, join the thread with a sl st at J1. Ch 16, sl st in the marked st 12 of Fan 1. Sl st back down the back bump of each of the 16 ch, then sl st in J1. (16 ch + 16 sl st per line)
Move to the next join point with sl sts in the back loops: 3 sts to J2, 3 sts to J3, 4 sts to J4, 4 sts to J5, 3 sts to J6 and 3 sts to J7. At each point, work the next fan’s line the same way. That makes 7 lines and 20 traveling sl sts. Fasten off.
Tension: Keep the chains even and slightly relaxed. If your chains are tight, the arc will cup. If they are loose, the fans will droop.
Fan tacks: Using the fan tails, whipstitch each pair of touching straight-edge corners together with 2 small stitches. That makes 6 tacks.
Legs: Join the thread at the first sc of Petal 4. Ch 7, sl st in 4th ch from hook (toe), [ch 3, sl st in the same ch] twice. Sl st in the next 3 ch and sl st in the medallion st. Fasten off. Repeat at the last sc of Petal 4. Each leg measures about ½ in (1.3 cm) including the foot.
Checkpoint: The piece should measure 4¾ in (12.1 cm) x 3¾ in (9.5 cm). Pin it flat over your template before you start the border.
Border
The border runs only across the outer arcs of the 7 fans, along the Row 4 edges. The starting count is 7 fans x 36 sts = 252 sts. No sts are added at the tacks.
Border gauge: Each scallop is about ¼ in (0.6 cm) wide and ⅛ in (0.3 cm) tall after Row 1.
Row 1 (RS): Join with sc in the first Row 4 st at the lower end of Fan 7. *Sk 2 sts, 5 dc in next st, sk 2 sts, sc in next st; repeat from * across. The sc falls on the first st of each new fan, so the fan joins land in scallop valleys. After the last scallop on Fan 1, sl st into the side of Fan 1’s final Row 4 st to anchor. Fasten off.
Per fan: 6 sc + 30 dc = 36 sts (6 scallops). Total: 42 sc + 210 dc = 252 sts, 42 scallops. The anchor sl st is not counted.
Row 2 (RS): With RS facing, join with sl st in the first sc of Row 1 at Fan 7. *Sc in next 2 dc, 2 sc in center dc, sc in next 2 dc, sl st in next sc; repeat from * across. On the final scallop, the closing sl st goes into the anchor sl st, which is not counted. Fasten off.
Per fan: 36 sts worked one into each + 6 extra (one per center dc) = 42 sts (36 sc + 6 sl st). Total: 252 sc + 42 sl st = 294 sts.
Why the math works: Each scallop uses exactly 6 sts, and each fan has 36 sts, so 36 ÷ 6 = 6 even scallops per fan with nothing left over. The border adds ¼ in (0.6 cm) to each side and to the top: 4¾ + ½ = 5¼ in (13.3 cm) wide, and 3¾ + ¼ = 4 in (10.2 cm) tall.
Body: Center the body’s breast end over Petal 1, with the neck pointing up along the Fan 4 line. Sew it in place around its lower half with the tail, through back loops only. Leave the neck and head free, then tack the head once to the Fan 4 line.
Hanging loop: Join at the Row 2 sl st between the 3rd and 4th scallops of Fan 4. Ch 40, sl st in the same st, then work 52 sc into the loop and sl st in the first sc. Fasten off. The loop stands about 1½ in (3.8 cm) tall.
Final Blocking
- Weave in all ends along stitch lines on the WS.
- Soak the ornament in cool water for 10 minutes and press out the water in a towel. Do not wring it.
- Pin it RS up over the 5¼ in (13.3 cm) x 4 in (10.2 cm) template.
- Pin each fan’s eye, then each spoke row, so the spokes radiate evenly.
- Put one pin in each scallop valley so all 42 scallops sit even.
- Straighten the feather lines and spread the leg toes.
- Spray with starch or stiffener if you like, then let it dry completely, about 12 hours.
Final Quality-Control Checklist
- All 7 fans measure 1 in (2.5 cm) across.
- The medallion has 6 even petals.
- All 7 feather lines are the same length and lie straight.
- There are 6 scallops per fan, 42 in total.
- The ornament measures 5¼ in (13.3 cm) x 4 in (10.2 cm).
- The body is centered, and the crest and beak are visible.
- The loop is centered over Fan 4.
- No tails show on the RS.
Troubleshooting
- Fans cup: Your Row 4 increases are missing. Recount to 36 sts.
- Fans ruffle: You may have extra sts. Recount Row 3 (29) and Row 4 (36).
- Arc is too wide: The feather chains are too long or too loose. Rework them tighter, or use ch 15.
- Scallops are uneven: Check that each scallop skips exactly 2 sts on each side.
- Body tilts: Re-sew it centered over Petal 1.
- Ornament is floppy: Use a stronger starch solution.
Care
Hand wash in cool water with mild soap and dry flat over the template. Re-starch as needed, and store it flat between tissue paper.
Final Notes
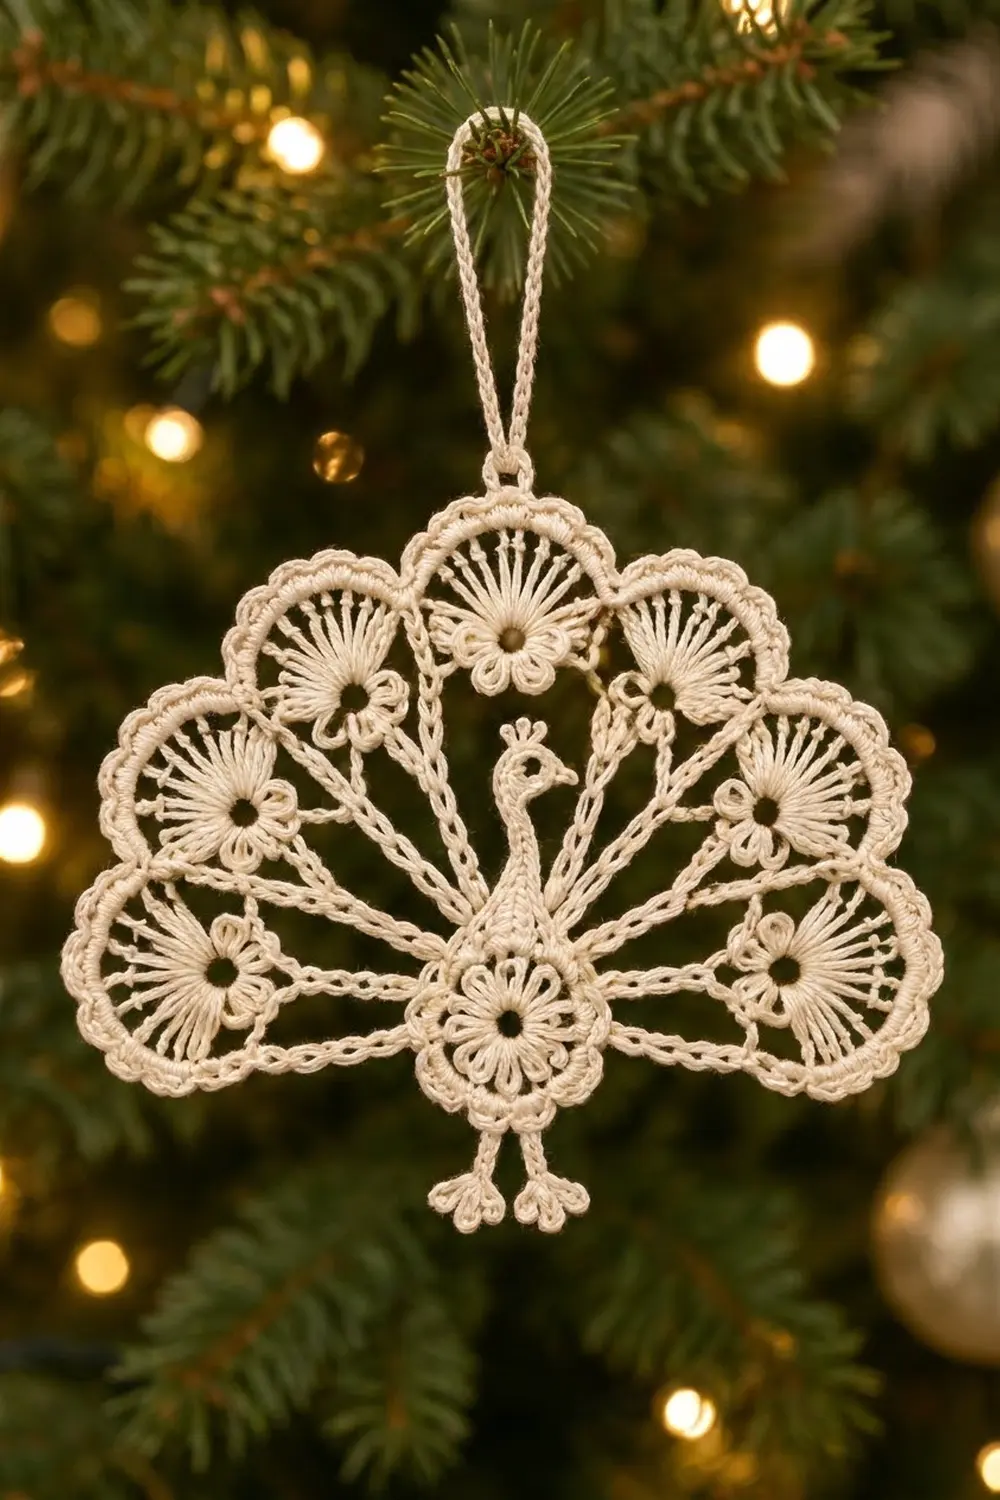
The measurement chain is simple. Each fan measures 1 in (2.5 cm), and the medallion measures 1¼ in (3.2 cm). Joined with 16-ch feather lines, the pieces form a 4¾ in (12.1 cm) x 3¾ in (9.5 cm) arc. The 36-st fan edges become 6 scallops each, and the ¼ in (0.6 cm) border brings the ornament to 5¼ in (13.3 cm) x 4 in (10.2 cm), with a 1½ in (3.8 cm) hanging loop on top. Check each stage, and the peacock will open evenly.
Happy crocheting!