

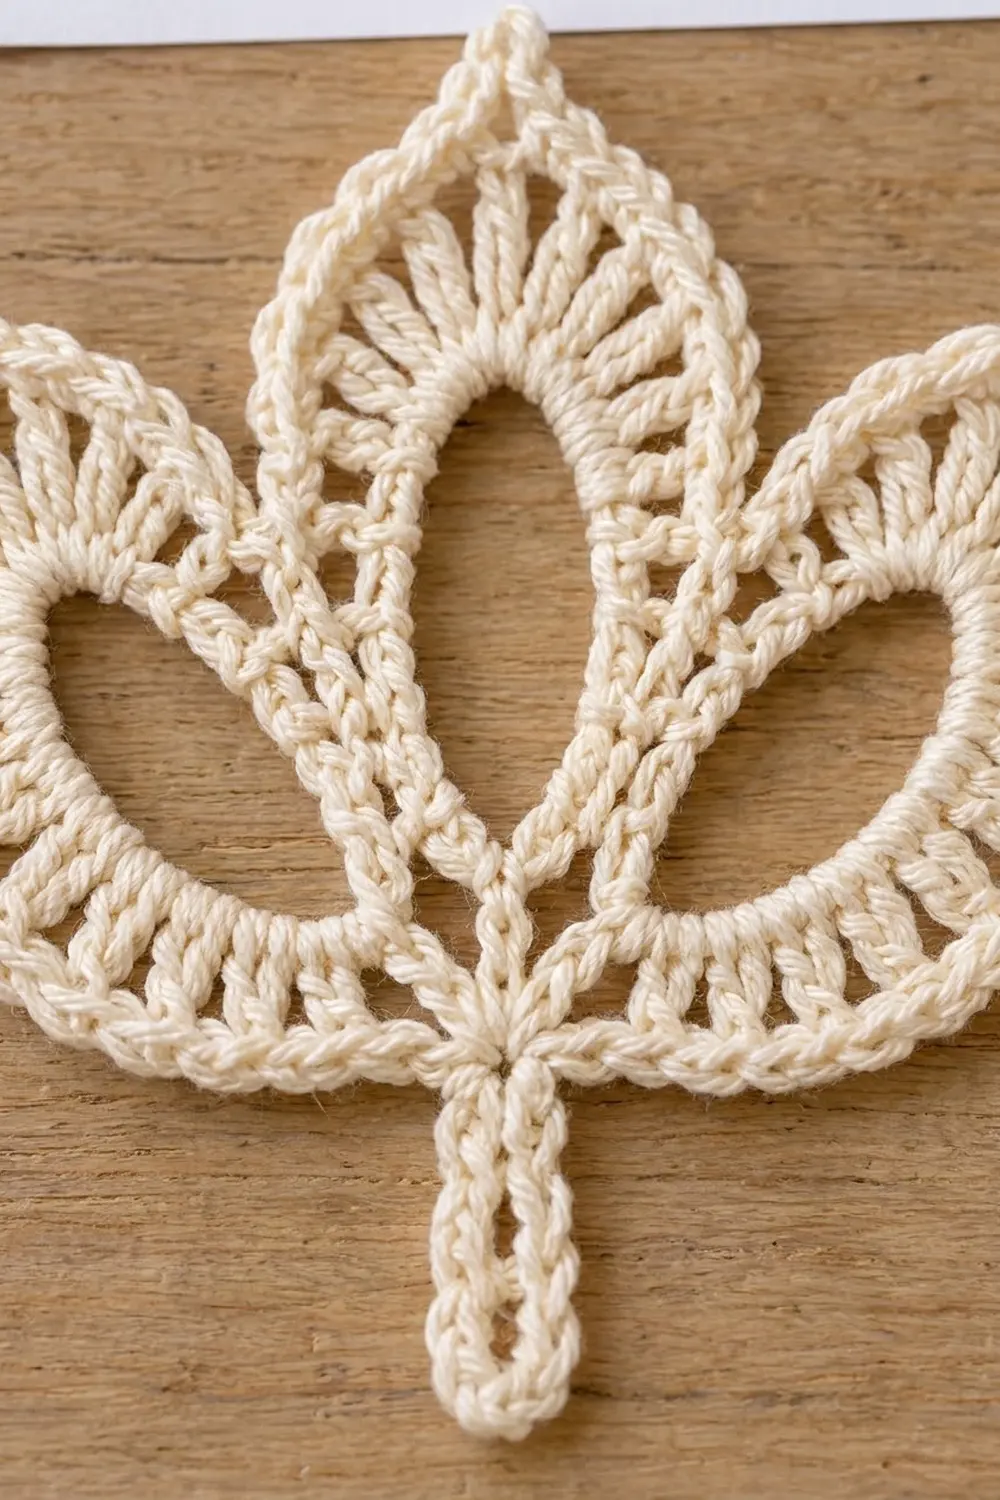
The Ivory Trefoil is a single lace motif shaped like a sprig of three pointed leaves rising from one shared point, with a slim looped stem below. Each leaf has a large open oval window in the middle, a fan of double crochet spokes around it, and a smooth, corded single crochet rim that comes to a point at the tip.
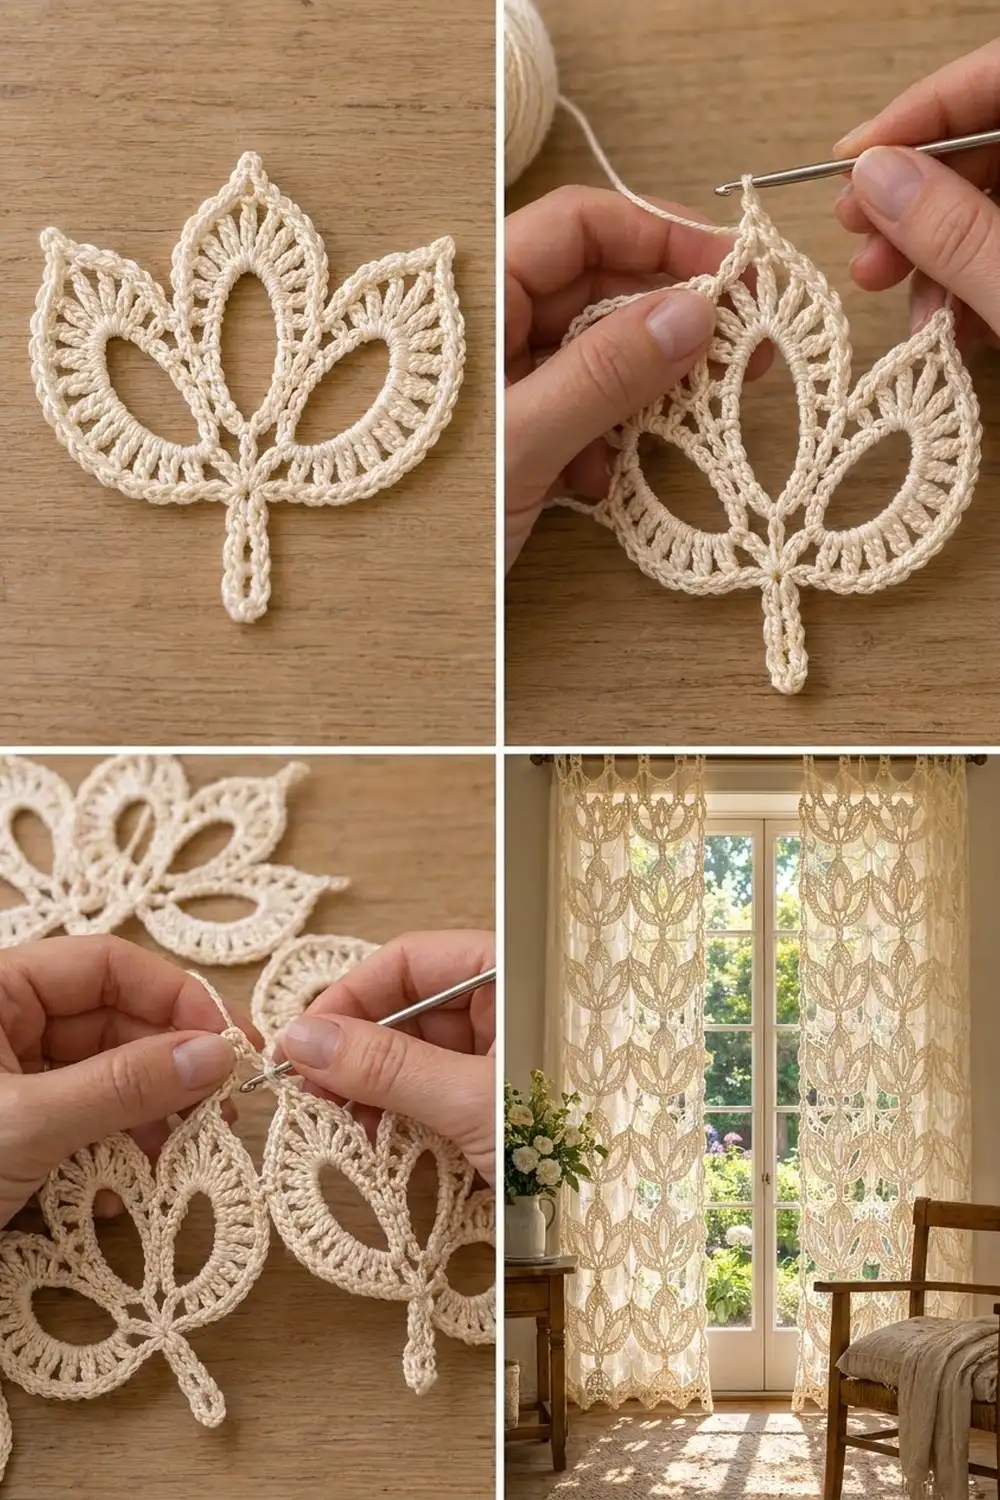
It uses one color, a soft ivory cotton, so the stitch texture stands out and the piece has a vintage, heirloom look. Use it as an appliqué, a lace coaster, an ornament, or a gift-tag accent.
The pattern uses US crochet terms. The finished, blocked motif measures about 6.5 in (16.5 cm) wide and 6 in (15.2 cm) tall, from the stem tip to the top of the center leaf.
The whole motif is one piece. First you chain four loops that all start from one junction stitch (stem, left leaf, center leaf, right leaf). Next you cover them with single crochet. Then you turn and add a double crochet fan to the three leaves. Finally you turn again and work a single crochet rim around everything. There is no sewing, and you have only two ends to weave in.
Finished Size and Construction
- Finished size: 6.5 in (16.5 cm) wide x 6 in (15.2 cm) tall
- Skill level: Easy-intermediate
- Terminology: US crochet terms
- Yarn weight: DK / light worsted (weight 3) cotton
- Hook: 3.5 mm (E-4)
- Number of pieces: 1 (single motif)
- Layout: one stem pointing down, three leaves fanning up from a single junction
- Piece size: 6.5 in (16.5 cm) x 6 in (15.2 cm)
- Size before border: 6 in (15.2 cm) wide x 5.5 in (14.0 cm) tall
- Border depth: 1 round of sc, about 0.25 in (0.6 cm)
Materials
Yarn: Choose a smooth mercerized or combed cotton in DK weight. Cotton keeps the pointed tips and open windows crisp after blocking. Acrylic or wool blends will give softer, rounder leaves.
- Ivory / cream: 10 g, about 25 m (27 yd)
This amount includes a margin of about 30% for tails, a practice start, and any ripping back.
Tools:
- 3.5 mm (E-4) crochet hook
- Tapestry needle
- Scissors
- Stitch marker
- Rust-proof pins and a blocking mat or folded towel
- Spray bottle with water
- Ruler or tape measure
Abbreviations (US Terms)
- ch – chain
- sl st – slip stitch
- sc – single crochet
- hdc – half double crochet
- dc – double crochet
- tr – treble crochet
- sp – space
- st(s) – stitch(es)
- rnd – round
- [ ] – repeat the steps inside the brackets the number of times stated
Special term – junction: the first chain of the foundation, where all four loops meet. Every “sl st in junction” goes into this point, or into the sl st already sitting on it in later rounds. Junction sl sts never count as stitches.
Gauge and Checkpoints
Gauge: 20 sc = 4 in (10.2 cm) with a 3.5 mm hook. In addition, 10 relaxed ch should measure about 2 in (5.1 cm).
Because this is one small piece, the motif itself is your test piece. Work Rnds 1 and 2, then measure before you go on.
Checkpoints (measured flat and relaxed):
- After Rnd 1: the center loop, flattened, is about 2.5 in (6.4 cm) long. The side loops and stem loop are about 2 in (5.1 cm) long.
- After Rnd 2: the center leaf is about 3 in (7.6 cm) from junction to tip. The side leaves are about 2.5 in (6.4 cm).
- After Rnd 3: the center leaf is about 3.5 in (8.9 cm) and the stem about 2 in (5.1 cm). Total height is 5.5 in (14.0 cm) and width is about 6 in (15.2 cm).
- After Rnd 4: the center leaf is about 3.75 in (9.5 cm) and the stem about 2.25 in (5.7 cm). Total size is 6.5 in (16.5 cm) wide x 6 in (15.2 cm) tall.
If the motif is too big: go down to a 3.25 mm or 3 mm hook.
If the motif is too small: go up to a 3.75 mm or 4 mm hook. Tight chains are the usual cause, so try chaining a little more loosely before you change hooks.
Do not change the chain counts to fix the size. Every stitch count below depends on them.
Pattern
Rnd 1: Foundation Loops
Ch 22, then sl st in the first ch made (the 22nd ch from hook). That first ch is now the junction, and you have a stem loop of 21 ch.
Left leaf loop: ch 21, sl st in junction.
Center leaf loop: ch 27, sl st in junction.
Right leaf loop: ch 21, sl st in junction.
You now have four chain loops coming out of one point. Lay the piece flat with the stem pointing down and the three leaf loops fanning up (left, center, right).
Count: stem 21 ch, left 21 ch, center 27 ch, right 21 ch.
Rnd 2: Cover the Loops
Work into each chain of each loop, making a ch-2 point at the tip of every loop.
Ch 1 (does not count as a st).
Stem: sc in next 10 ch, (sc, ch 2, sc) in next ch, sc in next 10 ch, sl st in junction. (22 sc + 1 ch-2 tip)
Left leaf: sc in next 10 ch, (sc, ch 2, sc) in next ch, sc in next 10 ch, sl st in junction. (22 sc + 1 ch-2 tip)
Center leaf: sc in next 13 ch, (sc, ch 2, sc) in next ch, sc in next 13 ch, sl st in junction. (28 sc + 1 ch-2 tip)
Right leaf: sc in next 10 ch, (sc, ch 2, sc) in next ch, sc in next 10 ch, sl st in junction. (22 sc + 1 ch-2 tip)
Rnd 2 total: 22 + 22 + 28 + 22 = 94 sc, plus 4 ch-2 tips.
That is 11 sc per side on the stem and on each side leaf, and 14 sc per side on the center leaf. Do not fasten off.
Rnd 3: Leaf Fans (Growth Round)
Work this round on the three leaves only. The stem stays at its Rnd 2 width so it stays slim.
Ch 1, turn. You now work back over the leaves in this order: right, center, left.
Right leaf:
- First side: sc in first sc, hdc in next sc, dc in next sc, [2 dc in next sc, dc in next sc] 4 times. (15 sts)
- Tip: (2 dc, ch 2, 2 dc) in ch-2 sp. (4 sts)
- Second side: [dc in next sc, 2 dc in next sc] 4 times, dc in next sc, hdc in next sc, sc in last sc. (15 sts)
- Sl st in junction.
Right leaf count: 15 + 4 + 15 = 34 sts, plus 1 ch-2 tip.
Center leaf:
- First side: sc in first sc, hdc in next sc, dc in next 2 sc, [2 dc in next sc, dc in next sc] 5 times. (19 sts)
- Tip: (2 tr, ch 2, 2 tr) in ch-2 sp. (4 sts)
- Second side: [dc in next sc, 2 dc in next sc] 5 times, dc in next 2 sc, hdc in next sc, sc in last sc. (19 sts)
- Sl st in junction.
Center leaf count: 19 + 4 + 19 = 42 sts, plus 1 ch-2 tip.
Left leaf: work exactly like the right leaf. (34 sts, plus 1 ch-2 tip)
Rnd 3 total: 34 + 42 + 34 = 110 sts, plus 3 ch-2 tips. The stem keeps its 22 sc from Rnd 2.
Check the math: each side of a side leaf uses 3 sc for the sc-hdc-dc ramp plus 8 sc for the repeats, which is 11 sc and matches Rnd 2. Each center side uses 4 sc plus 10 sc, which is 14 sc and also matches.
The short sc-hdc-dc ramp at each base keeps the leaves from crowding each other at the junction. The increases around the curve open the dc fan into spokes around the oval window. The tr stitches at the center tip make that leaf taller and pointier than the side leaves.
Rnd 4: Border
Work as written in the Border section below, then fasten off.
Border
Border gauge: one round of sc at the motif gauge, 20 sc = 4 in (10.2 cm). It adds about 0.25 in (0.6 cm) to every outer edge.
This is a conversion round. You work 1 sc into every existing stitch, and each tip gets 2 extra sc from working (sc, ch 2, sc) into its ch-2 sp.
Ch 1, turn. You now work in this order: left, center, right, stem.
Left leaf: sc in each of next 17 sts, (sc, ch 2, sc) in ch-2 sp, sc in each of next 17 sts, sl st in junction.
Count: 34 sts worked 1-per-stitch + 2 extra at tip = 36 sc, plus 1 ch-2 tip.
Center leaf: sc in each of next 21 sts, (sc, ch 2, sc) in ch-2 sp, sc in each of next 21 sts, sl st in junction.
Count: 42 sts worked 1-per-stitch + 2 extra at tip = 44 sc, plus 1 ch-2 tip.
Right leaf: work like the left leaf. (34 + 2 = 36 sc, plus 1 ch-2 tip)
Stem: sc in each of next 11 sc, (sc, ch 2, sc) in ch-2 sp, sc in each of next 11 sc, sl st in junction.
Count: 22 sts worked 1-per-stitch + 2 extra at tip = 24 sc, plus 1 ch-2 tip.
Rnd 4 total: 36 + 44 + 36 + 24 = 140 sc, plus 4 ch-2 tips.
Fasten off and weave in both ends along the back of the sc rim.
Why the math works: each leaf side in Rnd 3 has 15 sts (side leaf) or 19 sts (center leaf), plus the 2 tip stitches on that side, giving 17 or 21 stitches to sc into. Working 1 sc per stitch keeps the rim flat along the curves, since the dc fan already added the extra width there. The only increases are the 2 sc at each tip, which with the ch-2 keep the points sharp instead of rounded. The rim adds 0.25 in (0.6 cm) on each side, so the 6 in (15.2 cm) width before the border becomes 6.5 in (16.5 cm). The 5.5 in (14.0 cm) height gains 0.25 in (0.6 cm) at the center tip and at the stem tip, which brings it to 6 in (15.2 cm).
Final Blocking
- Soak the motif in cool water for 10 minutes, then press out the water in a towel without wringing.
- Lay it right side up on a blocking mat with the stem pointing straight down.
- Pin the center leaf tip so it sits 3.75 in (9.5 cm) above the junction.
- Pin the stem tip 2.25 in (5.7 cm) below the junction.
- Pin the side leaf tips out and up so the total width is 6.5 in (16.5 cm).
- Put one pin inside each oval window and gently stretch it into a smooth almond shape.
- Run a finger along each dc fan so the spokes spread evenly.
- Mist lightly and let it dry completely before you unpin it, usually 6–8 hours.
Final Quality-Control Checklist
- Size is 6.5 in (16.5 cm) wide x 6 in (15.2 cm) tall.
- All four loops meet at one tidy junction with no gaps.
- Stitch counts are 94 sc in Rnd 2, 110 sts in Rnd 3, and 140 sc in Rnd 4.
- Both side leaves are the same size and mirror each other.
- The center leaf is clearly taller and pointier than the side leaves.
- Every tip has a crisp ch-2 point.
- The oval windows are open and smooth, with no twisted chains.
- The stem is slim and straight, with no dc fan.
- Ends are woven in securely and hidden on the back.
Troubleshooting
Leaves ruffle or cup: the dc fan is too full for your tension. Use a smaller hook for Rnd 3 only, or block firmly.
Leaves curl inward: your Rnd 2 sc are too tight. Work Rnd 2 with a 3.75 mm hook.
Loops twisted in Rnd 1: check that each chain is not twisted before you sl st into the junction. Rip back and redo, because a twist will show in the window.
Junction looks bulky: insert the hook through only the top loop of the existing sl st for later junction sl sts.
Side leaves don’t match: count each side of the repeats. A missed “2 dc in next” on one side makes that leaf lean.
Tips look round: make sure the tip ch-2 is a true 2-chain space in Rnds 2, 3, and 4, then pin the points sharply while blocking.
Care
Hand wash in cool water with mild soap, press dry in a towel, and lay flat to dry. Re-pin the tips if needed.
Final Notes
The measurement chain is easy to follow. The Rnd 1 loops measure about 2 in (5.1 cm) for the side loops and stem, and 2.5 in (6.4 cm) for the center loop. Rnd 2 brings the center leaf to 3 in (7.6 cm), and Rnd 3 brings the motif to 6 in (15.2 cm) wide x 5.5 in (14.0 cm) tall. The 0.25 in (0.6 cm) rim in Rnd 4 finishes it at 6.5 in (16.5 cm) wide x 6 in (15.2 cm) tall. Check your counts at each round (94, 110, 140) and pin the tips sharply, and your trefoil will look as crisp as the original.
Happy crocheting!