

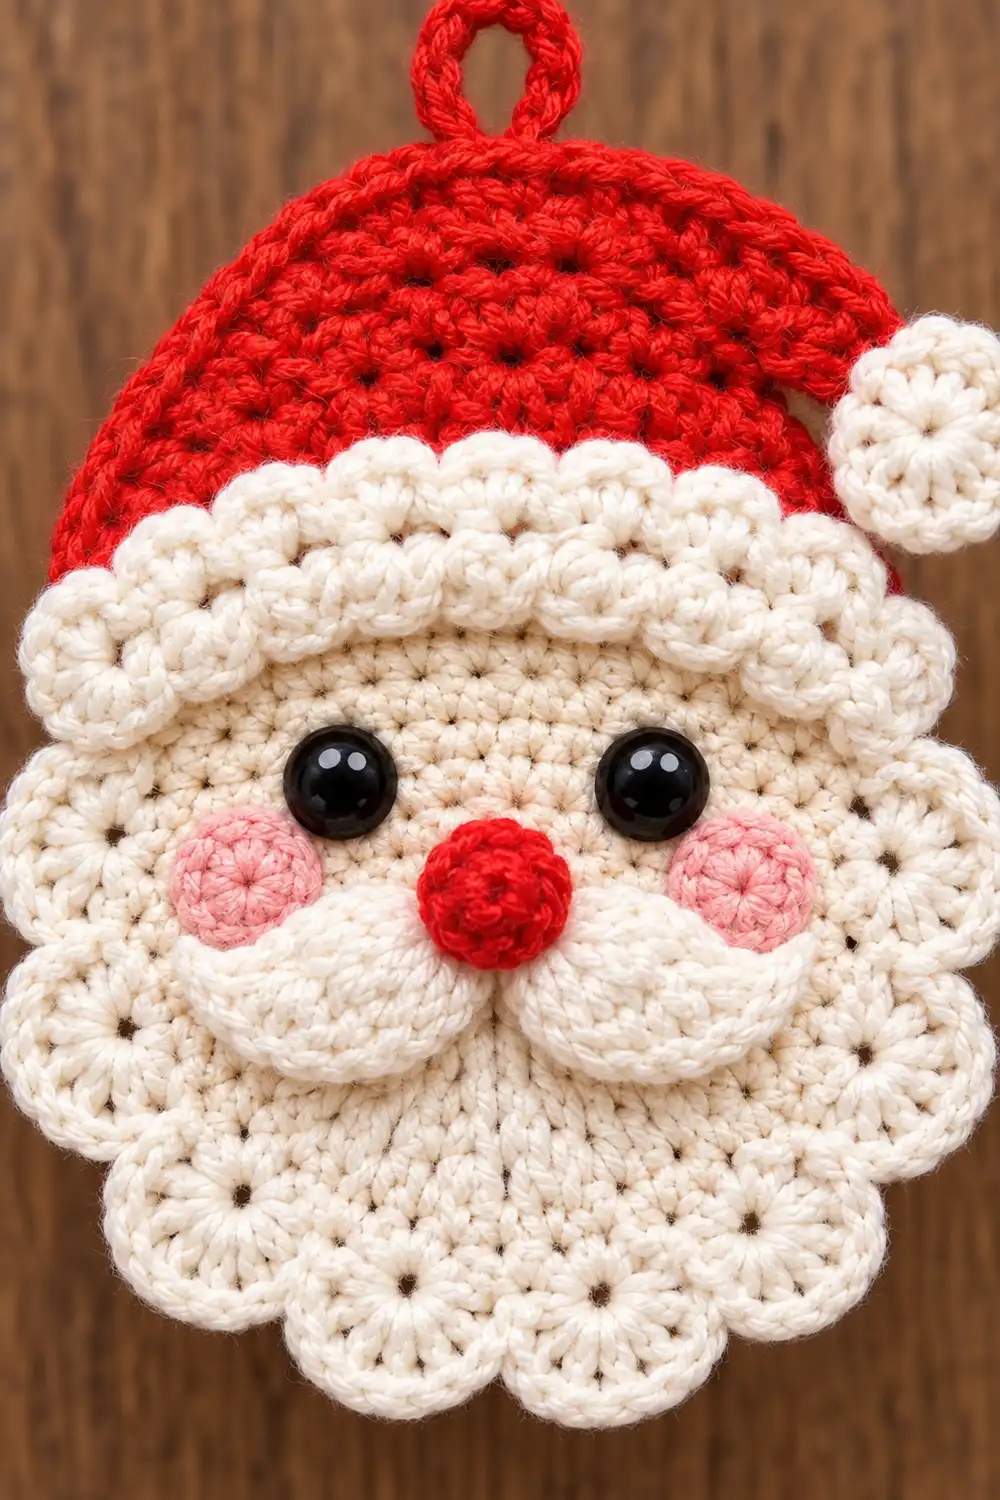
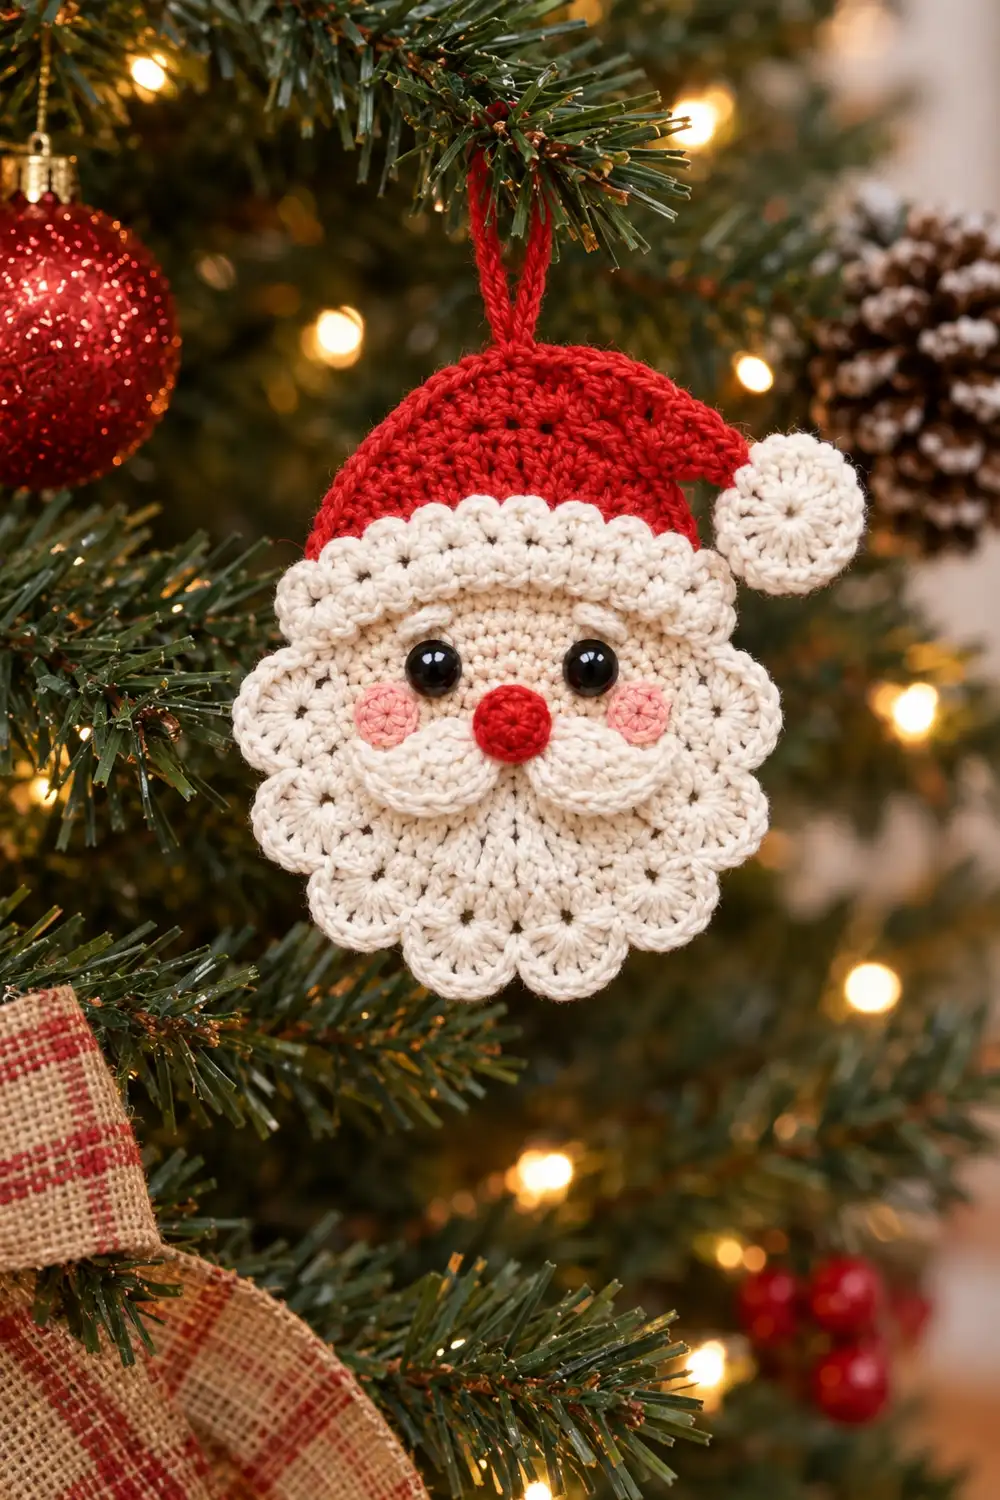
This little Santa face is a flat, round ornament with a cheerful, cottage-Christmas look. The cream face is framed by a scalloped shell-stitch edge all the way around. A fluffy bobble-textured beard and curled mustache give it depth. A red pompom nose, two black bead eyes, and two pink cheeks finish the face.
On top sits a red crocheted Santa hat. Its bottom edge has a white bobble trim, and a small white crocheted pompom sits at the folded tip. A red loop at the crown lets you hang it on the tree, a gift bag, or a doorknob.
The pattern uses US crochet terms. The bordered face measures 3.5 in (8.9 cm) across. The full ornament is about 4.5 in (11.4 cm) tall including the hat, not counting the loop.
Construction is simple. You crochet a cream disc in the round, then add one round of shells. The hat is worked flat in rows, and the bobble trim is worked off its foundation edge. The beard, mustache, nose, cheeks, tip pompom, and loop are small pieces sewn on. The eyes are beads.
Finished Size and Construction
- Finished size: 3.5 in (8.9 cm) across the bordered face. About 4.5 in (11.4 cm) tall with the hat, excluding the loop.
- Skill level: Easy-intermediate
- Terminology: US crochet terms
- Yarn weight: DK / light (3) cotton
- Hook: 3.5 mm (E-4)
- Number of pieces: 1 ornament. It is made from the face disc (with border) and the hat (with trim), plus 8 small sewn-on details: beard, 2 mustache halves, nose, 2 cheeks, tip pompom, and hanging loop.
- Layout: Layered appliqué on one round base
- Face disc before border: 2.8 in (7.1 cm) diameter
- Border depth: 0.35 in (0.9 cm) all around
- Face disc after border: 3.5 in (8.9 cm) diameter
Materials
Use a smooth, mercerized DK cotton or cotton blend. Cotton holds the shell edges crisply and keeps the bobbles defined. Avoid fuzzy yarns, which blur the beard texture.
- Cream: 15 g, about 34 m (face, border, beard, mustache, hat trim, tip pompom)
- Red: 6 g, about 13 m (hat, nose, loop)
- Pink: 2 g, about 4.5 m (cheeks)
These quantities include a margin of about 25% for gauge swatching and yarn tails.
Tools:
– 3.5 mm (E-4) crochet hook
– Tapestry needle
– Two 8 mm black beads (or sew-on black half-round beads)
– Black sewing thread and a sewing needle
– Locking stitch marker
– Rust-proof pins
– Small spray bottle for blocking
– A small scrap of cream yarn for filling the nose
Abbreviations (US Terms)
- ch – chain
- sl st – slip stitch
- sc – single crochet
- hdc – half double crochet
- dc – double crochet
- inc – 2 sc in the same stitch
- sc2tog – single crochet 2 together
- MR – magic ring
- st(s) – stitch(es)
- RS / WS – right side / wrong side
Special stitches:
- Bobble: Yarn over, insert hook in the stitch, pull up a loop, yarn over, pull through 2 loops. Repeat from * 2 more times in the same stitch. You now have 4 loops on the hook. Yarn over and pull through all 4. Bobbles are worked on WS rows so they pop out on the RS.
- Shell: 5 dc in the same stitch.
Gauge and Checkpoints
Gauge: 11 sc and 11 sc rounds/rows = 2 in (5.1 cm).
Make the face disc first. It is your gauge test. Measure flat, without stretching, at each checkpoint:
- After Rnd 4: 1.4 in (3.6 cm)
- After Rnd 6: 2.1 in (5.3 cm)
- After Rnd 8: 2.8 in (7.1 cm)
- After the border: 3.5 in (8.9 cm)
Other checkpoints:
- Hat at Row 1: 3.3 in (8.4 cm) wide
- Hat height: 2.2 in (5.6 cm)
- Beard: 2.2 in (5.6 cm) wide by 1.3 in (3.3 cm) tall
- Tip pompom: 1.1 in (2.8 cm)
- Nose: 0.5 in (1.3 cm)
- Cheeks: 0.6 in (1.5 cm) each
If your disc is too big, go down to a 3.25 mm hook. If it is too small, go up to a 3.75 mm hook. A difference of 0.1 in (0.3 cm) is fine. More than 0.2 in (0.5 cm) means the hat and beard will not fit as written.
Order of Work
- Face disc
- Border
- Hat and trim
- Small details
- Assembly
- Blocking
The border appears later in this article, but work it right after the face disc, before you assemble anything.
Face Disc (Cream)
Work in continuous spirals. Move your marker to the first stitch of each round.
- Rnd 1: MR, 6 sc in ring. Pull closed. (6)
- Rnd 2: Inc in each st. (12)
- Rnd 3: Sc 1, inc 6 times. (18)
- Rnd 4: Sc 2, inc 6 times. (24) Checkpoint: 1.4 in (3.6 cm).
- Rnd 5: Sc 3, inc 6 times. (30)
- Rnd 6: Sc 4, inc 6 times. (36) Checkpoint: 2.1 in (5.3 cm).
- Rnd 7: Sc 5, inc 6 times. (42)
- Rnd 8: Sc 6, inc 6 times. (48) Sl st in the next st. Checkpoint: 2.8 in (7.1 cm).
Each round adds exactly 6 stitches. This keeps the disc flat. If you see a hexagon forming, stagger the increase position in alternate rounds.
Do not fasten off. Continue to the Border section.
Hat (Red)
The hat is worked flat. Ch 1 at the start of each row does not count as a stitch. Rows 1–4 decrease slowly to give a rounded dome. After that, the hat tapers to a point that you will fold to one side.
- Row 1 (RS): Ch 19. Sc in 2nd ch from hook and in each ch across. (18) Checkpoint: 3.3 in (8.4 cm) wide.
- Row 2: Ch 1, turn, sc across. (18)
- Row 3: Ch 1, turn, sc2tog, sc 14, sc2tog. (16)
- Row 4: Ch 1, turn, sc across. (16)
- Row 5: Ch 1, turn, sc2tog, sc 12, sc2tog. (14)
- Row 6: Ch 1, turn, sc2tog, sc 10, sc2tog. (12)
- Row 7: Ch 1, turn, sc2tog, sc 8, sc2tog. (10)
- Row 8: Ch 1, turn, sc2tog, sc 6, sc2tog. (8)
- Row 9: Ch 1, turn, sc2tog, sc 4, sc2tog. (6)
- Row 10: Ch 1, turn, sc2tog, sc 2, sc2tog. (4)
- Row 11: Ch 1, turn, sc2tog twice. (2)
- Row 12: Ch 1, turn, sc2tog. (1)
Fasten off. Hat height checkpoint: 2.2 in (5.6 cm).
Hat Trim (Cream)
This trim is worked into the opposite side of the hat’s foundation chain.
- Row A (RS): With the RS facing, join cream at the right corner. Ch 1, then work 1 sc into each foundation chain loop. (18)
- Row B (WS): Ch 1, turn. Sc 1, bobble, sc 1 8 times, sc 1. (18 sts: 8 bobbles + 10 sc)
- Row C (RS): Ch 1, turn, sc across. (18)
Fasten off and leave a 12 in (30.5 cm) tail for sewing. The trim measures 0.55 in (1.4 cm) deep.
The Row B count works because 1 + (8 × 2) + 1 = 18. This matches the hat’s base exactly, so the trim lies flat without pulling.
Beard (Cream)
Bobbles are worked on the WS rows so they pop out on the front. The beard tapers toward the chin.
- Row 1 (RS): Ch 13. Sc in 2nd ch from hook and across. (12)
- Row 2 (WS): Ch 1, turn. Sc 1, bobble, sc 1 5 times, sc 1. (12, with 5 bobbles)
- Row 3: Ch 1, turn, sc2tog, sc 8, sc2tog. (10)
- Row 4: Ch 1, turn. Sc 1, bobble, sc 1 4 times, sc 1. (10, with 4 bobbles)
- Row 5: Ch 1, turn, sc2tog, sc 6, sc2tog. (8)
- Row 6: Ch 1, turn. Sc 1, bobble, sc 1 3 times, sc 1. (8, with 3 bobbles)
- Row 7: Ch 1, turn, sc2tog, sc 4, sc2tog. (6)
Fasten off and leave a long tail. Checkpoint: 2.2 in (5.6 cm) wide at the top and 1.3 in (3.3 cm) tall.
Mustache Halves (Cream, Make 2)
Ch 7. Starting in the 2nd ch from hook, work these stitches in the 6 chains:
- sc in the 1st ch
- hdc in the 2nd ch
- 2 dc in the 3rd ch
- hdc in the 4th ch
- sc in the 5th ch
- sl st in the 6th ch
That gives 7 sts. Fasten off with a tail. Each half is about 1.1 in (2.8 cm) long.
Nose (Red)
- Rnd 1: MR, 6 sc. (6)
- Rnd 2: Inc in each st. (12)
- Rnd 3: Sc around. (12)
- Rnd 4: Sc2tog 6 times. (6)
Before closing, tuck in a small scrap of cream yarn so the nose stays round. Leave a tail. The nose measures 0.5 in (1.3 cm).
Cheeks (Pink, Make 2)
MR, ch 2 (does not count), 10 hdc in ring. Pull closed and sl st to the first hdc. (10)
Leave a tail. Each cheek measures 0.6 in (1.5 cm).
Tip Pompom (Cream)
- Rnd 1: MR, ch 3 (counts as dc), 11 dc in ring. Sl st to the top of ch-3. (12)
- Rnd 2: Ch 1, 2 sc in each st. Sl st to the first sc. (24)
Leave a tail. The pompom measures 1.1 in (2.8 cm).
Hanging Loop (Red)
Ch 12 and sl st to the first ch to form a ring. Ch 1, then work 18 sc over the ring. Sl st to the first sc. (18)
The extra sc pack tightly over the chain, which makes a firm, rounded loop. Leave a tail. The loop measures about 0.9 in (2.3 cm).
Assembly (After the Border)
- Beard. Place the beard’s top edge 0.2 in (0.5 cm) below the disc center. Its lower edge should just touch the base of the bottom shells. Whipstitch all around the beard.
- Mustache. Pin the two halves edge to edge, centered over the beard’s top edge. Point the dc bumps up and the outer tips slightly upward. Sew in place.
- Nose. Sew the nose at the disc center, where the mustache halves meet.
- Eyes. Sew the beads with black thread, 0.5 in (1.3 cm) above center and 1 in (2.5 cm) apart. Pass the thread through each bead 3 times.
- Cheeks. Sew one cheek below and outside each eye.
- Hat. Position the trim’s lower edge 0.6 in (1.5 cm) above the disc center. At that height, the disc’s chord is about 3.3 in (8.4 cm), which matches the trim width. Sew along the bottom edge of the trim and up both ends. Then tack the hat sides wherever they overlap the border.
- Tip. Fold Rows 10–12 (about 0.5 in, 1.3 cm) toward the right and tack them down. Sew the tip pompom over the point.
- Loop. Sew the base of the loop firmly to the top center of the hat crown.
Border (Cream)
Border gauge: One shell round is 0.35 in (0.9 cm) deep, at the same 11 sc / 2 in gauge as the disc.
Work the border directly after Rnd 8 of the face disc.
- Rnd 9: Ch 1. Sc in the same st. Skip 1 st, shell in the next st, skip 1 st, sc in the next st. Repeat from * around. On the last repeat, omit the final sc and sl st to the first sc instead.
Count: 12 shells, so 12 sc + 60 dc = 72 sts.
Each quarter of the circle gets exactly 3 shells. Fasten off and weave in the ends.
Why the math works: Each repeat uses 4 base stitches: 1 sc, 1 skipped, 1 shell, and 1 skipped. Rnd 8 has 48 sts, and 48 ÷ 4 = 12 repeats with nothing left over. The sc anchor the valleys at the disc’s edge. The 5 dc in each shell fan out to fill the larger outer circle and form the scallops.
The finished diameter is 2.8 in (7.1 cm) + 2 × 0.35 in (0.9 cm) = 3.5 in (8.9 cm). The hat covers the top 2–3 shells, so about 9 scallops show around the face.
Final Blocking
- Lay the ornament face down on a towel or foam mat.
- Mist it until it is damp. Do not soak it.
- Turn it face up and shape the disc into a true 3.5 in (8.9 cm) circle.
- Pin the center dc of each shell to open the scallops evenly.
- Smooth the hat flat and keep the folded tip in place.
- Do not press the beard, nose, or bobbles. Lightly fluff them with your fingers instead.
- Let it dry completely, then remove the pins.
Final Quality-Control Checklist
- [ ] The bordered face measures 3.5 in (8.9 cm) across.
- [ ] There are 12 even shells, with no ruffling or cupping.
- [ ] All bobbles face the front on the beard and trim.
- [ ] The eyes are level, 1 in (2.5 cm) apart, and securely stitched.
- [ ] The cheeks sit symmetrically.
- [ ] The nose is round and centered over the mustache.
- [ ] The hat trim is straight and fully sewn down.
- [ ] The tip pompom and loop are firmly attached.
- [ ] All ends are woven in on the back.
Troubleshooting
- The disc cups into a bowl. Your tension is tight. Go up a hook size or check that you made 6 increases per round.
- The disc ruffles. You have extra increases or loose tension. Recount Rnd 8 to confirm 48 sts.
- The border waves. Your shells are too loose. Go down 0.25 mm for Rnd 9 only.
- The bobbles sit on the back. They were worked on a RS row. Bobble rows must be WS rows.
- The hat is too narrow for the face. Your gauge is tight. Remake the hat with a larger hook, aiming for 3.3 in (8.4 cm).
- The nose is flat. Add more scrap filling before closing Rnd 4.
- The eyes droop. Restitch them with a shorter thread path and pull snug.
Care
Spot clean or hand wash in cool water, then reshape and dry flat. Avoid the dryer, because heat can damage the beads.
Final Notes
Everything rests on one measurement chain:
- 11 sc = 2 in (5.1 cm)
- Rnd 8 = 48 sts and 2.8 in (7.1 cm)
- 12 shells bring the face to 3.5 in (8.9 cm)
- The 18-st hat, at 3.3 in (8.4 cm), matches the face’s width at the trim line
Check each number as you go, and your Santa will come out round, flat, and well proportioned.
Happy crocheting!