

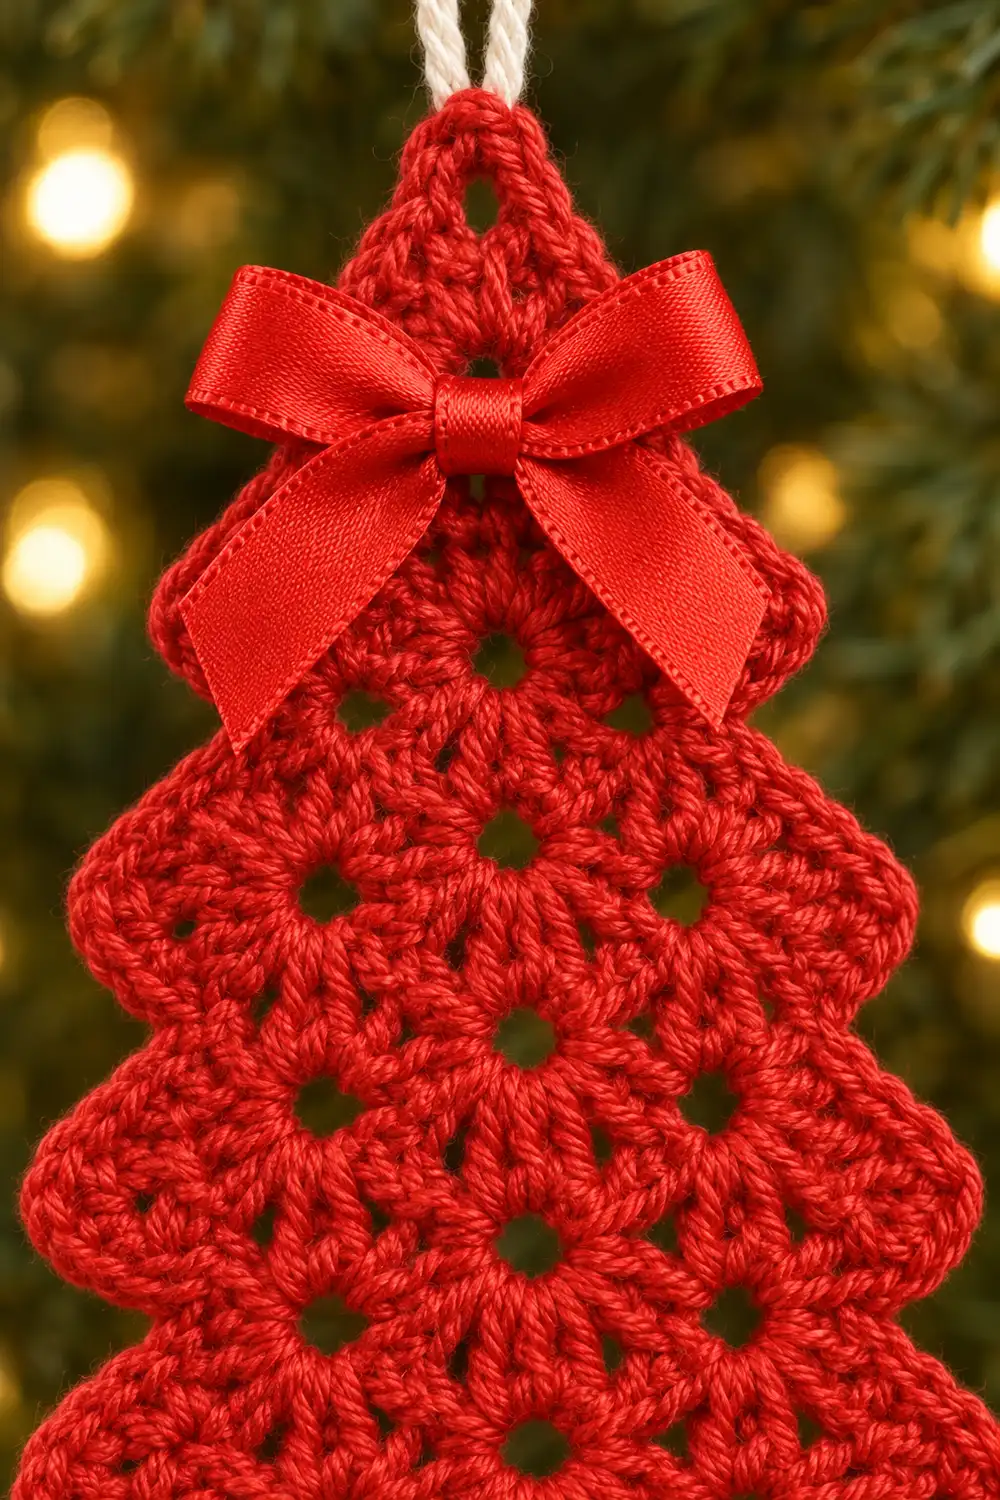
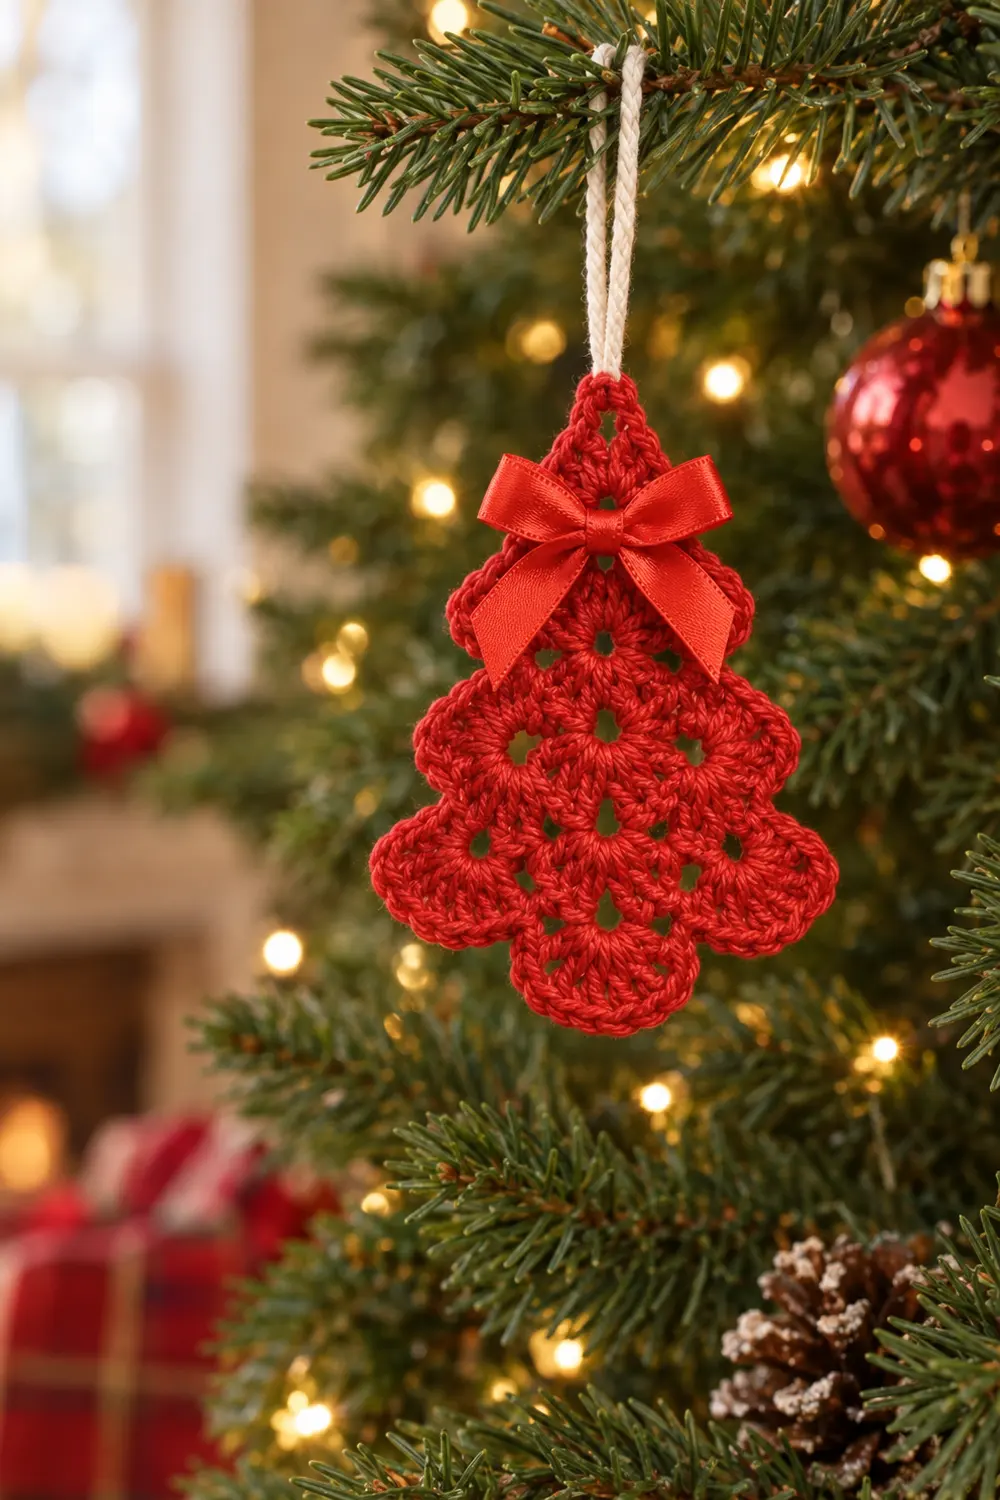
This little red tree is a classic granny-style ornament with a modern, tidy outline. Rows of 3-double-crochet groups create a lacy texture. Small eyelets run in diagonal lines, and three stepped tiers give it a clear tree silhouette.
The whole ornament is worked in one color of red worsted-weight cotton. A cream cotton cord makes the hanging loop, and a red satin bow adds a festive finish at the top. The pattern uses US crochet terms throughout.
The finished tree measures 4.5 in (11.4 cm) wide by 5.25 in (13.3 cm) tall, not counting the hanging loop.
You work the tree flat in turned rows from the tip down. Each row adds one granny group. At the end of each tier, a “step-in” row creates the tier point. One round of single crochet outlines the shape, and then you add the cord loop and bow.
Finished Size and Construction
- Finished size: 4.5 in (11.4 cm) wide x 5.25 in (13.3 cm) tall
- Hanging loop: about 3 in (7.6 cm) above the tip
- Skill level: Easy
- Terminology: US crochet terms
- Yarn weight: Worsted (#4) cotton
- Hook: 4.0 mm (G-6)
- Number of pieces: 1 (single ornament)
- Layout: One tree with three tiers, worked in 9 rows
- Size before border: 4 in (10.2 cm) wide x 4.75 in (12.1 cm) tall
- Border depth: 0.25 in (0.6 cm), 1 round of sc
Materials
Yarn advice: Choose a smooth, mercerized or combed cotton in worsted weight. Cotton holds the tier points crisply and blocks well. Acrylic works too, but the points will be softer.
- Red worsted cotton: 15 g, about 25 m (27 yd)
- Cream cotton cord: 3 mm twisted macramé cord, 12 in (30.5 cm)
- Red satin ribbon: 3/8 in (1.0 cm) wide, 10 in (25.4 cm)
Quantities include a comfortable margin for a gauge swatch and weaving in ends.
Tools:
- 4.0 mm (G-6) crochet hook
- Tapestry needle
- Red sewing thread and a sewing needle, for the bow
- Scissors
- Rust-proof pins and a blocking mat or folded towel
- Ruler or tape measure
- Optional: clear fray-check for the ribbon ends
Abbreviations (US Terms)
- ch – chain
- sl st – slip stitch
- sc – single crochet
- dc – double crochet
- sp – space
- st(s) – stitch(es)
- tch – turning chain
- RS – right side
Special stitch – Group: Work 3 dc into the same stitch or space. When a row begins with “ch 3, 2 dc,” the ch-3 counts as the first dc of that group.
Gauge and Checkpoints
Gauge is not critical for an ornament, but it controls the final size and how well the tier points line up. Work Rows 1–3 first as your test piece and measure before continuing.
Gauge: 1 group plus its ch-1 = about 0.8 in (2.0 cm) wide. One dc row = 0.5 in (1.3 cm) tall.
Checkpoints:
- After Row 3: The top tier is about 2.4 in (6.1 cm) wide and 1.75 in (4.4 cm) tall from the tip.
- After Row 6: The middle tier is about 3.2 in (8.1 cm) wide. Total height is 3.25 in (8.3 cm).
- After Row 9: The base is about 4 in (10.2 cm) wide. Total height is 4.75 in (12.1 cm).
If your tree is too big: Go down to a 3.75 mm hook, or keep the ch-1 spaces snug.
If your tree is too small: Go up to a 4.5 mm hook, or relax your dc tension.
Height matters more than width here. If each row is taller than 0.5 in (1.3 cm), the tiers will look stretched.
Pattern: Tree Body
The tree is worked flat in turned rows, starting at the tip. Every row either grows by one group or steps in to form a tier point.
The stitch count for each row is its own complete total. A row with g groups has 3g dc plus (g – 1) ch-1 spaces.
Top Tier
Row 1: Ch 4 and sl st in the first ch to form a ring. Ch 3 (counts as dc), then work 2 dc in the ring. Turn.
(1 group: 3 sts)
Row 2: Ch 3 (counts as dc). Work 2 dc in the first dc, which is the stitch at the base of the ch-3. Ch 1. Work 3 dc in the top of the tch. Turn.
(2 groups, 1 ch-1 sp: 7 sts)
Row 3: Ch 3. Work 2 dc in the first dc. Ch 1, 3 dc in the next ch-1 sp. Repeat from * to * once. Ch 1, then work 3 dc in the top of the tch. Turn.
(3 groups, 2 ch-1 sps: 11 sts)
The top tier is now complete. Check the Row 3 checkpoint.
Middle Tier
Row 4 (step-in): Sl st in each of the first 3 dc, then sl st into the next ch-1 sp. Ch 3, then work 2 dc in the same sp. Ch 1, then work 3 dc in the next ch-1 sp. Leave the last group unworked. Turn.
(2 groups, 1 ch-1 sp: 7 sts, plus 4 sl sts that are not counted)
Row 3’s two edge groups now jut past Row 4 on both sides. These are the first tier points.
Row 5: Ch 3. Work 2 dc in the first dc, ch 1, 3 dc in the ch-1 sp, ch 1, and 3 dc in the top of the tch. Turn.
(3 groups: 11 sts)
Row 6: Ch 3. Work 2 dc in the first dc. Ch 1, 3 dc in the next ch-1 sp. Repeat from * to * across. Ch 1, then work 3 dc in the top of the tch. Turn.
(4 groups, 3 ch-1 sps: 15 sts)
Check the Row 6 checkpoint.
Bottom Tier
Row 7 (step-in): Sl st in each of the first 3 dc, then sl st into the next ch-1 sp. Ch 3, then work 2 dc in the same sp. Ch 1, 3 dc in the next ch-1 sp. Repeat from * to * once. Leave the last group unworked. Turn.
(3 groups, 2 ch-1 sps: 11 sts)
Row 8: Work the same as Row 6.
(4 groups: 15 sts)
Row 9: Work the same as Row 6.
(5 groups, 4 ch-1 sps: 19 sts)
Fasten off. Weave in the ring tail by running it around the ring once, which firms up the tip. Check the Row 9 checkpoint.
Summary of counts: Rows 1–9 give 3, 7, 11, 7, 11, 15, 11, 15, and 19 sts. The top of the tree is the ring, and the base is the top edge of Row 9.
Border
The border is one round of sc worked around the whole outline, with the RS facing. It rounds the tier points, smooths the stepped sides, and follows the slight wave of the groups along the base.
Border gauge: Work 2 sc per dc row-end. Each row is 0.5 in (1.3 cm) tall, so this gives 4 sc per inch along the sides. That matches a relaxed worsted-cotton sc, so the edges lie flat.
Along the bottom, work 1 sc per stitch. That puts 19 stitches across 4 in (10.2 cm), which also lies flat.
Round 1: Join red with a sl st in the open top of the ring at the tip. Ch 1, then work (sc, ch 4, sc) in the ring. This makes the loop for the cord.
Side A: Work down the first side in this order:
- Top tier side: Work 2 sc around each row-end of Rows 1–3. (6 sc)
- First ledge: Work 3 sc in the outer st of Row 3’s edge group, then 1 sc in each of the next 2 sts. (5 sc)
- Middle tier side: Work 2 sc around each row-end of Rows 4–6. (6 sc)
- Second ledge: Work 3 sc in the outer st of Row 6’s edge group, then 1 sc in each of the next 2 sts. (5 sc)
- Bottom tier side: Work 2 sc around each row-end of Rows 7–9. (6 sc)
On the side where you slipped across, work each ledge sc into the sl sts. On the other side, work into the dc tops.
Bottom edge: Work 3 sc in the first st of Row 9, which is the corner. Work 1 sc in each of the next 17 sts, into each dc and each ch-1. Work 3 sc in the last st, which is the other corner.
(19 sts worked 1 each, plus 2 extra at each corner = 23 sc)
Side B: Work up the second side as a mirror of Side A:
- Bottom tier side: Work 2 sc around each row-end of Rows 9–7. (6 sc)
- Second ledge: Work 1 sc in each of the 2 inner ledge sts, then 3 sc in the outer st. (5 sc)
- Middle tier side: Work 2 sc around each row-end of Rows 6–4. (6 sc)
- First ledge: Work 1 sc in each of the 2 inner ledge sts, then 3 sc in the outer st. (5 sc)
- Top tier side: Work 2 sc around each row-end of Rows 3–1. (6 sc)
Sl st to the first sc to close the round. Fasten off and weave in the ends.
Round total: 28 sc on Side A, 23 sc on the bottom, 28 sc on Side B, and 2 sc at the tip, for 81 sc plus the ch-4 loop.
Why the math works:
- Each side has 9 row-ends x 2 sc = 18 sc, plus 2 ledges x 5 sc = 10 sc, for 28 sc per side.
- The bottom edge has exactly as many stitches as Row 9, which is 19, plus 4 corner extras.
- The ledge corners and bottom corners get 3 sc in one stitch. This turns each square step into a rounded point.
- The corner extras are the only added stitches, and each one is counted once.
Finishing: Cord Loop and Bow
Cord loop: Fold the 12 in (30.5 cm) cord in half. Push the fold through the ch-4 loop from front to back. Pass both tails through the fold and pull snug, which is a lark’s head knot. Tie the two tails together in an overhand knot about 3 in (7.6 cm) above the tip. Trim the ends and fluff them slightly.
Bow: Tie the 10 in (25.4 cm) ribbon into a bow about 2 in (5.1 cm) wide. Trim the tails at an angle and seal them with fray-check if you like. Center the bow on the top tier, over Rows 2–4, just below the tip. Tack it through the knot with 3–4 small stitches of red thread, catching only the back loops of the dc so nothing shows on the front.
Attach the bow after blocking so the satin stays crisp.
Final Blocking
- Soak the tree in cool water for 5 minutes, then press out the water in a towel. Do not wring it.
- Lay it RS up on a blocking mat.
- Pin the tip, then pin the base to 4.5 in (11.4 cm) wide.
- Pin each tier point outward so the tree is symmetrical left to right.
- Check that the height is 5.25 in (13.3 cm) and adjust the pins if needed.
- Open each eyelet gently with a fingertip.
- Let it dry completely, usually 6–12 hours.
- Unpin it, then add the bow.
Final Quality-Control Checklist
- [ ] The tree measures 4.5 in (11.4 cm) x 5.25 in (13.3 cm).
- [ ] There are three clear tiers with rounded points at matching heights on both sides.
- [ ] Row 9 has 5 groups and 19 sts.
- [ ] The border totals 81 sc, with 28 sc per side and 23 sc on the bottom.
- [ ] The eyelets line up in clean diagonal lines.
- [ ] The ch-4 loop is secure and the cord knot is tight.
- [ ] The bow is centered on the top tier and firmly tacked.
- [ ] All ends are woven in, with none visible on the RS.
Troubleshooting
The tree leans to one side. You probably missed a group at one edge. Recount each row against the summary list.
The tier points are uneven. Check that each step-in row slips across exactly 3 dc plus 1 ch-1 sp.
The sides ruffle. Your border is too loose. Work 3 sc per 2 row-ends instead, or go down a hook size for the border.
The sides pull in. Your border is too tight. Relax your tension or use a 4.5 mm hook for the border round only.
There is a gap at the tip. Tighten the ring tail and run it around the ring twice.
The bottom edge flares. Work the ch-1 stitches of Row 9 as sc into the ch-1 sp rather than into the chain itself.
The bow droops. Tack it at the knot and at both loops of the bow.
Care
Hand wash in cool water, press out the moisture, and dry flat. Keep the satin bow away from heat.
Final Notes
The measurement chain is simple:
- Each group plus its ch-1 is 0.8 in (2.0 cm) wide, and each row is 0.5 in (1.3 cm) tall.
- Nine rows make a 4 in (10.2 cm) by 4.75 in (12.1 cm) tree.
- A 0.25 in (0.6 cm) sc border brings it to 4.5 in (11.4 cm) by 5.25 in (13.3 cm).
- The cord and bow complete the ornament.
Optional: make several trees in red, green, and white to hang together on a garland.
Happy crocheting!