

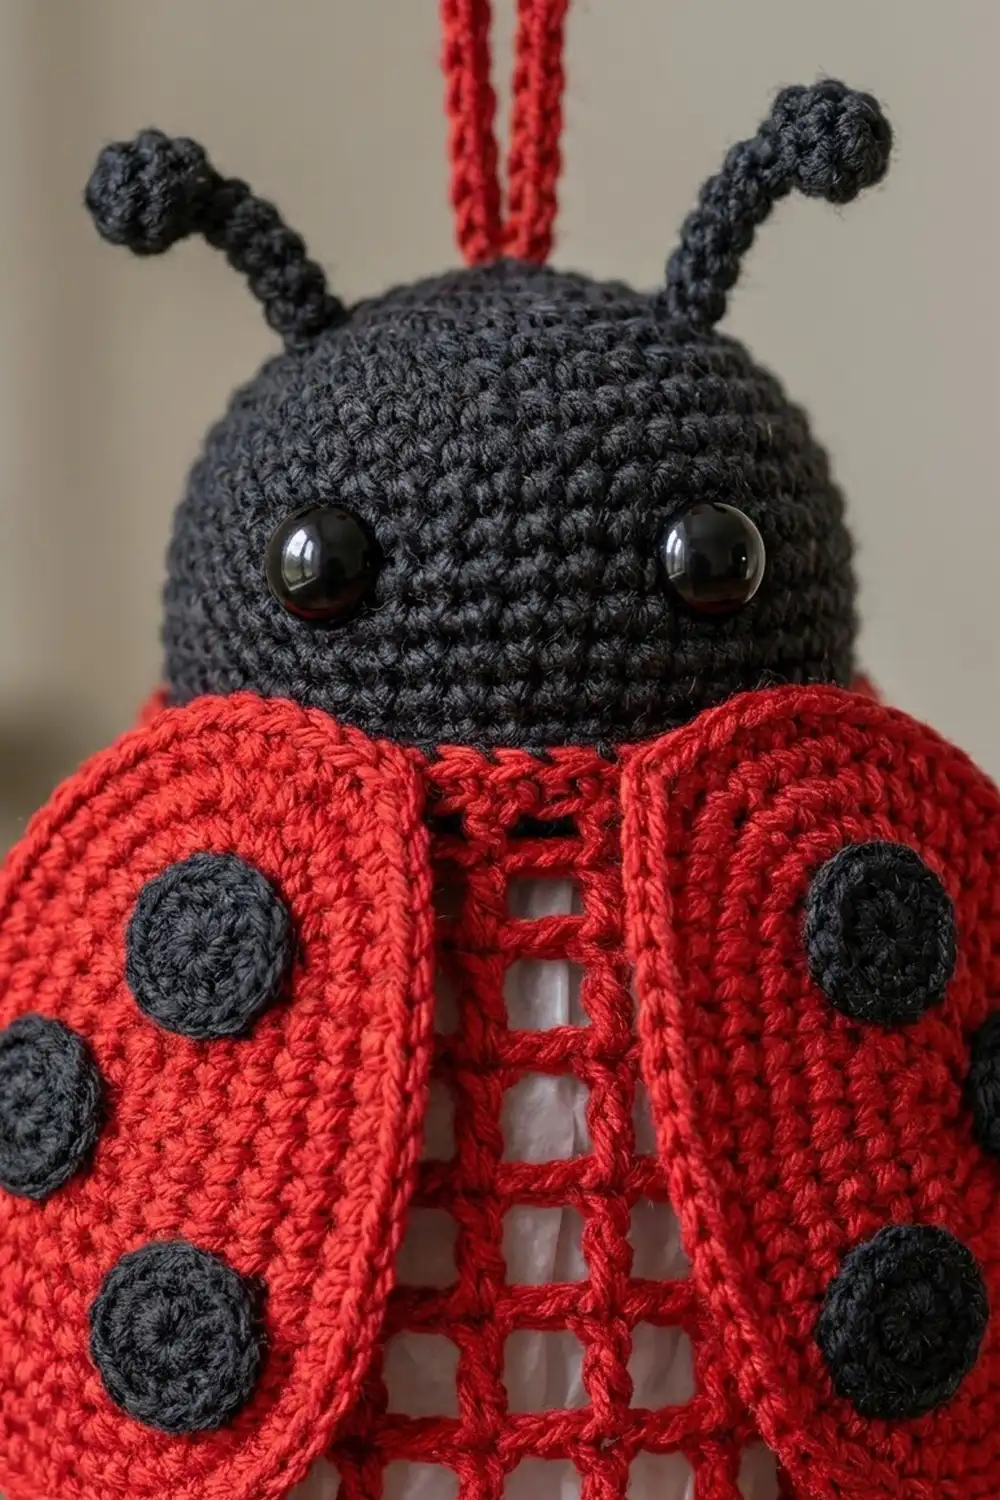
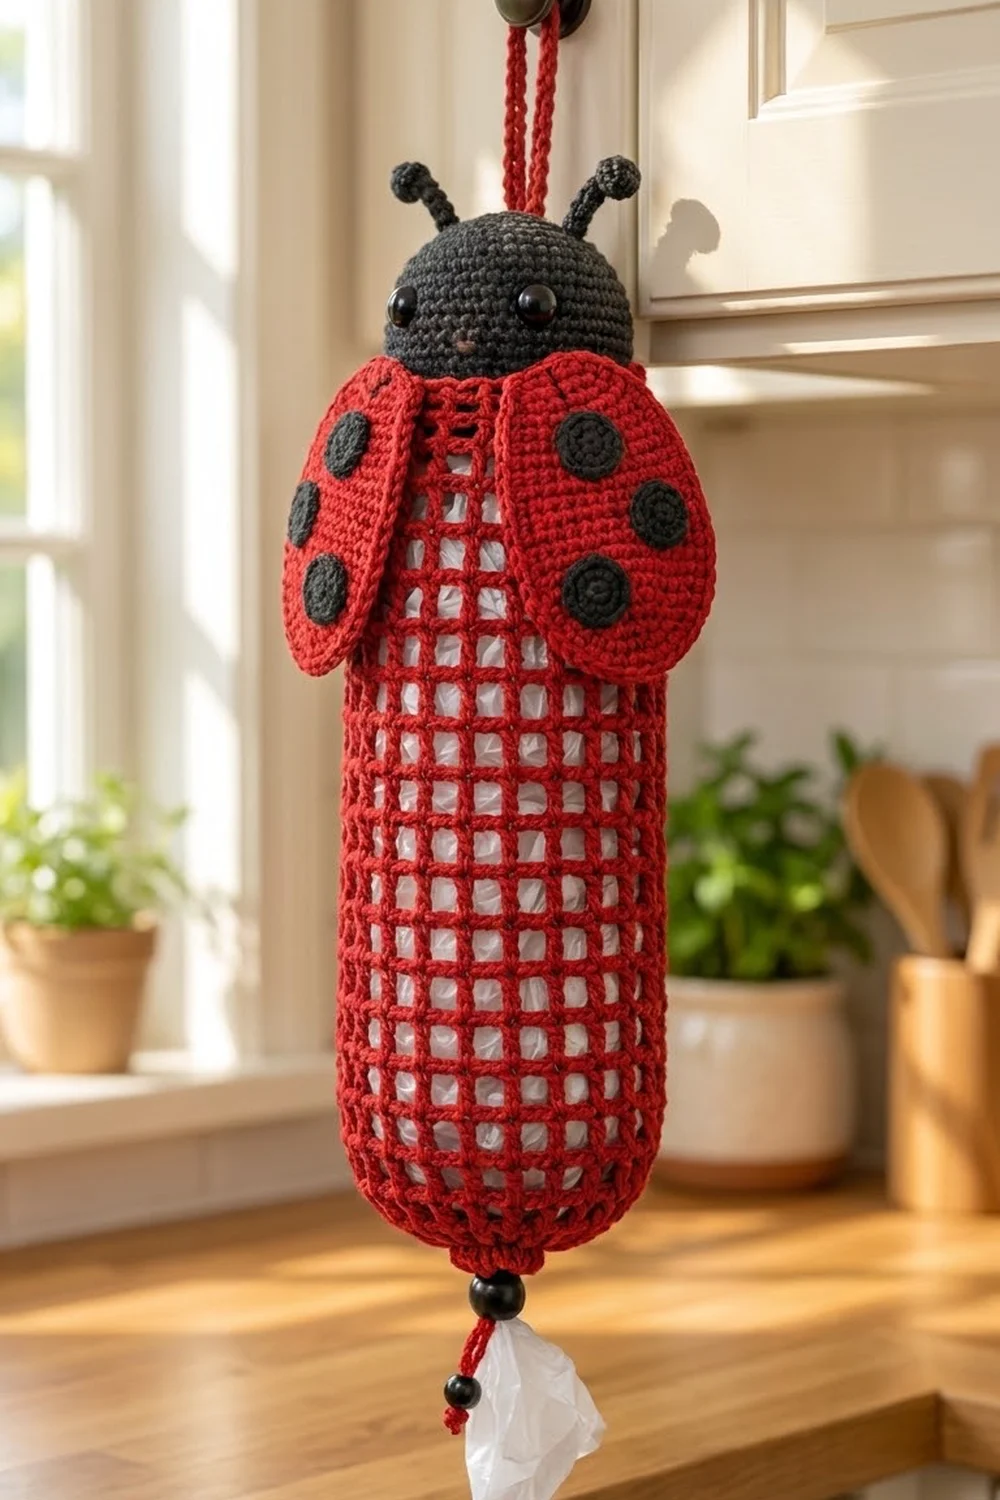
This cheerful ladybug hangs on a kitchen knob and quietly keeps your plastic bags in order. The body is a long red mesh tube, so you can see the bags inside. A black dome head with bobble antennae sits on top, and two spotted red wings frame the shoulders.
The palette is just classic ladybug red and deep black. The style is part amigurumi and part practical home goods. Bags go in at the top opening beside the head and pull out one at a time through the drawstring cinch at the bottom.
This pattern uses US crochet terms. The finished body measures 15.8 in (40.1 cm) long and 16 in (40.6 cm) around, which is about 5 in (12.7 cm) across. The overall hanging length is about 21 in (53.3 cm), plus a 4.5 in (11.4 cm) loop.
Construction is simple. You work the mesh body bottom-up in joined rounds and make the head, wings, spots and antennae separately. Then you assemble everything, add the top border, and thread the drawstring and bead.
Finished Size and Construction
- Finished body: 15.8 in (40.1 cm) long, 16 in (40.6 cm) circumference
- Overall length: about 21 in (53.3 cm), excluding the loop
- Skill level: Intermediate (advanced beginner with amigurumi experience)
- Terminology: US
- Yarn weight: Worsted (#4) cotton
- Hooks: 5.0 mm (H-8) for the body, 4.0 mm (G-6) for everything else
- Number of pieces: 16 (1 body, 1 head, 2 wings, 8 spots, 2 antennae, 1 loop, 1 drawstring)
- Layout: head on the back of the top rim, one wing on each side, bead cinch at the bottom
- Mesh tube: 20 mesh squares around, 21 mesh rounds tall
- Body before border: 15.2 in (38.6 cm) long
- Border depth: 0.6 in (1.5 cm), 3 rounds
Materials
Choose a smooth 100% cotton or cotton-blend worsted yarn. Cotton holds the mesh shape, resists stretching under the weight of the bags, and washes well. Avoid fuzzy acrylics, because they blur the mesh windows.
- Red: 140 g / 217 m (about 237 yd)
- Black: 40 g / 62 m (about 68 yd)
The quantities include roughly a 15% margin for gauge swatches and differences between dye lots.
Tools and notions:
– 5.0 mm (H-8) and 4.0 mm (G-6) crochet hooks
– 2 black safety eyes, 10 mm
– About 15 g of polyester fiberfill
– 1 black wooden bead, 16–20 mm, with a hole of at least 5 mm
– Stitch markers, tapestry needle, sewing pins, scissors
Abbreviations (US Terms)
- ch – chain
- sl st – slip stitch
- sc – single crochet
- hdc – half double crochet
- dc – double crochet
- inc – 2 sc in the same stitch
- sc2tog – single crochet 2 together
- MR – magic ring
- sp – space
- st(s) – stitch(es)
- Rnd – round
Mesh square: 1 dc + ch 2. Each square counts as 3 stitches.
5-dc bobble: Yarn over, insert the hook in the stitch, pull up a loop, yarn over, pull through 2 loops. Repeat from * 4 more times in the same stitch (6 loops on the hook). Yarn over and pull through all 6 loops.
Gauge and Checkpoints
Body (5.0 mm hook): 5 mesh squares = 4 in (10.2 cm) wide, and 6 mesh rounds = 4 in (10.2 cm) tall. In sc, 15 sc = 4 in (10.2 cm).
Small parts (4.0 mm hook): 18 sc and 20 rounds = 4 in (10.2 cm).
Make one wing first. It’s a quick gauge test for the small parts and should measure about 3 × 5 in (7.6 × 12.7 cm).
Checkpoints:
– After body Rnd 3: 10.7 in (27.2 cm) around, about 1.2 in (3.0 cm) tall
– After Rnd 9: 16 in (40.6 cm) around, about 5.2 in (13.2 cm) tall
– After Rnd 24: 15.2 in (38.6 cm) tall
– After the border: 15.8 in (40.1 cm) tall
– Head: about 3.8 in (9.7 cm) wide when stuffed
Too big? Go down half a hook size. Too small? Go up half a hook size. If only the height is off, add or remove mesh rounds. The width is fixed by the 20 squares.
Body (Red, 5.0 mm Hook)
Work in joined rounds and don’t turn.
Rnd 1: Ch 40 and join with a sl st to form a ring, taking care not to twist it. Ch 1, then sc in each ch around. Join to the first sc. (40 sc)
Rnd 2 (eyelets): Ch 4 (counts as dc + ch 1), skip the next st. Dc in the next st, ch 1, skip the next st. Repeat from * 18 more times. Join to the 3rd ch of the ch-4. (20 dc + 20 ch-1 sps = 40 sts)
Rnd 3: Ch 1, then sc in each dc and each ch-1 sp around. Join. (20 sc + 20 sc = 40 sc)
Rnd 4 (growth to mesh): Ch 5 (counts as dc + ch 2), skip the next st. Dc in the next st, ch 2, skip the next st. Repeat from * 18 more times. Join to the 3rd ch of the ch-5. (20 dc + 20 ch-2 sps = 60 sts, or 20 mesh squares)
Rnds 5–24: Ch 5 (counts as dc + ch 2). Dc in the next dc, ch 2. Repeat from * 18 more times. Join to the 3rd ch of the ch-5. (60 sts, or 20 mesh squares, in every round)
Rnds 4–24 give 21 mesh rounds, which is 14 in (35.6 cm) of mesh. The jump from 40 to 60 stitches in Rnd 4 creates the rounded bottom you see in the photo. Fasten off, but leave the top edge unbordered for now.
Head (Black, 4.0 mm Hook)
Work in a continuous spiral and mark the first stitch of each round.
- Rnd 1: 6 sc in MR. (6)
- Rnd 2: Inc in each st. (12)
- Rnd 3: (Sc 1, inc) × 6. (18)
- Rnd 4: (Sc 2, inc) × 6. (24)
- Rnd 5: (Sc 3, inc) × 6. (30)
- Rnd 6: (Sc 4, inc) × 6. (36)
- Rnd 7: (Sc 5, inc) × 6. (42)
- Rnd 8: (Sc 6, inc) × 6. (48)
- Rnd 9: (Sc 7, inc) × 6. (54)
- Rnds 10–18: Sc in each st. (54)
- Rnd 19: (Sc 7, sc2tog) × 6. (48)
- Rnd 20: (Sc 6, sc2tog) × 6. (42)
Insert the safety eyes between Rnds 13 and 14, with 9 sts between them. Start stuffing.
- Rnd 21: (Sc 5, sc2tog) × 6. (36)
- Rnd 22: (Sc 4, sc2tog) × 6. (30)
- Rnd 23: (Sc 3, sc2tog) × 6. (24)
- Rnd 24: (Sc 2, sc2tog) × 6. (18)
- Rnd 25: (Sc 1, sc2tog) × 6. (12)
- Rnd 26: Sc2tog × 6. (6)
Stuff the head lightly so it stays a dome rather than a hard ball. Close the hole and leave a 20 in (50.8 cm) tail. Press the bottom flat with your palm.
Antennae (Make 2, Black, 4.0 mm Hook)
Ch 12. Work a 5-dc bobble in the 4th ch from the hook. Sl st in each of the remaining 8 ch. Fasten off and leave a tail. (1 bobble + 8 sl st)
Each stem is about 1.6 in (4.1 cm) long and curls naturally.
Wings (Make 2, Red, 4.0 mm Hook)
End A is the narrow top of the wing and End B is the wider bottom. Each round begins at End A.
Rnd 1: Ch 12. Work 3 sc in the 2nd ch from the hook (End A) and sc in the next 9 ch. Work 3 sc in the last ch (End B). Rotate and sc in the unused loops of the next 9 ch. Join. (3 + 9 + 3 + 9 = 24)
Rnd 2: Ch 1. Work 2 sc in each of the next 3 sts, sc 9, 2 sc in each of the next 3 sts, sc 9. Join. (6 + 9 + 6 + 9 = 30)
Rnd 3: Ch 1. (Sc 1, inc) × 3, sc 9, (sc 1, inc) × 3, sc 9. Join. (9 + 9 + 9 + 9 = 36)
Rnd 4: Ch 1. (Sc 2, inc) × 3, sc 9, (sc 2, inc) × 3, sc 9. Join. (12 + 9 + 12 + 9 = 42)
Rnd 5: Ch 1. (Sc 3, inc) × 3, sc 9. Then work (hdc 3, 2 hdc in the next st) × 3 and sc 9. Join. (15 + 9 + 15 + 9 = 48)
The hdc section widens End B into the egg shape.
Rnd 6: Ch 1. (Sc 4, inc) × 3, sc 9, (sc 4, inc) × 3, sc 9. Join. (18 + 9 + 18 + 9 = 54)
Rnd 7: Ch 1. (Sc 5, inc) × 3, sc 9, (sc 5, inc) × 3, sc 9. Join. (21 + 9 + 21 + 9 = 60)
Rnd 8 (trim): Loosely sl st in each st around. (60 sl st worked 1 per st + 0 added = 60)
Fasten off and leave a long tail. The wing measures about 3 × 5 in (7.6 × 12.7 cm).
Spots (Make 8, Black, 4.0 mm Hook)
- Rnd 1: 6 sc in MR. Join. (6)
- Rnd 2: Inc in each st. Join. (12)
- Rnd 3 (trim): Sl st in each st. (12 worked 1 per st + 0 added = 12)
Fasten off and leave a tail. Each spot is about 1 in (2.5 cm) across.
Hanging Loop and Drawstring (Red, 4.0 mm Hook)
Loop: Ch 46, then sl st in the 2nd ch from the hook and each ch across. (45 sl st) The strip is about 9 in (22.9 cm) long.
Drawstring: Ch 91, then sl st in the 2nd ch from the hook and each ch across. (90 sl st) The cord is about 18 in (45.7 cm) long.
Make All Pieces
| Color | Pieces |
|---|---|
| Red | 1 body, 2 wings, 1 loop, 1 drawstring |
| Black | 1 head, 2 antennae, 8 spots |
Placement layout (front view):
            ( loop )
         o    ___    o      <- antennae
          \  /o o\  /       <- head, back of rim
  [WING]   |#######|   [WING]
  [ .. ]   |#######|   [ .. ]
  [ .. ]   |#######|   [ .. ]
           |#######|
           |#######|        <- 21 mesh rounds
            \#####/
             (==)           <- drawstring eyelets
              ●             <- bead
              ¥             <- knotted tail
Joining
Order of work: Work the Top Border (next section) first, then assemble. The border appears after this section because its math depends on the finished mesh count.
Spots: Pin 4 spots on each wing: 1 near End A, 2 side by side in the middle, and 1 near End B. Whipstitch around each spot through its Rnd 2 stitches with matching black yarn. Sew through the front layer of the wing only.
Antennae: Sew the stems to the head between Rnds 4 and 5, about 10 sts apart. Tack each stem about 0.5 in (1.3 cm) above its base so it stands upright.
Loop: Fold the strip in half. Sew both ends to the center top of the head, sewing through Rnds 1–3 at least three times. This loop carries all the weight, so secure it well.
Head: Find the 30 back stitches of the top border (see Border). Center the flat base of the head over the back 20 of those stitches, so the head overhangs the rim slightly to the front. Whipstitch the head’s base to the border, stitch to stitch, through all 3 border rounds and into the inside wall. The front 30 stitches stay open for loading bags.
Wings: Pin End A of each wing to the side of the body, right next to the head. Sew the top 1.5 in (3.8 cm) of each wing in place and leave the rest free so it splays outward.
Tension: Pull the sewing yarn snug, but not tight enough to pucker the mesh. The mesh should still lie flat between the seams.
Drawstring: Weave the cord in and out through the 20 ch-1 spaces of Rnd 2, passing over and under each dc. Thread both ends through the bead, knot them below it, and trim to 1 in (2.5 cm) tails.
Size checkpoint: The body should still measure 15.8 in (40.1 cm) from the cinch to the rim.
Border (Top Rim, Red, 5.0 mm Hook)
Border gauge: 15 sc = 4 in (10.2 cm), so 60 sc = 16 in (40.6 cm). That matches the mesh’s 20 squares at 5 squares per 4 in.
Join the yarn at the top of any dc in Rnd 24.
Rnd 1 (conversion): Ch 1. Sc in the dc, 2 sc in the next ch-2 sp. Repeat from * around. Join. (20 sc in dc + 40 sc in sps = 60 sc)
Each half has 30 sts: 10 squares × 3 sts.
Rnd 2: Ch 1, then sc in each st. Join. (60 sc: 30 front + 30 back)
Rnd 3 (trim): Loosely sl st in each st. (60 worked 1 per st + 0 added = 60)
Fasten off and weave in the ends.
Why the math works: Each mesh square is 1 dc + 2 ch, so 20 squares = 60 sts. The conversion round places exactly 1 sc per existing stitch, so no extra stitches are added. That keeps the rim at 16 in (40.6 cm), with no flaring or pulling in.
Final Blocking
- Lightly spritz the body and wings with water. Don’t wet the stuffed head.
- Slide a 4.5 in (11.4 cm) wide rolled towel or a tall container inside the tube.
- Gently straighten the mesh columns so the squares sit square.
- Pin the wings flat on a towel, about 3 × 5 in (7.6 × 12.7 cm), with the spots smoothed.
- Let everything dry completely, then remove the form.
Final Quality-Control Checklist
- 20 mesh squares in every round, with the columns stacked straight
- Body 15.8 in (40.1 cm) long and 16 in (40.6 cm) around
- Head about 3.8 in (9.7 cm) wide and dome-shaped, with the eyes level
- Loop sewn through several rounds and able to hold a firm tug
- Front 30 rim stitches open for loading bags
- Wings matching in size, with 4 spots each, sewn securely
- Drawstring cinches to about 1.5 in (3.8 cm) and the bead knot holds
Troubleshooting
- The mesh slants in a spiral: Always join into the 3rd ch of the ch-5 and work each dc into the dc below.
- The squares are taller than they are wide: Ch 2 loosely, or go down a hook size for the dc only.
- The rim ruffles: You probably put 3 sc in some spaces. Recount to 60.
- The wings cup: Block them flat. If they still cup, switch the Rnd 5 hdc to sc.
- The head is lumpy: Pull out some stuffing and roll the head between your palms.
- Bags fall out the bottom: Tighten the drawstring and add a second knot.
Care
Hand wash in cool water and lay flat to dry, reshaping the mesh over a form. Don’t wring the stuffed head.
Final Notes
The measurement chain stays simple. The 40-st bottom grows to 20 mesh squares (60 sts, 16 in / 40.6 cm around). Twenty-one mesh rounds add 14 in (35.6 cm). The 60-st border brings the body to 15.8 in (40.1 cm). Check gauge at each stage, and your ladybug will hang straight and hold a generous stack of bags.
Happy crocheting!