

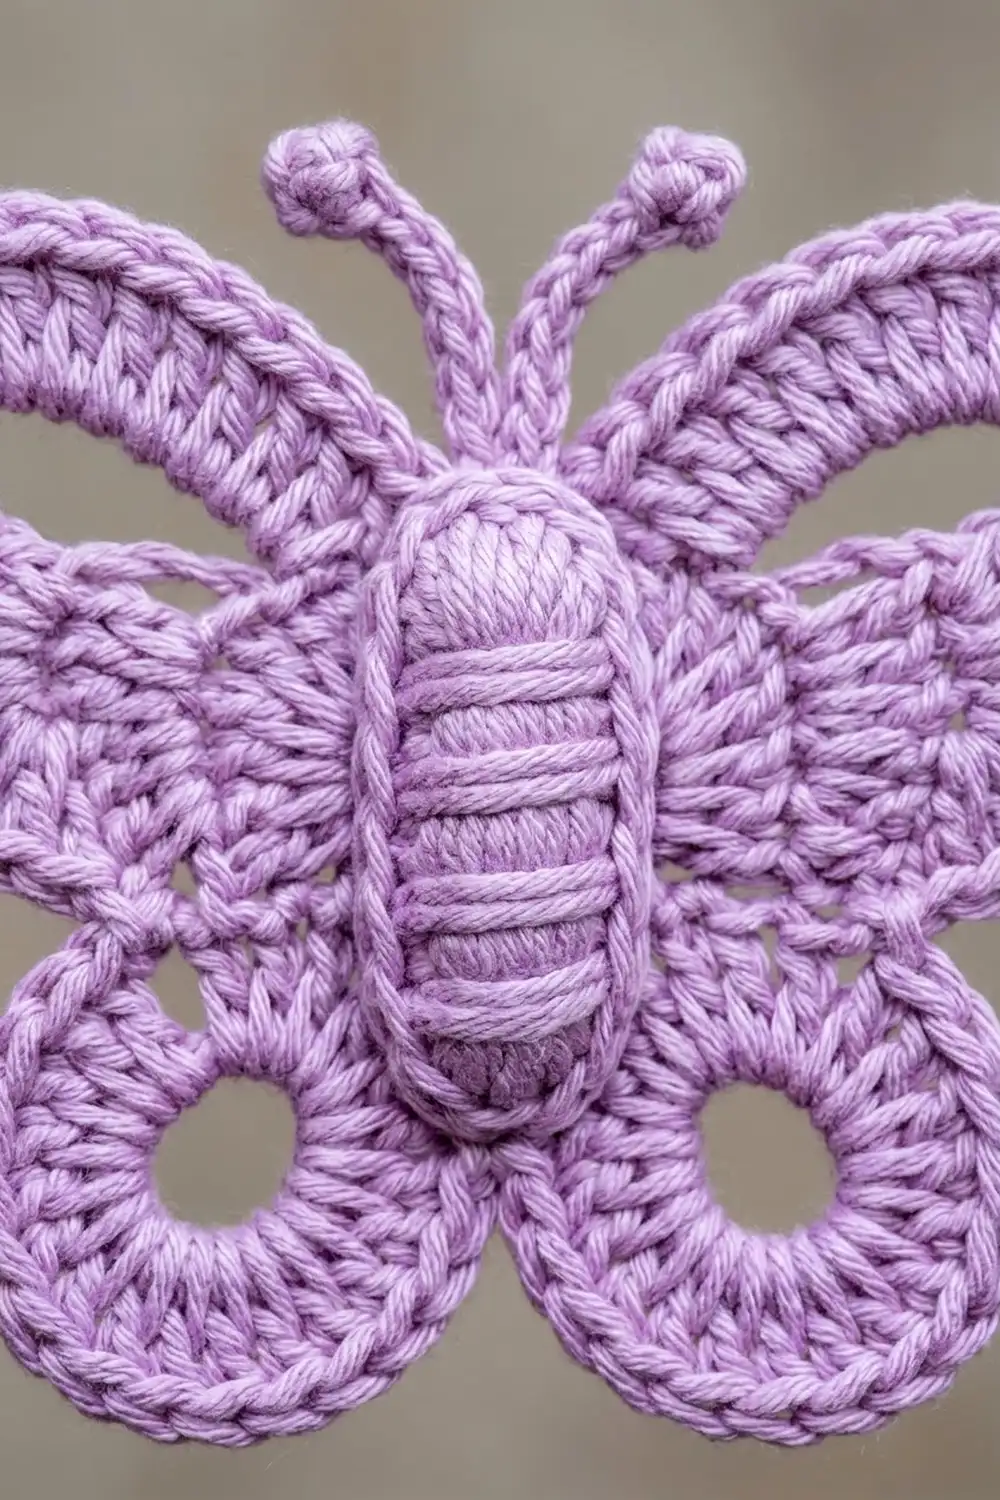
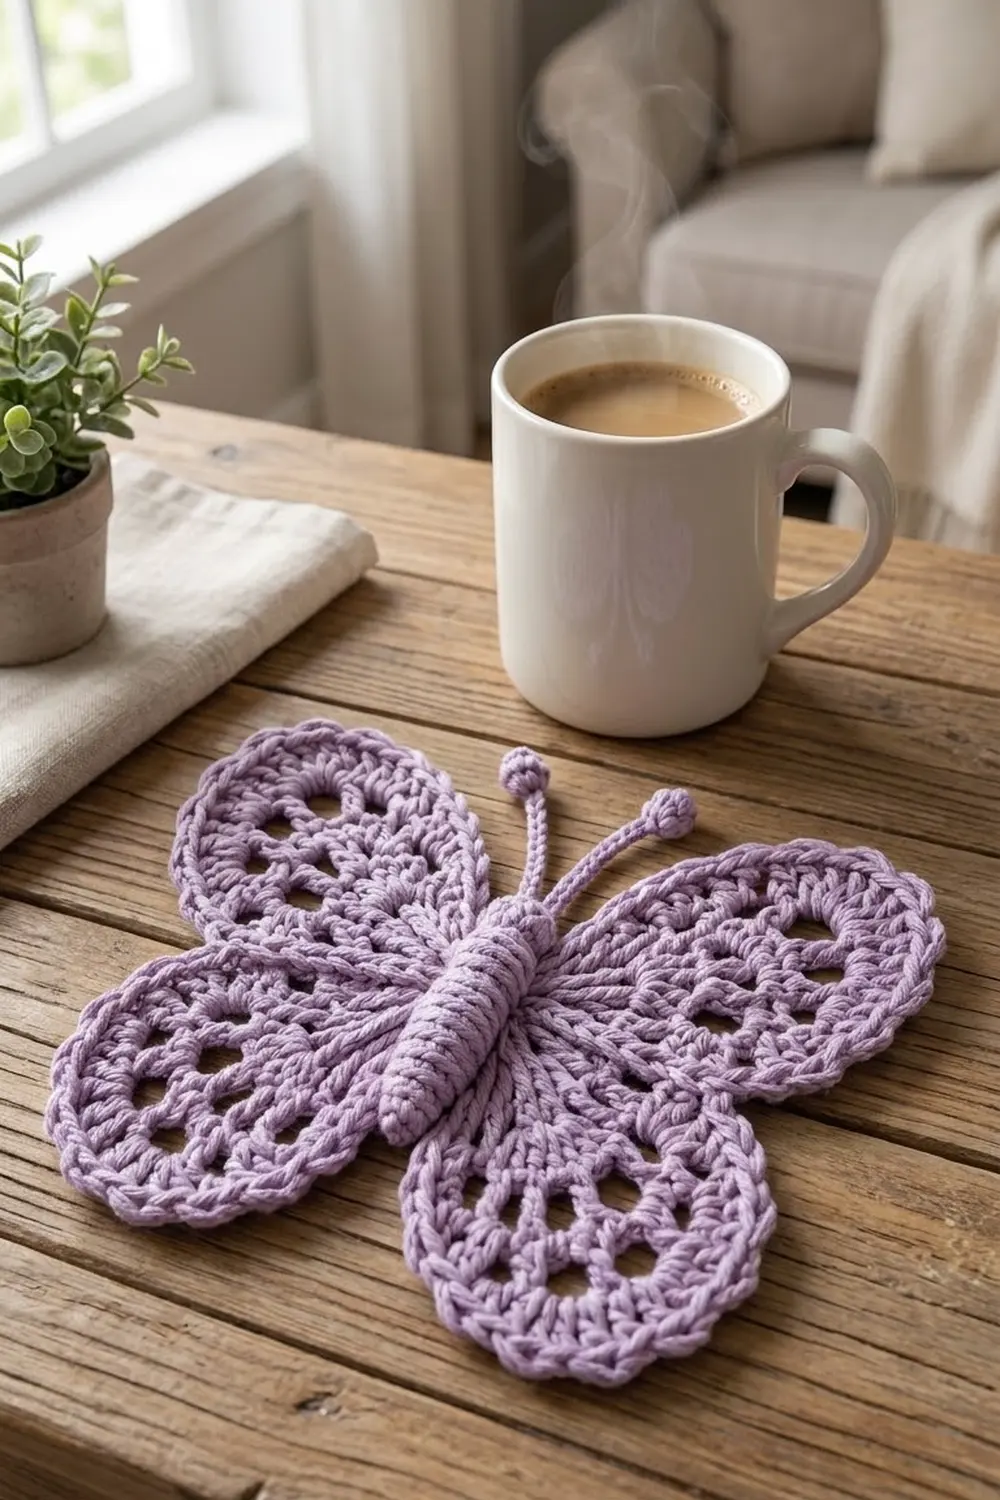
This lacy butterfly motif is soft and airy. The upper wings fan out from the center in pairs of treble crochet stitches, then open into a band of large loops. The smaller lower wings have a neat ring of open holes. A padded body with wrapped segments sits on top, and two antennae with bobble tips finish the look.
The sample is made in a single lilac shade, which keeps the stitch texture front and center. A corded crab-stitch edge outlines every wing, so the butterfly holds a crisp shape. You can use it as an appliqué, a gift-tag topper, or a decoration.
This pattern uses US crochet terms. The finished motif measures about 5 in (12.7 cm) wide across the wings and 4.25 in (10.8 cm) tall across the wings. It stands about 5 in (12.7 cm) tall with the antennae.
Here is the build order. First you work a small center disc. Each of the four wings is then worked in short rows off one quarter of the disc. One continuous border round goes around all four wings, followed by a round of reverse single crochet. Last, you make the stuffed body and sew it over the center, then add the antennae.
Finished Size and Construction
- Finished size: 5 in (12.7 cm) wide x 4.25 in (10.8 cm) tall across the wings
- Skill level: Intermediate
- Terminology: US crochet terms
- Yarn weight: DK (light, #3) cotton or cotton blend
- Hook: 3.5 mm (E-4)
- Number of pieces: 1 butterfly motif (a wing panel plus a body sewn on top)
- Layout: 4 wings worked off one center disc
- Piece size: 5 in (12.7 cm) x 4.25 in (10.8 cm)
- Size before border: 4.5 in (11.4 cm) x 3.75 in (9.5 cm)
- Border depth: about 0.25 in (0.6 cm), 2 rounds
Materials
Yarn: Use a smooth mercerized DK cotton. It shows the lace holes clearly and blocks crisply. Avoid fuzzy or very splitty yarn, because the crab-stitch edge and the wrapped body will lose their definition.
- Lilac: 10 g (about 25 m / 27 yd)
The quantity includes a safety margin of about 25 percent for your gauge swatch and for weaving in ends.
Tools:
– 3.5 mm (E-4) crochet hook
– Yarn needle
– Scissors
– A small amount of fiberfill or matching yarn scraps for the body
– Rustproof pins and a blocking mat
– Spray bottle with water
– Stitch marker
Abbreviations (US Terms)
- ch – chain
- sl st – slip stitch
- sc – single crochet
- dc – double crochet
- tr – treble crochet
- sc2tog – single crochet 2 together
- rev sc – reverse single crochet (crab stitch)
- sp(s) – space(s)
- st(s) – stitch(es)
- rnd – round
Special stitches
Reverse single crochet (rev sc): Work from left to right (right to left if you are left-handed). Insert the hook into the next stitch to the right, yarn over and pull up a loop, then yarn over and draw through both loops. This creates the corded, rope-like edge.
5-dc popcorn: Work 5 dc in the stitch shown. Drop the loop from your hook. Insert the hook from front to back through the top of the first dc, pick up the dropped loop, and pull it through.
Gauge and Checkpoints
Gauge: 20 sc and 22 rows = 4 in (10.2 cm) in sc, using a 3.5 mm hook.
Gauge matters less here than in a garment. Still, test by making one complete motif first, and measure at each stage:
- After Rnd 2 (disc): 0.9 in (2.3 cm) across
- After Upper Wing Row 2: about 1.25 in (3.2 cm) from the disc edge to the wing tip
- After Upper Wing Row 4: about 1.9 in (4.8 cm) from the disc edge
- After Lower Wing Row 3: about 1.1 in (2.8 cm) from the disc edge
- Before border: 4.5 in (11.4 cm) x 3.75 in (9.5 cm)
- After border: 5 in (12.7 cm) x 4.25 in (10.8 cm)
- Body: 2.25 in (5.7 cm) long x 0.75 in (1.9 cm) wide, flattened
If your motif is too big: go down to a 3.25 mm (D-3) hook, or tighten the loops of your treble stitches.
If your motif is too small: go up to a 3.75 mm (F-5) hook.
Keep the same hook for the body, so the body stays in proportion to the wings.
Center Disc
Rnd 1: Ch 4, then sl st to the first ch to form a ring.
Rnd 2: Ch 3 (counts as dc), work 11 dc into the ring, then sl st to the top of the beginning ch-3. (12 dc) Fasten off.
Number the stitches 1 to 12, going counterclockwise, with the beginning ch-3 as st 1. Hold the disc so that sts 1–3 point up and to the right. The wings are assigned like this:
- Upper right wing: sts 1–3
- Lower right wing: sts 4–6
- Lower left wing: sts 7–9
- Upper left wing: sts 10–12
The body will cover the center of the disc later.
Upper Wings (make 2: on sts 1–3 and sts 10–12)
Row 1: Join yarn with a sl st in the first stitch of the wing’s three. Ch 4 (counts as tr) and work 2 tr in the same st, then 3 tr in each of the next 2 sts. Turn. (9 tr)
Row 2: Ch 4 (counts as tr) and work 1 tr in the first st. Then [ch 1, 2 tr in next st] 8 times. Turn. (18 tr in 9 pairs, 8 ch-1 sps)
The pairs of treble stitches spread out like spokes. This creates the radiating texture on the upper wing.
Row 3: Ch 1. Sc in the first tr, then [ch 4, sc in next ch-1 sp] 8 times. Ch 4, then sc in the top of the turning ch. Turn. (10 sc, 9 ch-4 loops)
These loops form the band of large open holes near the edge of the wing.
Row 4: Ch 1, then work 5 sc in each ch-4 loop across. (45 sc) Fasten off.
Checkpoint: each upper wing should reach about 1.9 in (4.8 cm) from the disc edge.
Lower Wings (make 2: on sts 4–6 and sts 7–9)
Row 1: Join yarn with a sl st in the first stitch of the wing’s three. Ch 3 (counts as dc) and work 2 dc in the same st, then 3 dc in each of the next 2 sts. Turn. (9 dc)
Row 2: Ch 5 (counts as dc + ch 2). Dc in the next st, then [ch 2, dc in next st] 7 times. Turn. (9 dc, 8 ch-2 sps)
The ch-2 spaces become the ring of open holes in the lower wing.
Row 3: Ch 1 and sc in the first dc. Then [3 sc in next ch-2 sp, sc in next dc] 8 times. (33 sc: 1 + 8 x 4) Fasten off.
Checkpoint: each lower wing should reach about 1.1 in (2.8 cm) from the disc edge. The whole wing panel should measure 4.5 in (11.4 cm) x 3.75 in (9.5 cm).
Border
The border is worked at the same gauge as the motif: 1 sc per stitch along the tops of rows. Along the row ends, work 2 sc in the side of each tr or dc row and 1 sc in the side of each sc row.
Rnd 1 (sc): With the right side facing, join yarn at the base of the upper right wing, beside the disc. Work around each wing in turn as follows. There are no extra stitches between wings; go straight from the last stitch of one wing to the first stitch of the next.
- Upper wing: Work up the first side with 2 sc in the end of Row 1, 2 sc in the end of Row 2, and 1 sc in the end of Row 3 (5 sts). Sc in each of the 45 sts of Row 4. Work down the second side with 1 sc in the end of Row 3, 2 sc in the end of Row 2, and 2 sc in the end of Row 1 (5 sts). (55 sc: 5 + 45 + 5)
- Lower wing: Work up the first side with 2 sc in the end of Row 1 and 2 sc in the end of Row 2 (4 sts). Sc in each of the 33 sts of Row 3. Work down the second side with 2 sc in the end of Row 2 and 2 sc in the end of Row 1 (4 sts). (41 sc: 4 + 33 + 4)
Work the wings in this order: upper right (55), lower right (41), lower left (41), upper left (55). Sl st to the first sc. (192 sc: 55 + 41 + 41 + 55)
Rnd 2 (rev sc): Ch 1, then work 1 rev sc in each sc around. Sl st to the first st. (192 rev sc) Fasten off.
Why the math works: The wing rows already flare outward because of the increases in Rows 1 and 2. So the top edge of each wing needs exactly one border stitch per stitch, with no extra increases. The row-end ratio (2 sc per tall row, 1 per sc row) matches the height of each row, so the sides lie flat. Rnd 2 works 1:1 into Rnd 1, so the count stays at 192. Each round adds about 0.125 in (0.3 cm) at the outer edge, so the border adds 0.25 in (0.6 cm) to each wing. That brings the panel from 4.5 in (11.4 cm) to 5 in (12.7 cm) wide, and from 3.75 in (9.5 cm) to 4.25 in (10.8 cm) tall.
Body
The body is worked in a continuous spiral. Place a stitch marker in the first st of each round.
Rnd 1: Magic ring, 6 sc in the ring. (6 sc)
Rnd 2: [Sc in next st, 2 sc in next st] 3 times. (9 sc)
Rnds 3–12: Sc in each st around. (9 sc each round)
Stuff the body lightly. It should look padded but still flatten slightly when pressed.
Rnd 13: [Sc2tog, sc in next st] 3 times. (6 sc)
Fasten off, leaving a 12 in (30.5 cm) tail. Thread the tail through the front loops of the last round, pull it closed, and keep the rest of the tail for wrapping and sewing.
Segments: Use the tail to wrap tightly around the body twice at each of four points. Space the wraps about 0.4 in (1 cm) apart, starting 0.5 in (1.3 cm) from the Rnd 1 end, which is the head. Pull each wrap firm to create the ridges.
Attach: Center the body vertically over the disc, with the head between the two upper wings. Whipstitch around its underside through the disc and the inner wing rows.
Antennae (make 2)
Join yarn with a sl st in the head, beside the center line. Ch 14, then work a 5-dc popcorn in the 4th ch from the hook. Sl st in each of the remaining 10 ch, back toward the head. (1 popcorn, 10 sl st) Fasten off and weave in the end.
Each antenna is about 1.25 in (3.2 cm) long. Working sl sts back down the chain stiffens the stem so it can hold a curve.
Final Blocking
- Weave in all ends along the back of the stitches, not through the open holes.
- Pin the motif face up on a blocking mat. Pin the upper wings first to 5 in (12.7 cm) across.
- Pin each ch-4 loop open so the holes stay round.
- Pin the lower wings so the total height is 4.25 in (10.8 cm) across the wings.
- Curve each antenna outward and pin it in place.
- Mist evenly until damp, without soaking the body.
- Leave to dry completely, which takes about 6 to 8 hours. Then unpin.
Final Quality-Control Checklist
- The disc is 0.9 in (2.3 cm) and fully hidden under the body
- Each upper wing has 9 tr pairs and 9 open loops
- Each lower wing has 8 open holes
- Border Rnd 1 has 192 sc (55, 41, 41, 55), and Rnd 2 has 192 rev sc
- The corded edge is continuous, with no gaps between wings
- The body has 4 even segments and is centered vertically
- Both antennae are the same length and curve symmetrically
- Size is 5 in (12.7 cm) x 4.25 in (10.8 cm) across the wings
Troubleshooting
Wings cup or ruffle: Your treble stitches are too tight or too loose compared with your sc. Check your hook size, and redo Row 2 with a more even yarn-over.
Loops in Row 3 sag: Make the ch-4 loops snug, and block with a pin in each loop.
Edge curls under: The rev sc is too tight. Loosen your tension, or work Rnd 2 with a 3.75 mm hook.
Gaps between wings at the disc: Pull the first border stitch of each new wing snug against the last stitch of the previous wing. The body will cover this area anyway.
Body looks lumpy: Remove some stuffing, then re-wrap the segments evenly.
Antennae flop: Work the sl sts more firmly, or apply a light starch spray when blocking.
Care
Hand wash in cool water with a mild soap. Press out the water gently, then reshape and dry the motif flat, re-pinning the antennae if needed.
Final Notes
Here is the full measurement chain to check against. The disc is 0.9 in (2.3 cm). The upper wings reach 1.9 in (4.8 cm) from the disc edge and the lower wings reach 1.1 in (2.8 cm). The wing panel measures 4.5 in (11.4 cm) x 3.75 in (9.5 cm) before the border. Two border rounds of 192 stitches bring it to 5 in (12.7 cm) x 4.25 in (10.8 cm). The 2.25 in (5.7 cm) body and the 1.25 in (3.2 cm) antennae complete the motif.
If you match each checkpoint, every butterfly you make will come out the same size. Happy crocheting!