

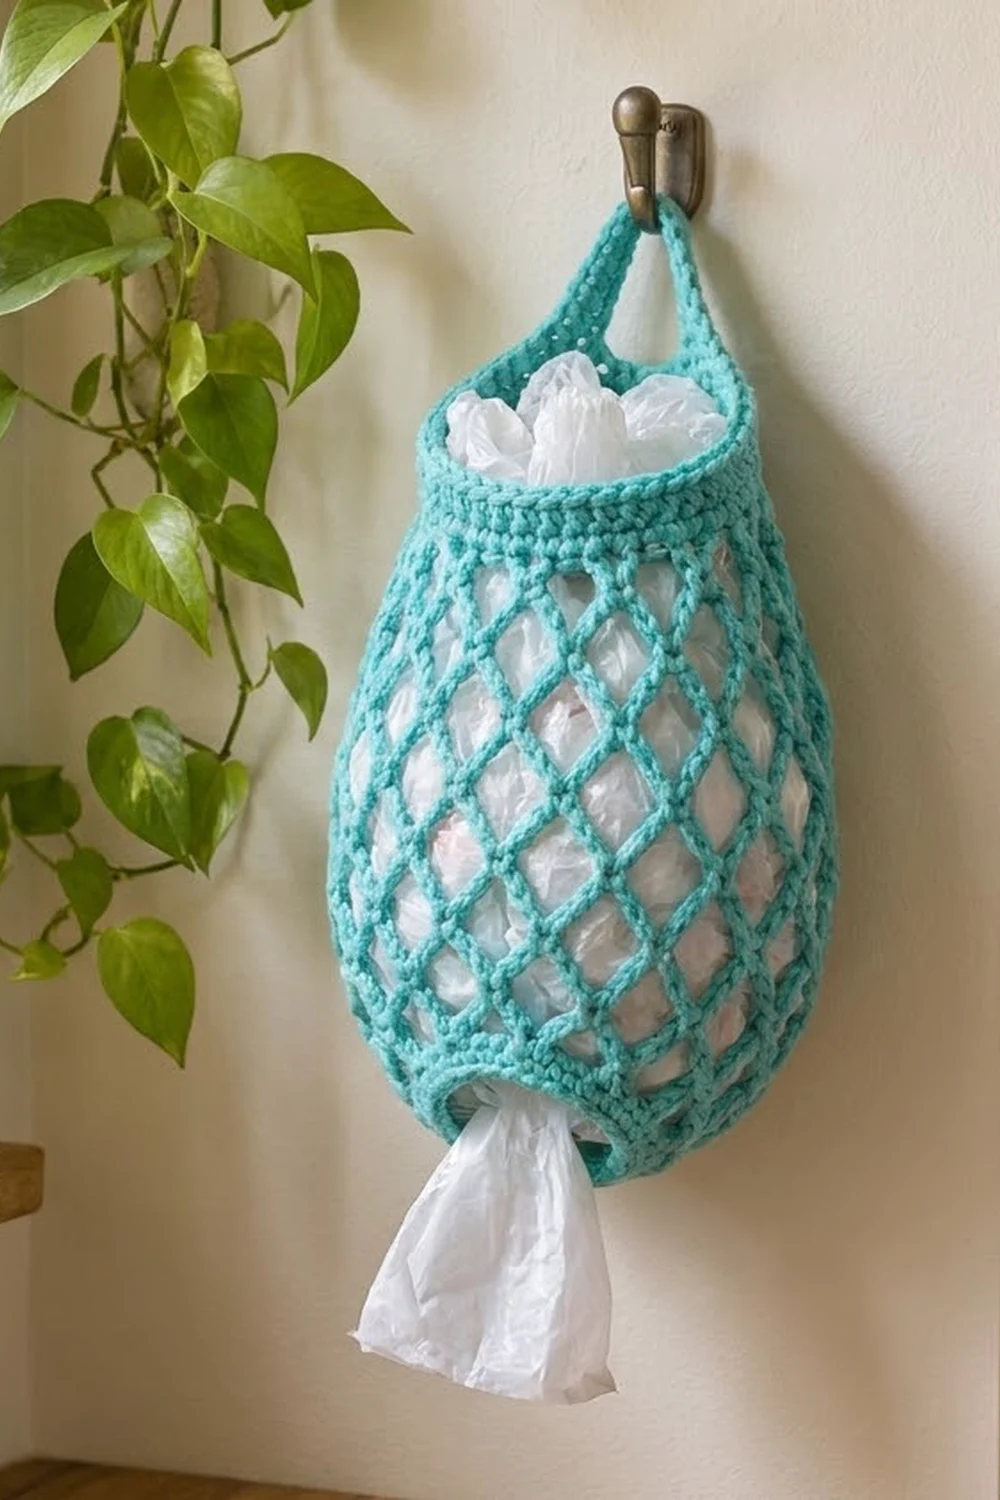
The Lagoon Lattice Grocery Bag Holder is one hanging piece worked in a single bright turquoise yarn. It is shaped like a teardrop: a narrow solid rim at the top, an open diamond mesh body that bulges in the middle, and a small solid ring at the bottom. You stuff plastic bags in through the top and pull them out one at a time through the bottom ring.
The look is clean and a little retro. The diamond lattice lets you see the bags inside without looking messy. With just one cheerful color, it suits a pantry door, a hook by the back door, or the inside of a cupboard.
This pattern uses US crochet terms. Laid flat, the finished holder is about 7 in (17.8 cm) wide at its widest point. It is about 11 in (27.9 cm) tall from the bottom ring to the top of the rim. The hanging strap adds about 4 in (10.2 cm), for a total hanging length of about 15 in (38.1 cm).
There are no seams until the very end. You start with a chain ring, which becomes the dispensing opening, and work a flat solid base outward from it. Then you work 11 rounds of chain-loop diamond mesh. A conversion round turns the mesh into a solid sc rim. Finally, you work a short strap in rows from the rim and sew it to the opposite side. A last edging round tidies the opening and the strap.
Finished Size and Construction
- Finished size: about 7 in (17.8 cm) wide flat at the widest point x 11 in (27.9 cm) tall, plus a 4 in (10.2 cm) hanging loop
- Skill level: Easy / advanced beginner
- Terminology: US crochet terms
- Yarn weight: Worsted (#4), cotton or cotton blend
- Hook: 5.0 mm (H-8)
- Number of pieces: 1 (worked in the round, with a strap worked in rows from the rim)
- Layout: one standalone holder; nothing to assemble
- Piece size: bottom opening about 2 in (5.1 cm) across; solid base about 3.8 in (9.7 cm) across; top rim about 4.5 in (11.4 cm) wide flat
- Size before border: about 10.9 in (27.7 cm) tall after the rim rounds, before the edging round
- Border depth: the solid rim is about 1.1 in (2.8 cm) deep; the edging round adds about 0.25 in (0.6 cm)
Materials
Choose a smooth worsted-weight cotton or cotton blend. Cotton holds the mesh shape well, doesn’t stretch out under the weight of the bags, and shows the diamond lattice clearly. Acrylic also works, but the mesh will be springier and a little longer when full.
- Turquoise (main and only color): about 100 g / 180 m (197 yd)
Tools:
- 5.0 mm (H-8) crochet hook
- Stitch marker
- Tapestry needle
- Scissors
- Measuring tape
- Rust-proof pins and a towel for blocking
The yarn amount includes about a 20 percent margin for your gauge swatch and small differences in tension. The holder itself uses about 80 g.
Abbreviations (US Terms)
- ch – chain
- sl st – slip stitch
- sc – single crochet
- dc – double crochet
- st(s) – stitch(es)
- sp – space
- sk – skip
- rnd – round
- rep – repeat
Special technique – loop join: at the end of each mesh round, you work a short chain plus a dc into the first sc. The dc takes the place of the last part of the final chain loop. It also leaves your hook at the center of that loop, so you can start the next round without slip-stitching across.
- ch 2 + dc = one ch-5 loop
- ch 3 + dc = one ch-6 loop
- ch 1 + dc = one ch-4 loop
Gauge and Checkpoints
Gauge: 16 sc and 18 rows = 4 in (10.2 cm) with a 5.0 mm hook.
Make a small swatch first: ch 20, work 20 rows of sc (19 sts per row), and measure the center. Since this is a single piece, the base also works as a test. Work Rnds 1–3 and check them before going on.
Checkpoints:
- After Rnd 1: the opening is about 2 in (5.1 cm) across. Two fingers side by side should fit through easily.
- After Rnd 3: the flat base ring measures about 3.8 in (9.7 cm) across the outside.
- After Rnd 11: the mesh measures about 5 in (12.7 cm) above Rnd 4, measured with the piece hanging.
- After Rnd 15: the mesh measures about 9 in (22.9 cm) above Rnd 4.
- After Rnd 20: total height is about 10.9 in (27.7 cm), and the rim measures about 4.5 in (11.4 cm) wide flat.
If your base is too big, go down 0.5 mm in hook size. If it is too small or stiff, go up 0.5 mm. Don’t change the chain lengths in the mesh to fix the size. Change the hook instead, so the base, mesh, and rim stay in proportion.
Bottom Ring and Base
The base is worked in joined rounds of sc. Join each round with a sl st to the first sc, then ch 1 to start the next round. The ch 1 never counts as a stitch.
Foundation: Ch 24, sl st to the first ch to form a ring. Take care not to twist the chain.
Rnd 1: Ch 1, sc in each ch around, sl st to first sc. (24 sc)
Rnd 2: Ch 1, sc in next st, 2 sc in next st; rep from * 12 times, sl st to first sc. (36 sc)
Rnd 3: Ch 1, sc in next 2 sts, 2 sc in next st; rep from * 12 times, sl st to first sc. (48 sc)
The base now lies flat as a solid ring with a hole in the center. This hole is the dispensing opening.
Rnd 4: Ch 1, sc in each st around, sl st to first sc. (48 sc)
With no increases in Rnd 4, the work starts to curve upward and forms the bottom edge of the wall.
Diamond Mesh Body
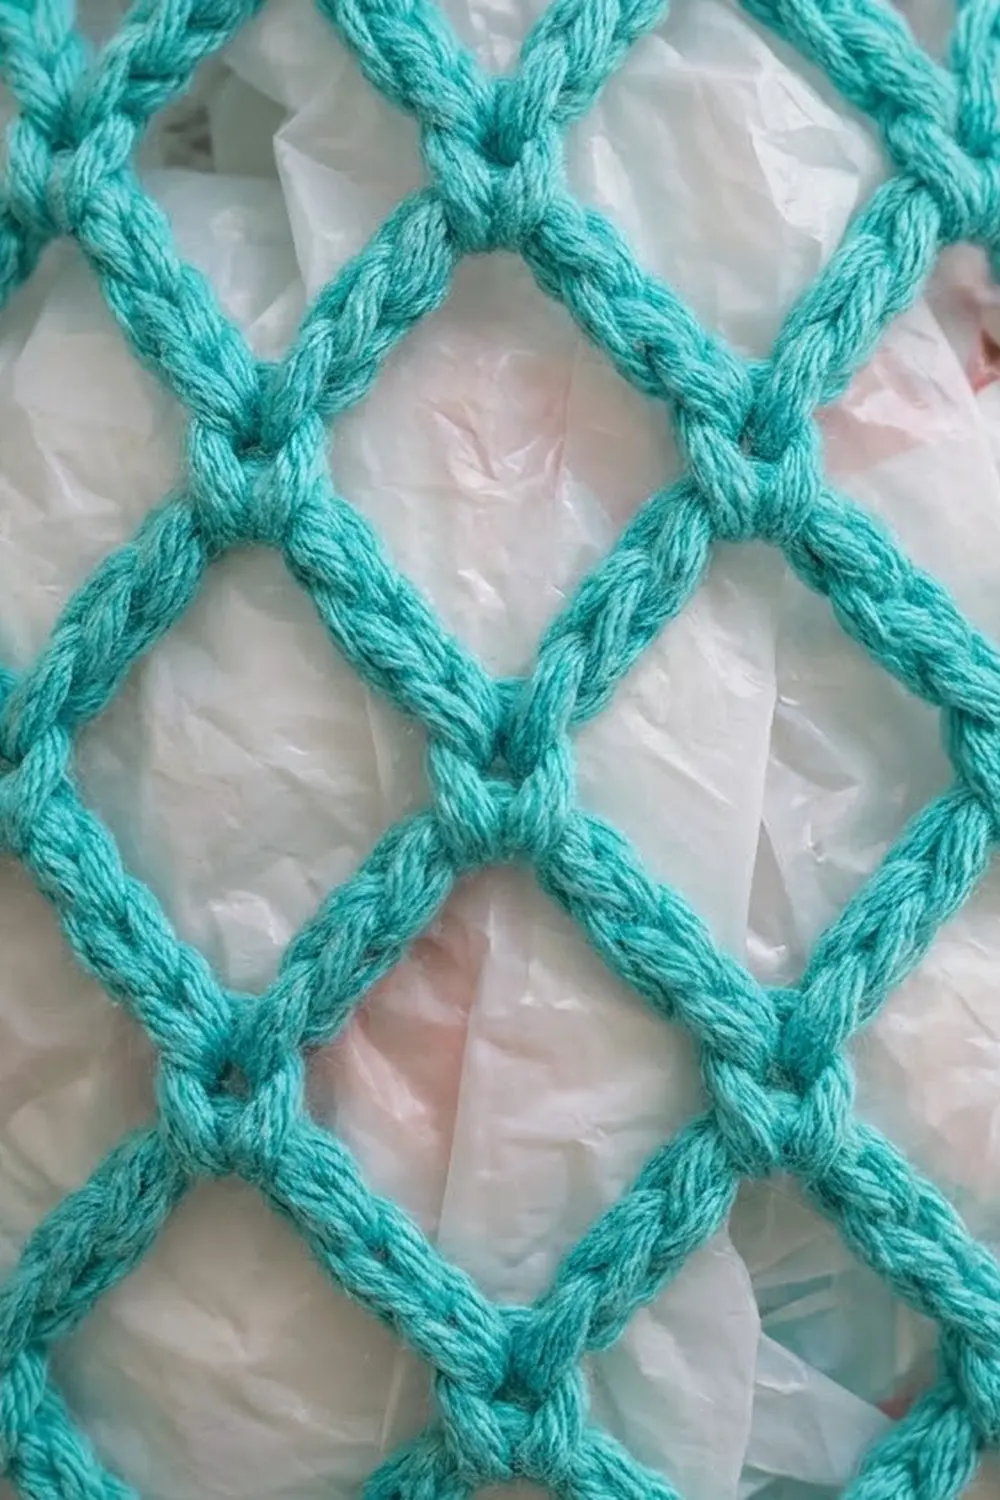
Each mesh round has 12 chain loops. Every sc sits in the center of a loop from the round below, which creates the diamonds. The loop length changes to shape the teardrop: short at the bottom, longer through the middle, and shorter again toward the top.
Rnd 5 (setup): Ch 1, sc in first st, ch 5, sk 3 sts, sc in next st; rep from * 10 more times, ch 2, sk 3 sts, dc in first sc. (12 sc and 12 loops)
Check the math: 12 repeats x 4 sts (1 sc + 3 skipped) = 48 sts, which uses every stitch of Rnd 4.
Rnd 6: Ch 1, sc around the post of the dc just made, ch 5, sc in next ch-5 sp; rep from * 10 more times, ch 2, dc in first sc. (12 ch-5 loops)
Rnds 7–11: Ch 1, sc around the post of the dc, ch 6, sc in next loop; rep from * 10 more times, ch 3, dc in first sc. (12 ch-6 loops each round)
These five longer rounds form the widest part of the teardrop.
Rnds 12–13: Ch 1, sc around the post of the dc, ch 5, sc in next loop; rep from * 10 more times, ch 2, dc in first sc. (12 ch-5 loops each round)
Rnds 14–15: Ch 1, sc around the post of the dc, ch 4, sc in next loop; rep from * 10 more times, ch 1, dc in first sc. (12 ch-4 loops each round)
Every mesh round has 12 loops. Only the loop length changes. That is why the body bulges and then narrows without any increases or decreases.
Solid Top Rim
Rnd 16 (conversion): Ch 1, 2 sc around the post of the dc just made, 3 sc in next ch-4 sp; rep from * 10 more times, 1 sc around the same dc post, sl st to first sc. (36 sc)
The count is 12 loop spaces x 3 sc each = 36 sc. The joining loop gets 2 sc at the start and 1 sc at the end, so it holds 3 sc like the others. You don’t work into the sc stitches of Rnd 15; they stay hidden behind the new rim.
Rnds 17–20: Ch 1, sc in each st around, sl st to first sc. (36 sc each round)
The rim is now 5 rounds deep, about 1.1 in (2.8 cm). Place a marker in the first sc of Rnd 20 and don’t fasten off.
Hanging Strap
You work the strap in rows on 5 sts of the rim, then sew it to the 5 sts directly opposite.
Row 1: Ch 1, sc in first 5 sts of Rnd 20, turn. (5 sc)
Rows 2–36: Ch 1, sc in each st across, turn. (5 sc each row)
The strap is now about 8 in (20.3 cm) long and 1.25 in (3.2 cm) wide. Fasten off, leaving a 12 in (30.5 cm) tail.
The strap covers rim sts 1–5, so the opposite group is sts 19–23. To check: the center of the strap is st 3 and the center of the opposite group is st 21. They are exactly 18 sts apart, which is half of 36. Lay the strap flat without twisting it, and use the tail to whipstitch the last row to sts 19–23. The strap now forms a loop that rises about 4 in (10.2 cm) above the rim.
Edging (Border)
Border gauge: the edging uses the same gauge, 16 sc = 4 in (10.2 cm), with one sc per strap row along the strap edges.
Edging Rnd: Join yarn with a sl st at the inner corner where the strap meets the rim at st 5. Work one continuous round:
- Strap edge 1: 36 sc evenly along the side of the strap, one per row (36 sc)
- Rim section A: sc in each of the free rim sts 24–36 (13 sc)
- Strap edge 2: 36 sc along the other side of the strap, one per row (36 sc)
- Rim section B: sc in each of the free rim sts 6–18 (13 sc)
Sl st to first sc and fasten off. (98 sc total)
Why the math works: the rim has 36 sts. The strap uses 5 sts at each end (sts 1–5 and 19–23), which leaves 36 − 10 = 26 free sts in two groups of 13. Each strap edge has 36 rows, and one sc per row gives 36 sc per edge. The total is 36 + 13 + 36 + 13 = 98 sc. One sc per row is close enough to the 18 rows per 4 in (10.2 cm) gauge that the strap edges stay flat and don’t ruffle.
Bottom ring edge (optional): Join yarn in any free loop of the foundation chain and sl st loosely in each of the 24 foundation loops. (24 sl st) This firms up the dispensing opening so it keeps its round shape. Keep the stitches loose so the opening stays about 2 in (5.1 cm) across.
Weave in all ends along the solid rim or the base, where they won’t show through the mesh.
Final Blocking
- Wet the holder in cool water and gently squeeze out the extra water. Don’t wring it.
- Roll it in a towel and press to remove more water.
- Lay it flat on a dry towel or blocking mat.
- Stretch the mesh lengthwise so each diamond opens evenly. Then ease the sides out to about 7 in (17.8 cm) at the widest point.
- Shape the base ring into a smooth circle about 3.8 in (9.7 cm) across. Pin the rim straight at about 4.5 in (11.4 cm) wide.
- Pin the strap flat at about 1.25 in (3.2 cm) wide.
- Let it dry completely. For a fuller teardrop, stuff it lightly with a dry towel for the last few hours of drying.
Final Quality-Control Checklist
- Base has 48 sc in Rnd 3 and Rnd 4.
- Every mesh round has exactly 12 loops.
- Chain lengths follow the sequence: 2 rounds of ch-5, 5 rounds of ch-6, 2 rounds of ch-5, 2 rounds of ch-4.
- Rim has 36 sc in every round from Rnd 16 to Rnd 20.
- Strap is 5 sts wide and 36 rows long, attached to sts 1–5 and 19–23.
- Strap is not twisted.
- Edging round has 98 sc.
- Bottom opening is about 2 in (5.1 cm) across. Total height is about 11 in (27.9 cm), plus a 4 in (10.2 cm) loop.
- All ends are woven into solid areas.
Troubleshooting
Base cups or ruffles. If Rnd 3 cups upward, your tension is tight, so go up a hook size for the base. If it ruffles, go down a size.
Mesh looks crooked or spiraled. Make sure each round starts with the sc around the dc post, not in the next loop. Starting one loop late shifts the diamonds.
Loop count is off. Count the sc stitches in the round, not the chains. Every round should have 12 sc and 12 loops.
Bags fall out of the bottom too easily. Work the optional sl st round on the bottom ring, or use a smaller hook for Rnds 1–2.
Rim flares. Work Rnds 17–20 with a hook 0.5 mm smaller. The stitch counts stay the same, so the strap placement doesn’t change.
Strap stretches over time. Use cotton instead of acrylic and keep the strap rows firm. You can also work a row of sl st along each strap edge after the edging.
Care
Hand wash in cool water with mild soap, and lay flat to dry, reshaping the mesh while it is damp. Avoid hot dryers, which can shrink cotton and distort the diamonds.
Final Notes
Here is the whole measurement chain. A 24-ch ring makes a 2 in (5.1 cm) opening. Three rounds then build a 48-st base about 3.8 in (9.7 cm) across. Those 48 sts divide into 12 mesh loops. Loops of 5, 6, 5, and 4 chains create a teardrop body about 9 in (22.9 cm) tall. The 12 loops convert to 36 sc for a 1.1 in (2.8 cm) rim, and a 5-st strap of 36 rows makes a 4 in (10.2 cm) hanging loop. Check each stage as you go, and the holder will come out about 7 in (17.8 cm) wide and 11 in (27.9 cm) tall.
Happy crocheting!