
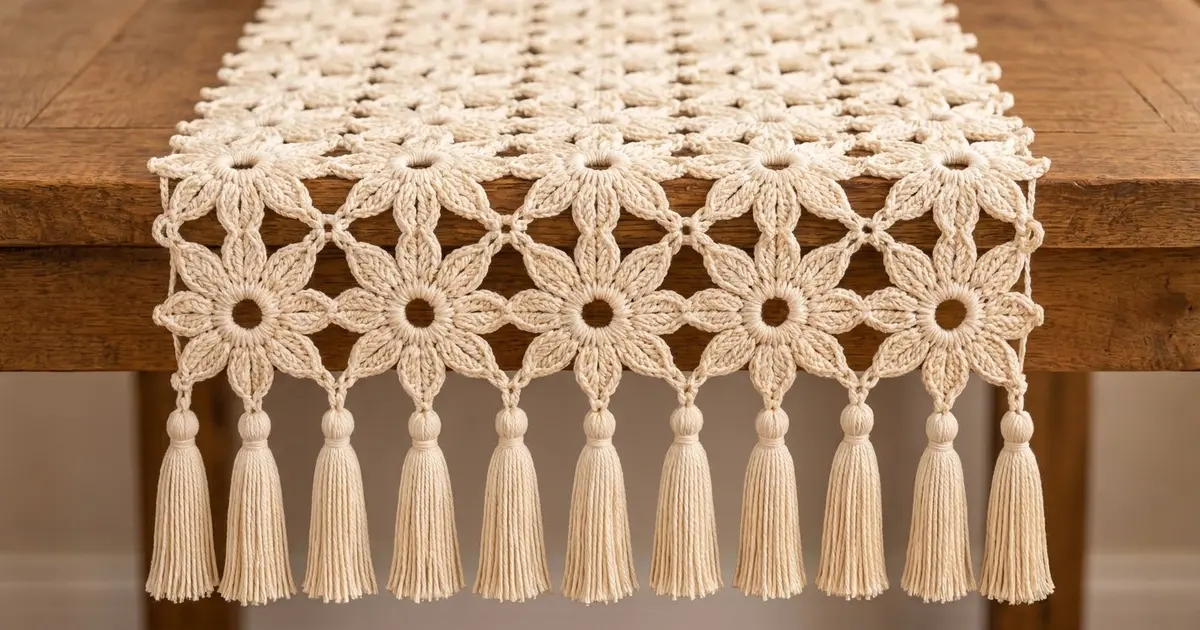
The Lattice Bloom Table Runner is a lacy, airy runner made of eight-petal flowers. Each flower has an open center ring and pointed, leaf-shaped petals. Chain lattice points hold the flowers together, leaving small diamond windows between them, and a row of plump tassels finishes each short end.
The runner is worked in one color, a soft cream or natural cotton. One color lets the stitch texture stand out and suits a boho, farmhouse, or neutral table. This pattern uses US crochet terms throughout.
The finished runner measures 15 in (38.1 cm) wide by 45 in (114.3 cm) long, measured from petal tip to petal tip. With the 4 in (10.2 cm) tassels at both ends, the total length is 53 in (134.6 cm).
Construction is simple and repetitive. You make one complete flower, then crochet the other 26 flowers and join each one to its neighbors during its last round (join-as-you-go). There is no sewing. The layout is 3 flowers across and 9 flowers long. At the end you add 7 tassels to each short end.
Finished Size and Construction
- Finished size: 15 x 45 in (38.1 x 114.3 cm), tip to tip
- Total length with tassels: 53 in (134.6 cm)
- Skill level: Intermediate (easy, repetitive motif; joining needs attention)
- Terminology: US crochet terms
- Yarn weight: Worsted (#4) cotton or cotton blend
- Hook: 4.5 mm (US 7)
- Number of pieces: 27 flower motifs
- Layout: 3 motifs wide x 9 motifs long
- Motif size: 5 in (12.7 cm) from tip to tip, measured top to bottom or side to side
- Size before border: 15 x 45 in (38.1 x 114.3 cm)
- Border depth: no stitched border; tassel fringe adds 4 in (10.2 cm) to each short end
Materials
Yarn: Choose a smooth, firmly twisted worsted-weight cotton, at about 190 m per 100 g. Cotton keeps the petal points crisp and the lattice from stretching. Avoid very fuzzy yarn, because it blurs the petal veins.
- Cream / natural ecru: 300 g, approx. 570 m
- Motifs: about 6 g each, so roughly 162 g for 27 motifs
- Tassels: about 3.7 g each, so roughly 52 g for 14 tassels
The quantities above include a safety margin of about 25 percent. This covers your gauge test, weaving in ends, and small tension differences.
Tools:
– 4.5 mm (US 7) crochet hook
– Tapestry needle
– Scissors
– Stiff card or a tassel maker, 4.5 in (11.4 cm) tall
– Rust-proof pins and a blocking mat or folded towels
– Spray bottle
– Measuring tape
Abbreviations (US Terms)
- ch – chain
- sl st – slip stitch
- sc – single crochet
- hdc – half double crochet
- dc – double crochet
- tr – treble crochet
- sp – space
- rep – repeat
- st(s) – stitch(es)
Special stitches:
- Picot: ch 3, sl st in first ch.
- Picot join: ch 1, sl st into the picot of the neighboring motif, ch 1. This takes the place of a picot.
- Lattice loop: ch 11. This leaves an open chain loop at the petal tip.
- Lattice join: ch 5, sl st around the lattice loop (or the joined lattice point) already sitting at that corner, ch 5. This takes the place of a lattice loop.
Gauge and Checkpoints
Gauge is measured on a full motif, not a swatch. Make Motif 1 first and check it before you go on.
- Checkpoint 1 (after Round 2): the ring measures 1.75 in (4.4 cm) across the outside edge, with an open center of about 0.5 in (1.3 cm).
- Checkpoint 2 (after Round 4, unblocked): 4.75 in (12.1 cm) tip to tip.
- Checkpoint 3 (after blocking): 5 in (12.7 cm) tip to tip, top petal to bottom petal and left petal to right petal.
If your motif is too big (over 5.25 in / 13.3 cm after blocking), go down to a 4 mm hook. If it is too small (under 4.75 in / 12.1 cm after blocking), go up to a 5 mm hook. A 0.25 in (0.6 cm) difference per motif adds up to 0.75 in (1.9 cm) across the width and 2.25 in (5.7 cm) along the length.
Motif Pattern
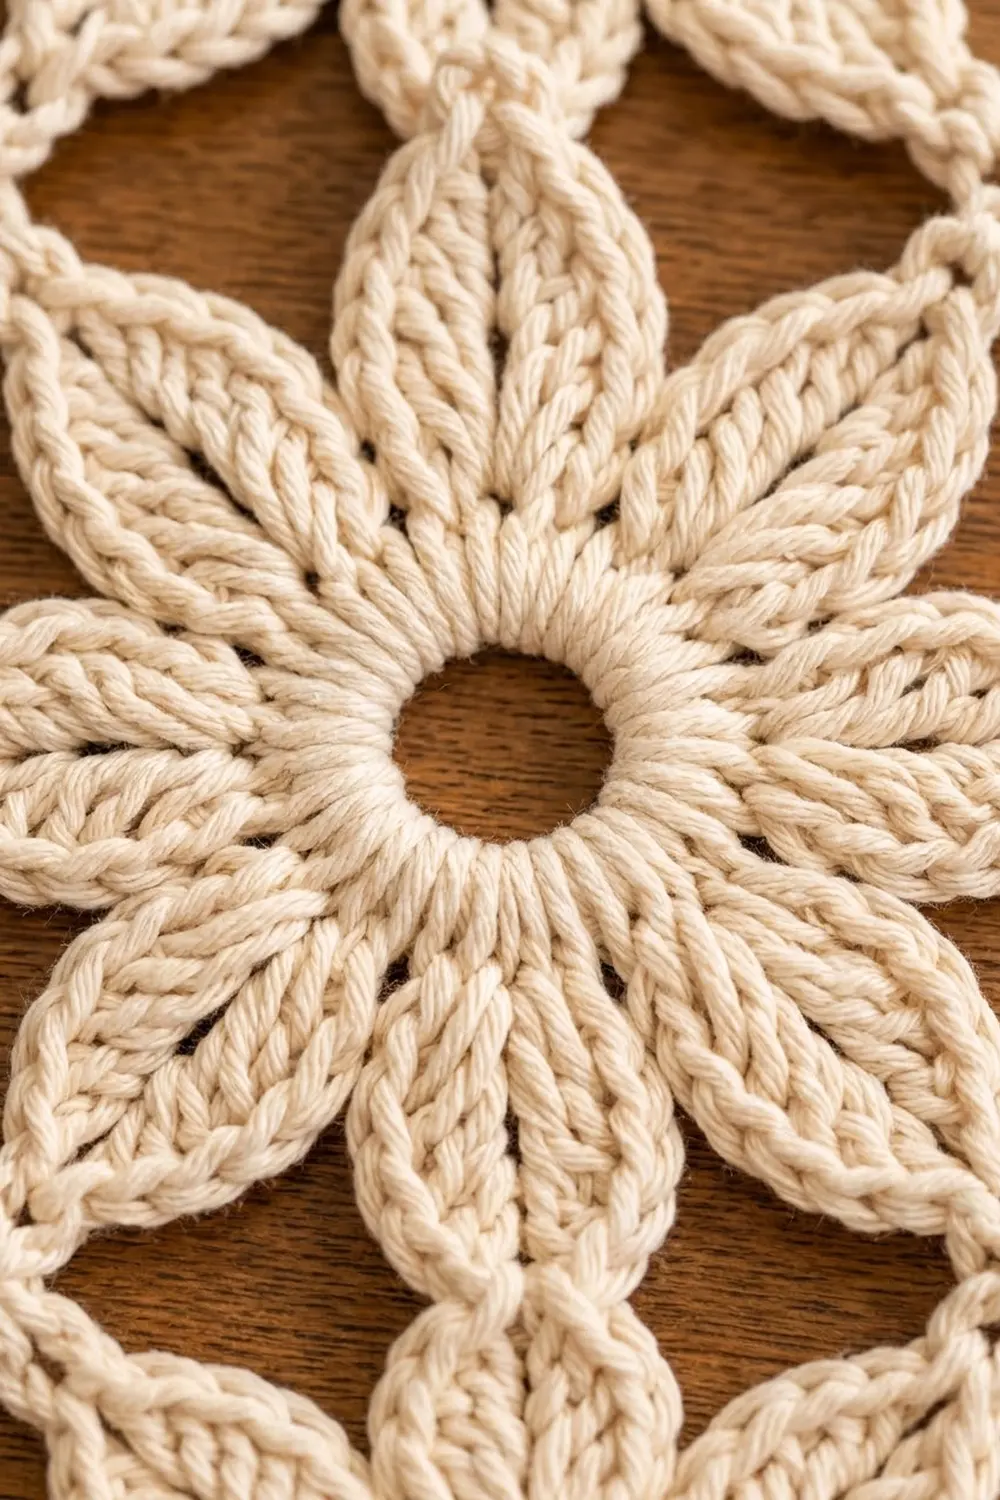
Each motif has 8 petals, numbered in the order you work them:
- Point petals are Petals 1, 3, 5, and 7. They sit at the top, bottom, left, and right, and each ends in a picot.
- Lattice petals are Petals 2, 4, 6, and 8. They sit on the diagonals, and each ends in a lattice loop.
Round 1 (Ring)
Ch 10, sl st in first ch to form a ring.
Ch 1, work 24 sc into the ring, sl st in first sc to join. (24 sc)
Round 2 (Ring Thickening)
Ch 1, sc in each sc around, sl st in first sc to join. (24 sc)
This round makes the thick, rounded ring around the open center. Check Checkpoint 1 now.
Round 3 (Petal Loops)
Ch 1, sc in the same st as the join, ch 13, skip 2 sc.
*Sc in next sc, ch 13, skip 2 sc; rep from * 6 more times. Sl st in first sc to join.
(8 sc and 8 ch-13 loops)
Each loop spans 3 sts of the ring (the sc plus 2 skipped), and 8 loops x 3 sts = 24 sts. This uses the whole ring evenly.
Round 4 (Petals)
Sl st into the first ch-13 loop. Each petal is worked entirely inside one loop:
Petal sides: (sc, hdc, 2 dc, 3 tr) in loop, tip, (3 tr, 2 dc, hdc, sc) in same loop, then sl st in next sc of Round 3.
Use this tip for each petal:
- Petals 1, 3, 5, 7: picot
- Petals 2, 4, 6, 8: lattice loop
Work all 8 petals. The last sl st goes into the first sc of Round 3, which closes the round. Fasten off and leave a 6 in (15.2 cm) tail.
Round 4 count: 14 sts per petal (7 per side) x 8 = 112 sts, plus 8 sl sts between petals, 4 picots, and 4 lattice loops.
The stitch heights climb from sc to tr and then step back down, which gives each petal its leaf shape. The packed ch-13 loop pinches into a narrow open slit along the center of the petal, and that slit forms the vein.
Check Checkpoint 2.
Make All Pieces
You need 27 motifs in total, all in cream.
- Make Motif 1 complete, following the pattern above.
- Make Motifs 2–27 with the same Rounds 1–3. In Round 4, replace tips with picot joins or lattice joins wherever the motif touches a motif already in place.
Layout grid (rows run along the length; columns A–C run across the width):
       A    B    C
Row 1  [1]  [2]  [3]
Row 2  [4]  [5]  [6]
Row 3  [7]  [8]  [9]
Row 4  [10] [11] [12]
Row 5  [13] [14] [15]
Row 6  [16] [17] [18]
Row 7  [19] [20] [21]
Row 8  [22] [23] [24]
Row 9  [25] [26] [27]
Work across each row from left to right, then start the next row at column A.
Joining
Method: join-as-you-go in Round 4. Before you start a new motif’s Round 4, turn it so that one point petal will face each neighbor already in place.
Point petals (side to side, top to bottom): when a point petal faces a placed motif, use a picot join into that motif’s facing picot.
- Each new motif in Row 1 makes 1 picot join (to its left neighbor).
- Each new motif in column A of later rows makes 1 picot join (to the motif above).
- All other motifs make 2 picot joins (above and left).
Lattice petals (diagonal corners): each inner corner of the grid is shared by up to 4 motifs. The first motif to reach a corner leaves a plain lattice loop there. Every later motif at that corner uses a lattice join into that same first loop, so all of the diagonal tips gather at one point. That is what creates the diamond windows.
A lattice petal on the outer edge of the runner with no neighbor at that corner stays a plain lattice loop. Along the long sides, the lattice petals of two stacked motifs meet at one edge point. Along the short ends, the lattice petals of two side-by-side motifs meet at one edge point.
Why the math works: a lattice join (ch 5 + sl st + ch 5 = 11 sts) has exactly the same length as a lattice loop (ch 11). A picot join (ch 1 + sl st + ch 1) has the same length as a picot (ch 3 + sl st). Joined petals therefore keep the same shape and size as free petals.
Each grid square measures 5 in (12.7 cm), and a diagonal corner sits 3.5 in (8.9 cm) from the motif center. The petal reaches about 2.5 in (6.4 cm), and the lattice chain bridges the remaining distance of about 1 in (2.5 cm).
Tension advice: work joins at your normal tension. Do not pull the joining sl st tight, or the diamond windows will pucker and the motifs will cup.
Size checkpoint: after Row 1, the strip should measure 15 in (38.1 cm) wide (3 x 5 in / 12.7 cm) once you pin it out. After Row 9, the runner should measure 45 in (114.3 cm) long (9 x 5 in / 12.7 cm).
Border: Tassel Fringe
This runner has no stitched border round. The flower tips and lattice points form the finished edge. The “border” is the tassel fringe on each short end.
Border gauge: on each short end, the hanging points line up in one straight line, spaced every 2.5 in (6.4 cm).
Hanging points per short end (7 total):
- Outer corner lattice loop of the left motif, at 0 in (0 cm)
- Bottom point petal picot of the left motif, at 2.5 in (6.4 cm)
- Edge lattice point between the left and middle motifs, at 5 in (12.7 cm)
- Bottom point petal picot of the middle motif, at 7.5 in (19.1 cm)
- Edge lattice point between the middle and right motifs, at 10 in (25.4 cm)
- Bottom point petal picot of the right motif, at 12.5 in (31.8 cm)
- Outer corner lattice loop of the right motif, at 15 in (38.1 cm)
Why the math works: 3 motifs give 3 point petals plus 2 shared lattice points plus 2 outer corners, which makes 7 points. Seven points have 6 gaps of 2.5 in (6.4 cm) each, and 6 x 2.5 in = 15 in (38.1 cm), the full width. Make 14 tassels in total (7 per end).
Long sides: no tassels. Each long side shows 9 point-petal picots, 8 edge lattice points, and 2 corner loops.
Tassel (make 14):
- Wrap yarn 30 times around a 4.5 in (11.4 cm) card.
- Thread a 12 in (30.5 cm) strand under the wraps at the top and tie it tightly. Leave the ends long; they will attach the tassel later.
- Cut the wraps at the bottom.
- Wrap a separate 20 in (50.8 cm) strand around the bundle 0.75 in (1.9 cm) below the top, about 6–8 times, to form a rounded head. Knot the strand, then thread its ends down into the skirt.
- Trim the skirt evenly to 4 in (10.2 cm) below the top of the head.
Attach: thread both tie ends through a hanging point, knot them securely on the back, then hide the ends inside the tassel head.
Final Blocking
- Weave in all ends before you block. Wait to trim the tails until after the runner dries.
- Lay the runner flat on a blocking mat or on towels. Keep the tassels off the mat edge.
- Spray it with water until it is evenly damp, but not dripping.
- Pin the four outer corners to 15 x 45 in (38.1 x 114.3 cm).
- Pin every edge point (picots and lattice points) along all four sides, keeping each long side straight.
- Pin each point petal tip so the petals sit straight and pointed. Pin each inner lattice point so the diamonds open evenly.
- Leave it to dry fully, at least 12 hours.
- Unpin it, trim the woven tails, and brush or retrim the tassels to an even 4 in (10.2 cm).
Final Quality-Control Checklist
- [ ] 27 motifs, arranged 3 across and 9 long
- [ ] Each motif has 24 sc in Rounds 1 and 2, 8 loops in Round 3, and 112 petal sts in Round 4
- [ ] Every inner corner gathers all of its diagonal tips at one point
- [ ] No petal is twisted or skipped at a join
- [ ] Runner measures 15 x 45 in (38.1 x 114.3 cm) after blocking
- [ ] 7 tassels on each short end, spaced 2.5 in (6.4 cm) apart
- [ ] All tassels are 4 in (10.2 cm) long, with matching heads
- [ ] All ends are woven in and secured
Troubleshooting
- The ring ruffles or cups: your 24 sc are too crowded in a tight ring. Make sure the starting ch 10 is relaxed, or use a slightly looser tension.
- Petals look rounded, not pointed: check that you work 3 tr on each side of the tip and that the picot is closed with a sl st.
- No vein shows: you may be working into the chains instead of around the loop. Work all petal sts into the ch-13 space.
- Diamonds are uneven: a lattice join went into the wrong loop. Every join at a corner must go into the first loop made at that corner.
- Runner narrows in the middle: your joining tension is tight. Undo the join and redo it with a looser sl st.
- Tassels are uneven: trim them while they hang, after blocking.
Care
Hand wash in cool water with a mild detergent and gently press out the water. Lay it flat to dry and reblock it as needed. Do not hang it, which stretches the lattice.
Final Notes
The measurement chain is short and easy to check:
- Rounds 1–2 make a ring 1.75 in (4.4 cm) across.
- Round 4 brings each motif to 5 in (12.7 cm) once blocked.
- Three motifs across give 15 in (38.1 cm), and nine motifs long give 45 in (114.3 cm).
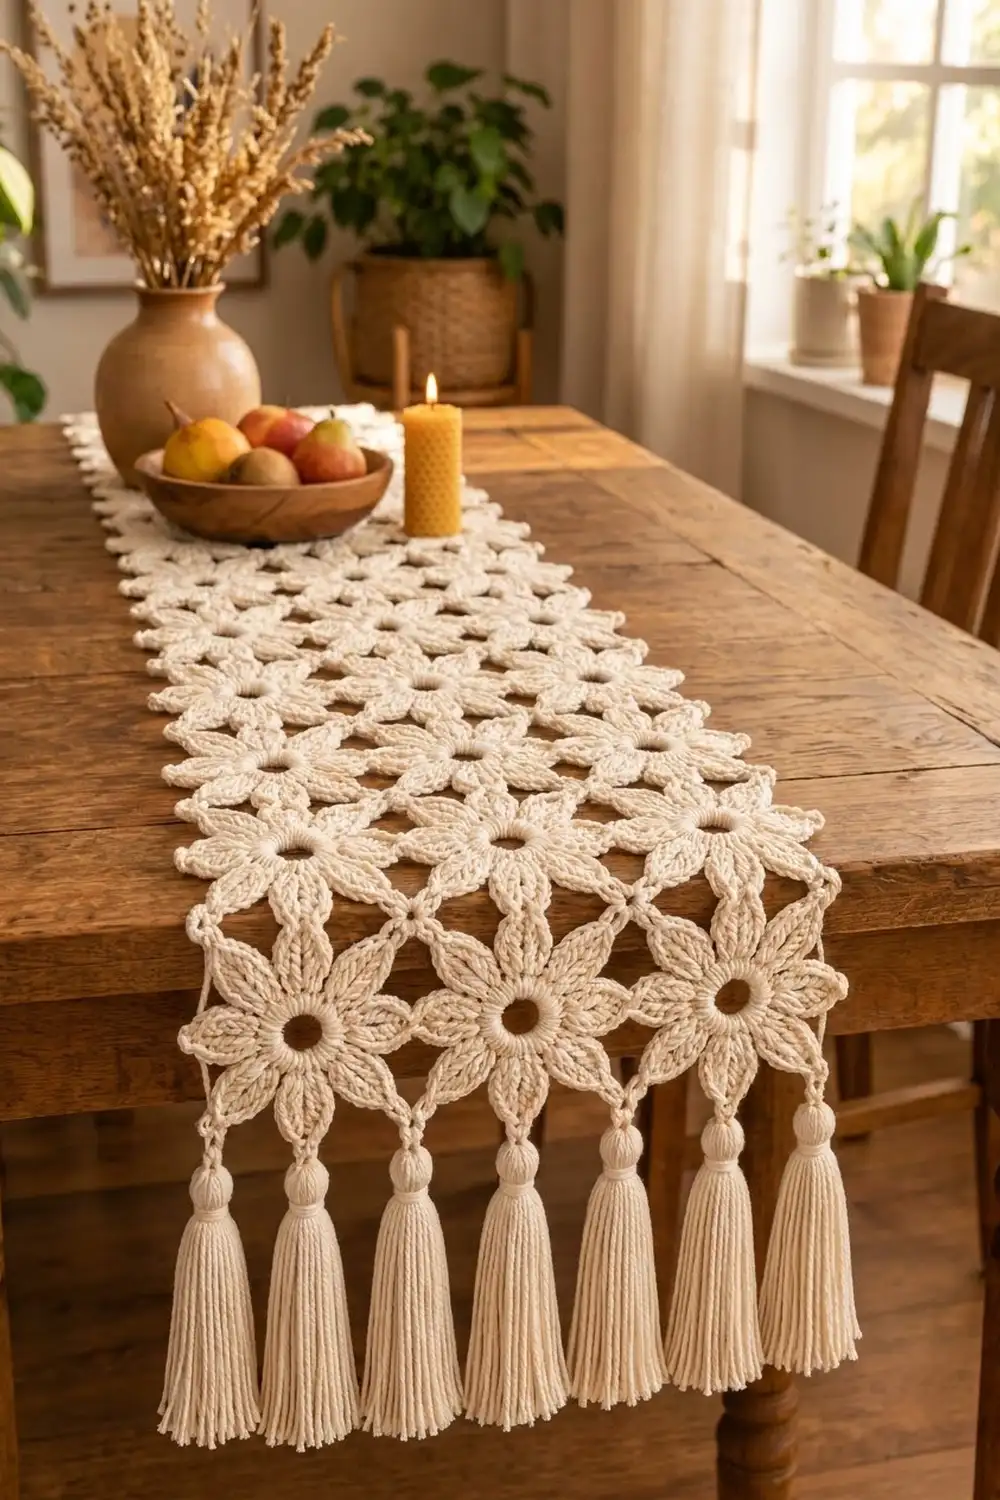
- Seven tassels per end, spaced 2.5 in (6.4 cm) apart, fill the width exactly and add 4 in (10.2 cm) at each end, for a total length of 53 in (134.6 cm).
Check your first motif and your first row, and the rest of the runner will follow.
Happy crocheting!