

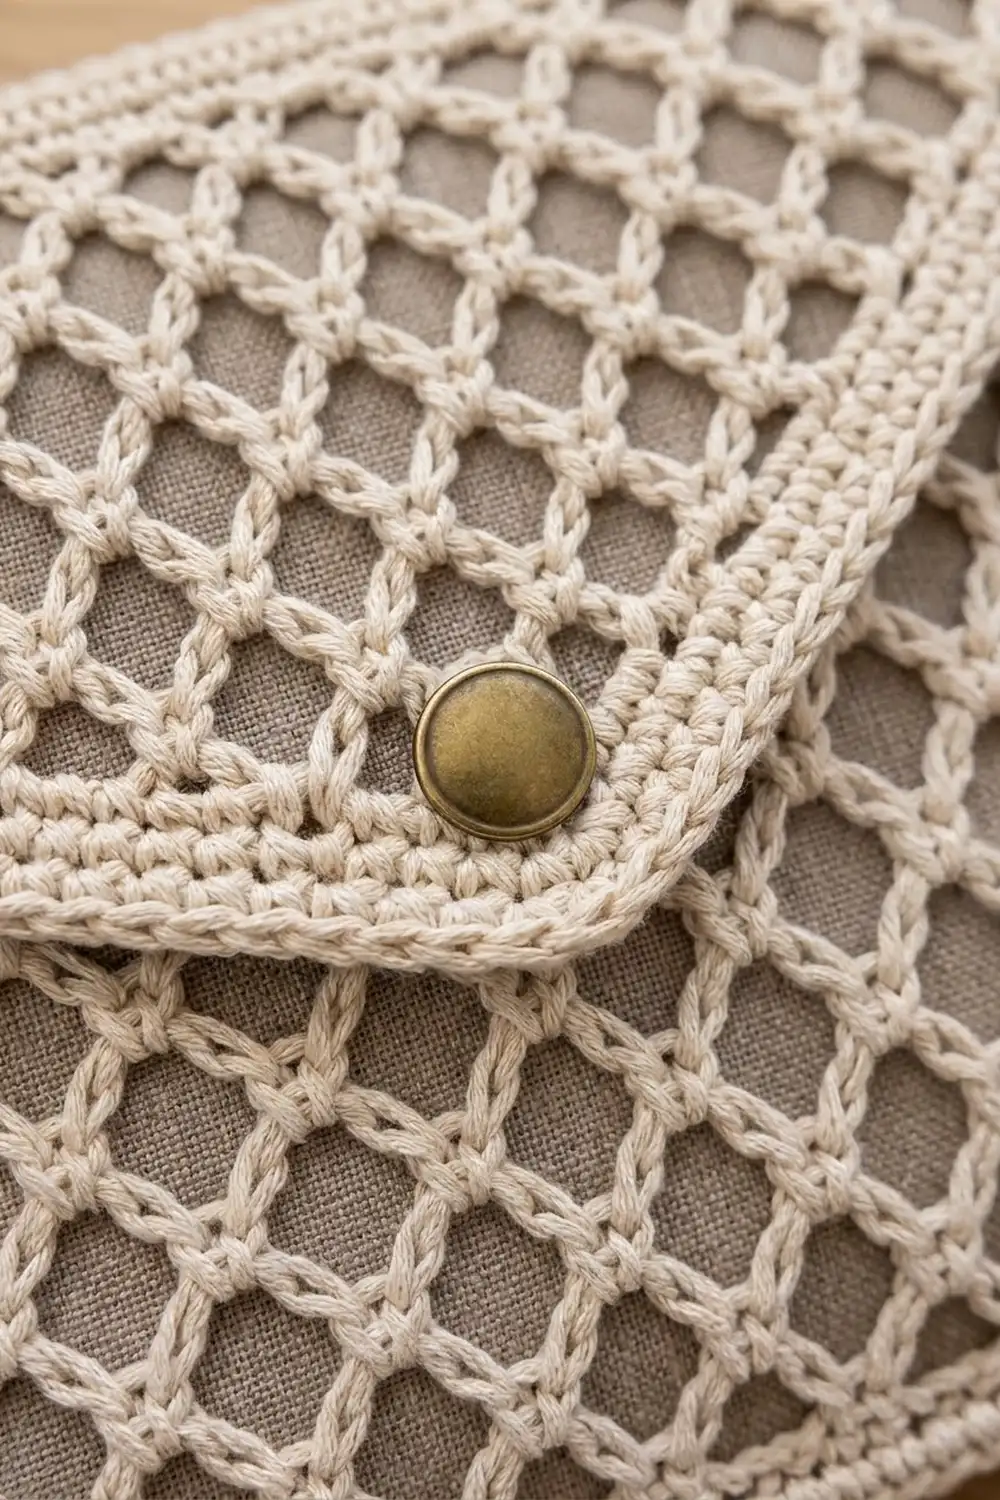
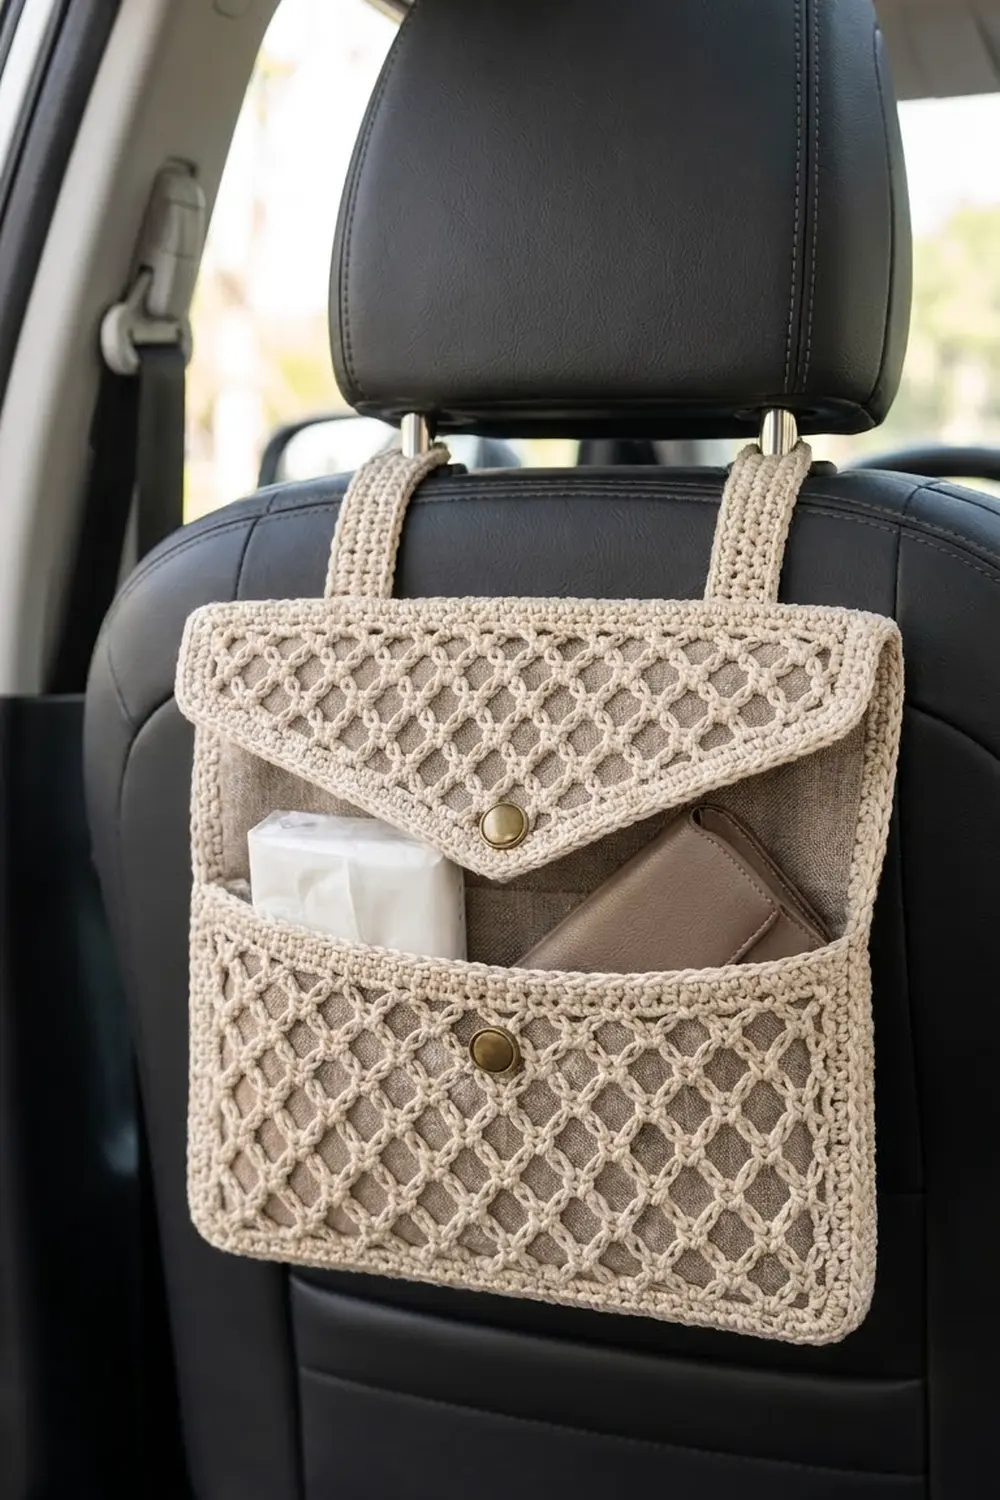
The Lattice Lane Car Seat Organizer hangs from the headrest posts and keeps tissues, a wallet, a phone or a small notebook within easy reach. It is made of cream cotton yarn in an open diamond lattice. A taupe linen-look lining sits behind the lattice, so the diamonds stand out clearly.
The design has a front pocket, an envelope flap with a shallow V point and a brass button, and two solid straps. Each panel has a firm single crochet border with a corded edge, which keeps the shape crisp when the pocket is full.
This pattern uses US crochet terms. The finished organizer measures 12.75 in wide x 9.5 in tall (32.4 x 24.1 cm), not counting the straps.
You will crochet three lattice panels, add borders, line them with fabric, stack and sew them together, then attach the straps and the closure.
Finished Size and Construction
- Finished size: 12.75 x 9.5 in (32.4 x 24.1 cm), body only
- Skill level: Intermediate
- Terminology: US
- Yarn weight: Worsted (#4) cotton or cotton blend
- Hook: 4.0 mm (G-6)
- Number of pieces: 5 crocheted parts (back panel, pocket, flap, 2 straps) and 3 fabric linings
- Layout: pocket on the lower back panel, flap over the top, straps behind the top edge
- Back panel: 12.75 x 9.5 in (32.4 x 24.1 cm)
- Back panel before border: 11.25 x 8 in (28.6 x 20.3 cm)
- Pocket: 12.75 x 6.5 in (32.4 x 16.5 cm); 11.25 x 5 in (28.6 x 12.7 cm) before border
- Flap: 12.75 in (32.4 cm) wide, 2.5 in (6.4 cm) deep at the sides, 6.25 in (15.9 cm) deep at the point
- Border depth: 0.75 in (1.9 cm)
Materials
Yarn: Choose a smooth, tightly plied worsted cotton. The lattice depends on clear stitch definition, and cotton keeps the loops from stretching under load.
- Cream/ecru: 200 g (about 380 m / 416 yd)
- Back panel about 60 g, pocket about 40 g, flap about 40 g, straps about 20 g together
These quantities include a margin of about 40 g for your gauge swatch and any differences in tension.
Tools and notions:
- 4.0 mm (G-6) crochet hook
- Taupe linen or linen-look cotton fabric, 0.5 yd (45.7 cm)
- Matching sewing thread and a hand-sewing needle
- Tapestry needle
- One 0.75 in (1.9 cm) brass shank button
- One sew-on snap, 0.5 in (1.3 cm)
- Locking stitch markers
- Rust-proof pins and a blocking mat
- Measuring tape
Abbreviations (US Terms)
- ch – chain
- sc – single crochet
- sl st – slip stitch
- st(s) – stitch(es)
- sk – skip
- rep – repeat
- RS / WS – right side / wrong side
- ch-5 loop – the space under a chain-5
- rev sc – reverse single crochet
Special stitch: Reverse single crochet (rev sc). Work from left to right (right to left if you are left-handed). Insert the hook into the next stitch to the right, yarn over, pull up a loop, yarn over and pull through both loops on the hook. This makes the corded outer edge.
Lattice net: This is rows of ch-5 loops, each anchored with an sc in the center of a loop on the row below. When stretched open, the loops form diamonds.
Gauge and Checkpoints
- Solid sc: 16 sc x 18 rows = 4 in (10.2 cm)
- Lattice: 4 foundation sc = 1 in (2.5 cm); 1 ch-5 loop repeat = 1 in (2.5 cm); 2 lattice rows = 1 in (2.5 cm)
Make the pocket first as your test piece. It is the smallest panel and uses every technique except the V shaping.
- Checkpoint 1: pocket before border = 11.25 x 5 in (28.6 x 12.7 cm), measured lightly stretched.
- Checkpoint 2: pocket after border = 12.75 x 6.5 in (32.4 x 16.5 cm).
If your piece is too big, go down to a 3.75 mm hook. If it is too small, go up to a 4.5 mm hook. Width depends mostly on the foundation and border, so check those first. If only the height is off, loosen or tighten the ch-5 loops.
Back Panel
Foundation: Ch 46. Sc in 2nd ch from hook and in each ch across. Turn. (45 sc)
Row 1 (RS): Ch 1, sc in first sc, *ch 5, sk 3 sc, sc in next sc; rep from * across. Turn. (12 sc, 11 ch-5 loops)
Row 2: Ch 5 (counts as a half loop), sc in first ch-5 loop, *ch 5, sc in next ch-5 loop; rep from * across, ch 2, dc in last sc. Turn. (11 sc, 10 full loops plus 2 half loops)
Row 3: Ch 1, sc in the dc, *ch 5, sc in next ch-5 loop; rep from * across, ending ch 5, sc in 3rd ch of the turning ch. Turn. (12 sc, 11 ch-5 loops)
Rows 4–15: Repeat Rows 2–3 six more times. (Row 15 has 12 sc and 11 ch-5 loops)
Closing Row: Ch 1, sc in first sc, *3 sc in next ch-5 loop, sc in next sc; rep from * across. (1 + 11 x 4 = 45 sc)
Checkpoint: 11.25 x 8 in (28.6 x 20.3 cm). Do not fasten off.
Front Pocket
Work the Foundation and Rows 1–3 as for the back panel. Then repeat Rows 2–3 three more times, for 9 lattice rows in total. Finish with the Closing Row (45 sc).
Checkpoint: 11.25 x 5 in (28.6 x 12.7 cm).
Envelope Flap
The flap is worked from the top edge down. The V point is shaped by dropping chain loops at each end of the row.
Foundation and Rows 1–3: Work as for the back panel. (Row 3: 12 sc, 11 ch-5 loops)
Row 4: Turn, sl st in each of the first 3 ch of the first loop, ch 1, sc in the same loop. *Ch 5, sc in next loop; rep from * to the last loop. Turn. (11 sc, 10 loops)
Row 5: Turn, sl st across the first loop to its center, ch 1, sc in the same loop, then sl st across to the center of the 2nd loop. Remove the sc you just made from your count; the row starts here. Ch 1, sc in the 2nd loop, *ch 5, sc in next loop; rep from * to the 2nd-to-last loop, and leave the last loop unworked. Turn. (8 sc, 7 loops)
Row 6: Work as Row 4, with sc in loops 1 through 7. (7 sc, 6 loops)
Row 7: Work as Row 5, with sc in loops 2 through 5. (4 sc, 3 loops)
Row 8: Work as Row 4. (3 sc, 2 loops)
Row 9: Work as Row 4. (2 sc, 1 loop) Do not fasten off.
Why the V works: Rows 4, 6, 8 and 9 move each edge inward by 0.5 in (1.3 cm), and Rows 5 and 7 move it by 1.5 in (3.8 cm). That adds up to 5 in (12.7 cm) per side. The single loop left in Row 9 sits exactly at the center of the flap. The six shaping rows add 3 in (7.6 cm) of depth.
Checkpoint: 11.25 in (28.6 cm) wide; 1.75 in (4.4 cm) deep at the sides; 4.75 in (12.1 cm) deep at the tip.
Straps (Make 2)
Foundation: Ch 7. Sc in 2nd ch from hook and in each ch across. Turn. (6 sc)
Rows 2–54: Ch 1, sc in each sc across. Turn. (6 sc)
Fasten off, leaving a 12 in (30.5 cm) tail for sewing.
Checkpoint: 1.5 x 12 in (3.8 x 30.5 cm).
Make All Pieces
| Part | Qty | Color | Finished size |
|---|---|---|---|
| Back panel | 1 | Cream | 12.75 x 9.5 in (32.4 x 24.1 cm) |
| Front pocket | 1 | Cream | 12.75 x 6.5 in (32.4 x 16.5 cm) |
| Flap | 1 | Cream | 12.75 x 6.25 in (32.4 x 15.9 cm) |
| Strap | 2 | Cream | 1.5 x 12 in (3.8 x 30.5 cm) |
Layout (front view):
   [STRAP]             [STRAP]
+-----------------------------+
|  FLAP (top edge = top)      |
|   \                     /   |
|     \       (o)       /     |   <- button 0.5 in above tip
|-------------V---------------|   <- pocket top, 3 in from top
|  POCKET                     |
|                             |
+-----------------------------+
     BACK PANEL behind all
Border
Border gauge: 4 sc = 1 in (2.5 cm), and each round is 0.25 in (0.6 cm) deep. Three rounds give a 0.75 in (1.9 cm) border.
In the counts below, “per side” runs from one corner center stitch to the next and includes both corner centers.
Back Panel Border
Rnd 1: Continuing from the Closing Row, ch 1. Work 3 sc in the first st (corner), sc in each of the next 43 sts, and 3 sc in the last st (corner). Work 30 sc down the side, 2 sc in the end of each lattice row. Work 3 sc in the first foundation st, sc in each of the next 43, and 3 sc in the last. Work 30 sc up the second side. Join with a sl st. (158 sts: top and bottom 47 each, sides 34 each)
Rnd 2: Ch 1, sc in each st around, with 3 sc in each corner center. Join. (166 sts: top and bottom 49 each, sides 36 each)
Rnd 3: Ch 1, rev sc in each st around. Join and fasten off. (166 rev sc)
Why the math works: After Rnd 2, 49 sts at 4 per inch = 12.25 in (31.1 cm), and 36 sts = 9 in (22.9 cm). The rev sc edge adds 0.25 in (0.6 cm) on every side, which gives 12.75 x 9.5 in (32.4 x 24.1 cm).
Pocket Border
Rnd 1: Work as for the back panel, but with 18 sc along each side (2 per lattice row). (134 sts: top and bottom 47 each, sides 22 each)
Rnd 2: (142 sts: top and bottom 49 each, sides 24 each)
Rnd 3: Rev sc around. (142 rev sc)
Check: 24 sts = 6 in (15.2 cm), plus the edge = 6.5 in (16.5 cm).
Flap Border
Rnd 1: Ch 1. Work the top edge as for the back panel (3 sc, 43 sc, 3 sc); the top edge is the foundation. Then work:
– 6 sc down the straight side (2 per row for Rows 1–3)
– 24 sc evenly along the diagonal edge, about 4 per shaping row, worked around the exposed loops and row-end sc
– 3 sc in the tip loop
– 24 sc up the second diagonal
– 6 sc up the second straight side
Join. Where the straight side meets the diagonal, work 1 sc only; the angle is shallow enough to lie flat. (49 + 12 + 48 + 3 = 112 sts)
Rnd 2: Sc around, with 3 sc in each top corner center and 3 sc in the tip center. (118 sts; the top edge is 49 between corner centers)
Rnd 3: Rev sc around. (118 rev sc)
Why the math works: Each diagonal measures about 5.83 in (14.8 cm), so it needs about 23.3 sc. Working 24 sc adds a little ease, which keeps the edge from pulling in when you block it.
Lining
Block all the crocheted panels first (see Final Blocking). Then cut the fabric:
- Back panel lining: cut 12.75 x 9.5 in (32.4 x 24.1 cm). Press under 0.5 in (1.3 cm) on all sides, so it finishes at 11.75 x 8.5 in (29.8 x 21.6 cm).
- Pocket lining: cut 12.75 x 6.5 in (32.4 x 16.5 cm). It finishes at 11.75 x 5.5 in (29.8 x 14.0 cm).
- Flap lining: trace the flap mesh and add 0.5 in (1.3 cm) all around.
Slip-stitch the pocket and flap linings to the WS of their lattice, along the inner edge of border Rnd 1, so the taupe fabric shows through the diamonds.
Sew the back panel lining to the RS of the back panel. This gives the inside of the pocket a smooth fabric surface that will not snag your belongings.
Joining
Method: Whipstitch with the tail yarn, working through Rnd 2 sts just inside the rev sc edge.
- Pocket to back: Place the pocket on the back panel with the bottom edges aligned. Join the 49 bottom sts to the 49 bottom sts, one stitch to one stitch. Then join each pocket side (24 sts) to the lowest 24 of the back panel’s 36 side sts; the bottom corner center is shared. Leave the pocket top open. The two rev sc ridges stack into a thick, rounded edge.
- Flap to back: Lay the flap RS up over the top of the back panel. Whipstitch its 49 top sts to the back panel’s 49 top sts.
- Straps: On the WS of the back panel, place one strap over the top-edge Rnd 2 sts 8–13 and the other over sts 37–42. Both straps sit 1.75 in (4.4 cm) in from the sides. Overlap each strap end 1.5 in (3.8 cm) onto the panel, fold the strap into a loop, and bring its other end down to the same spot. Sew around all edges.
- Closure: Sew the button 0.5 in (1.3 cm) above the flap tip. Sew the snap halves behind the button and onto the matching spot on the pocket.
Tension: Pull each whipstitch snug, but not so tight that the border puckers. Both edges should stay the same length.
Size checkpoint: The assembled body measures 12.75 x 9.5 in (32.4 x 24.1 cm). The pocket top sits 3 in (7.6 cm) below the top edge, and the flap overlaps the pocket by 3.25 in (8.3 cm).
Final Blocking
- Before lining, soak each crocheted panel in cool water for 10 minutes.
- Gently press out the water in a towel. Do not wring.
- Pin each panel to its finished size on the mat, stretching the lattice evenly so the diamonds open.
- Pin the flap point and the straight-to-diagonal bends crisply.
- Let the panels dry completely, then line and assemble.
- Press the finished organizer lightly through a cloth, avoiding the button.
Final Quality-Control Checklist
- Body is 12.75 x 9.5 in (32.4 x 24.1 cm)
- Back panel Rnd 2 has 166 sts, pocket Rnd 2 has 142, flap Rnd 2 has 118
- Diamonds are even, with no twisted loops
- Flap tip is centered and the button sits over the snap
- Lining is flat and its stitches don’t show on the RS
- Straps are level, 1.75 in (4.4 cm) from each side
- All ends are woven in
Troubleshooting
- Diamonds lean: Your chains are uneven. Count each ch-5 carefully and keep the same tension.
- Border ruffles: Your tension is too loose or you added extra sts. Recount the per-side numbers.
- Border cups: You worked too few row-end sts. Use exactly 2 per lattice row.
- Flap tip is off-center: Recount the loops in Rows 4–9.
- Pocket sags: Use a stiffer lining or add lightweight interfacing.
Care
Spot clean, or hand wash cool and lay flat to dry. Remove the organizer from the seat before washing and reshape it while damp.
Final Notes
The measurement chain runs from one number to the next. With 4 sc to 1 in, the 45-st foundation gives an 11.25 in (28.6 cm) lattice. The 0.75 in (1.9 cm) border brings it to 12.75 in (32.4 cm). The pocket’s 9 lattice rows and the back panel’s 15 rows set heights of 6.5 in (16.5 cm) and 9.5 in (24.1 cm), and the six shaping rows give the flap its V. If you check the pocket against its two checkpoints before moving on, every later piece will match it.
Happy crocheting!