
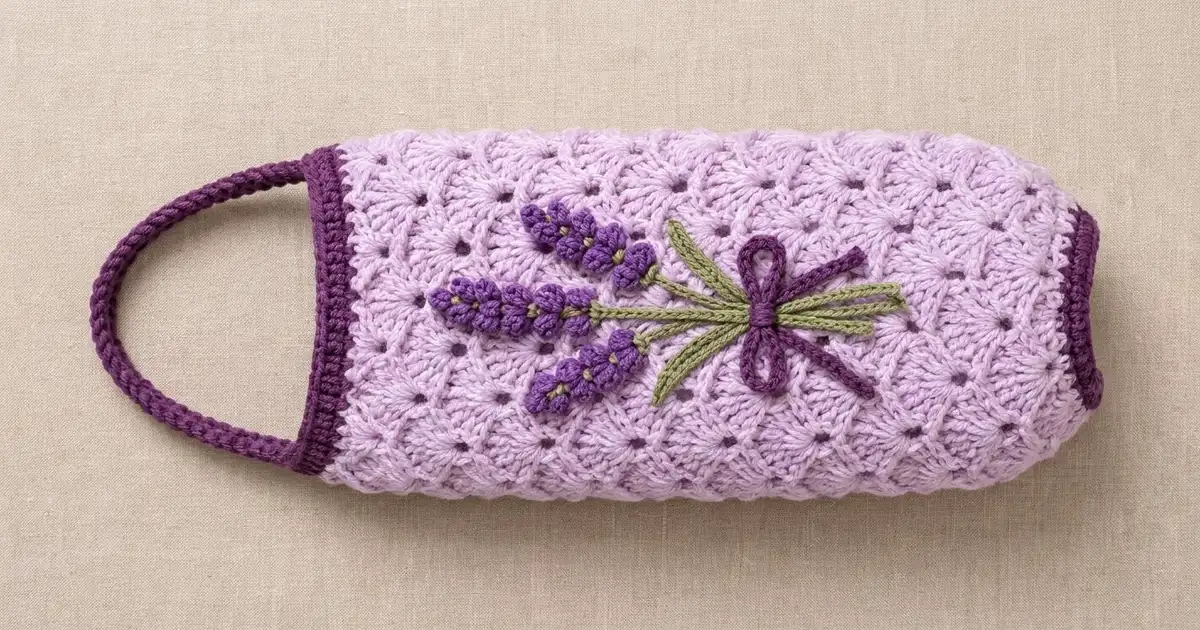
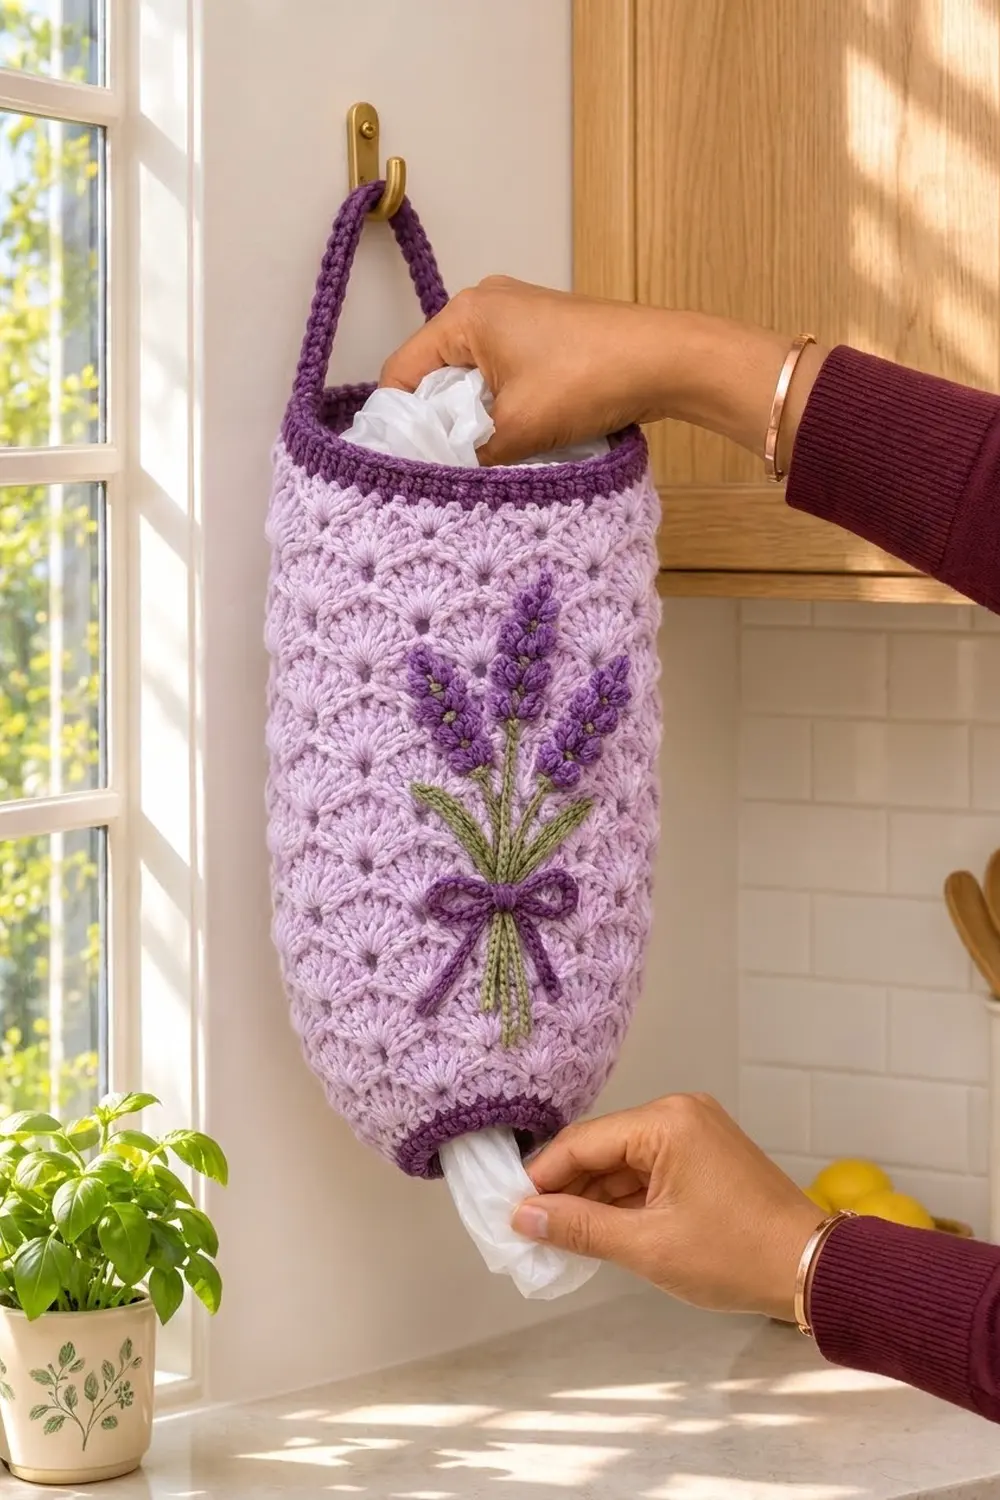
This bag holder turns a pile of plastic grocery bags into something nice to look at. It’s a soft lilac tube worked in an offset shell stitch. The shells stack into gentle scallops with small eyelets between them.
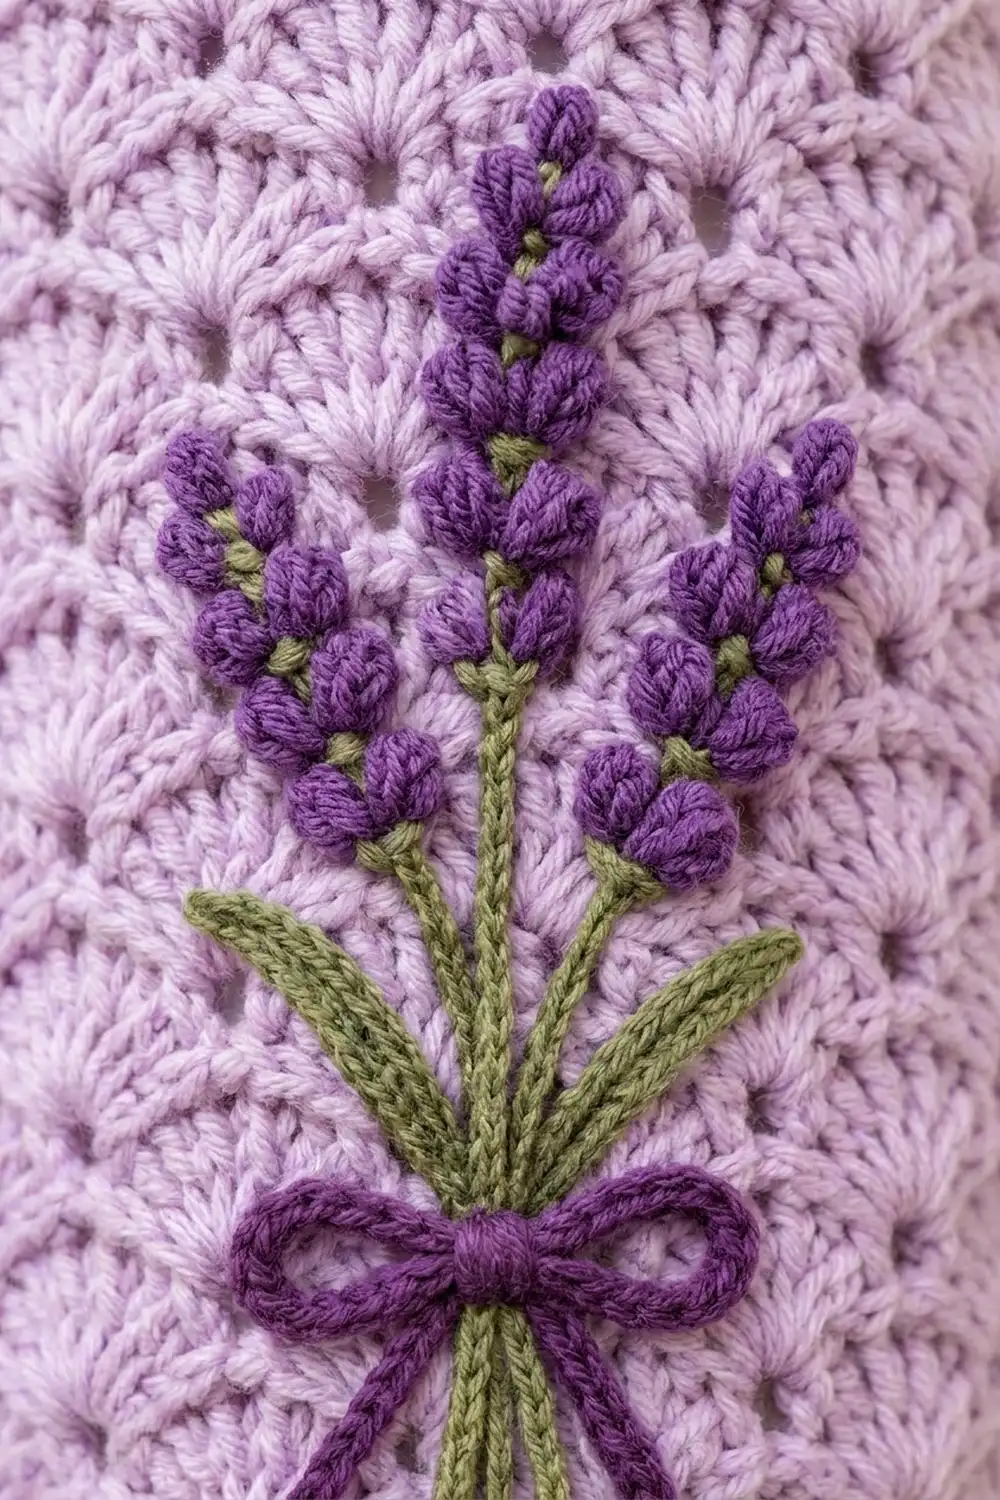
Dark plum bands finish both openings, and a sturdy plum strap hangs it from a hook or cabinet knob. A raised lavender bouquet with bumpy purple spikes, green stems, two leaves and a little tied bow gives it a cottage-kitchen look.
The pattern uses US crochet terms. The finished tube is 16.25 in (41.3 cm) tall and 6 in (15.2 cm) wide when flat. The strap adds about 4.5 in (11.4 cm) of hanging loop.
You work the holder from the bottom up in joined rounds. First comes a narrow plum band for the dispensing opening. Next, three lilac increase rounds widen it into the tube, followed by 18 shell rounds. Last, a plum top band levels the scallops, and the strap is worked straight off that band. The bouquet pieces are made separately and sewn onto the front.
Finished Size and Construction
- Finished size: 16.25 in (41.3 cm) tall x 6 in (15.2 cm) wide flat, plus a 10 in (25.4 cm) strap
- Skill level: Easy-Intermediate
- Terminology: US
- Yarn weight: Worsted (#4)
- Hook: 5.0 mm (H-8)
- Number of pieces: 1 main body (tube with strap worked on), plus 13 small appliqué pieces
- Layout: Single seamless tube, bouquet centered on the front
- Circumference: 12 in (30.5 cm), which is 48 stitches
- Size before top band: 15.25 in (38.7 cm) tall
- Band depth: 1 in (2.5 cm) at top and bottom
Materials
Use a smooth worsted-weight acrylic or cotton blend. Acrylic stays springy and stands up to constant bag-pulling. Cotton gives crisper shells but stretches a little more. The amounts below assume roughly 180 m per 100 g.
- Lilac (main color): 150 g, about 270 m
- Dark plum (bands, strap, flower spikes, bow): 50 g, about 90 m
- Sage green (stems, leaves): 15 g, about 27 m
All quantities include a margin of about 15%, so you have enough for a gauge swatch and small corrections.
Tools:
– 5.0 mm (H-8) crochet hook
– Tapestry needle
– 4 stitch markers
– Rust-proof pins
– Measuring tape
– Scissors
Abbreviations (US Terms)
- ch – chain
- sl st – slip stitch
- sc – single crochet
- hdc – half double crochet
- dc – double crochet
- sk – skip
- st(s) – stitch(es)
- inc – 2 sc in same st
Special stitches:
- Shell: 5 dc in the same stitch.
- Bobble: [Yarn over, insert hook in st, yarn over and pull up a loop, yarn over and pull through 2 loops] 3 times in the same st. Then yarn over and pull through all 4 loops on hook.
- Bud: (Ch 2, bobble, ch 2, sl st) all in the same st.
Gauge and Checkpoints
Gauge:
– Single crochet: 16 sc x 16 rounds = 4 in (10.2 cm)
– Shell pattern: 2 repeats (12 sts) = 3 in (7.6 cm) wide; 4 shell rounds = 3 in (7.6 cm) tall
Treat the bottom band as your test piece. After Round 4, lay it flat and measure before going further.
Checkpoints:
– After Round 4: circumference 7.5 in (19.1 cm), which is 3.75 in (9.5 cm) flat; height 1 in (2.5 cm)
– After Round 7: circumference 12 in (30.5 cm), which is 6 in (15.2 cm) flat; height 1.75 in (4.4 cm)
– After Round 15: height 7.75 in (19.7 cm)
– After Round 25: height 15.25 in (38.7 cm)
– After Round 29: height 16.25 in (41.3 cm)
If your piece is too big, change down half a hook size (4.5 mm). If it is too small, change up to 5.5 mm. Don’t add or remove stitches: the shell pattern needs exactly 48 stitches (8 repeats of 6).
Main Body
Bottom Band (dark plum)
Foundation: Ch 30. Join with a sl st to the first ch, taking care not to twist the chain.
Round 1: Ch 1, sc in each ch around. Join with a sl st to the first sc. (30 sc)
Rounds 2–4: Ch 1, sc in each st around, join. (30 sc)
Fasten off the plum. The band is now 1 in (2.5 cm) tall with 15 sts on each flat side.
Increase Rounds (lilac)
Round 5: Join lilac. Ch 1, [sc in next 4 sts, inc] 6 times, join. (36 sc)
Round 6: Ch 1, [sc in next 5 sts, inc] 6 times, join. (42 sc)
Round 7: Ch 1, [sc in next 6 sts, inc] 6 times, join. (48 sc)
These three rounds give the rounded taper at the bottom of the holder. You now have 24 sts on each flat side.
Shell Body (lilac)
The shell body alternates two rounds. Round A has full shells. Round B shifts the shells over by half a repeat, so the scallops stack like fish scales and leave a small eyelet at the base of each shell.
Round 8 (Round A): Ch 1, sc in first st, [sk 2, shell in next st, sk 2, sc in next st] 7 times, sk 2, shell in next st, sk 2, join with a sl st to the first sc.
(8 shells + 8 sc = 48 sts)
Round 9 (Round B): Ch 3 (counts as dc), 2 dc in the same st, [sk 2 dc, sc in the center dc of the shell, sk 2 dc, shell in next sc] 7 times, sk 2 dc, sc in center dc, sk 2 dc, 2 dc in the first st (where the ch-3 sits), join with a sl st to the top of the ch-3.
(7 full shells + 1 split shell of 3 + 2 sts, + 8 sc = 48 sts)
Round 10 (Round A): Ch 1, sc in the top of the ch-3 (the center of the split shell), [sk 2 dc, shell in next sc, sk 2 dc, sc in center dc] 7 times, sk 2 dc, shell in next sc, sk last 2 dc, join to the first sc.
(48 sts)
Rounds 11–25: Keep alternating Round B (odd rounds) and Round A (even rounds). Finish with Round 25, which is a Round B.
(48 sts every round)
You now have 18 shell rounds, about 13.5 in (34.3 cm) of shell fabric. The total height should be 15.25 in (38.7 cm). Fasten off the lilac.
Border: Top Band and Strap
The top band works as this piece’s border. It levels the uneven shell edge into a firm rim that holds its shape when you push bags in.
Border gauge: 16 sc = 4 in (10.2 cm), the same as the bottom band.
Round 26 (conversion round, dark plum): Join plum in the top of the ch-3.
– Ch 1. Sc in the same st and in the next dc, hdc in next dc, dc in next sc, hdc in next dc.
– [Sc in next 3 dc, hdc in next dc, dc in next sc, hdc in next dc] 7 times.
– Sc in the last dc, join.
Count: 48 sts worked 1 per existing stitch + 0 extra = 48 sts.
The taller dc stitches fill the low points over the sc dips. The sc stitches sit over the high shell centers, so the rim comes out level.
Rounds 27–29: Ch 1, sc in each st around, join. (48 sc)
Per-side check: Flatten the tube with the bouquet area centered. You should have 24 sts on each flat side, front and back. 24 sts at 4 sts per inch gives 6 in (15.2 cm). The band matches the shell body because the shell gauge (12 sts = 3 in) and the sc gauge (16 sts = 4 in) both work out to 4 sts per inch. Neither band flares or pulls in.
Do not fasten off.
Strap
Row 1: Ch 1, sc in the next 4 sts. (4 sc) Place these 4 sts at one side fold of the flattened tube.
Rows 2–40: Ch 1, turn, sc in each st across. (4 sc)
The strap is now 10 in (25.4 cm) long and 1 in (2.5 cm) wide. Count 24 sts around from the start of the strap to find the 4 sts at the opposite fold, sts 25–28. Whipstitch the end of the strap to those 4 sts on both the inside and the outside so it holds firmly. Weave in the ends.
Lavender Bouquet Appliqué
The bouquet has 5 flower spikes, 5 stems, 2 leaves and 1 bow. Leave a 10 in (25.4 cm) tail on each piece for sewing.
Flower Spikes (dark plum, make 5)
- Ch 9.
- Side 1: Sl st in the 2nd ch from the hook and work a bud in the same ch. [Sk 1 ch, bud in next ch] 3 times, then sl st in the last ch. (4 buds)
- Side 2: Rotate the piece to work along the free loops of the foundation chain. Sl st in each of the 7 remaining loops, working a bud into loops 1, 3, 5 and 7. (4 buds)
Each spike has 8 buds and is about 2 in (5.1 cm) long. The buds sit in pairs, giving the plump, beaded lavender look.
Stems (sage green)
- Center stem (make 1): Ch 25, sl st in the back bump of the 2nd ch from the hook and each ch across. (24 sl st) It is about 5.5 in (14.0 cm) long.
- Middle stems (make 2): Ch 22, work the same way. (21 sl st) Each is about 5 in (12.7 cm) long.
- Outer stems (make 2): Ch 20, work the same way. (19 sl st) Each is about 4.5 in (11.4 cm) long.
Leaves (sage green, make 2)
Ch 13.
- Side 1: Sl st in the 2nd ch from the hook, sc in the next 2 ch, hdc in the next 3 ch, dc in the next 3 ch, hdc in the next 2 ch, then (sc, ch 2, sc) in the last ch. (12 ch used)
- Side 2: Rotate and work along the 11 free loops: hdc in the next 2, dc in the next 3, hdc in the next 3, sc in the next 2, sl st in the last.
Each leaf is about 3 in (7.6 cm) long.
Bow (dark plum, make 1)
Ch 40, then sl st in the back bump of the 2nd ch from the hook and each ch across. (39 sl st) The cord is about 9 in (22.9 cm) long. Tie it into a small bow with two loops and two tails.
Assembly
The finished bouquet is about 7.5 in (19.1 cm) tall and 4 in (10.2 cm) wide.
- Flatten the tube with the strap seams at the side folds. Center the bouquet on the front, with the stem ends about 3 in (7.6 cm) above the bottom band.
- Stems: Pin the 5 stems in a fan, with the center stem tallest and the stems meeting at the bottom. The flowers spread out at the top.
- Spikes: Sew one flower spike to the top of each stem, overlapping the stem by 0.25 in (0.6 cm). Tack down only the spine of each spike so the buds stay raised.
- Leaves: Sew the 2 leaves angling outward from the gathering point, one to each side, pointing upward.
- Bow: Sew the bow over the gathering point, about 2 in (5.1 cm) above the stem ends, and let the tails hang down over the stems. Tack each tail at its end.
Sew only through the front layer of the tube. Slip a piece of cardboard inside so you don’t catch the back.
Final Blocking
- Stuff the tube with a rolled towel so it is round and 6 in (15.2 cm) wide when pressed flat.
- Mist the shell body lightly with water. Keep the bouquet fairly dry so the buds stay plump.
- With your fingers, ease each shell round so the scallops sit evenly and the eyelets are open.
- Pin the top band level and check the height: 16.25 in (41.3 cm).
- Let it dry completely, at least 12 hours, before you remove the towel.
- Flatten the strap and pin it straight while it dries.
Final Quality-Control Checklist
- Every shell round has 8 shells and 48 sts.
- The bottom opening measures 7.5 in (19.1 cm) around.
- The body is 6 in (15.2 cm) wide flat with no twist in the shell columns.
- The top band sits level with no peaks over the shells.
- The strap is sewn to opposite folds on both the inside and the outside.
- All 5 spikes are raised, and the bouquet is centered on the front.
- Ends are woven in securely, especially at the strap seam.
Troubleshooting
The shells lean in a spiral. Join each round with a sl st, and start each round exactly as written: the ch-3 for Round B, the sc in the top of the ch-3 for Round A.
Your count is off by 1 or 2. Usually the last “sk 2” was missed. Count the 8 shells before joining.
The top band ruffles. You worked dc where hdc belonged in Round 26. Rework that round with the hdc–dc–hdc sequence over each dip.
Bags fall out of the bottom. Your bottom band is loose. Work it with a 4.5 mm hook, or work Round 4 in the back loops only.
The buds look flat. Pull each bobble snug before the closing ch 2, and don’t press the bouquet when you block.
Care
Hand wash in cool water and lay flat to dry, reshaping the scallops by hand. Don’t tumble dry: heat flattens the raised bouquet.
Final Notes
The measurement chain for the whole piece:
- Bottom band: 30 sts, 7.5 in (19.1 cm) around, 1 in (2.5 cm) tall
- Increase rounds: widen to 48 sts and 12 in (30.5 cm) around, which is 6 in (15.2 cm) flat
- Shell body: 18 rounds, 13.5 in (34.3 cm), bringing the height to 15.25 in (38.7 cm)
- Top band: 1 in (2.5 cm), for a finished 16.25 in (41.3 cm)
- Strap: 10 in (25.4 cm), giving about 4.5 in (11.4 cm) of hanging loop, for an overall hanging height of about 20.75 in (52.7 cm)
If you hit each checkpoint, the bouquet will fit and the holder will fill and dispense smoothly.
Happy crocheting!