

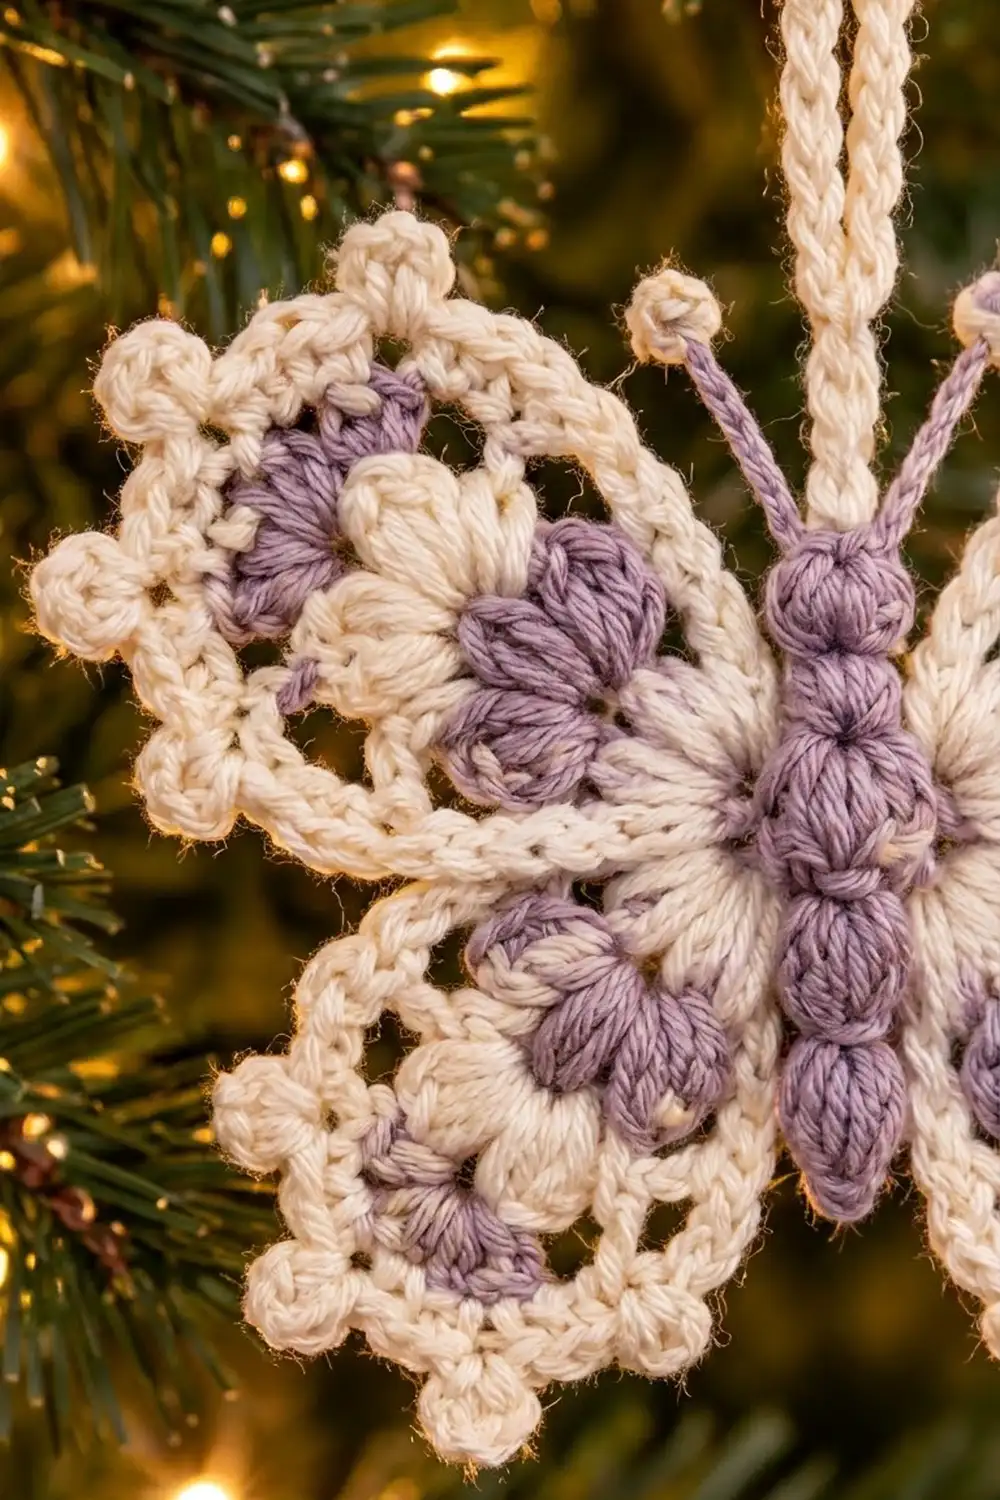
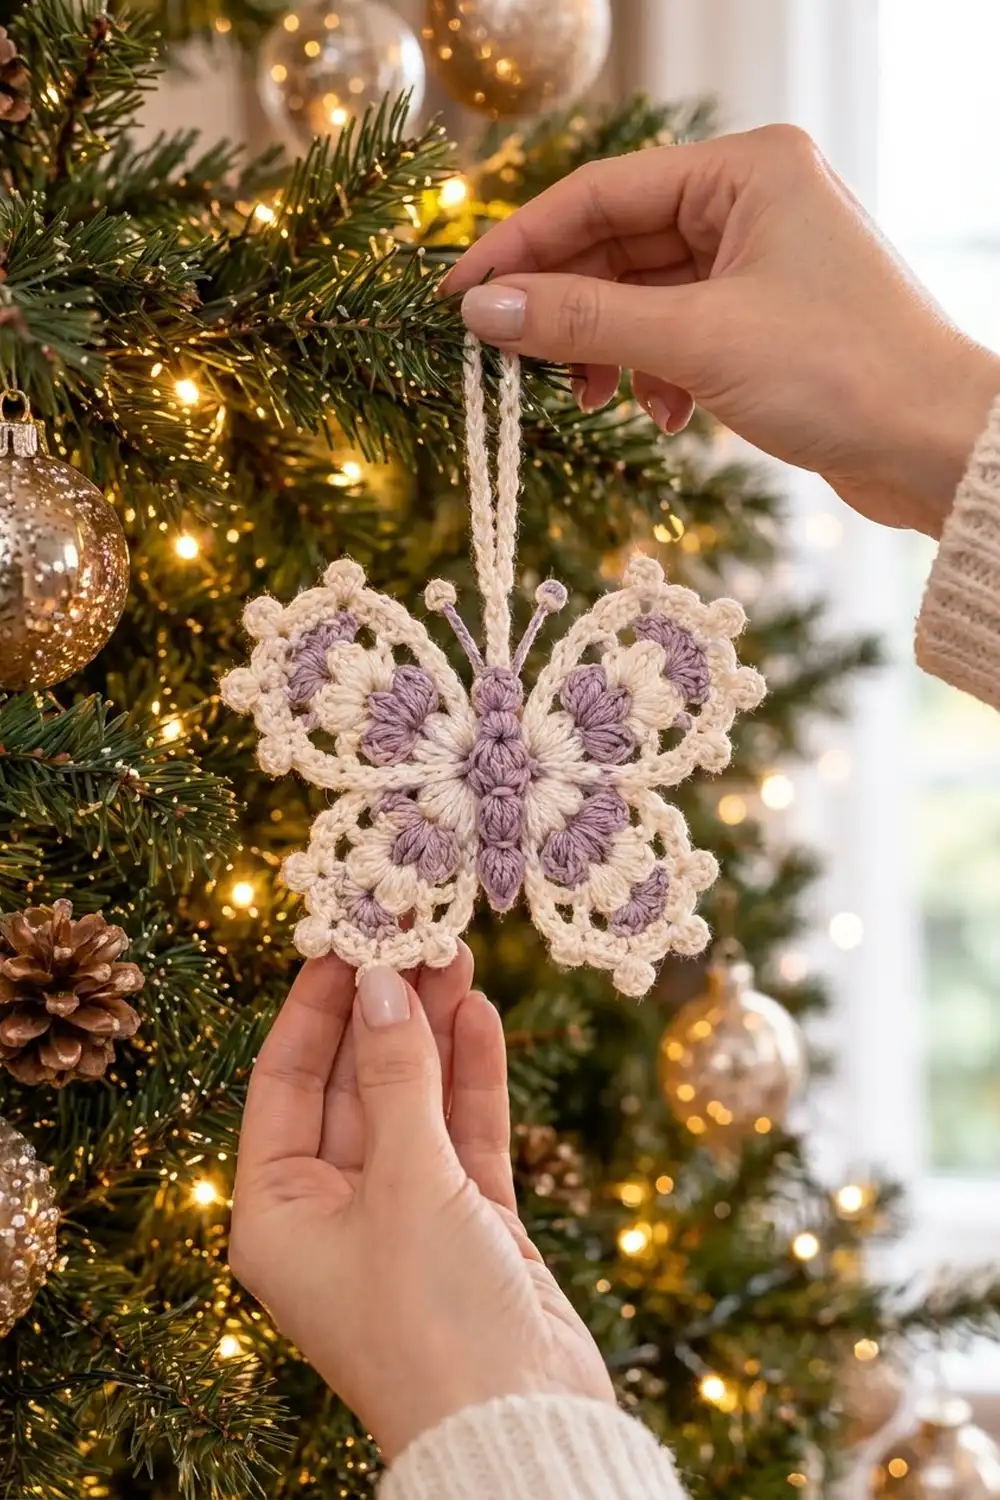
The Lavender Frost Butterfly is a lacy hanging ornament in soft cream with lavender accents. Each wing has a flower-like center. Lavender puffs form a ring, and plump cream puffs sit between them. Around that is an open chain ring, then a scalloped edge with a picot at the tip of every scallop.
The body is a column of five lavender puffs. Two short antennae end in small round knobs, and a textured cream cord loop lets you hang it on a tree, a window latch or a gift.
The pattern uses US crochet terms. The finished ornament measures about 5 in (12.7 cm) wide and 4 in (10.2 cm) tall. The loop adds about 3 in (7.6 cm).
You’ll make four round wing motifs, a puff-stitch body with antennae and a hanging cord. Then you sew the wings behind the body, tack the wings to each other and block the ornament flat.
Finished Size and Construction
- Finished size: 5 in (12.7 cm) wide x 4 in (10.2 cm) tall, plus a 3 in (7.6 cm) loop
- Skill level: Easy-intermediate
- Terminology: US crochet terms
- Yarn weight: DK / light (#3) cotton or cotton blend
- Hook: 3.5 mm (E-4)
- Number of pieces: 6 (2 upper wings, 2 lower wings, 1 body with antennae, 1 hanging cord)
- Layout: The upper wings sit beside the top half of the body and the lower wings beside the bottom half
- Piece size:
- Upper wing: 2.5 in (6.4 cm) across
- Lower wing: 2 in (5.1 cm) across
- Body: 0.5 in (1.3 cm) wide x 2.5 in (6.4 cm) long
- Size before border: Upper wing 2.1 in (5.3 cm), lower wing 1.6 in (4.1 cm)
- Border depth: 0.2 in (0.5 cm) on each side of a wing
Materials
Use a smooth mercerized or combed cotton in DK weight, about 2.2 m per gram. Cotton shows the puffs clearly, keeps the picots crisp and blocks flat.
- Cream (main color, MC): 20 g / 44 m, for the wing centers, cream puffs, lace and picot rounds, and the cord
- Lavender (contrast color, CC): 10 g / 22 m, for the inner wing puffs, the body and the antennae
These amounts include a margin of about 30 percent, so you won’t use them up on one ornament.
Tools:
- 3.5 mm (E-4) hook
- Tapestry needle
- Scissors
- Stitch marker
- Ruler
- Blocking mat and rustproof pins
- Spray bottle
- Diluted fabric stiffener (optional)
Abbreviations (US Terms)
- ch – chain
- sl st – slip stitch
- sc – single crochet
- hdc – half double crochet
- dc – double crochet
- sp(s) – space(s)
- st(s) – stitch(es)
- MC / CC – main color (cream) / contrast color (lavender)
Puff (wing puff): (Yarn over, insert hook, yarn over, pull up a loop to 0.5 in / 1.3 cm) 3 times, so you have 7 loops on the hook. Yarn over and pull through all 7 loops. Ch 1 to close. The closing ch doesn’t count as a stitch.
Body puff: Work like the wing puff, but pull up a loop 4 times, so you have 9 loops on the hook.
Picot: Ch 3, sl st in the 3rd ch from the hook.
Gauge and Checkpoints
The wings must match in size to sit evenly behind the body. Make one upper wing first and measure it lightly blocked.
| Piece | After Round 4 | After Round 5 | After Round 6 |
|---|---|---|---|
| Upper wing | 1.75 in (4.4 cm) | 2.1 in (5.3 cm) | 2.5 in (6.4 cm) |
| Lower wing | 1.4 in (3.6 cm) | 1.6 in (4.1 cm) | 2 in (5.1 cm) |
For the body, each puff segment should measure about 0.5 in (1.3 cm), so five segments make 2.5 in (6.4 cm).
Too big: Use a 3.25 mm (D-3) hook, or pull up shorter loops in the puffs.
Too small: Use a 3.75 mm (F-5) hook, or work the ch-5 loops a little looser.
A wing that is off by up to 0.1 in (0.3 cm) will block to size.
Upper Wing (Make 2)
Round 1 (MC): Make a magic ring. Ch 1, then work 8 sc in the ring. Pull the ring closed and sl st to the first sc. Fasten off. (8 sc)
Round 2 (CC): Join lavender with a sl st in any sc. Ch 2 (doesn’t count as a stitch). Work a puff in the same st, then ch 2. Puff in the next sc, ch 2. Repeat from * 6 more times. Sl st to the top of the first puff and fasten off. (8 puffs, 8 ch-2 sps)
Round 3 (MC): Join cream in any ch-2 sp. Ch 2 (doesn’t count). Work a puff in the same sp, then ch 3. Puff in the next ch-2 sp, ch 3. Repeat from * 6 more times. Sl st to the first puff. (8 puffs, 8 ch-3 sps)
Each cream puff now sits between two lavender puffs, giving the alternating petal look.
Round 4 (MC, conversion round): Ch 1. Work 1 sc in the top of the same puff and 4 sc in the next ch-3 sp. Sc in the next puff, 4 sc in the next ch-3 sp. Repeat from * 6 more times. Sl st to the first sc. (8 sc on puffs + 32 sc in sps = 40 sc)
Checkpoint: 1.75 in (4.4 cm).
Round 5 (MC, lace round): Ch 1. Sc in the same st, which sits on a puff. Ch 5 and skip the next 4 sc. Sc in the next sc, ch 5, skip the next 4 sc. Repeat from * 6 more times. Sl st to the first sc. (8 sc, 8 ch-5 loops)
Every sc lands on a cream puff, so each loop stays centered over a petal pair. Checkpoint: 2.1 in (5.3 cm).
Round 6 is in the Border section.
Lower Wing (Make 2)
Round 1 (MC): Make a magic ring. Ch 1, then work 6 sc in the ring. Sl st to the first sc and fasten off. (6 sc)
Round 2 (CC): Join lavender in any sc. Ch 2 (doesn’t count). Work a puff in the same st, then ch 2. Puff in the next sc, ch 2. Repeat from * 4 more times. Sl st to the first puff and fasten off. (6 puffs, 6 ch-2 sps)
Round 3 (MC): Join cream in any ch-2 sp. Ch 2 (doesn’t count). Work a puff in the same sp, then ch 3. Puff in the next ch-2 sp, ch 3. Repeat from * 4 more times. Sl st to the first puff. (6 puffs, 6 ch-3 sps)
Round 4 (MC, conversion round): Ch 1. Work 1 sc in the top of the same puff and 4 sc in the next ch-3 sp. Sc in the next puff, 4 sc in the next ch-3 sp. Repeat from * 4 more times. Sl st to the first sc. (6 sc on puffs + 24 sc in sps = 30 sc)
Checkpoint: 1.4 in (3.6 cm).
Round 5 (MC, lace round): Ch 1. Sc in the same st, ch 5 and skip the next 4 sc. Sc in the next sc, ch 5, skip the next 4 sc. Repeat from * 4 more times. Sl st to the first sc. (6 sc, 6 ch-5 loops)
Checkpoint: 1.6 in (4.1 cm).
Body with Antennae (Make 1)
Body (CC): Leave a 10 in (25.4 cm) tail. Ch 2, then work a body puff in the 2nd ch from the hook, including its closing ch 1. This puff is the head.
Ch 2, body puff in the 2nd ch from the hook. Repeat from * 3 more times. (5 body puffs)
The puffs stack into a column 2.5 in (6.4 cm) long. Ch 1 and fasten off, leaving a 6 in (15.2 cm) tail.
First antenna (CC): Join lavender with a sl st at the top of the head, just left of center. Ch 6. Work a wing puff in the 2nd ch from the hook; this is the knob. Sl st in each of the next 4 ch, then sl st into the head. (1 knob, 4 sl sts)
Second antenna: Sl st into the head just right of center and repeat the first antenna. Fasten off.
Each antenna measures about 0.75 in (1.9 cm). Thread the starting tail once through the base of the head and pull gently to round it.
Hanging Cord (Make 1)
Cord (MC): Leave an 8 in (20.3 cm) tail. Ch 50. Sl st in the back bump of the 2nd ch from the hook and in the back bump of each remaining ch. Fasten off, leaving an 8 in (20.3 cm) tail. (49 sl sts)
The cord measures about 6 in (15.2 cm) and has a braided texture. Folded in half, it makes a 3 in (7.6 cm) loop.
Make All Pieces
- Cream: Rounds 1 and 3–6 of all four wings, plus the cord
- Lavender: Round 2 of all four wings, plus the body and antennae
Layout grid (front view):
             [ Loop ]
        [Antenna][Antenna]
[Upper Wing L][Head  ][Upper Wing R]
[Upper Wing L][Puff 2][Upper Wing R]
[Upper Wing L][Puff 3][Upper Wing R]
[Lower Wing L][Puff 4][Lower Wing R]
[Lower Wing L][Puff 5][Lower Wing R]
All wings sit behind the body so the lavender column stays in front.
Joining
Method: Whipstitch from the back with cream yarn and a tapestry needle.
Stitch-to-stitch logic:
- Upper wings to body: Slide one scallop of each upper wing 0.25 in (0.6 cm) behind body puffs 2 and 3. Whipstitch that scallop’s dc, picot and dc to the back of the puffs with 4 stitches.
- Lower wings to body: Attach one scallop of each lower wing behind puffs 4 and 5 the same way.
- Upper wing to lower wing: On each side, overlap the upper wing’s lowest scallop and the lower wing’s top scallop by 0.5 in (1.3 cm). Match picot to picot and tack with 2 stitches.
- Loop: Fold the cord in half. Sew both ends behind the head, between the antennae, and down to the top of puff 2.
Tension: Keep each stitch snug, not tight. Over-tight sewing tilts the wings forward and bunches the body.
Size checkpoint:
- Width: 2.5 + 0.5 + 2.5 − 0.25 − 0.25 = 5 in (12.7 cm)
- Height: 2.5 + 2 − 0.5 = 4 in (10.2 cm)
If the ornament is lopsided, re-tack one wing with a different overlap.
Border
Round 6 is the scalloped picot border. Work it on every wing before joining.
Border gauge: One scallop covers about 1 in (2.5 cm) of the outer edge and adds 0.2 in (0.5 cm) of depth.
Upper wing, Round 6 (MC): Sl st into the first ch-5 loop and ch 1. In each ch-5 loop, work (sc, hdc, dc, picot, dc, hdc, sc). Sl st to the first sc and fasten off. (8 scallops = 48 sts + 8 picots)
Lower wing, Round 6 (MC): Work it the same way. (6 scallops = 36 sts + 6 picots)
Why the math works: Each loop is built on 5 sc from Round 4: 1 sc on a puff plus 4 sc in a space.
- Upper wing: 8 loops x 5 = 40 sc, which matches Round 4.
- Lower wing: 6 loops x 5 = 30 sc, which also matches.
Each scallop holds 6 sts and 1 picot, so the upper wing has 48 sts (8 x 6) and the lower wing has 36 sts (6 x 6). The border adds 0.2 in (0.5 cm) on each side:
- Upper wing: 2.1 in (5.3 cm) + 0.4 in (1.0 cm) = 2.5 in (6.4 cm)
- Lower wing: 1.6 in (4.1 cm) + 0.4 in (1.0 cm) = 2 in (5.1 cm)
Final Blocking
- Weave in all ends along stitches of the same color.
- Lay the ornament face down and spray it until it’s evenly damp. For a firmer ornament, brush on diluted stiffener instead.
- Turn it face up and pin it to 5 in (12.7 cm) x 4 in (10.2 cm).
- Pin each picot out to a point, using one pin per picot.
- Pin the outermost picot of each lower wing 0.1 in (0.3 cm) farther out to make a slight teardrop.
- Pinch the puffs and antenna knobs into shape.
- Let it dry for at least 8 hours, or 24 hours if you used stiffener.
Final Quality-Control Checklist
- Each upper wing has 8 lavender puffs, 8 cream puffs and 8 picots.
- Each lower wing has 6 lavender puffs, 6 cream puffs and 6 picots.
- The upper wings measure 2.5 in (6.4 cm) and the lower wings 2 in (5.1 cm).
- The body has 5 puffs and measures 2.5 in (6.4 cm).
- The antennae are equal in length, with round knobs.
- No sewing shows from the front.
- The ornament measures 5 in (12.7 cm) x 4 in (10.2 cm) and hangs level.
Troubleshooting
- Flat or uneven puffs: Pull every loop to the same height and keep the closing ch 1.
- Wing ruffles: The loops are too long. Work ch-4 loops or go down a hook size.
- Wing cups: Loosen your tension in Round 5.
- Picots disappear: Pin each picot firmly when blocking.
- Ornament hangs crooked: Re-center the loop on the head.
Care
Hand wash in cool water with mild soap, roll it in a towel to remove water, and dry it flat with the picots re-pinned. If you used stiffener, reapply it after washing.
Final Notes
Here’s how the measurements add up:
- Round 4: The wing centers measure 1.75 in (4.4 cm) and 1.4 in (3.6 cm).
- Round 5: The lace rounds bring them to 2.1 in (5.3 cm) and 1.6 in (4.1 cm).
- Round 6: The 0.2 in (0.5 cm) border finishes them at 2.5 in (6.4 cm) and 2 in (5.1 cm).
- Assembly: With the 2.5 in (6.4 cm) body and small overlaps, the ornament measures 5 in (12.7 cm) x 4 in (10.2 cm).
If each checkpoint matches, the finished butterfly will too.
Happy crocheting!