
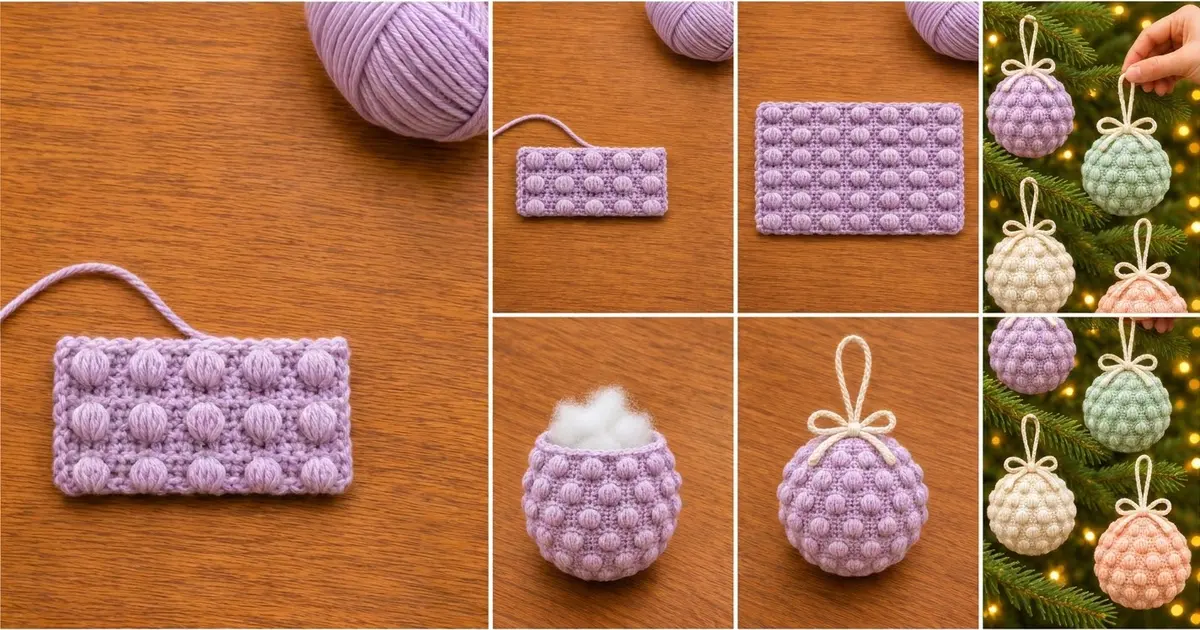
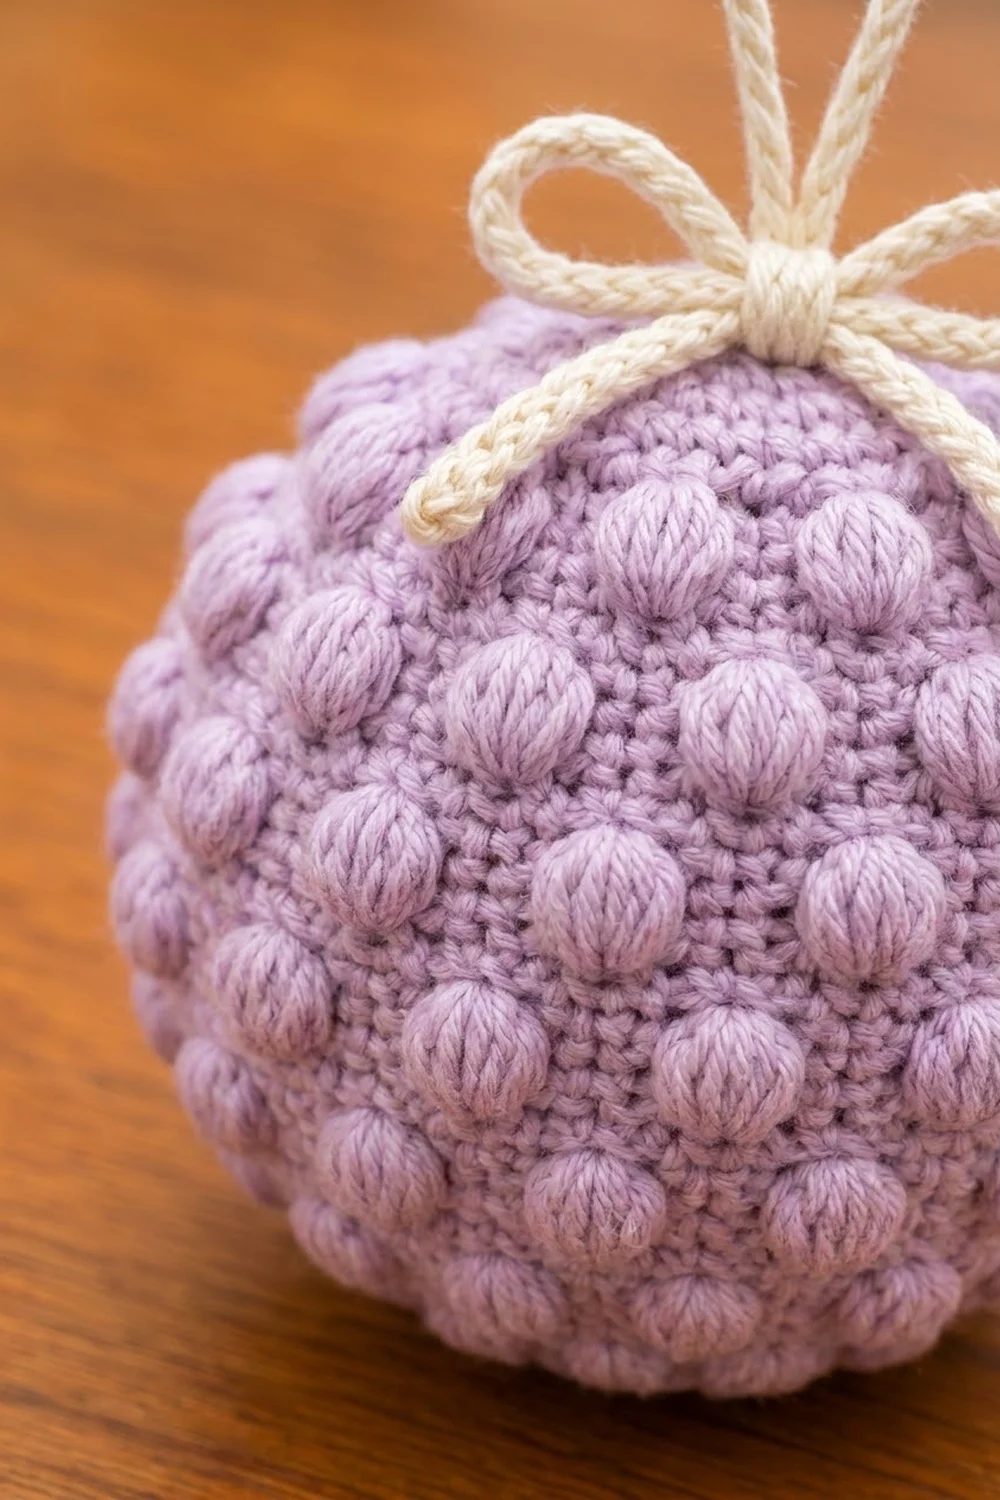
The Lavender Frost Puff Ball is a small, squishy Christmas ornament covered in neat rows of puff stitches. Seven columns of puffs go around the ball and six rows of puffs go from top to bottom, so the surface looks like a soft, bubbly grid. A cream cord loop and a little tied bow finish the top.
The sample is soft lavender with a cream hanger. Sage green, cream, and peach also look lovely, and a set of mixed pastels makes a calm, Scandinavian-style tree. This pattern uses US crochet terms throughout.
The finished ornament measures about 3 in (7.6 cm) in diameter once stuffed. The hanging loop adds about 2.5 in (6.4 cm) above the ball. One ornament takes an evening or less, so it’s easy to make a full set before the holidays.
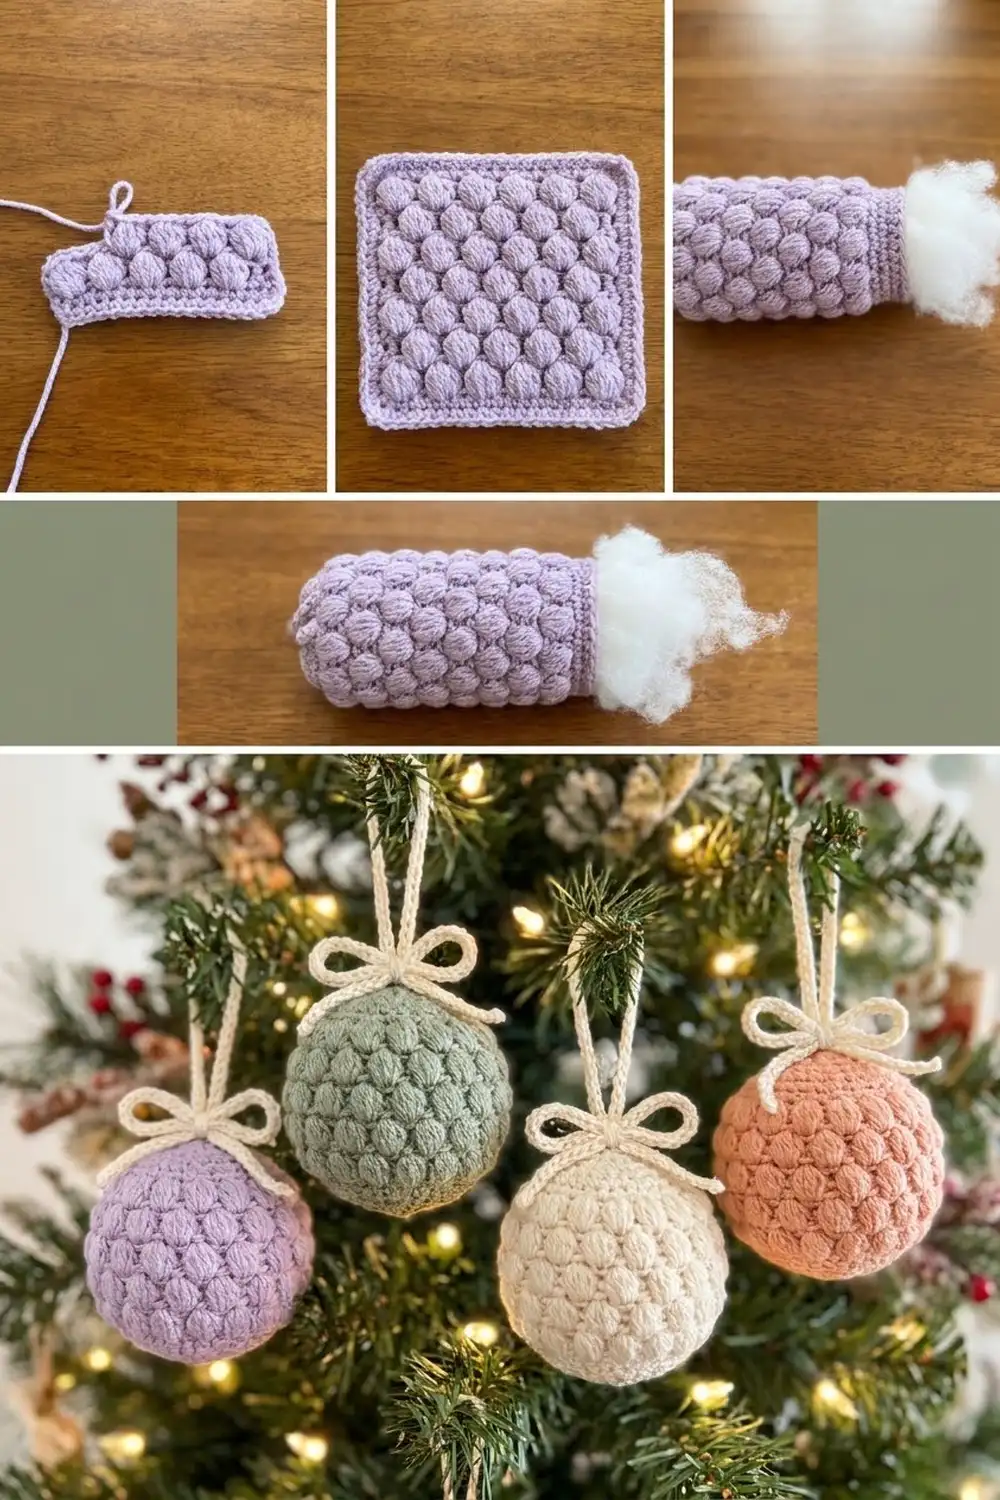
Construction is simple. You crochet one flat rectangle in rows, add one round of single crochet around the edge, and block it. Then you seam the short ends into a tube, gather one end shut, stuff it, and gather the other end. Finally you add the slip-stitch cord loop and bow.
Finished Size and Construction
- Finished size: about 3 in (7.6 cm) in diameter, stuffed
- Skill level: Easy-Intermediate
- Terminology: US crochet terms
- Yarn weight: worsted (#4)
- Hook: 4.0 mm (G-6)
- Number of pieces: 1 ball panel, plus 2 cream cords (loop and bow)
- Layout: 7 puffs across × 6 puff rows, in straight columns
- Panel size before border: 8.75 in × 5.4 in (22.2 cm × 13.7 cm)
- Panel size after border: 9.25 in × 5.9 in (23.5 cm × 15.0 cm)
- Border depth: about 0.25 in (0.6 cm) per edge, 1 round of sc
Materials
Use a smooth worsted-weight yarn. Acrylic, cotton blend, or wool blend all work. Avoid fuzzy or very splitty yarns, because they hide the puff shapes. A firm, slightly shiny yarn gives the clearest puffs.
- Lavender (main color): 25 g, about 50 m (55 yd)
- Cream (cord and bow): 5 g, about 10 m (11 yd)
- Polyester fiberfill: about 10 g
Tools:
– 4.0 mm (G-6) crochet hook
– Tapestry needle
– Scissors
– Stitch markers (2)
– Pins and a blocking mat or folded towel
– Spray bottle
All quantities include a small safety margin. Puff stitches use more yarn than plain stitches, so don’t cut your supply too close.
Abbreviations (US Terms)
- ch – chain
- sc – single crochet
- sl st – slip stitch
- st(s) – stitch(es)
- yo – yarn over
- RS / WS – right side / wrong side
- rep – repeat
Special stitch – Puff stitch (puff): (Yo, insert hook in the indicated st, yo and pull up a loop to about 0.5 in / 1.3 cm tall) 4 times, so you have 9 loops on the hook. Yo and pull through all 9 loops, then ch 1 to lock it. The closing ch-1 sits on top of the puff. It counts as the puff’s single stitch, and you work into it on the next row. The ch-1 does not count as an extra stitch.
Gauge and Checkpoints
Gauge in pattern: 16 sts and 20 rows = 4 in (10.2 cm), measured over the puff pattern.
There is only one panel, so the panel is your test. Work the first 12 rows and then stop to measure.
- After Row 4 (first puff row): the width should be 8.75 in (22.2 cm).
- After Row 12: the height should be about 2.4 in (6.1 cm).
- After Row 27: the panel should measure 8.75 in × 5.4 in (22.2 cm × 13.7 cm).
- After the border: the panel should measure 9.25 in × 5.9 in (23.5 cm × 15.0 cm).
Too big? Pull out the work and go down to a 3.75 mm (F-5) hook. A loose panel lets stuffing show between the stitches.
Too small? Go up to a 4.5 mm (US 7) hook. A smaller panel still makes a cute ornament, but it is harder to close neatly around the stuffing.
Pull each puff’s loops up to the same height. Even loops matter more than anything else in this pattern.
Ball Panel
With lavender, ch 36.
Row 1 (WS): Sc in the 2nd ch from hook and in each ch across. Turn. (35 sc)
Row 2 (RS): Ch 1 (does not count as a st here or in later rows), sc in each st across. Turn. (35 sc)
Row 3 (WS): Ch 1, sc in each st across. Turn. (35 sc)
Place a marker on the RS (the side facing you on Row 2) so you always know which side the puffs should pop toward.
Row 4 (RS, puff row): Ch 1, sc in the first 2 sts, puff in the next st, sc in the next 4 sts; rep from * 5 more times, puff in the next st, sc in the last 2 sts. Turn. (35 sts: 7 puffs + 28 sc)*
Check the count: 2 + (6 × 5) + 1 + 2 = 35. Each edge holds 2 sc. After seaming, those 2 + 2 add up to 4 sc between the last and first puff, the same spacing as everywhere else on the ball.
Row 5 (WS): Ch 1, sc in each st across, working into the closing ch-1 on top of each puff. Turn. (35 sc)
Row 6 (RS): Ch 1, sc in each st across. Turn. (35 sc)
Row 7 (WS): Ch 1, sc in each st across. Turn. (35 sc)
Rows 4–7 form the 4-row pattern repeat. Puff rows always fall on RS rows, so every puff pops to the outside.
Rows 8–23: Rep Rows 4–7 four more times. The puff rows are Rows 8, 12, 16, and 20, and each has 35 sts (7 puffs + 28 sc). Every sc row has 35 sc.
Row 24 (RS, puff row): Rep Row 4. (35 sts: 7 puffs + 28 sc)
Rows 25–27: Ch 1, sc in each st across. Turn. (35 sc each row)
You now have 6 puff rows (Rows 4, 8, 12, 16, 20, 24) with 3 plain sc rows above and below each one, and 42 puffs in total. Row 27 ends on the WS. Do not fasten off.
Checkpoint: 8.75 in × 5.4 in (22.2 cm × 13.7 cm). The puffs should sit in 7 straight vertical columns.
Hanging Loop and Bow
Loop cord: With cream, ch 31. Sl st in the back bump of the 2nd ch from hook and in each ch across. Fasten off, leaving a 6 in (15.2 cm) tail at each end. (30 sl sts, about 6 in / 15.2 cm long)
Bow cord: With cream, ch 51. Sl st in the back bump of the 2nd ch from hook and in each ch across. Fasten off and weave in the ends. (50 sl sts, about 10 in / 25.4 cm long)
Working the slip stitches into the back bumps gives a round, braided-looking cord like the one in the photo.
Border
Continue with the lavender still attached to the panel.
Border gauge: 1 sc per stitch along the top and bottom edges, 1 sc per row-end along the sides, and 3 sc in each corner stitch.
Border Round (RS): Ch 1 and turn so the RS faces you. Work along the top of Row 27: 3 sc in the first st (corner), sc in the next 33 sts, 3 sc in the last st (corner). Rotate and work down the side: sc in the end of each of Rows 26 through 2. (25 sc) Rotate and work along the underside of the foundation chain: 3 sc in the first ch (corner), sc in the next 33 ch, 3 sc in the last ch (corner). Rotate and work up the second side: sc in the end of each of Rows 2 through 26. (25 sc) Sl st to the first sc. Fasten off, leaving a 12 in (30.5 cm) tail for seaming.
Counts per side (each count includes that side’s 2 corner center sts):
– Top and bottom edges: 1 corner center + 1 corner extra + 33 + 1 corner extra + 1 corner center = 37 sts each
– Short sides: 1 corner center + 1 corner extra + 25 + 1 corner extra + 1 corner center = 29 sts each
– Round total: 128 sts. (37 + 37 + 29 + 29 = 132, minus 4 corner centers counted twice = 128.)
Why the math works: The long edges keep their 35 original stitches. The two outer stitches become corner centers, and each corner adds 1 extra stitch on that side, so 35 + 2 = 37. The short sides use the 25 inner row-ends (Rows 2–26), while Rows 1 and 27 are already covered by the corners, so 25 + 2 extras + 2 corner centers = 29. One sc per row-end matches the row gauge closely enough to keep the sides flat, and 3 sc per corner turns each corner a neat 90°.
Checkpoint: 9.25 in × 5.9 in (23.5 cm × 15.0 cm).
Final Blocking
- Lay the bordered panel RS up on a blocking mat or folded towel.
- Pin it to 9.25 in × 5.9 in (23.5 cm × 15.0 cm), keeping the edges straight.
- Mist it lightly with water. Do not press the puffs flat.
- Let it dry completely, then unpin.
- Seam: Fold the panel RS out so the two 29-st short sides meet. Thread the 12 in (30.5 cm) tail on a tapestry needle and whipstitch through both loops of each matching pair of border sts, 29 pairs in all. You now have a tube about 9.25 in (23.5 cm) around.
- Gather the bottom: Cut 12 in (30.5 cm) of lavender. Weave it in and out through all 37 border sts around one opening. Pull it tight, knot it, and tuck the end inside.
- Stuff: Add fiberfill in small tufts through the open top until the ball is firm and round, about 10 g. Shape it with your hands as you go.
- Gather the top: Weave another 12 in (30.5 cm) of lavender through the 37 sts of the top opening. Pull it closed and knot it, then run the tail through the ball to hide it.
- Attach the loop: Fold the loop cord in half. Sew both cord ends into the top gathered center so the loop stands about 2.5 in (6.4 cm) above the ball.
- Tie the bow: Wrap the bow cord around the base of the loop and tie a bow with two loops about 0.75 in (1.9 cm) long. The bow should be about 2 in (5.1 cm) wide. Tack the knot in place with a few cream stitches.
Final Quality-Control Checklist
- 7 puff columns and 6 puff rows, all on the outside
- Seam spacing matches the rest: 4 sc between the puffs on either side of the seam
- Diameter about 3 in (7.6 cm), circumference about 9.4 in (23.9 cm)
- Both gathered ends are fully closed, with no stuffing showing
- The seam runs straight from top to bottom
- The loop is centered and the bow is tacked down
- All ends are hidden inside the ball
Troubleshooting
Puffs pop toward the inside: You worked puff rows on the WS. Check your RS marker. Puff rows must be Rows 4, 8, 12, 16, 20, and 24.
Puffs lean or look uneven: Pull every loop up to the same height, about 0.5 in (1.3 cm), before closing. Keep your hook straight as you pull through all 9 loops.
Stitch count grows on the row after a puff: You worked into both the puff and its ch-1. Work only one sc into the closing ch-1.
Puff columns drift sideways: Count 4 sc between puffs on every puff row, and start each puff row with exactly 2 sc.
Edges ripple after the border: Your border has too many or too few stitches along the sides. Rework it with exactly 25 sc along each side.
Gathered end won’t close: Weave through every one of the 37 sts, not every other one, and pull firmly before knotting.
Ball looks lumpy: Pull out the fiberfill and restuff with smaller tufts.
Care
Spot clean with mild soap and cool water, then let the ornament air dry. Store it in a box with tissue paper so the puffs keep their shape.
Final Notes
Here is the full measurement chain: 35 sts = 8.75 in (22.2 cm) wide, and 27 rows = 5.4 in (13.7 cm) tall. The border brings the panel to 9.25 in × 5.9 in (23.5 cm × 15.0 cm), with 37 sts on each long edge and 29 on each short side. Seaming makes a 9.25 in (23.5 cm) tube, and stuffing stretches it to a ball about 3 in (7.6 cm) across. If each checkpoint matches, the finished ornament will too. Make one in each pastel shade for a soft, matching tree.
Happy crocheting!