

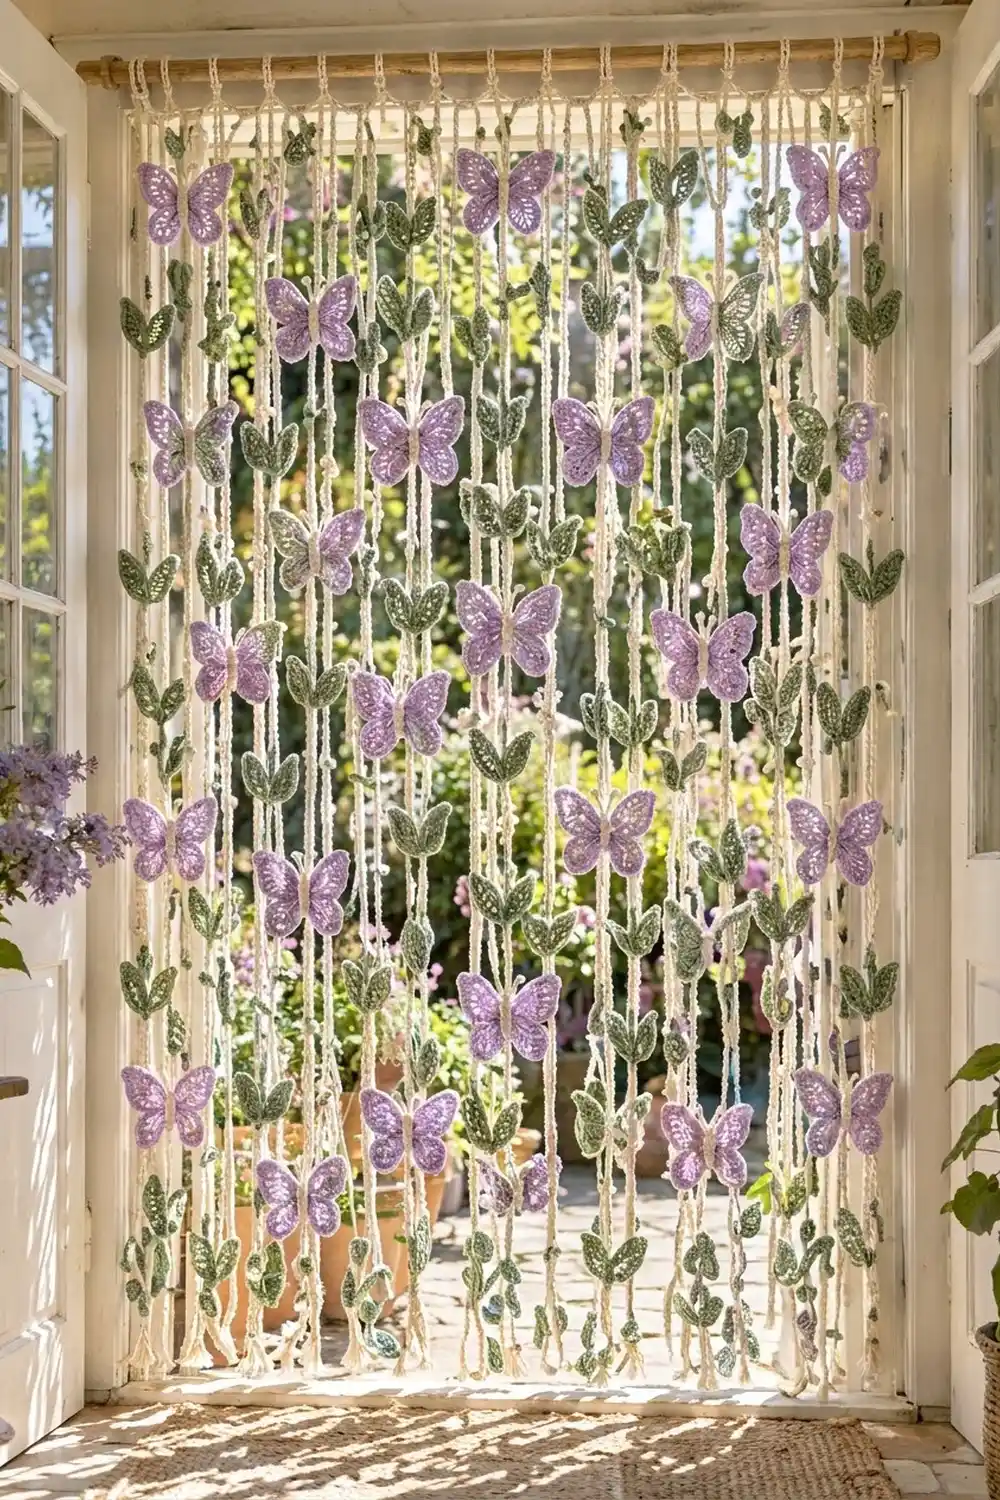
This door curtain fills a doorway with movement and soft color. Sixteen chunky cream cords hang from a wooden dowel. Lavender butterflies with lacy wings and sage-green leaf pairs flutter along each cord.
The palette is calm and garden-inspired: cream cords, lavender wings and sage leaves. Each butterfly gets a cream segmented body and knobbed antennae, so the cords seem to pass right through the butterflies.
This pattern uses US crochet terms. The finished curtain measures 32 in (81.3 cm) wide and 78 in (198.1 cm) long below the dowel. It hangs from a 36 in (91.4 cm) dowel.
You will crochet three kinds of pieces: long slip-stitch cords, one-piece butterfly wings with a framed edge, and simple pointed leaves. You then attach the motifs to the cords at exact stitch positions and hang the cords on the dowel 2 in (5.1 cm) apart.
Finished Size and Construction
- Finished size: 32 in (81.3 cm) wide × 78 in (198.1 cm) drop
- Skill level: Intermediate (easy stitches, many repeats, careful placement)
- Terminology: US
- Yarn weight: Worsted (#4) cotton
- Hooks: 4.0 mm (G-6) for motifs; 5.0 mm (H-8) for cords
- Number of pieces: 16 cords, 80 butterflies (wing piece + body), 160 leaves
- Layout: 16 cords; each cord carries 5 butterflies and 5 leaf pairs
- Piece sizes: butterfly 3.25 in (8.3 cm) wide × 2.75 in (7.0 cm) tall; leaf 2 in (5.1 cm) × 1 in (2.5 cm); leaf pair 3 in (7.6 cm) wide × 1.5 in (3.8 cm) tall
- Butterfly size before border: 2.75 in (7.0 cm) × 2.25 in (5.7 cm)
- Border depth: 0.25 in (0.6 cm) wing frame
Materials
Use a smooth, mercerized or combed worsted-weight cotton, about 85 yd (78 m) per 50 g. Cotton holds the butterfly shapes well and stretches less than acrylic on long hanging cords.
- Cream (cords, bodies, antennae): 475 g, about 741 m
- Lavender (wings): 220 g, about 343 m
- Sage green (leaves): 140 g, about 218 m
These quantities include a margin of about 15–20% for swatching, tails and sewing.
Tools:
– 4.0 mm (G-6) and 5.0 mm (H-8) crochet hooks
– Wooden dowel, 36 in (91.4 cm) long, 1 in (2.5 cm) diameter, with two brackets
– Tapestry needle
– About 20 locking stitch markers
– Tape measure, scissors, pencil
– Blocking mat and rust-proof pins
Abbreviations (US Terms)
- ch – chain
- sl st – slip stitch
- sc – single crochet
- hdc – half double crochet
- dc – double crochet
- tr – treble crochet
- sp – space
- st(s) – stitch(es)
- BB – back bump of a chain
Special stitch – Cord slip stitch: Insert the hook into the back bump of the chain, yarn over and pull through both the chain and the loop on the hook. This makes a firm cord that looks twisted.
Gauge and Checkpoints
Motif gauge (4.0 mm hook, single strand): 16 sc × 18 rows = 4 in (10.2 cm).
Cord gauge (5.0 mm hook, cream held double): 4 cord sl st = 1 in (2.5 cm), measured after a gentle tug.
Make one butterfly, one leaf and a 40-stitch test cord before anything else. Then check:
- Butterfly Rnd 1: 0.75 in (1.9 cm) across
- Butterfly Rnd 2: 2.75 in (7.0 cm) wide × 2.25 in (5.7 cm) tall
- Butterfly Rnd 3 (frame): 3.25 in (8.3 cm) wide × 2.75 in (7.0 cm) tall
- Leaf: 2 in (5.1 cm) long × 1 in (2.5 cm) wide
- Test cord: 40 sts = 10 in (25.4 cm)
If your pieces are too big, go down one hook size. If they are too small, go up one size. Cord gauge matters most. If your cord is off by 0.25 in (0.6 cm) per 10 in (25.4 cm), a full strand will be off by about 2 in (5.1 cm).
Cords (Make 16)
Use the 5.0 mm hook with cream held double. Leave a 6 in (15.2 cm) starting tail.
Foundation: Ch 329.
Row 1: Sl st in the BB of the 2nd ch from hook and in the BB of each ch across. You will have 328 sl st.
Hanging loop: Don’t fasten off. Fold the last 16 sts into a ring and sl st into st 312, counted from the starting end, to close it. That gives a 16-st loop, 4 in (10.2 cm) around, and a 312-st drop, 78 in (198.1 cm) long.
Fasten off and weave in the end at the loop. At the bottom, tie the starting tails in a tight overhand knot against the last stitch and trim them to 0.5 in (1.3 cm).
Checkpoint: Lay the cord flat and measure from the loop join to the knot. It should be 78 in (198.1 cm).
Butterfly Wings (Make 80)
Use the 4.0 mm hook and lavender. The wings are worked in one piece in the round. The cord will later run up the back of the center ring.
Rnd 1: Make a magic ring. Ch 1, then work 12 sc in the ring. Pull the ring closed and sl st to the first sc. (12 sc)
Number these stitches 1 to 12 in your head. Stitch 1 is the top center.
Rnd 2 (lacy wings):
1. Ch 1 (does not count as a stitch). Sl st in the same st (st 1).
2. Upper wing: In st 2, work (dc, ch 1, tr, ch 1, tr). In st 3, work (tr, ch 1, tr, ch 1, dc).
3. Sl st in st 4.
4. Lower wing: In st 5, work (hdc, ch 1, dc). In st 6, work (dc, ch 1, hdc).
5. Sl st in st 7. This is the bottom center.
6. Lower wing: In st 8, work (hdc, ch 1, dc). In st 9, work (dc, ch 1, hdc).
7. Sl st in st 10.
8. Upper wing: In st 11, work (dc, ch 1, tr, ch 1, tr). In st 12, work (tr, ch 1, tr, ch 1, dc).
9. Sl st to the first sl st.
Count after Rnd 2:
– Each upper wing: 6 sts and 4 ch-1 sps
– Each lower wing: 4 sts and 2 ch-1 sps
– Total: 20 sts + 4 sl st + 12 ch-1 sps
The tall tr stitches make the large upper wings. The shorter hdc and dc stitches make the small lower wings. The ch-1 spaces create the lacy middle.
Checkpoint: 2.75 in (7.0 cm) wide × 2.25 in (5.7 cm) tall.
Don’t fasten off. Work the frame round (Rnd 3) from the Border section now, then come back here for the body.
Butterfly Body and Antennae (Make 80)
Use the 4.0 mm hook and cream.
Body:
1. Ch 9.
2. Starting in the 2nd ch from hook, work sc in the next 7 ch.
3. Work 3 sc in the last ch. This is the head end.
4. Rotate and work along the free loops: sc in the next 7 ch.
5. Sl st to the first sc. (17 sc)
6. Leave an 18 in (45.7 cm) tail for wrapping.
The body is an oval 2.25 in (5.7 cm) long × 0.5 in (1.3 cm) wide.
Antennae (make 2 on each body):
1. Join cream at the head end, one st to the right of center.
2. Ch 7. Sl st in the 3rd ch from hook to make the knob.
3. Sl st in the next 4 ch, then sl st into the body.
4. Repeat 1 st to the left of center for the second antenna.
5. Fasten off.
Each antenna is 0.75 in (1.9 cm) long.
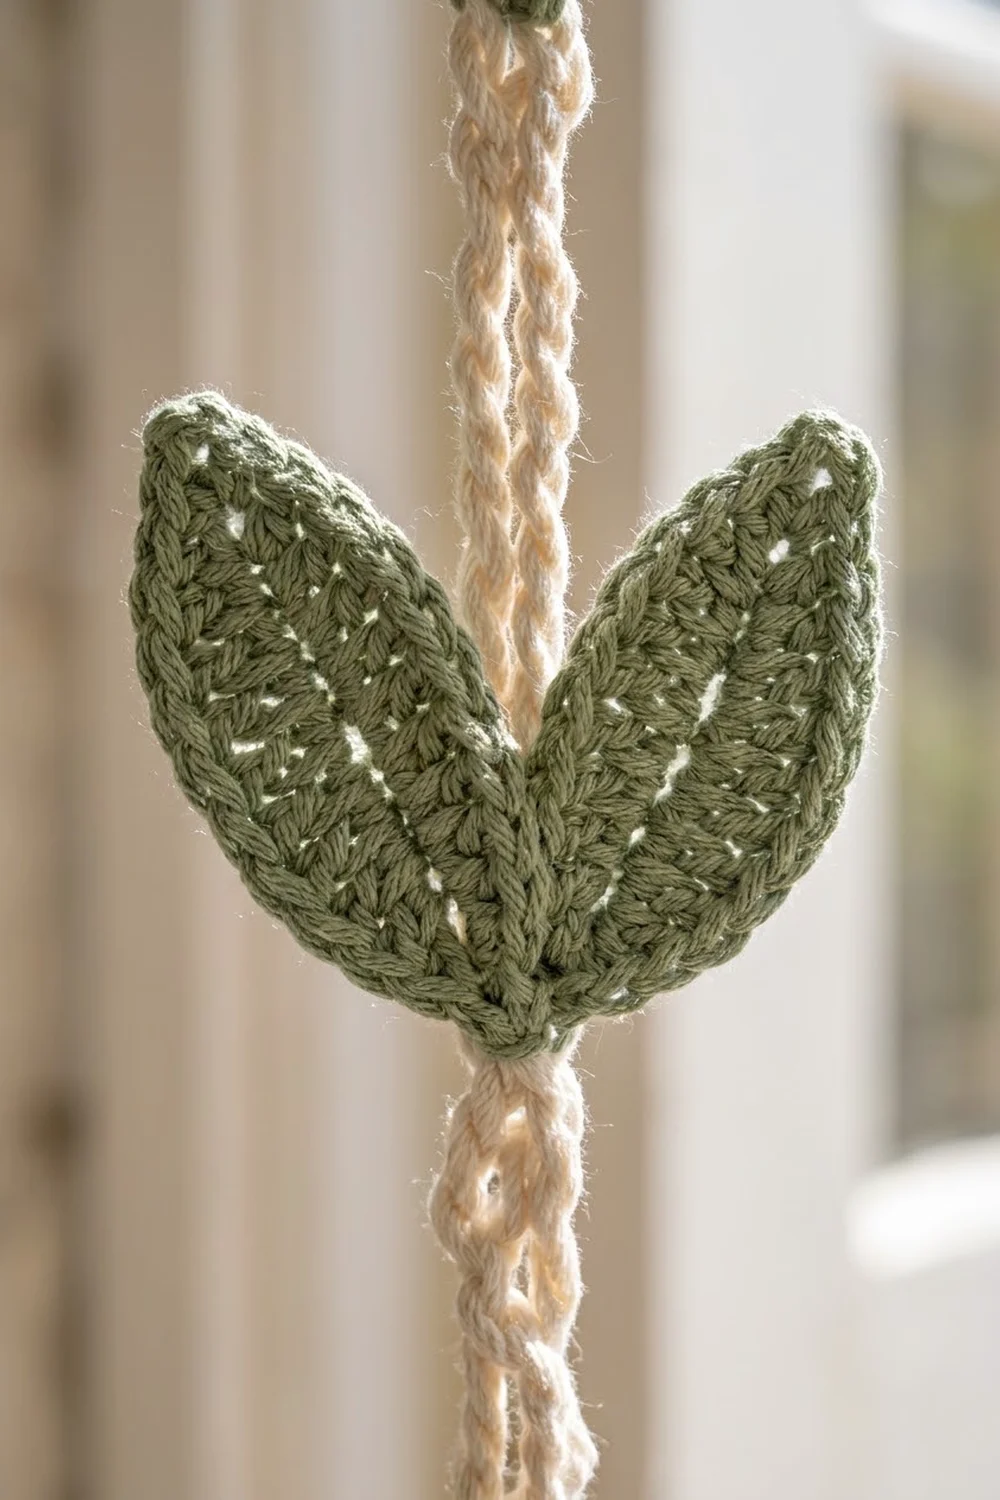
Leaves (Make 160)
Use the 4.0 mm hook and sage. Leave an 8 in (20.3 cm) starting tail.
- Ch 9.
- Starting in the 2nd ch from hook (base end), work: sc, hdc, dc in each of the next 3 ch, hdc, sc. (7 sts)
- In the last ch (tip), work (sc, ch 2, sc).
- Working along the free loops: sc, hdc, dc in each of the next 3 ch, hdc, sc. (7 sts)
- Sl st to the first sc. Fasten off and leave an 8 in (20.3 cm) tail.
Count: 16 sts + ch-2 tip.
The foundation chain becomes the center line of the leaf. The ch-2 makes the pointed tip. Both tails come out at the base, ready for sewing.
Make All Pieces
| Piece | Color | Quantity |
|---|---|---|
| Cords | Cream (held double) | 16 |
| Butterfly wings | Lavender | 80 |
| Butterfly bodies + antennae | Cream | 80 |
| Leaves (pair them up) | Sage | 160 (80 pairs) |
There are two cord types:
– Type A (odd cords 1, 3, 5 … 15): butterfly first, then leaf pair, alternating
– Type B (even cords 2, 4, 6 … 16): leaf pair first, then butterfly, alternating, with every motif placed 3.5 in (8.9 cm) lower than on Type A
Motif positions, measured from the loop join down. The stitch number counts down from the loop join at 4 sts per inch.
| Type A | Type B |
|---|---|
| B at 7 in (17.8 cm), st 28 | L at 10.5 in (26.7 cm), st 42 |
| L at 14 in (35.6 cm), st 56 | B at 17.5 in (44.5 cm), st 70 |
| B at 21 in (53.3 cm), st 84 | L at 24.5 in (62.2 cm), st 98 |
| L at 28 in (71.1 cm), st 112 | B at 31.5 in (80.0 cm), st 126 |
| B at 35 in (88.9 cm), st 140 | L at 38.5 in (97.8 cm), st 154 |
| L at 42 in (106.7 cm), st 168 | B at 45.5 in (115.6 cm), st 182 |
| B at 49 in (124.5 cm), st 196 | L at 52.5 in (133.4 cm), st 210 |
| L at 56 in (142.2 cm), st 224 | B at 59.5 in (151.1 cm), st 238 |
| B at 63 in (160.0 cm), st 252 | L at 66.5 in (168.9 cm), st 266 |
| L at 70 in (177.8 cm), st 280 | B at 73.5 in (186.7 cm), st 294 |
Layout grid for one 4-cord section. Repeat it 4 times across the dowel. B = butterfly, L = leaf pair.
Height     C1  C2  C3  C4
7"          B   .   B   .
10.5"       .   L   .   L
14"         L   .   L   .
17.5"       .   B   .   B
21"         B   .   B   .
...    (pattern continues to 73.5")
70"         L   .   L   .
73.5"       .   B   .   B
Each cord has 5 butterflies and 5 leaf pairs. Across 16 cords that’s 80 butterflies and 80 pairs.
Joining
Mark the cords. Lay each cord flat. Count stitches down from the loop join and place a marker at every position in the table above for that cord’s type.
Attach the butterflies (stitch-to-stitch).
1. Center the wing ring’s back on the marked cord stitch, so the cord runs vertically behind stitches 1 and 7 of Rnd 1.
2. Lay the body on the front over the same line, head up. Its 9-stitch length covers cord stitches 4 before through 4 after the marked stitch.
3. Using the body tail, wrap 3 times around the body, the wing center and the cord together. Make the wraps 0.5 in (1.3 cm), 1 in (2.5 cm) and 1.5 in (3.8 cm) below the head.
4. Pull each wrap snug, then pass the needle under the previous wrap to lock it.
These wraps make the segmented body and hold all three layers together.
Attach the leaf pairs.
1. Overlap the bases of two leaves on the front of the marked cord stitch.
2. Angle each leaf 45° upward and outward, so the tips are 3 in (7.6 cm) apart.
3. With one leaf’s tails, whipstitch both bases through the cord stitch and the stitches directly above and below it.
4. Knot the tails at the back and weave them into the cord.
Tension advice. Make the stitches firm enough that the motifs don’t spin, but don’t pinch the cord. If the cord bunches up behind a motif, the drop will get shorter.
Hanging. Mark the dowel 3 in (7.6 cm) in from each end, then every 2 in (5.1 cm) in between, for 16 marks spanning 30 in (76.2 cm). Slide the loops on in order: cord 1, a Type A, goes on the left, then alternate types. With butterflies reaching 1 in (2.5 cm) past the outer cords, the curtain is 32 in (81.3 cm) wide.
Size checkpoint. Let the curtain hang for 24 hours, then measure each cord from the loop join to the knot. Every cord should be 78 in (198.1 cm), give or take 0.5 in (1.3 cm).
Border
The curtain doesn’t need an outer border; each cord already ends in a knot. The border here is the solid frame round worked around every butterfly wing piece before the body goes on.
Border gauge: 4 sc = 1 in (2.5 cm) along the wing edge. The frame adds 0.25 in (0.6 cm) all around.
Rnd 3 (frame): Ch 1. Sl st in the same sl st (top center). Then work around the four wings in this order:
- Upper wing: sc in the dc, sc in the sp, 2 sc in the tr, sc in the sp, 2 sc in the tr, 2 sc in the tr, sc in the sp, 2 sc in the tr, sc in the sp, sc in the dc. (14 sc)
- Sl st in the next sl st.
- Lower wing: sc in the hdc, sc in the sp, 2 sc in the dc, 2 sc in the dc, sc in the sp, sc in the hdc. (8 sc)
- Sl st in the next sl st.
- Lower wing: repeat step 3. (8 sc)
- Sl st in the next sl st.
- Upper wing: repeat step 1. (14 sc)
- Sl st to the first sl st. Fasten off and weave in the ends.
Count after Rnd 3: 44 sc + 4 sl st = 48 sts.
The upper-wing count is 10 positions worked once (10) plus 4 extra sc in the tr tops (4), for 14. The lower-wing count is 6 positions (6) plus 2 extra in the dc tops (2), for 8.
Why the math works: All the extra stitches go into the tallest stitches, where the outer curve is longest. The edge lies flat instead of cupping. The 4 sl sts stay at the wing divisions, so the notches between the wings stay sharp.
Checkpoint: 3.25 in (8.3 cm) wide × 2.75 in (7.0 cm) tall.
Final Blocking
- Block the motifs before attaching them, if you can. Mist the butterflies and leaves with water.
- Pin each butterfly to 3.25 in × 2.75 in (8.3 cm × 7.0 cm). Open up the ch-1 spaces with pins.
- Pin each leaf to 2 in × 1 in (5.1 cm × 2.5 cm), with a sharp tip.
- Let everything dry completely.
- After hanging, lightly mist any cords that twist, run your fingers down them, and let them dry while hanging.
Final Quality-Control Checklist
- 16 cords, each 328 sts, with a 16-st loop and a 312-st drop
- All cords measure 78 in (198.1 cm)
- 80 butterflies, each with 48 sts in Rnd 3 and measuring 3.25 in × 2.75 in (8.3 cm × 7.0 cm)
- 160 leaves, each with 16 sts + ch-2 tip
- Type A and Type B cords alternate across the dowel
- Every motif sits at its listed stitch number
- Body wraps are locked and the motifs don’t spin
- Cord loops are spaced 2 in (5.1 cm) apart on the dowel
Troubleshooting
- Wings cup: Your Rnd 3 is too tight. Use a 4.5 mm hook for the frame only.
- Wings ruffle: You added extra sc. Recount: 14 per upper wing, 8 per lower wing.
- Cords are different lengths: Check gauge on every cord. Add or remove sts at the bottom end, not in the loop.
- Butterflies flip backward: Add a 4th wrap at the head, or tack the wing tips lightly to the cord.
- Leaves droop: Sew one stitch higher on the cord to brace each leaf at its 45° angle.
- Motifs overlap between cords: Check that each Type B motif sits 3.5 in (8.9 cm) lower than the Type A motifs beside it.
Care
Dust the curtain or shake it gently. Spot-clean with cool water and mild soap, then rehang it to dry so the cords stay straight.
Final Notes
Here’s how the measurements build on each other. A cord gauge of 4 sts per inch gives a 312-st drop of 78 in (198.1 cm). Motif positions every 7 in (17.8 cm), with a 3.5 in (8.9 cm) offset on Type B cords, keep the motifs from colliding. Each butterfly measures 2.75 in (7.0 cm) after Rnd 2 and 3.25 in (8.3 cm) after the frame. Sixteen cords spaced 2 in (5.1 cm) apart give a 32 in (81.3 cm) wide curtain.
If you check gauge at every stage, the finished curtain will hang evenly in your doorway.
Happy crocheting!