

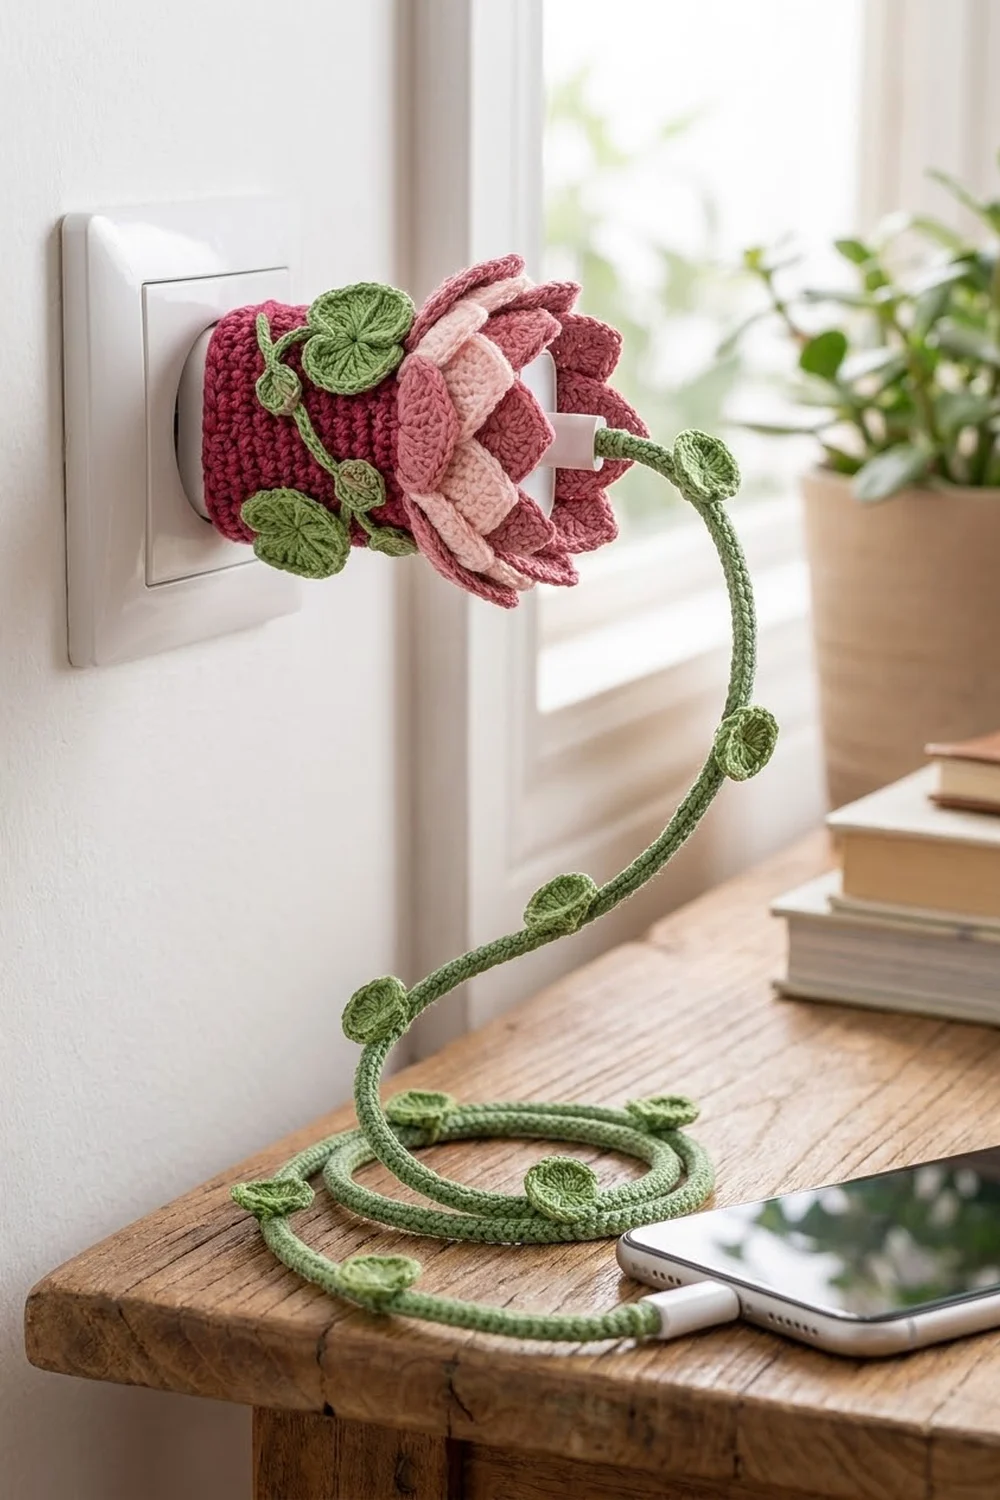
The Lotus Bloom Charger Cover turns an ordinary white phone charger into a small water-lily sculpture. A cranberry tube slips over the charger block, and a two-tier lotus crown opens around the plug pins. A trailing green vine with lily pads wraps around the body, and a matching green sleeve with tiny pads covers the charging cable.
The palette has four colors: deep cranberry for the body, dusty rose for the large outer petals, pale blush pink for the inner petals, and a fresh leaf green for the vine, pads, and cable sleeve. The style is botanical and textured, but every piece uses basic stitches.
This pattern uses US crochet terms. The finished tube measures 8.8 in (22.4 cm) around, about 2.8 in (7.1 cm) across, and 3.1 in (7.9 cm) tall. With the petals, the total height is about 4 in (10.2 cm). The cable sleeve covers 36 in (91.4 cm) of cable, and you can adjust that length.
Construction is simple. You work the body as a joined tube in rounds and give both edges a reverse single crochet trim. The petals and pads are made separately and sewn on. You surface-crochet the vine straight onto the tube. The cable sleeve is a long three-row strip closed around the cable with slip stitches.
Finished Size and Construction
- Finished body size: 8.8 in (22.4 cm) circumference × 3.1 in (7.9 cm) tall; 4.4 in (11.2 cm) wide when flattened
- Height to petal tips: about 4 in (10.2 cm)
- Skill level: Intermediate (lots of small parts, but no complex stitches)
- Terminology: US
- Yarn weight: DK / light worsted cotton (weight 3)
- Hook: 3.0 mm (US C/2–D/3)
- Number of pieces: 30 (1 body, 6 large petals, 10 small petals, 2 large pads, 4 stemmed pads, 6 mini pads, 1 cable sleeve)
- Layout: an open tube with a two-tier petal crown; the vine and pads sit on the sides
- Body size before border: 8.8 in (22.4 cm) × 2.7 in (6.9 cm)
- Border depth: 0.2 in (0.5 cm) at the top and 0.2 in (0.5 cm) at the bottom
Materials
Use a smooth, mercerized cotton or cotton blend. It gives crisp stitch definition, petals that hold their shape, and doesn’t stretch out on the charger. The yardage below assumes about 115 m per 50 g ball.
- Color A – Cranberry (body): 15 g / 35 m
- Color B – Dusty Rose (large petals): 6 g / 14 m
- Color C – Pale Blush Pink (small petals): 6 g / 14 m
- Color D – Leaf Green (vine, pads, cable sleeve): 20 g / 46 m
All quantities include a margin of roughly 25% for gauge swatches and sewing tails.
Tools:
– 3.0 mm crochet hook
– Tapestry needle
– 4 locking stitch markers
– Rustproof pins
– Spray bottle and blocking mat
– Soft tape measure
– The charger and cable you plan to cover, for fitting
Abbreviations (US Terms)
- ch – chain
- sl st – slip stitch
- sc – single crochet
- hdc – half double crochet
- dc – double crochet
- MR – magic ring
- BLO – back loop only
- st(s) – stitch(es)
- sp – space
- rev sc – reverse single crochet (crab stitch)
Special stitch: reverse single crochet. Work from left to right (right-handed). Insert the hook into the next stitch to the right, yarn over, pull up a loop, yarn over, and pull through both loops. This makes a corded, slightly rolled edge.
Gauge and Checkpoints
Gauge: 20 sc and 22 rounds = 4 in (10.2 cm), worked in the round.
Before making all the small parts, test with the body. It’s the only piece where size really matters, because it has to fit the charger.
Checkpoints:
– After the foundation ring, the chain should lie flat around the charger without stretching.
– After Rnd 5, the tube is 0.9 in (2.3 cm) tall.
– After Rnd 10, the tube is 1.8 in (4.6 cm) tall.
– After Rnd 15, the tube is 2.7 in (6.9 cm) tall and 8.8 in (22.4 cm) around.
If your tube is too big: go down a hook size (2.75 mm) and start over. A loose tube slides down and the crown droops.
If it’s too small: go up a hook size (3.25 mm). If the charger block measures more than 7.6 in (19.3 cm) around, add 2 stitches to the foundation chain for every 0.4 in (1.0 cm) of extra ease you need.
Body (Color A)
Ch 44 and join with a sl st to the first ch to form a ring. Don’t twist the chain.
Rnd 1: Ch 1, sc in each ch around, sl st to the first sc. (44 sc)
Rnds 2–15: Ch 1, sc in each st around, sl st to the first sc. (44 sc in each round)
Don’t fasten off. The tube now measures 8.8 in (22.4 cm) × 2.7 in (6.9 cm). Leave the live loop on a stitch marker; you’ll come back to it for the border.
Joined rounds give a faint diagonal seam line. Turn the tube so this seam sits at the back of the charger.
Large Petals (Color B – make 6)
Each petal is worked around both sides of a foundation chain. This gives a raised center vein, a rounded base, and a pointed tip.
Ch 9.
Rnd 1: Sc in the 2nd ch from hook, hdc in the next ch, dc in the next 3 ch, hdc in the next ch, sc in the next ch (7 sts). Work 3 sc in the last ch to round the base. Rotate and work along the other side of the chain: sc, hdc, 3 dc, hdc, sc (7 sts). Ch 2 for the tip and sl st to the first sc. (17 sts + ch-2 tip)
Rnd 2: Ch 1. Sc in the next 7 sts, 2 sc in each of the 3 base sts, sc in the next 7 sts, then (sc, ch 2, sc) in the tip ch-2 sp. Sl st to the first sc. (7 + 6 + 7 + 2 = 22 sc + ch-2 tip)
Fasten off and leave a 10 in (25.4 cm) tail for sewing.
Petal checkpoint: 1.6 in (4.1 cm) tall × 1.2 in (3.0 cm) wide.
Small Petals (Color C – make 10)
Ch 7.
Rnd 1: Sc in the 2nd ch from hook, hdc in the next ch, dc in the next ch, hdc in the next ch, sc in the next ch (5 sts). Work 3 sc in the last ch. Along the other side of the chain: sc, hdc, dc, hdc, sc (5 sts). Ch 2 and sl st to the first sc. (13 sts + ch-2 tip)
Rnd 2: Ch 1. Sc in the next 5 sts, 2 sc in each of the 3 base sts, sc in the next 5 sts, then (sc, ch 2, sc) in the tip ch-2 sp. Sl st to the first sc. (5 + 6 + 5 + 2 = 18 sc + ch-2 tip)
Fasten off and leave an 8 in (20.3 cm) tail.
Petal checkpoint: 1.2 in (3.0 cm) tall × 0.9 in (2.3 cm) wide.
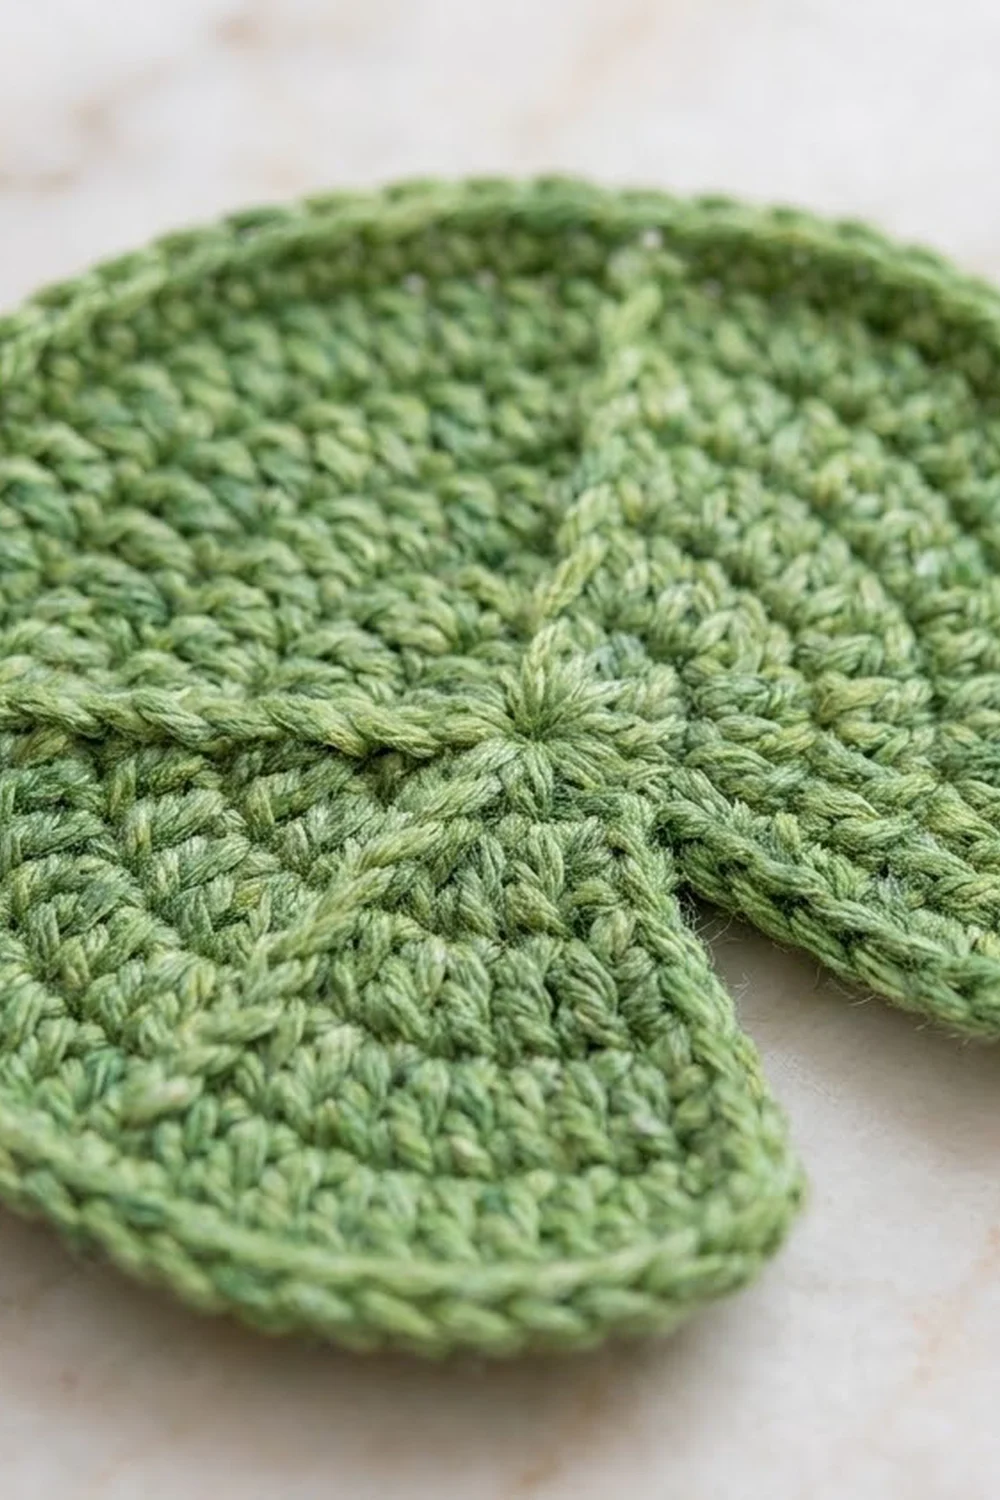
Large Lily Pads (Color D – make 2)
These pads are worked in turned rows, not joined rounds. That leaves the classic V-shaped notch.
Row 1: MR, ch 2 (doesn’t count as a st), 10 dc in the ring, turn. Pull the ring closed. (10 dc)
Row 2: Ch 2, 2 dc in each st across, turn. (20 dc)
Row 3: Ch 1, (sc in the next st, 2 sc in the next st) 10 times. (30 sc)
Fasten off and leave a 10 in (25.4 cm) tail. Checkpoint: about 1.5 in (3.8 cm) across.
Stemmed Lily Pads (Color D – make 4)
Row 1: MR, ch 2 (doesn’t count), 8 dc in the ring, turn. (8 dc)
Row 2: Ch 1, 2 sc in each st across. (16 sc)
Stem: Ch 5, sl st in the 2nd ch from hook and in the next 3 ch (4 sl st). Sl st into the pad edge.
Fasten off and leave an 8 in (20.3 cm) tail. Checkpoint: pad 0.9 in (2.3 cm) across, stem 0.6 in (1.5 cm) long.
Mini Lily Pads (Color D – make 6)
Row 1: MR, ch 1, 6 sc in the ring, turn. (6 sc)
Row 2: Ch 1, 2 sc in each st across. (12 sc)
Fasten off and leave a 6 in (15.2 cm) tail. Checkpoint: 0.6 in (1.5 cm) across.
Cable Sleeve (Color D)
Measure the bare cable between the plug heads. This pattern covers 36 in (91.4 cm). At 5 sts per inch, chain 5 × your length in inches, plus 1.
Ch 181.
Row 1: Sc in the 2nd ch from hook and in each ch across, turn. (180 sc)
Rows 2–3: Ch 1, sc in each st across, turn. (180 sc in each row)
Don’t fasten off. The strip is 36 in (91.4 cm) long and about 0.5 in (1.3 cm) wide. Lay the cable along the strip and fold the long edges around it. Sl st through the last row and the opposite side of the foundation chain together, 1 sl st per st (180 sl st). Fasten off. The closed sleeve is about 0.25 in (0.6 cm) in diameter.
Make All Pieces
| Color | Piece | Quantity |
|---|---|---|
| A – Cranberry | Body tube | 1 |
| B – Dusty Rose | Large petal | 6 |
| C – Pale Blush | Small petal | 10 |
| D – Leaf Green | Large pad | 2 |
| D – Leaf Green | Stemmed pad | 4 |
| D – Leaf Green | Mini pad | 6 |
| D – Leaf Green | Cable sleeve | 1 |
Layout grid around the top of the tube (44 sts, starting just right of the back seam):
Stitch:      1   3   5   9  10  14  18  22  25  27  31  32  35  40
Small (C):   S       S   S      S   S   S       S   S       S   S
Large (B):       L           L          L   L           L       L(40)
Small petals sit at sts 1, 5, 9, 14, 18, 22, 27, 31, 35, 40. The gaps are 4-4-5-4-4-5-4-4-5-5 = 44 sts.
Large petals sit at sts 3, 10, 18, 25, 32, 40. The gaps are 7-8-7-7-8-7 = 44 sts.
Joining
Small petals (inner tier): Pin each small petal to the inside of the tube with its 3 center base stitches level with Rnd 15. The tip should point straight up. Whipstitch the 6 base stitches of Rnd 2 across 4 body stitches, centered on that petal’s stitch number. Neighboring petals touch or overlap by about 1 stitch.
Large petals (outer tier): Pin each large petal to the outside of the tube with its base on Rnd 13, centered on its stitch number. Sew the 6 base stitches across 4 body stitches. Then add one tacking stitch 0.3 in (0.8 cm) above the base so the tip flares outward instead of lying flat.
Vine: Hold Color D inside the tube and surface sl st a wavy line around the body. Run it between Rnd 3 and Rnd 11, rising and falling once every 11 sts (four waves in 44 sts). Make 1 sl st per stitch you cross.
Pads: Sew the 2 large pads on opposite sides of the front, overlapping the vine. Tuck each stemmed pad’s stem under the vine, spacing them evenly, and sew them down with small stitches. Sew the 6 mini pads to the cable sleeve at 3, 9, 15, 21, 27, and 33 in (7.6, 22.9, 38.1, 53.3, 68.6, and 83.8 cm).
Tension: Sew firmly enough that pieces don’t wobble, but don’t pull so tight that the tube puckers.
Size checkpoint: the tube still measures 8.8 in (22.4 cm) around and slides over the charger.
Border (Color A)
Border gauge: 5 rev sc per inch, the same as the body sc.
Top Border Rnd: Put the live loop from Rnd 15 back on the hook. Ch 1, rev sc in each st around, keeping the petal bases tucked aside. Sl st to the first st. (44 rev sc: 22 across the front and 22 across the back when flattened)
Bottom Border Rnd: Join Color A to the opposite side of the foundation chain at the seam. Ch 1, rev sc in each ch around, sl st to the first st. (44 rev sc: 22 front + 22 back)
Why the math works: Each border round places exactly 1 stitch per existing stitch, at the same gauge as the body. With no increases or decreases, the edges don’t flare or pull in. Each round adds 0.2 in (0.5 cm), so 2.7 + 0.2 + 0.2 = 3.1 in (7.9 cm) total height.
You can also work the border before joining. The counts are identical.
Final Blocking
- Lightly mist all petals and pads with water.
- Pin each loose petal and pad flat by its tip and edges, and pull each pad’s notch into a clean V.
- Put the tube over the charger (or a 2.8 in / 7.1 cm diameter glass) and shape the outer petals so they flare evenly.
- Mist the cable sleeve and lay it in gentle curves.
- Let everything dry completely, at least 6 hours.
Final Quality-Control Checklist
- Tube measures 8.8 in (22.4 cm) around and 3.1 in (7.9 cm) tall
- 10 small and 6 large petals are evenly spaced, with tips pointing the right way
- Vine waves stay between Rnds 3 and 11
- All pads have clean notches and secure stitching
- Cable sleeve is closed along its full length with no gaps
- All tails are woven in and trimmed
Troubleshooting
- Petals curl sideways: you worked tighter on one side of the chain. Block flat, and match your tension on both sides next time.
- Tube slides off: it’s too loose. Remake it with 2 fewer foundation chains.
- Pad notch closes up: you joined the rows by mistake. Turn at the end of every row.
- Cable sleeve twists: sl st along it without stretching the strip, and let it relax before blocking.
- Border ruffles: you’ve added stitches. Recount to 44.
Care
Remove the cover from the charger before cleaning. Hand wash in cool water with mild soap, press out the water in a towel, and dry flat while reshaping the petals.
Final Notes
The measurement chain is simple: 20 sc = 4 in (10.2 cm), so 44 sts = 8.8 in (22.4 cm) around. Fifteen body rounds give 2.7 in (6.9 cm), and two 0.2 in (0.5 cm) border rounds bring the tube to 3.1 in (7.9 cm). The petal crown takes the total height to about 4 in (10.2 cm). The cable sleeve follows the same 5-sts-per-inch rule, so 180 sts cover 36 in (91.4 cm). Check each step and your lotus will fit perfectly.
Happy crocheting!