
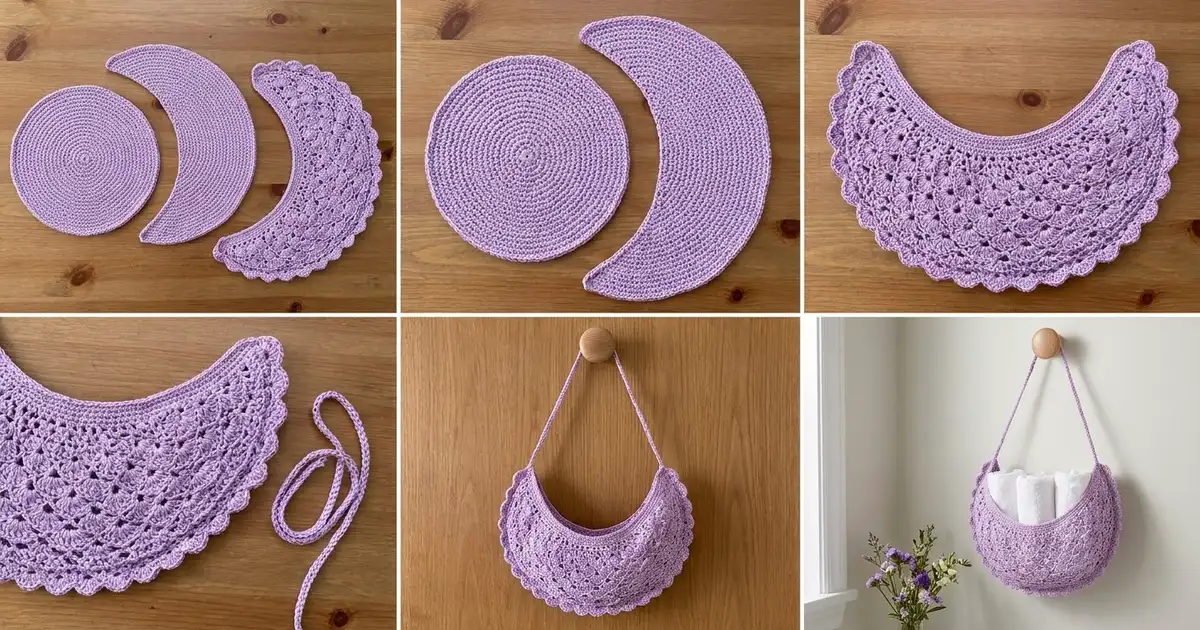
The Lilac Moon Hanging Basket is a crescent-shaped wall pocket. A solid back and a lacy, fan-patterned front are joined along the outer curve. The opening runs along the inner curve, so rolled washcloths, a small plant or a few bath treats sit inside like they’re resting in the moon.
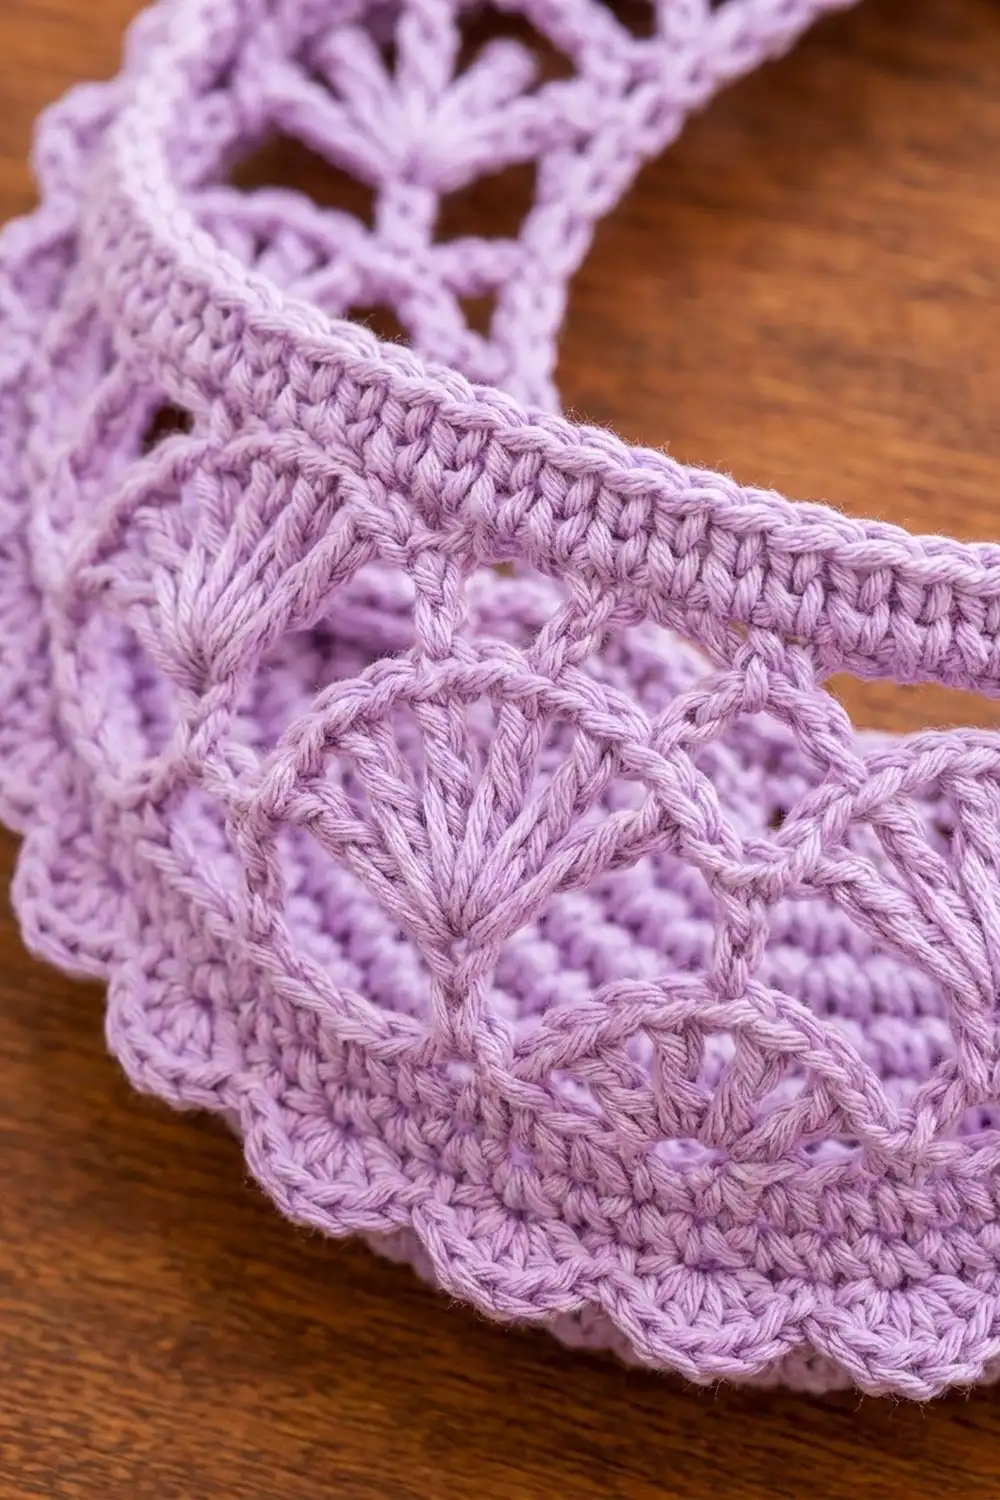
The design uses a single lilac shade throughout. The solid back keeps the basket sturdy, the fan shells on the front keep it light, and a dense scalloped edge outlines the curve. A slim slip-stitch cord hangs it from a knob or peg.
This pattern uses US crochet terms. The finished basket measures about 10.5 in (26.7 cm) tall and 9 in (22.9 cm) wide, with a depth of 1.75 in (4.4 cm) at the center bottom.
Construction is simple. You work a solid crescent back in shaped rows. Then you work a front crescent that changes from single crochet to fan shells and then to a single-crochet gusset band. You join the two with a single-crochet seam, add a scalloped border, close the tips, finish the inner edges and attach the cord.
Finished Size and Construction
- Finished size: about 10.5 in (26.7 cm) tall x 9 in (22.9 cm) wide
- Depth: 1.75 in (4.4 cm) at center bottom, tapering to the tips
- Skill level: Intermediate
- Terminology: US
- Yarn weight: Worsted (#4) cotton or cotton blend
- Hook: 4.0 mm (G-6)
- Number of pieces: 3 (back panel, front panel with gusset, hanging cord)
- Layout: front stacked over back, joined along the outer curve
- Crescent band width: about 2.5 in (6.4 cm) at center
- Size before border: about 9.5 in (24.1 cm) x 8 in (20.3 cm)
- Border depth: about 0.5 in (1.3 cm)
Materials
Choose a smooth, firm worsted-weight cotton. Cotton holds the crescent shape and won’t stretch much under a load. Acrylic works but makes a softer basket.
- Lilac: 120 g / 228 m (about 100 g per 190 m skein)
Quantities include a margin of about 25% for the gauge disc and small differences in tension.
Tools:
– 4.0 mm (G-6) crochet hook
– Tapestry needle
– 4 stitch markers
– Scissors
– Rust-proof pins and a blocking mat
– Spray bottle
Abbreviations (US Terms)
- ch – chain
- sl st – slip stitch
- sc – single crochet
- hdc – half double crochet
- dc – double crochet
- sk – skip
- st(s) – stitch(es)
- sc3tog – single crochet 3 together: (insert hook in next st, yarn over, pull up a loop) 3 times, yarn over, pull through all 4 loops on hook. Uses 3 sts, makes 1.
- fan – the stated number of dc worked into one stitch
- center dc – the middle dc of a fan (3rd of 5, 4th of 7, 5th of 9)
The turning ch 1 never counts as a stitch.
Gauge and Checkpoints
Gauge: 16 sc x 18 rows = 4 in (10.2 cm) in sc worked in rows.
Gauge disc (optional, matches the round piece in the photo): Make a magic ring. Rnd 1: 6 sc in ring. Rnds 2–8: increase 6 sc evenly each round. Rnd 8 = 48 sc. The disc should measure 3.5 in (8.9 cm) across.
Make the back panel first and use it as your test piece. Check these points:
- Back Row 1: 12 in (30.5 cm) long
- Back Row 11, outer edge: 22 in (55.9 cm) measured along the curve
- Back center width: 2.5 in (6.4 cm)
- Front Row 7: 22 in (55.9 cm), the same as back Row 11
- Gusset (front Rows 8–15): 1.75 in (4.4 cm) deep
If your back panel is too big, go down 0.5 mm. If it’s too small, go up 0.5 mm. If only the row height is off and the stitch width is right, keep your hook and add or remove one gusset row at the end.
Back Panel (Solid Crescent)
The back is shaped in two ways. A sc3tog at each end of every row tapers the horns. Eight increases in the middle of every row curve the band. Each row has a net change of 4 more sts than the row before.
Row 1: Ch 49, sc in 2nd ch from hook and in each ch across. Turn. (48 sc)
Rows 2–11 use this formula: ch 1, sc3tog, [sc in next a sts, 2 sc in next st] 8 times, sc in next r sts, sc3tog. Turn.
| Row | Worked into | a | r | Row total |
|---|---|---|---|---|
| 2 | 48 | 4 | 2 | 52 sc |
| 3 | 52 | 4 | 6 | 56 sc |
| 4 | 56 | 5 | 2 | 60 sc |
| 5 | 60 | 5 | 6 | 64 sc |
| 6 | 64 | 6 | 2 | 68 sc |
| 7 | 68 | 6 | 6 | 72 sc |
| 8 | 72 | 7 | 2 | 76 sc |
| 9 | 76 | 7 | 6 | 80 sc |
| 10 | 80 | 8 | 2 | 84 sc |
| 11 | 84 | 8 | 6 | 88 sc |
Here’s the check for Row 2: 1 (sc3tog) + 8 x 6 + 2 + 1 (sc3tog) = 52. Each later row follows the same logic.
Fasten off. The foundation edge is the inner curve. Row 11 is the outer curve. The horn tips are the two ends of Row 1. Lay the back flat: it should be a smooth crescent with an outer edge of 22 in (55.9 cm).
Front Panel (Lace Crescent with Gusset)
Solid Rim
Rows 1–3: Work exactly as back panel Rows 1–3. (Row 3: 56 sc)
These three solid rows make the firm rim along the basket opening.
Fan Rows
Row 4 (conversion row): Ch 1, 2 sc in first st, sk 2, 5 dc in next st, sk 2, sc in next st; repeat from * 9 times, sc in last st. Turn.
This row works into all 56 sts and adds 1 extra st at the start. The total is 9 fans x 5 dc = 45, plus 12 sc = 57 sts.
Row 5 (growth row): Ch 1, sc in first 2 sc, sk 2 dc, sc in center dc of next fan, sk 2 dc, 7 dc in next sc, sk 2 dc, sc in center dc of next fan; repeat from * 8 times, sk 2 dc, sc in last 2 sc. Turn.
Row 5 total: 69 sts (8 fans x 7 dc = 56, plus 13 sc).
Row 6 (growth row): Ch 1, sc in first 2 sc, 3 hdc in next sc, sk 3 dc, sc in center dc of next fan, sk 3 dc, 9 dc in next sc, sk 3 dc, sc in center dc of next fan; repeat from * 7 times, sk 3 dc, 3 hdc in next sc, sc in last 2 sc. Turn.
Row 6 total: 81 sts (7 fans x 9 dc = 63, plus 2 x 3 hdc = 6, plus 12 sc).
The 3-hdc groups at each end are small half-fans. They let the lace taper into the horns.
Row 7 (trim row): Ch 1, sc in each st across, working 2 sc in the center dc of each 9-dc fan. Turn.
Row 7 total: 81 + 7 = 88 sc.
Checkpoint: Row 7 must match back Row 11, at 88 sts and 22 in (55.9 cm). The front’s height should now match the back’s 2.5 in (6.4 cm) width.
Gusset Band
Rows 8–15: Ch 1, sc in each st across. Turn. (88 sc each row)
Fasten off after Row 15 and leave a 24 in (61 cm) tail for sewing the tips. This 1.75 in (4.4 cm) band folds back to form the basket floor.
Hanging Cord
Ch 61. Sl st in back bump of 2nd ch from hook and in each ch across. (60 sl st)
The cord should measure about 15 in (38.1 cm). Leave a 6 in (15.2 cm) tail at each end.
Make All Pieces
All pieces use Lilac:
- 1 back panel (88 sts on outer edge)
- 1 front panel with gusset (88 sts on Row 15)
- 1 hanging cord (60 sl st)
Stacking layout, seen from the side at the center bottom:
FRONT (lace, Rows 1–7)
   |
GUSSET (Rows 8–15, folds back = floor)
   |
BACK (solid, Rows 1–11)
Seen from the front, the back’s inner curve sits behind the front’s rim. The opening is the gap between the two inner edges.
Joining
Method: single crochet through both layers.
Fold the gusset back so front Row 15 lies against back Row 11, with wrong sides facing each other. Match the ends first, then the centers (st 44 on each), and pin or mark them.
Joining Row: Join yarn at the right-hand end. Ch 1, then sc through 1 st of the front and 1 st of the back together, 1 for 1, across all 88 pairs. Work 2 sc in the 44th pair (the center).
Total: 88 (1 per pair) + 1 extra = 89 sc. Do not fasten off.
The two edges have the same count, so no easing is needed. Keep your tension even. If you pull too tight, the outer curve cups. If you work too loose, the seam ripples.
Checkpoint: The joined outer edge should still measure 22 in (55.9 cm).
Border
Border gauge: each scallop covers 4 sts, or about 1 in (2.5 cm), and stands about 0.5 in (1.3 cm) tall.
Scallop Row: Ch 1, turn, sc in first st, sk 1, 5 dc in next st, sk 1, sc in next st; repeat from * 22 times. Fasten off.
Total: 22 scallops, 133 sts (22 x 5 dc = 110, plus 23 sc).
Why the math works: Each repeat uses 4 sts. 22 x 4 = 88, and 88 + 1 (first sc) = 89, which is exactly the joining row count. That’s why the extra center sc was added in the joining row. It turns 88 into a 4-multiple-plus-1, so the scallops end on a sc at both tips.
Close the Tips
Use the tail from front Row 15. At each end, fold the 8 gusset row-ends flat and whipstitch them closed. Then whipstitch the front’s slanted edge to the back’s slanted edge up to the horn tip. The front has 7 row-ends and the back has 11, but both edges are about 2.5 in (6.4 cm) long, so ease them evenly.
Inner Edge Finish
Front rim: Join yarn at one tip. Ch 1, sc in each of the 48 free loops of the front foundation chain. (48 sc) Fasten off.
Back inner edge: Repeat on the back foundation chain. (48 sc) Fasten off.
Attach the Cord
Sew one cord end securely to the upper horn tip. Sew the other end to the joined outer edge at the 6th scallop from that tip, about 6 in (15.2 cm) along the curve. Weave in all ends.
Final Blocking
- Lightly mist the whole basket with water until it’s damp but not wet.
- Lay it face up on the blocking mat.
- Push a folded hand towel into the pocket so the gusset opens to 1.75 in (4.4 cm).
- Pin the outer curve, opening each scallop into a rounded point.
- Gently pull the fans open so the gaps between them are clear.
- Pin both horn tips to sharp points.
- Check the size: 10.5 in (26.7 cm) x 9 in (22.9 cm).
- Let it dry completely before removing the pins and towel.
Final Quality-Control Checklist
- Back Row 11 and front Row 7 each have 88 sts
- Gusset is 8 rows and 1.75 in (4.4 cm) deep
- Joining row has 89 sc
- Border has exactly 22 scallops and ends on a sc at both tips
- Front Row 4 has 9 fans, Row 5 has 8 fans and Row 6 has 7 fans
- Horn tips are closed and pointed
- Cord is 15 in (38.1 cm) and firmly attached at both points
- All ends are woven in on the back
Troubleshooting
Back cups like a bowl: You have too many increases or tight tension. Recount the rows against the table and relax your grip.
Back ruffles: Your tension is too loose. Go down one hook size.
Front shorter than back: Your dc rows are short. Add one gusset row, or loosen your dc height.
Scallops don’t fit: The joining row is missing its extra center sc. Recount to 89.
Basket tips forward when loaded: Move the cord’s lower attachment one scallop farther from the tip.
Fans lean to one side: Make sure each fan sits in the sc between the previous fans, not in a dc.
Care
Hand wash in cool water, press out the water in a towel and lay flat to dry. Reshape the scallops and tips while it’s damp.

Final Notes
The measurement chain is simple. The 48-st foundation gives an inner curve of 12 in (30.5 cm). Ten shaped rows bring the back’s outer edge to 88 sts, or 22 in (55.9 cm). The front reaches the same 88 sts through its fan rows. The gusset adds 1.75 in (4.4 cm) of depth. One extra joining stitch makes 89, which gives exactly 22 scallops. If each checkpoint matches, the finished basket will hang straight and hold its shape.
Happy crocheting!