

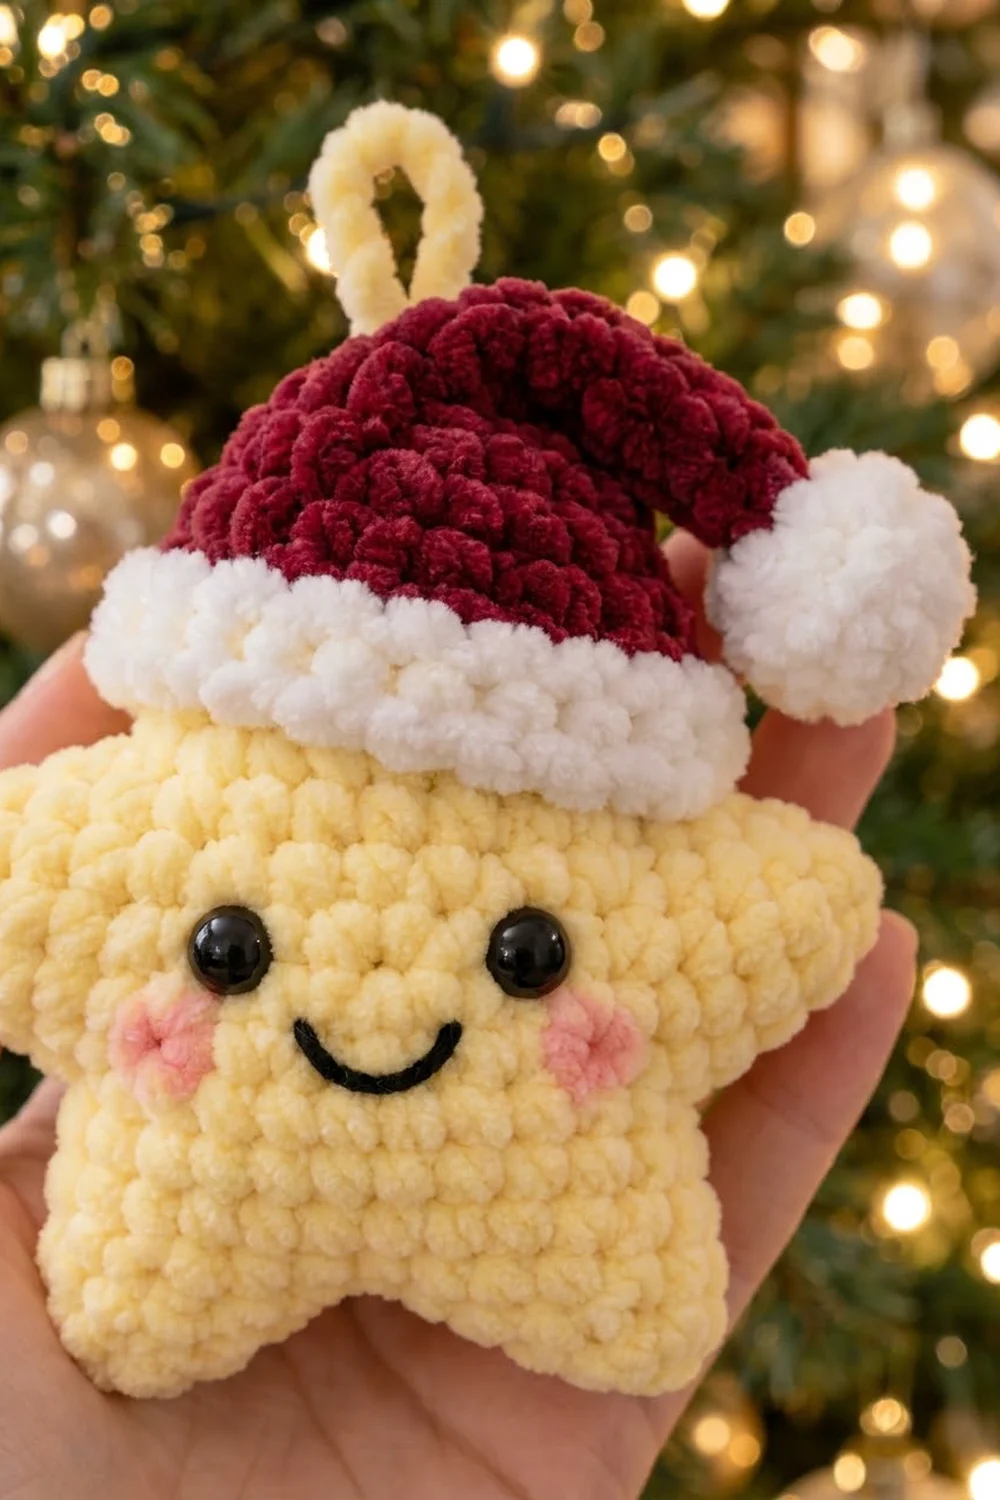
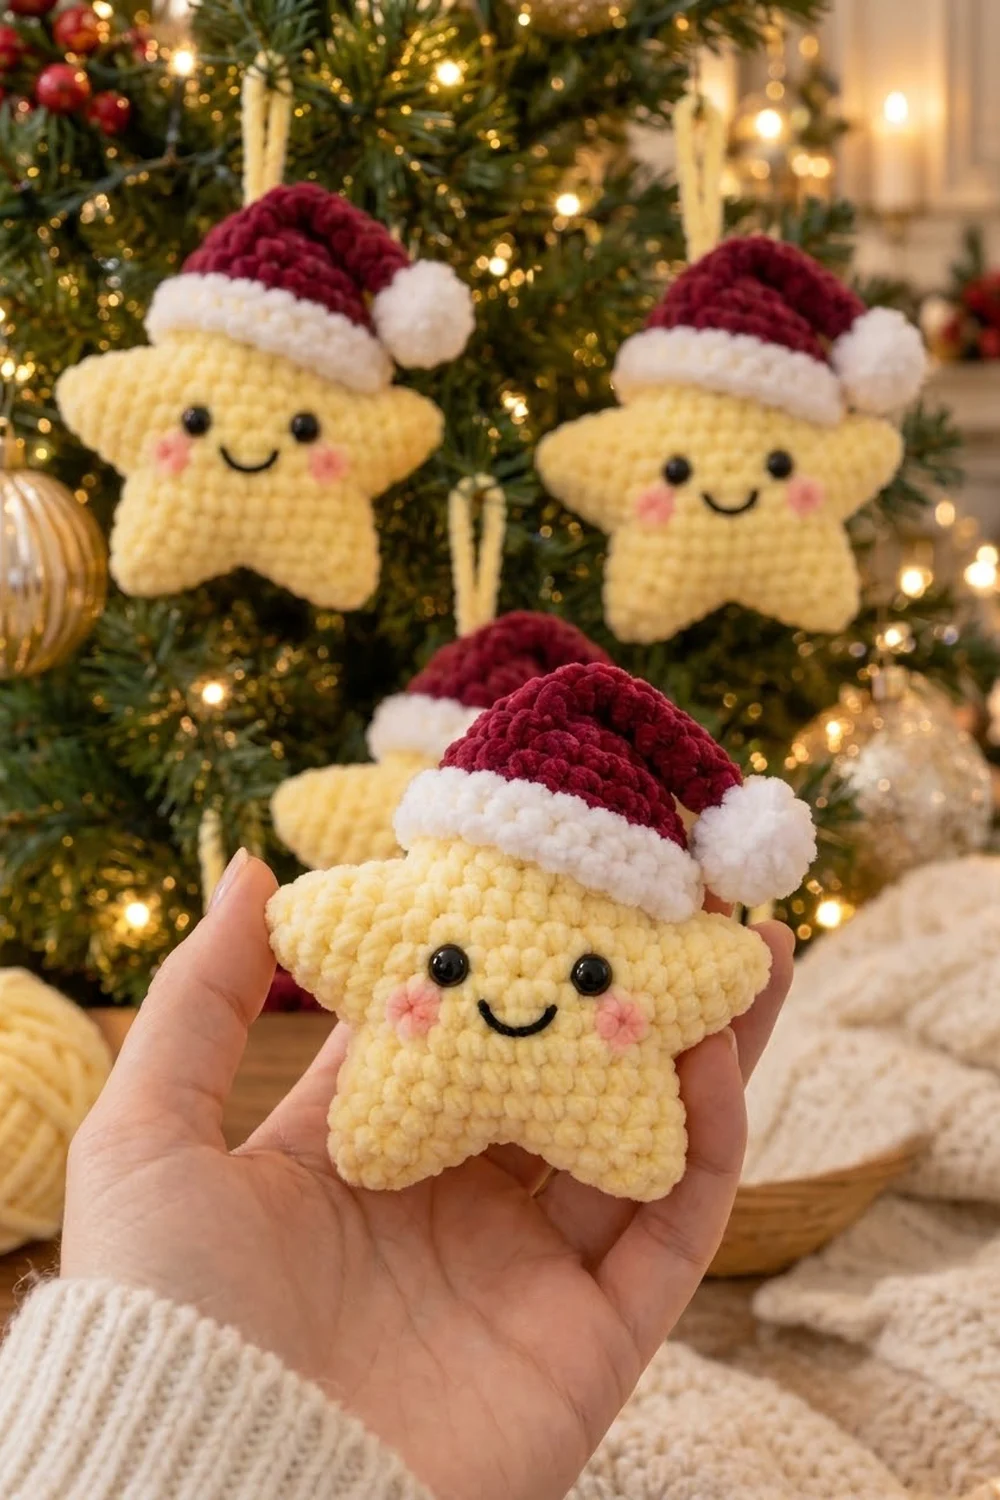
This little star is a sweet holiday ornament. It’s a soft, puffy, butter-yellow star with a slouchy burgundy Santa hat, a fluffy white brim and pompom, shiny black eyes, a stitched smile and rosy pink cheeks. Plush chenille yarn gives it a squishy, velvety look that glows under tree lights.
The colors are simple: pale yellow for the star and hanging loop, deep burgundy for the hat, and bright white for the brim and pompom. Small touches of black and pink make the face. The style is cute and cozy, so it works on a tree, as a gift tag or in a stocking.
This pattern uses US crochet terms. The finished star measures about 4.75 in (12.1 cm) wide and 4.5 in (11.4 cm) tall. With the hat on, the ornament stands about 5.75 in (14.6 cm) tall, plus a 3 in (7.6 cm) hanging loop.
Construction is simple. You crochet two identical flat star panels: a center worked in rounds, then five points worked in short rows. You add the face to the front panel, then join both panels with one single crochet edge round, stuffing lightly as you go. A small cone hat with a white brim slips over the top point, and a pompom and a loop finish the ornament.
Finished Size and Construction
- Finished star size: 4.75 in (12.1 cm) wide x 4.5 in (11.4 cm) tall
- Height with hat: about 5.75 in (14.6 cm), plus 3 in (7.6 cm) loop
- Skill level: Easy / advanced beginner
- Terminology: US crochet terms
- Yarn weight: Bulky (#5) plush chenille
- Hook: 5 mm (US H-8)
- Number of pieces: One finished ornament, assembled from 2 star panels, 1 hat, 1 pompom and 1 hanging loop
- Layout: Single star, one point straight up, hat on the top point
- Panel size before border: 4.5 in (11.4 cm) wide x 4.25 in (10.8 cm) tall
- Border depth: about 0.125 in (0.3 cm) on every edge
Materials
Choose a smooth bulky plush chenille, about 100 g / 120 m (131 yd) per skein, with a recommended hook of 5 to 6 mm. Avoid shaggy textures; you want clear stitches so the points stay crisp.
- Pale yellow: 20 g, about 24 m (26 yd), for the star panels, border and loop
- Burgundy: 10 g, about 12 m (13 yd), for the hat
- White: 8 g, about 9.6 m (10.5 yd), for the brim and pompom
- Black: about 1 m (1.1 yd) of worsted yarn or 6-strand embroidery floss, for the smile
- Pink: about 0.5 m (0.5 yd) of soft worsted or sport yarn, for the cheeks
These amounts include a margin of about 20 percent for testing and tails.
Tools:
- 5 mm (US H-8) crochet hook
- Two 10 mm (0.4 in) black safety eyes
- About 10 g polyester fiberfill
- Stitch markers
- Yarn needle with a large eye
- Scissors
- Optional: pink blush and a cotton swab
Abbreviations (US Terms)
- MR – magic ring
- ch – chain
- sl st – slip stitch
- sc – single crochet
- 2 sc – 2 single crochet in the same stitch (increase)
- sc2tog – single crochet 2 together (decrease)
- 3 sc in tip – 3 single crochet in the same tip stitch
- st(s) – stitch(es)
- Rnd – round
Special stitch – row-end sc: Insert the hook under the outer post of the last stitch of a row (the “row end”) and work a sc as usual. One sc row end is about one stitch tall.
Special stitch – valley sc2tog: Insert into the Row 1 end of one point, yarn over and pull up a loop. Insert into the Row 1 end of the next point, yarn over and pull up a loop. Yarn over and pull through all 3 loops.
Gauge and Checkpoints
Gauge: 14 sc x 14 rows = 4 in (10.2 cm), or 7 sc x 7 rows = 2 in (5.1 cm). That’s 3.5 sts per inch.
Plush chenille is hard to swatch, so make one complete star panel first as your test. It uses only about 6 g and shows you everything you need to know.
Checkpoints:
- After star Rnd 4: the center pentagon is about 2.25 in (5.7 cm) across.
- After one point: the point sticks out about 1.25 in (3.2 cm) past the Rnd 4 edge.
- Finished panel: about 4.5 in (11.4 cm) from tip to tip across the two side points.
- Hat after Rnd 10, flattened: about 2.75 in (7.0 cm) wide.
- Pompom: about 1 in (2.5 cm) across.
If your panel is too big: Go down to a 4.5 mm hook. If it’s too small or stiff: Go up to a 5.5 mm hook. The stitch counts stay the same; only the hook changes. Use the same hook for the hat so it fits the top point.
Star Panels (Make 2)
Use pale yellow. Join each round with a sl st. The ch 1 at the start of a round does not count as a stitch.
Rnd 1: In MR, ch 1, 5 sc. Pull the ring closed, sl st to first sc. (5 sts)
Rnd 2: Ch 1, 2 sc in each st around, sl st to first sc. (10 sts)
Rnd 3: Ch 1, (sc in next st, 2 sc in next st) x5, sl st to first sc. (15 sts)
Rnd 4: Ch 1, (sc in next 2 sts, 2 sc in next st) x5, sl st to first sc. (20 sts)
Checkpoint: about 2.25 in (5.7 cm) across. A slight dome is normal; the stuffing will smooth it out. Fasten off.
Each repeat of Rnd 4 made exactly 4 sts, so you now have 5 groups of 4 sts. Each group becomes one point.
Points (work 5 times per panel)
Row 1: Join yarn in the first st of a 4-st group, ch 1, sc in the same st and in the next 3 sts. (4 sts)
Row 2: Ch 1, turn, sc2tog, sc in next 2 sts. (3 sts)
Row 3: Ch 1, turn, sc2tog, sc in next st. (2 sts)
Row 4: Ch 1, turn, sc2tog. (1 st) Fasten off, leaving a 3 in (7.6 cm) tail.
Because you turn every row, the decreases switch sides and the point comes out even. Join the next point in the very next unworked st of Rnd 4. Repeat until all 20 sts of Rnd 4 are used (5 points x 4 sts = 20 sts).
Each panel has 20 + 5 x (4 + 3 + 2 + 1) = 70 sts. Tie the point tails together in pairs on the wrong side. They will be hidden inside the stuffed star.
Face (Front Panel Only)
Lay the front panel right side up with one point straight up.
- Eyes: Insert the safety eyes between Rnds 2 and 3, one on each side of center. Space them about 1.25 in (3.2 cm) apart, center to center, and keep them level. Snap the backs on firmly.
- Smile: With black, backstitch a shallow U shape about 0.75 in (1.9 cm) wide. Center it just below the magic ring, between Rnds 1 and 2.
- Cheeks: With pink, work 3 or 4 tight straight stitches on top of each other in Rnd 3, just below and outside each eye. For a softer look, dab on blush instead.
The face should sit a little below center so the hat brim doesn’t crowd the eyes.
Hat
Work the hat in continuous spiral rounds from the tip down. Mark the first st of each round.
With burgundy:
Rnd 1: 4 sc in MR. (4 sts)
Rnd 2: (Sc in next st, 2 sc in next st) x2. (6 sts)
Rnd 3: Sc in each st around. (6 sts)
Rnd 4: (Sc in next 2 sts, 2 sc in next st) x2. (8 sts)
Rnd 5: (Sc in next 3 sts, 2 sc in next st) x2. (10 sts)
Rnd 6: (Sc in next 4 sts, 2 sc in next st) x2. (12 sts)
Rnd 7: (Sc in next 5 sts, 2 sc in next st) x2. (14 sts)
Rnd 8: (Sc in next 6 sts, 2 sc in next st) x2. (16 sts)
Rnd 9: (Sc in next 7 sts, 2 sc in next st) x2. (18 sts)
Rnd 10: (Sc in next 8 sts, 2 sc in next st) x2. (20 sts)
Checkpoint: flattened, the hat is about 2.75 in (7.0 cm) wide. Change to white in the last st.
Rnds 11–12 (brim): With white, sc in each st around. (20 sts each round) Sl st to the next st and fasten off, leaving a 12 in (30.5 cm) tail.
Unfolded, the hat is about 3.5 in (8.9 cm) long. Because the increases sit at only two points, the hat stays a slim cone that slouches to the side.
Pompom
With white:
Rnd 1: 6 sc in MR. (6 sts)
Rnd 2: 2 sc in each st around. (12 sts)
Rnd 3: Sc in each st around. (12 sts)
Rnd 4: (Sc2tog) x6. (6 sts)
Stuff firmly. Weave the tail through the front loops of the remaining 6 sts and pull closed, leaving a 6 in (15.2 cm) tail. Checkpoint: about 1 in (2.5 cm) across.
Hanging Loop
With pale yellow, ch 20, about 6 in (15.2 cm) long. Fasten off, leaving 6 in (15.2 cm) tails at both ends. Folded in half, it makes a 3 in (7.6 cm) loop.
Border (Joining Edge Round)
The border is one round of sc worked through both panels at once. It joins the star and gives it a plump, rounded edge.
Border gauge: The same as the panels, 3.5 sts per inch. Each slanted side of a point is about 1.25 in (3.2 cm) long, so it needs about 4 to 4.5 sts.
Hold the panels wrong sides together, with the front panel facing you and the points lined up. Work through both layers for every stitch.
Joining Round: With pale yellow, start at the valley to the right of the top point. For each of the 5 points, work:
- Valley sc2tog over the Row 1 end of the previous point and the Row 1 end of this point (1 st)
- 2 sc in the Row 2 end, sc in the Row 3 end (3 sts)
- 3 sc in tip (3 sts)
- Sc in the Row 3 end, 2 sc in the Row 2 end (3 sts)
That’s 1 + 3 + 3 + 3 = 10 sts per point, and 5 x 10 = 50 sts in total. Sl st to the first st.
Stuff each point lightly as you finish it, pushing in small tufts with the hook end. Before you close the last point, stuff the center with about 8 g until the star is soft and puffy but not hard. Fasten off and bury the tail inside.
Why the math works: Each slanted side gets 3 sts, plus a share of the 3-sc tip and half of the valley decrease, for about 4.5 sts. At 3.5 sts per inch, that’s about 1.3 in (3.3 cm). This matches the 1.25 in (3.2 cm) side, with a little extra room for stuffing. The 3 sc in each tip turn the corner without flattening it. The decrease in each valley pulls the notch inward so the star keeps a crisp shape.
Finishing the Ornament
- Hat: Slide the hat over the top point. The brim should sit across the base of the top point and just touch the upper side points. Tilt the hat slightly to one side. With the white tail, whipstitch the brim to the star all the way around, front and back.
- Slouch: Fold the hat tip down toward the right and tack it to the hat with 2 burgundy stitches.
- Pompom: Sew the pompom to the folded tip so it sits beside the brim on the right.
- Loop: Sew both loop ends to the top of the hat at the fold, centered, so the ornament hangs straight.
Final Blocking
Heat flattens plush chenille, so block gently.
- Lay the ornament face up on a towel.
- Pinch each point between your thumb and finger to sharpen it.
- Hold a steam iron 2 in (5.1 cm) above the star for 2 to 3 seconds. Don’t let the iron touch the yarn.
- Shape the points and valleys again while the yarn is warm, then let it cool flat.
- Fluff the brim and pompom with your fingers.
- Hang the ornament by its loop for an hour to check that it hangs straight.
Final Quality-Control Checklist
- Each panel has 20 sts in Rnd 4 and 5 points of 4 rows each.
- The joining round has exactly 50 sts (10 per point).
- The star is 4.75 in (12.1 cm) wide and 4.5 in (11.4 cm) tall.
- The eyes are secure, level and 1.25 in (3.2 cm) apart.
- The smile is centered and about 0.75 in (1.9 cm) wide.
- The hat has 20 sts at the brim and fits snugly on the top point.
- The pompom is about 1 in (2.5 cm) across and firmly attached.
- No stuffing or tails show through the stitches.
Troubleshooting
Points are lopsided: You probably forgot to turn. Every row starts with ch 1, turn, sc2tog.
Points look blunt: Check that you worked 3 sc in each tip stitch, and pinch the tips while blocking.
Edge ruffles: The border is too loose. Go down one hook size for the joining round only.
Edge puckers or valleys flatten: The border is too tight. Go up one hook size, and make sure you worked 2 sc in each Row 2 end.
Hat is too tight: Check your gauge. If needed, work one extra round after Rnd 10: (sc in next 9 sts, 2 sc in next st) x2, for 22 sts. Then work the brim over 22 sts.
Loops of chenille pop out: Tug the yarn gently every few stitches. Weave tails in with short back-and-forth passes.
Care
Spot clean with a damp cloth and mild soap, then air dry flat. Store the ornament wrapped in tissue paper so the yarn stays plush.
Final Notes
All the measurements build on each other. A gauge of 3.5 sts per inch gives a 2.25 in (5.7 cm) center after Rnd 4, five 1.25 in (3.2 cm) points and a 4.5 in (11.4 cm) panel. The 50-st joining round brings the star to 4.75 in (12.1 cm) wide. The 20-st hat, 2.75 in (7.0 cm) wide, sits snugly on the top point, for a total height of 5.75 in (14.6 cm). Check each stage against these numbers and your star will match.
Happy crocheting!