

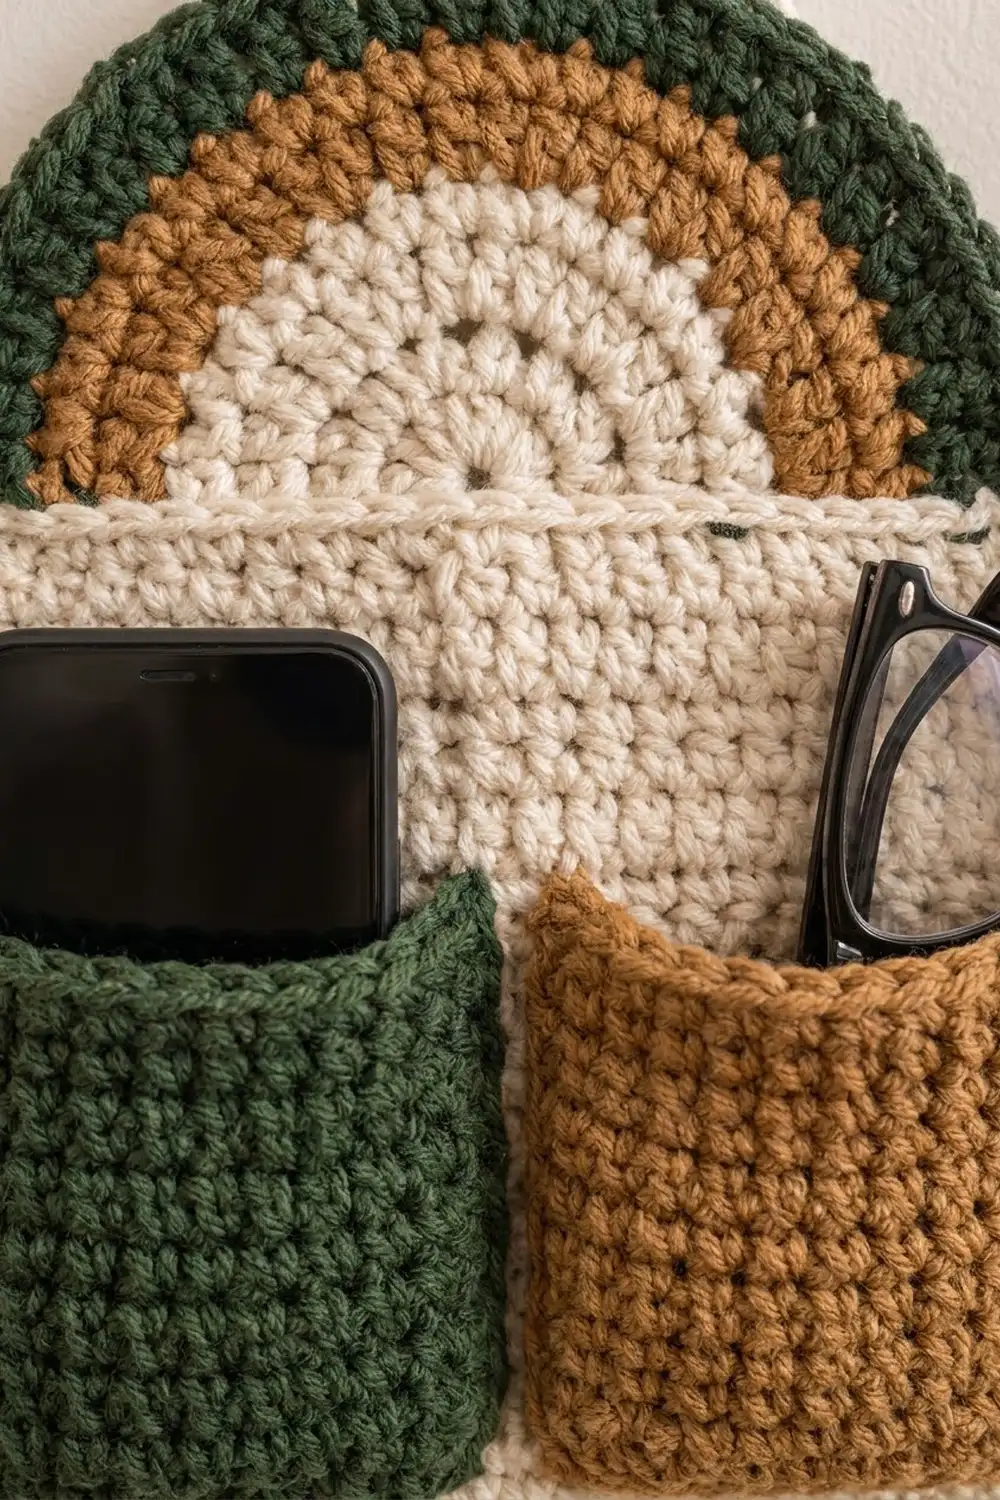
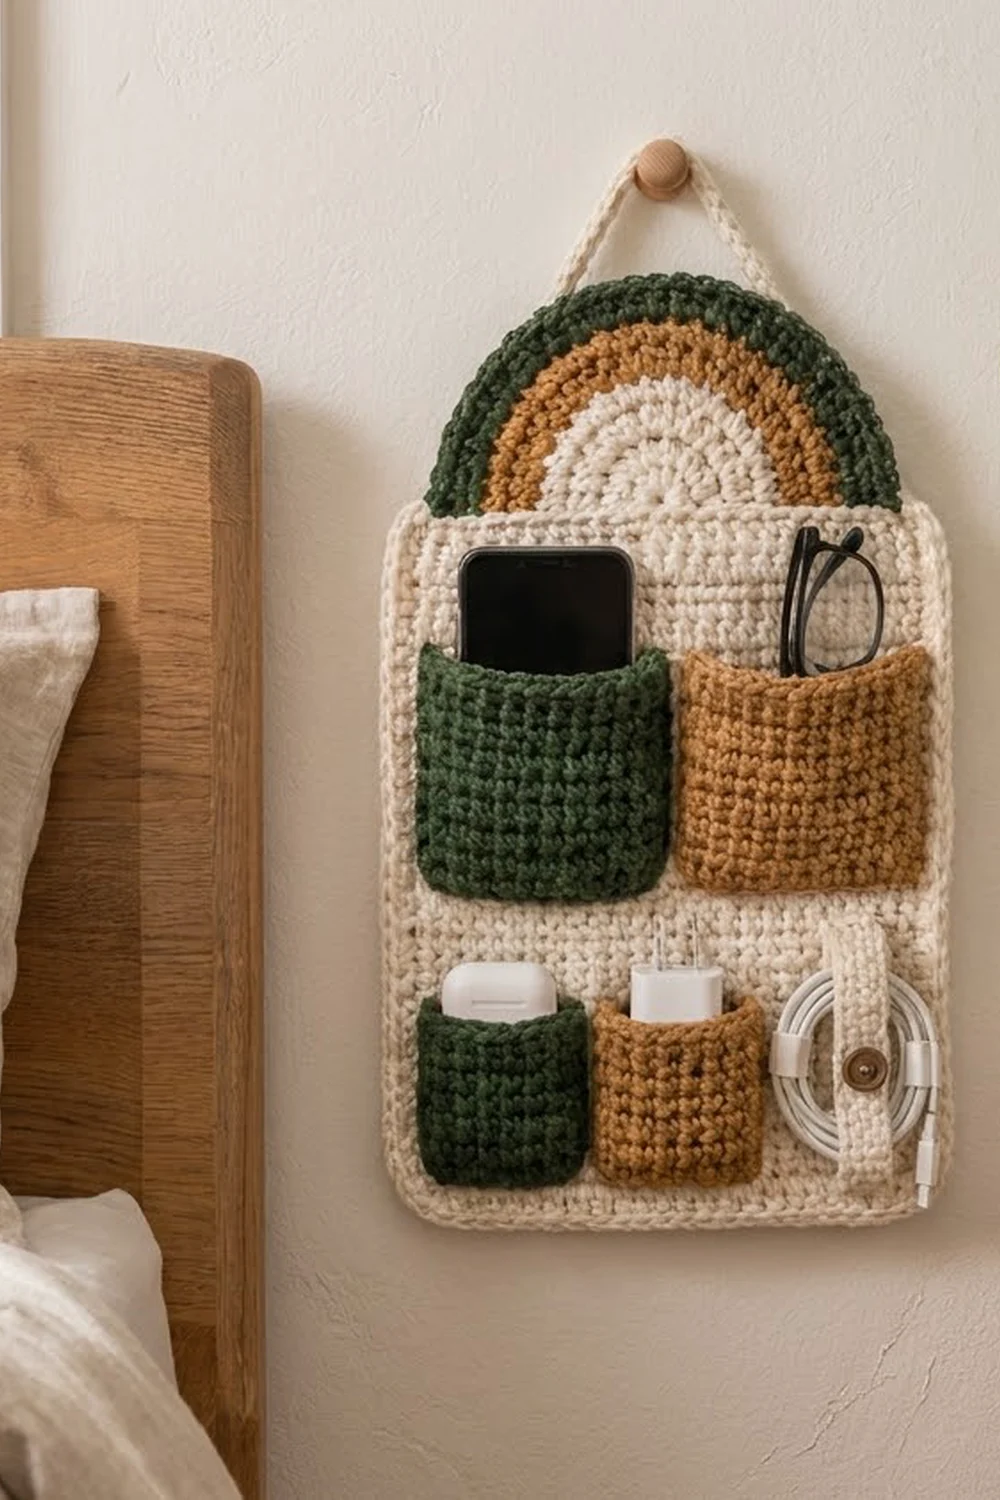
This organizer gives your phone, glasses, earbuds and charger a home right next to the bed. It is a cream single-crochet panel topped with a rainbow arch. It has two large pockets, two small pockets, and a buttoned strap that holds a coiled charging cable in place.
The colors are forest green, caramel brown and cream, with a wooden button. The rainbow has a cream center, a caramel middle band and a green outer band. The pockets swap between green and caramel so the layout looks balanced.
The pattern uses US crochet terms. The finished organizer measures 10 in (25.4 cm) wide and about 16 in (40.6 cm) tall including the arch.
Construction overview: crochet the panel in rows. Then make the half-circle rainbow, the four pockets, the strap and the cord. Sew the pockets and strap onto the panel, add a two-round border, then attach the rainbow and cord at the back.
Finished Size and Construction
- Finished size: 10 in × 16 in (25.4 cm × 40.6 cm), including the arch
- Skill level: Easy / advanced beginner
- Terminology: US
- Yarn weight: Worsted (#4)
- Hook: 4.5 mm (US 7)
- Number of pieces: 8 (1 panel, 1 rainbow, 2 large pockets, 2 small pockets, 1 strap, 1 cord)
- Layout: 2 large pockets on top; 2 small pockets plus a cord strap below
- Panel before border: 9 in × 12 in (22.9 cm × 30.5 cm)
- Panel after border: 10 in × 13 in (25.4 cm × 33.0 cm)
- Border depth: ½ in (1.3 cm) per side, in 2 rounds
Materials
Use a smooth cotton or cotton-acrylic worsted yarn. Cotton holds its shape well under weight. The amounts below assume about 185 m per 100 g.
- Cream: 70 g / 130 m (panel, border, rainbow center, strap, cord)
- Forest green: 25 g / 45 m (outer rainbow band, 1 large pocket, 1 small pocket)
- Caramel: 25 g / 45 m (middle rainbow band, 1 large pocket, 1 small pocket)
Tools:
– 4.5 mm (US 7) hook
– One ¾ in (1.9 cm) wooden button
– Tapestry needle
– Stitch markers
– Rustproof pins
– Measuring tape
– Blocking mat
All quantities include a margin of about 15–20% for swatching and sewing tails.
Abbreviations (US Terms)
- ch – chain
- sc – single crochet
- inc – 2 sc in the same stitch
- sl st – slip stitch
- st(s) – stitch(es)
- sk – skip
- RS / WS – right side / wrong side
Special technique – back-bump slip stitch: insert the hook under the bump on the back of a chain, then work a sl st. This makes a firm, round cord.
Gauge and Checkpoints
Gauge: 16 sc × 18 rows = 4 in (10.2 cm) in sc rows, after blocking.
Make one large pocket first. It is your swatch and should measure 4 in × 4 in (10.2 cm × 10.2 cm).
Checkpoints:
– Large pocket: 4 in × 4 in (10.2 cm × 10.2 cm)
– Panel at Row 18: 4 in (10.2 cm) tall
– Finished panel: 9 in × 12 in (22.9 cm × 30.5 cm)
– Rainbow, Row 10: 4.4 in (11.2 cm) across the straight edge
– Rainbow, Row 20: 8.9 in (22.6 cm) across the straight edge
– Bordered panel: 10 in × 13 in (25.4 cm × 33.0 cm)
If your pocket is too big: go down to a 4.0 mm hook. If it is too small: go up to a 5.0 mm hook. Change hooks instead of changing stitch counts, because the pocket positions depend on the panel matching the pockets 1:1.
Back Panel
Use cream.
Row 1: Ch 37, sc in 2nd ch from hook and in each ch across. (36 sts)
Rows 2–54: Ch 1, turn, sc in each st across. (36 sts)
Checkpoint: Row 18 measures 4 in (10.2 cm). Row 54 measures 12 in (30.5 cm). The width is 9 in (22.9 cm). Fasten off and weave in the ends.
Rainbow Arch
This is a flat half circle worked in turned rows. Every row adds exactly 3 sts, so Row n has 3 × n sts. The ch 1 at the start of a row never counts as a stitch.
Start with cream.
Row 1: Magic ring, ch 1, 3 sc in ring, pull the ring closed. (3)
Row 2: Ch 1, turn, inc in each st. (6)
Row 3: Ch 1, turn, (sc 1, inc) × 3. (9)
Row 4: Ch 1, turn, (sc 2, inc) × 3. (12)
Rows 5–10: Keep going the same way: each row is (sc n−2, inc) × 3, where n is the row number.
– Row 5: 15 sts
– Row 6: 18 sts
– Row 7: 21 sts
– Row 8: 24 sts
– Row 9: 27 sts
– Row 10: 30 sts
Change to caramel on the last yarn-over of Row 10.
Rows 11–15 (caramel): Continue the same way.
– Row 11: 33 sts
– Row 12: 36 sts
– Row 13: 39 sts
– Row 14: 42 sts
– Row 15: 45 sts
Change to green.
Rows 16–20 (green): Continue the same way.
– Row 16: 48 sts
– Row 17: 51 sts
– Row 18: 54 sts
– Row 19: 57 sts
– Row 20: 60 sts
Fasten off.
The cream center has a radius of about 2.2 in (5.6 cm), the caramel band reaches 3.3 in (8.4 cm), and the full arch has a radius of 4.4 in (11.2 cm). The straight edge has 40 row-ends and measures 8.9 in (22.6 cm).
Tip: on even rows, move the increases half a repeat over so the curve stays round instead of forming points.
Pockets
All four pockets are flat rectangles worked bottom-up in sc rows.
Large pocket (make 1 green, 1 caramel):
– Row 1: Ch 17, sc in 2nd ch from hook and in each ch across. (16 sts)
– Rows 2–18: Ch 1, turn, sc in each st across. (16 sts)
– Fasten off and leave a 24 in (61.0 cm) tail for sewing.
– Size: 4 in × 4 in (10.2 cm × 10.2 cm).
Small pocket (make 1 green, 1 caramel):
– Row 1: Ch 13, sc in 2nd ch from hook and in each ch across. (12 sts)
– Rows 2–13: Ch 1, turn, sc in each st across. (12 sts)
– Fasten off and leave a 20 in (50.8 cm) tail.
– Size: 3 in × 2.9 in (7.6 cm × 7.4 cm).
Cord Strap and Hanging Cord
Strap (cream):
– Row 1: Ch 6, sc in 2nd ch from hook and in each ch across. (5 sts)
– Rows 2–13: Ch 1, turn, sc in each st across. (5 sts)
– Row 14 (buttonhole): Ch 1, turn, sc 1, ch 3, sk 3, sc 1. (2 sc + 3 ch)
– Row 15: Ch 1, turn, sc 1, 3 sc in the ch-3 space, sc 1. (5 sts)
– Rows 16–20: Ch 1, turn, sc in each st across. (5 sts)
– Fasten off. Size: 1.25 in × 4.4 in (3.2 cm × 11.2 cm).
Hanging cord (cream): Ch 46. Sl st in the back bump of the 2nd ch from hook and in each ch across. (45 sl sts)
The cord measures about 11 in (27.9 cm). Leave 8 in (20.3 cm) tails at both ends.
Make All Pieces
Pieces by color:
– Cream: 1 panel, rainbow Rows 1–10, 1 strap, 1 cord
– Green: 1 large pocket, 1 small pocket, rainbow Rows 16–20
– Caramel: 1 large pocket, 1 small pocket, rainbow Rows 11–15
Layout on the panel: hold the panel RS facing. Count rows from the bottom and stitches from the left.
Rows 39–54 | open panel (items stand up out of pockets)
Rows 21–38 | st1 | GREEN LARGE sts 2–17 | gap 18–19 | CARAMEL LARGE sts 20–35 | st36
Rows 16–20 | open; strap top sewn over rows 18–19, sts 30–34
Rows 3–15  | st1 | GREEN SMALL sts 2–13 | gap 14 | CARAMEL SMALL sts 15–26 | cord zone 27–36
Rows 1–2   | open; button on row 5, st 32
Check that the stitches across each band add up to 36:
– Top band: 1 + 16 + 2 + 16 + 1 = 36
– Bottom band: 1 + 12 + 1 + 12 + 10 = 36
Joining
Method: Use a whipstitch with the matching pocket color. Sew the sides and bottom of each pocket, and leave the top open.
Stitch-to-stitch logic: the pockets and panel have the same gauge, so everything matches 1:1.
– Large pockets: the 18 row-ends on each side match 18 panel rows (Rows 21–38). The 16 foundation loops along the bottom match 16 panel sts along Row 21.
– Small pockets: the 13 row-ends on each side match panel Rows 3–15. The 12 foundation loops match 12 panel sts.
Pin all four corners of each pocket before you sew. Make one needle pass per row-end or stitch.
Strap: with Row 1 at the top, sew strap Rows 1–2 over panel Rows 18–19, sts 30–34. Sew around all four edges of this 2-row area. Let the rest of the strap hang free.
Button: sew the button to panel Row 5, st 32, directly under the buttonhole. Use a short thread shank so the strap can close over a coiled cable.
Tension: pull each stitch just snug. If it is too tight, the panel puckers. If it is too loose, the pocket edges gape. Leave the pocket fronts slightly relaxed so a phone slides in easily.
Size checkpoint: the panel should still measure 9 in × 12 in (22.9 cm × 30.5 cm) and lie flat.
Border
Border gauge: each sc round adds about ¼ in (0.6 cm) per side. Along the side edges, work 8 sc for every 9 row-ends.
Round 1 (cream):
1. With RS facing, join cream in the top-right corner st. Ch 1, 3 sc in that st.
2. Along the top: sc in the next 34 sts, then 3 sc in the last st (corner).
3. Down the left side: work 48 sc across the 54 row-ends, using 8 sc per 9 rows (6 repeats).
4. Bottom corner: 3 sc in the first foundation loop.
5. Along the bottom: sc in the next 34 loops, then 3 sc in the last loop (corner).
6. Up the right side: work 48 sc across the 54 row-ends.
7. Sl st to the first sc.
Round 1 total: 176 sts.
– Top and bottom: 36 sts each between corner centers (34 + 1 from each corner group)
– Sides: 50 sts each between corner centers (48 + 1 from each corner group)
– Corners: 4 center sts
– Check: 36 + 36 + 50 + 50 + 4 = 176
Round 2: Ch 1. Sc in each st around, with 3 sc in each corner center st. Sl st to join. (184 sts)
– Top and bottom: 38 sts each between corner centers
– Sides: 52 sts each between corner centers
– Corners: 4 center sts
– Check: 38 + 38 + 52 + 52 + 4 = 184
Why the math works: the panel’s 36 top sts match its 9 in (22.9 cm) width, and 4 sc per in matches the gauge. The sides pick up 48 sc for 12 in (30.5 cm) because 8 sc per 9 rows equals 4 sts per in at 4.5 rows per in. Each 3-sc corner adds 2 sts per side per round. That gives just enough extra to turn the corner without cupping or ruffling. Two rounds of ¼ in (0.6 cm) give a ½ in (1.3 cm) border, so the bordered panel measures 10 in × 13 in (25.4 cm × 33.0 cm).
Attach the Rainbow and Hanging Cord
- Place the rainbow behind the panel with its straight edge 1.5 in (3.8 cm) below the top edge of the border. Center it so there is about 0.5 in (1.3 cm) of panel on each side.
- Whipstitch the straight edge and the overlapping curve to the back of the panel with cream.
- About 3 in (7.6 cm) of arch should show above the panel.
- Sew the cord ends to the back of the green band, 1 in (2.5 cm) in from each end of the straight edge.
Final Blocking
- Lightly spray the whole organizer with water until it is damp, not soaked.
- Lay it RS up on the blocking mat.
- Pin the panel to 10 in × 13 in (25.4 cm × 33.0 cm), with the corners square.
- Ease the arch into a smooth curve with a 3 in (7.6 cm) rise.
- Smooth the pocket fronts flat without stretching their tops.
- Let it dry completely, for about 24 hours.
- Unpin it, then check the measurements again.
Final Quality-Control Checklist
- Panel is 10 in × 13 in (25.4 cm × 33.0 cm), and the total height is about 16 in (40.6 cm)
- Border Round 2 has 184 sts, with neat 3-sc corners
- All four pocket tops are open, level and square
- The large pockets line up across Row 38; the small pockets line up across Row 15
- The strap buttons closed over a cable without pulling
- The rainbow bands are even (cream, then caramel, then green) and the arch is centered
- The cord is secure and the organizer hangs straight
- All ends are woven in on the WS
Troubleshooting
- Rainbow ruffles: use a hook 0.5 mm smaller for Rows 16–20, or block it harder.
- Rainbow cups: use a hook 0.5 mm larger, or check that you are working 3 increases per row and not 2.
- Panel puckers around the pockets: remove the stitches and sew again with looser whipstitches.
- Border waves: you picked up too many sts on the sides. Go back to 8 sc per 9 rows.
- Border pulls in: check that every corner has 3 sc.
- Buttonhole too loose: sew 2–3 small stitches at one end to close it up a little.
- Organizer tilts: move one cord end until the panel hangs level.
Care
Hand wash in cool water, press out the water in a towel, and dry flat to the blocked size. Do not tumble dry, because heat can shrink the cotton and pull the pockets out of shape.
Final Notes
The measurements build on each other:
– Gauge of 16 sc × 18 rows = 4 in (10.2 cm)
– Panel of 9 in × 12 in (22.9 cm × 30.5 cm)
– Pockets sewn 1:1, so the panel keeps that size
– Border of ½ in (1.3 cm) per side, giving 10 in × 13 in (25.4 cm × 33.0 cm)
– Rainbow showing 3 in (7.6 cm) above the panel, for a total of about 16 in (40.6 cm)
If each checkpoint matches, the finished organizer will match too. Happy crocheting!