

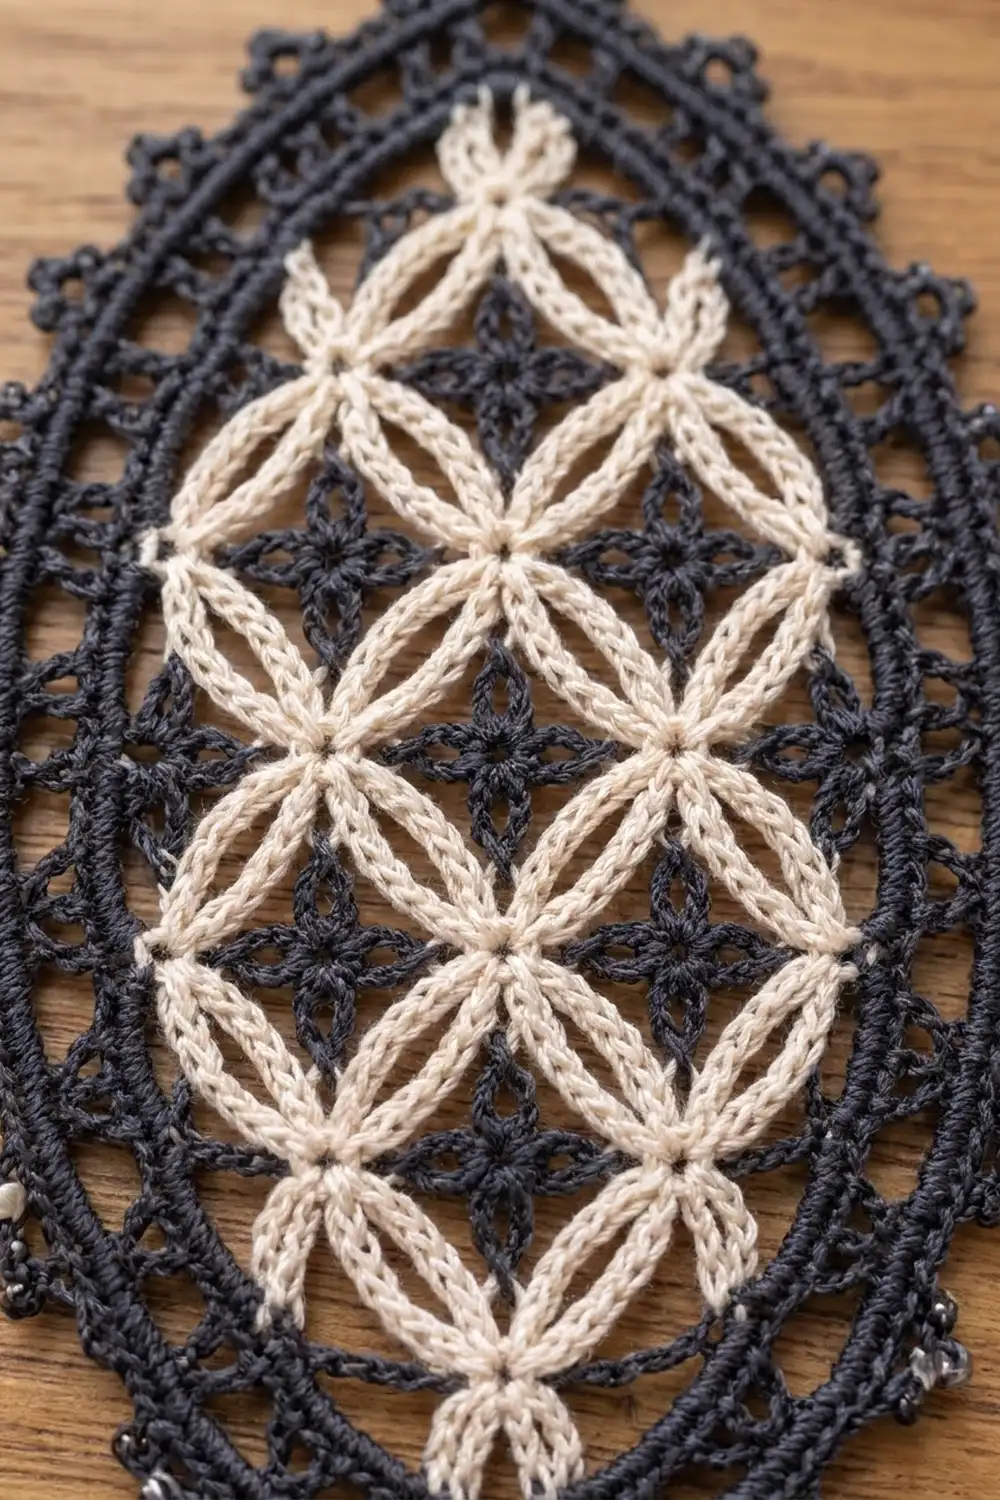
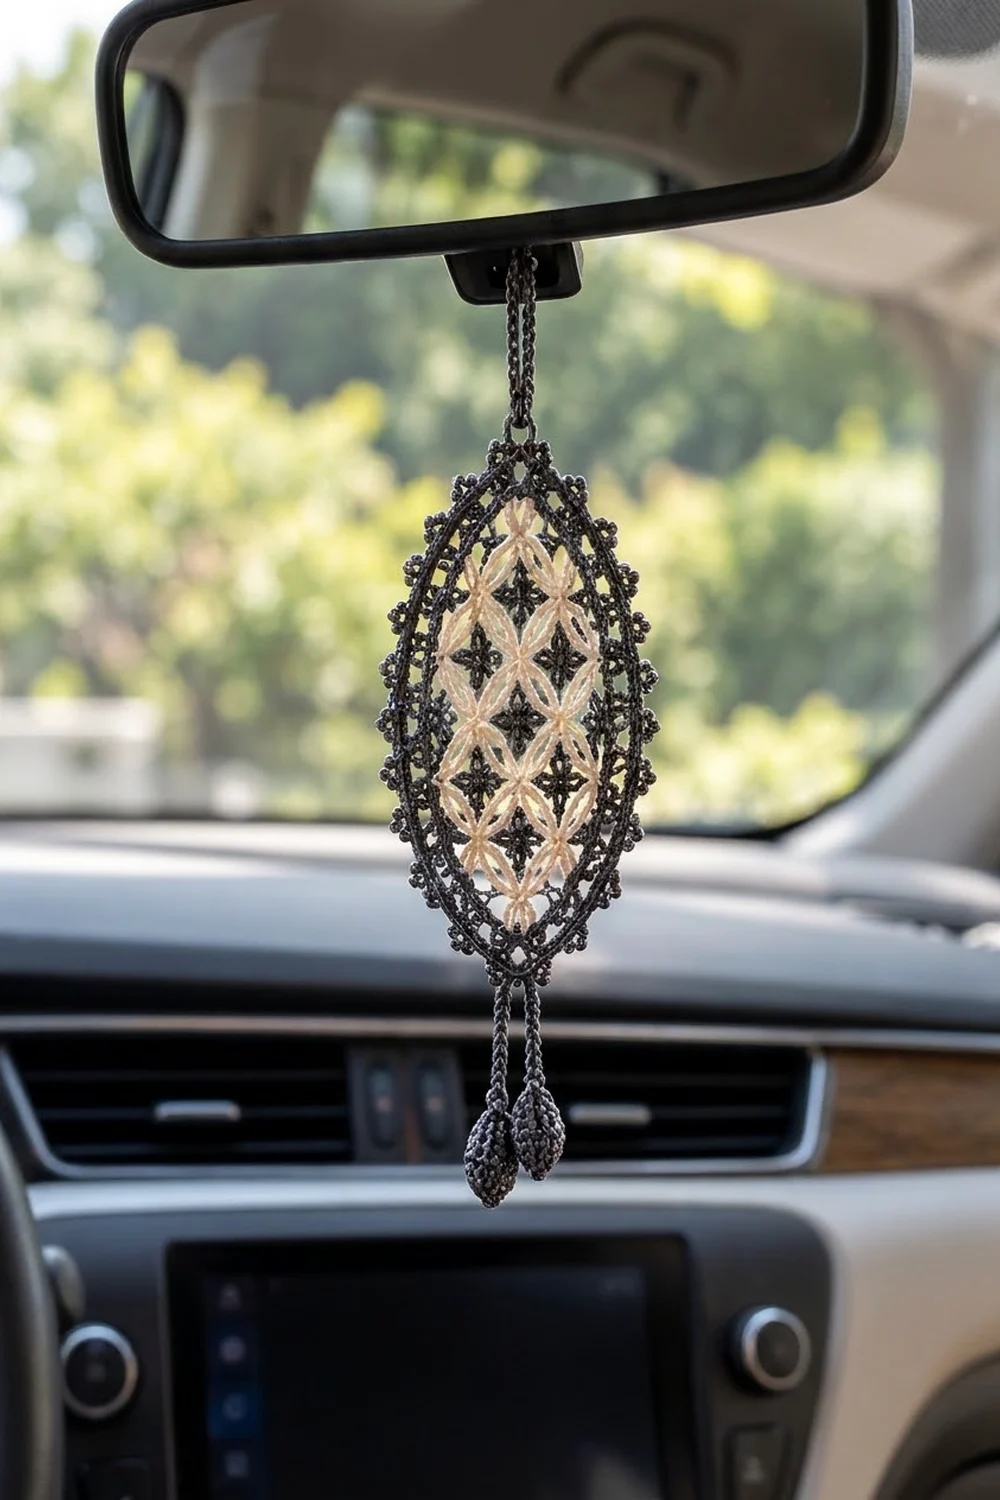
The Midnight Lattice Car Mirror Charm is a small lace pendant that hangs from a rear-view mirror. A cream lattice of curved chain loops fills the center and reads as a field of interlocking circles. A tiny charcoal star sits in each diamond opening.
A charcoal frame surrounds the lattice. It starts with a solid band, moves into a ring of small arches, and ends in a row of bead-like picot dots. A doubled chain hanger goes over the mirror stem, and two cords with small crocheted beads hang from the bottom point.
This pattern uses US crochet terms. The finished body measures 2.75 in (7.0 cm) wide by 4 in (10.2 cm) tall. With the drops, it measures 6.125 in (15.6 cm) from the top point to the bottom of the beads.
You make it in five stages: a cream mesh lattice worked in rows from point to point, 19 charcoal star fillers joined into the openings as you go, a four-round charcoal frame, a chain hanger, and two bead drops.
Finished Size and Construction
- Finished body: 2.75 in x 4 in (7.0 cm x 10.2 cm)
- Body plus drops: 6.125 in (15.6 cm); with the hanger, about 9.125 in (23.2 cm) of total hanging length
- Skill level: Intermediate (thread lace)
- Terminology: US
- Yarn weight: Size 10 cotton crochet thread (lace weight)
- Hook: 1.5 mm (US steel size 8)
- Number of pieces: 1 finished piece. The stars are joined as you go, the frame is worked directly onto the lattice, and the hanger and drops are attached.
- Layout: Single pointed-oval motif, hung vertically
- Lattice size (before border): 1.5 in x 2.75 in (3.8 cm x 7.0 cm)
- Border (frame) depth: 0.625 in (1.6 cm) on every side
Materials
Use a smooth, tightly plied mercerized cotton thread in size 10. Mercerized cotton holds its shape in a warm car, keeps the lattice crisp, and will not fuzz up the picots. Do not use acrylic here, because it relaxes in heat and the arches lose their curve.
- Cream (Color A): 5 g, about 20 m
- Charcoal (Color B): 10 g, about 36 m
These quantities include a generous margin for swatching and for the long tails the 19 star fillers need.
Tools:
- 1.5 mm (US steel size 8) hook
- Fine tapestry needle that fits size 10 thread
- Small sharp scissors
- Rust-proof pins and a foam blocking board
- Spray bottle of water
- Light fabric stiffener or starch (optional)
- A pinch of fiberfill or thread scraps for the beads
Abbreviations (US Terms)
- ch – chain
- sl st – slip stitch
- sc – single crochet
- dc – double crochet
- tr – treble crochet
- sc2tog – single crochet 2 together
- sp(s) – space(s)
- tch – turning chain
- MR – magic ring
- rep – repeat
- RS – right side
Special stitches:
- Picot: Ch 3, sl st in 3rd ch from hook. This makes a small round dot.
- Node: Any sc that anchors the lattice loops. You join star points into nodes.
Gauge and Checkpoints
Basic gauge: 13 sc = 1 in (2.5 cm), and 13 ch = 1 in (2.5 cm).
This is a single small piece, so the charm works as its own test piece. Make the lattice first and measure it before you start any charcoal work.
Checkpoints:
- After Row 4 (widest row): 1.5 in (3.8 cm) wide, about 1 in (2.5 cm) tall from the bottom point
- After Row 8: about 2 in (5.1 cm) tall
- Finished lattice (Row 11): 1.5 in x 2.75 in (3.8 cm x 7.0 cm), lightly pinned
- After Frame Round 2: 2 in x 3.25 in (5.1 cm x 8.3 cm)
- After Frame Round 4: 2.75 in x 4 in (7.0 cm x 10.2 cm)
If your lattice is too big: Go down to a 1.25 mm hook, or tighten your chains. Loose chains are the usual cause.
If your lattice is too small: Go up to a 1.75 mm hook. If the loops look flat instead of curved, your chains are too tight for the frame counts below.
Part 1: Cream Lattice
With Color A. The lattice is worked in rows from the bottom point to the top point.
The rows come in three types:
- Increase rows add a loop at each edge.
- Straight rows alternate between a “half-loop” row (B) and a “full-loop” row (C).
- Decrease rows slip stitch in to the middle of the first loop.
Row 1 (RS): Ch 2, sc in 2nd ch from hook. Turn. (1 sc)
Row 2: Ch 1, (sc, ch 7, sc) in the sc. Turn. (1 loop, 2 sc)
Row 3: Ch 1, sc in first sc, ch 7, sc around the ch-7 loop, ch 7, sc in last sc. Turn. (2 loops, 3 sc)
Row 4: Ch 1, sc in first sc, ch 7, sc around next loop 2 times, ch 7, sc in last sc. Turn. (3 loops, 4 sc)
Check: 1.5 in (3.8 cm) wide.
Row 5 (B): Ch 7 (counts as tr + ch 3), sc around first loop, ch 7, sc around next loop 2 times, ch 3, tr in last sc. Turn. (2 full loops, 2 half loops, 3 sc)
Row 6 (C): Ch 1, sc in first tr, ch 7, sc around next full loop 2 times, ch 7, sc in 4th ch of tch. Turn. (3 loops, 4 sc)
Row 7: Repeat Row 5. (2 full loops, 3 sc)
Row 8: Repeat Row 6. (3 loops, 4 sc)
Check: about 2 in (5.1 cm) tall.
Row 9 (decrease): Ch 1, sl st in first sc and in next 4 ch (the 4th ch is the center of the loop), ch 1, sc around same loop, ch 7, sc around next loop 2 times. Turn. (2 loops, 3 sc)
Row 10: Ch 1, sl st in first sc and in next 4 ch, ch 1, sc around same loop, ch 7, sc around next loop. Turn. (1 loop, 2 sc)
Row 11: Ch 1, sl st in first sc and in next 4 ch, ch 1, sc around same loop. (1 sc, top point)
Fasten off and weave in the ends.
Pin the lattice to 1.5 in x 2.75 in (3.8 cm x 7.0 cm). Ease each ch-7 loop into a round arch so the interlocking-circle look appears. Mist it and let it dry before you add the stars.
Opening count: Every full loop in Rows 2–10 has a sc worked into it from the row above, and that closes a diamond opening. Rows 2 through 10 have 1 + 2 + 3 + 2 + 3 + 2 + 3 + 2 + 1 = 19 openings. The half loops in the B rows are edge loops, not openings.
Part 2: Charcoal Star Fillers (make 19, joined as you go)
Each star sits in the middle of one opening. Every opening has four corners:
- the node below
- the node at the left
- the node at the right
- the node above (the sc from the next row that sits on the loop)
Work the stars from the bottom of the lattice up so the piece is easier to hold.
Round 1: With Color B, leave a 6 in (15.2 cm) tail and make a MR. Ch 1, 8 sc in ring, then sl st in first sc. (8 sc) Pull the ring fully closed.
Round 2: Hold the star in the center of the opening with the RS facing.
- Ch 3, insert hook from front to back through the node at the bottom corner, sl st.
- Ch 3, sl st in the same sc of the star center.
- Sl st in next 2 sc.
- Rep steps 1–3 for the right, top, and left corners.
The last “sl st in next 2 sc” ends in the first sc. (4 doubled points, 8 sc)
Each point is a ch 3 going out and a ch 3 coming back, so it lies as a narrow petal. The four petals make a four-point star. Fasten off and weave both tails into the star center, not into the cream thread.
Tension tip: The points should lie flat without pulling the corners in. If the opening puckers, use ch 4 instead of ch 3 on every point of that star.
Part 3: Charcoal Frame (Border)
Border gauge: 13 sc = 1 in (2.5 cm). Each frame round adds about 0.15 in (0.4 cm). Four rounds give the 0.625 in (1.6 cm) frame depth.
Side definitions:
- Lattice edge: Each side runs from the top point (Row 11) to the bottom point (Row 1) and has 9 row-ends, one each for Rows 10 down to 2.
- Frame: A “side” runs from one point space to the other point space.
Round 1: With RS facing, join Color B in the top point sc.
- Ch 1, (sc, ch 3, sc) in the top point.
- Ch 4, sc in the end stitch of the next row 9 times.
- Ch 4, (sc, ch 3, sc) in the bottom point sc.
- Ch 4, sc in the end stitch of the next row 9 times.
- Ch 4, sl st in first sc.
(20 ch-4 sps: 10 per side, plus 2 point ch-3 sps, 22 sc)
Round 2 (solid band):
- Sl st in top point ch-3 sp, ch 1, (2 sc, ch 2, 2 sc) in the same sp.
- 5 sc in each of the next 10 ch-4 sps.
- (2 sc, ch 2, 2 sc) in the bottom point sp.
- 5 sc in each of the next 10 ch-4 sps.
- Sl st in first sc.
(108 sc: each side has 2 + 50 + 2 = 54 sc between the point ch-2 sps)
Check: 2 in x 3.25 in (5.1 cm x 8.3 cm). Five sc in a ch-4 space is slightly full. That fullness rounds the hexagon-shaped lattice into a smooth oval.
Round 3 (arch ring):
- Sl st in top point ch-2 sp, ch 1, (sc, ch 3, sc) in the same sp.
- Ch 2, skip 1 sc, dc in next sc.
- Ch 2, skip 2 sc, dc in next sc 17 times.
- Ch 2, skip last sc.
- (sc, ch 3, sc) in the bottom point sp.
- Repeat steps 2–4 along the second side.
- Sl st in first sc.
(Per side: 18 dc and 19 ch-2 sps. Total: 36 dc, 38 ch-2 sps, 2 point ch-3 sps)
Why the math works: Each side has 54 sc. The dc stitches land on sc 2, 5, 8 and so on up to 53, which is 18 dc. That leaves 1 skipped sc at each end and 2 skipped sc between dc, so 1 + (17 × 2) + 1 + 18 = 54. Both ends of each side match, so the arches are even all the way around.
Round 4 (picot edge):
- Sl st in top point ch-3 sp, ch 1, (2 sc, picot, 2 sc) in the same sp.
- Skip the point sc.
- (Sc, picot, sc) in next ch-2 sp, sc in next dc 18 times.
- (Sc, picot, sc) in last ch-2 sp.
- Skip the point sc, then (2 sc, picot, 2 sc) in the bottom point sp.
- Repeat steps 2–4 along the second side.
- Sl st in first sc.
(Per side: 19 picots and 38 + 18 = 56 sc. Total: 120 sc and 40 picots, including 4 sc and 1 picot at each point)
Fasten off and weave in the end.
Check: 2.75 in x 4 in (7.0 cm x 10.2 cm). The picots come out about every 0.25 in (0.6 cm), which gives the beaded-edge look.
Part 4: Hanger and Bead Drops
Hanger:
- Join Color B in the top point ch-3 sp of Round 3, behind the Round 4 picot.
- Ch 80, about 6 in (15.2 cm), then sl st in the same sp to form a loop.
- Sl st in the back bump of each of the 80 ch around the loop.
The sl st pass doubles the cord, so it won’t stretch or twist. The loop hangs about 3 in (7.6 cm) above the charm once it is looped over the mirror stem. Fasten off and weave in.
Bead (make 2): With Color B, work in continuous rounds.
- Round 1: 6 sc in MR. (6)
- Round 2: Sc in next sc, 2 sc in next sc 3 times. (9)
- Round 3: Sc in next 2 sc, 2 sc in next sc 3 times. (12)
- Rounds 4–6: Sc in each sc around. (12 each round)
- Round 7: Sc in next 2 sc, sc2tog 3 times. (9)
Stuff the bead firmly with fiberfill or thread scraps.
- Round 8: Sc in next sc, sc2tog 3 times. (6)
- Round 9: Sc2tog 3 times. (3)
Do not fasten off. The bead is about 0.375 in (1.0 cm) wide and 0.625 in (1.6 cm) long.
Cord:
- From the bead top, ch 20, about 1.5 in (3.8 cm).
- Remove the hook, insert it from front to back through the bottom point ch-3 sp of Round 3, pick up the loop, and sl st.
- Fasten off and bury the tail down through the chain.
Attach the second bead in the same space, next to the first, so the two cords hang side by side.
Final Blocking
- Wet the charm and press it gently in a towel until it is damp, not dripping.
- Pin it RS up to 2.75 in x 4 in (7.0 cm x 10.2 cm), starting with the two points.
- Pin the widest part of each side, then pin the rest of the outline evenly.
- Pin out every picot so it stands as a round dot.
- Use a pin tip to shape each cream loop into an arch, and center each star in its opening.
- If you want a stiffer charm, brush or spray on a light coat of stiffener.
- Let it dry completely, at least 12 hours.
- Unpin it, then roll each bead between your fingers so it is a smooth oval.
Final Quality-Control Checklist
- Lattice measures 1.5 in x 2.75 in (3.8 cm x 7.0 cm) with 19 openings
- Each opening holds one star with all 4 points joined
- Frame Round 2 has 54 sc per side and 108 sc in total
- Frame Round 3 has 18 dc and 19 arches per side
- Frame Round 4 has 40 picots in total
- Body measures 2.75 in x 4 in (7.0 cm x 10.2 cm) and sits flat
- Hanger cord is doubled along its full length
- Both cords are 20 ch, and the two beads are matched ovals
- All ends are woven into their own color
Troubleshooting
Lattice leans to one side. Check the B rows. They must start with ch 7 (tr + ch 3) and end with ch 3, tr.
Lattice is narrower at the top than at the bottom. In the decrease rows, slip stitch into exactly 4 ch to reach the loop center.
Stars pull the openings out of shape. Lengthen the points to ch 4, or re-pin the lattice before you add the stars.
Frame ruffles. Your Round 2 is too loose. Go down a hook size for the frame only.
Frame cups. Make the Round 1 chains a little looser, or work 6 sc in the two middle ch-4 sps on each side. Keep the count at 54 per side by working 4 sc in each of the two ch-4 sps nearest the points.
Picots are uneven. Make each sl st into the 3rd chain from the hook, every time.
Beads look lumpy. Add or remove stuffing before Round 8.
Care
Hand wash in cool water, press out the moisture in a towel, and reshape and pin to dry. Re-stiffen if needed. To avoid fading, move the charm out of strong sun if the car is parked outdoors for long periods.
Final Notes
The whole charm depends on one chain of measurements. The lattice is 1.5 in x 2.75 in (3.8 cm x 7.0 cm) with 19 openings. Frame Round 2 brings it to 2 in x 3.25 in (5.1 cm x 8.3 cm) with 54 sc per side. Rounds 3 and 4 finish the body at 2.75 in x 4 in (7.0 cm x 10.2 cm). The drops add 2.125 in (5.4 cm), and the hanger adds about 3 in (7.6 cm) of hanging length. Check each stage before you start the next one and the charm will come out symmetrical.
Happy crocheting!