

This window valance is made from seven lacy round mandala motifs joined in a single row. Hanging below them are fifteen dangling strands with crocheted moons, stars, teardrops and tassels. Each motif has a pale blue eight-petal puff flower in the center, a silver-gray ring around it, and an open navy mesh frame. The navy frame finishes in a straight top band and a lacy point under every motif.
The palette is navy, light blue and silver-gray. Read against daylight, it looks like a night sky: gray crescent moons, light blue stars, navy openwork teardrops and soft gray tassels.
The pattern uses US crochet terms. The finished valance body is 43″ (109.2 cm) wide and 9″ (22.9 cm) deep. The strands add about 14″ (35.6 cm), for a total drop of about 23″ (58.4 cm).
Construction: you crochet one motif, then join the other six as you go on their last round. A three-row top band straightens the upper edge, and short rows build a point under each motif. The small pieces are crocheted separately and strung on chain with beads.
Finished Size and Construction
- Finished size: 43″ × 9″ (109.2 × 22.9 cm) body; about 23″ (58.4 cm) total drop with strands
- Skill level: Intermediate
- Terminology: US
- Yarn weight: DK (3), cotton or cotton blend
- Hook: 4.0 mm (G-6)
- Number of pieces: 7 motifs, 8 stars, 7 moons, 15 teardrops, 15 tassels
- Layout: 7 motifs in 1 row
- Motif size: 6″ (15.2 cm) diameter
- Size before border: 43″ × 6″ (109.2 × 15.2 cm)
- Border depth: top band 0.5″ (1.3 cm); points 2.5″ (6.4 cm) below the motifs
Materials
Mercerized cotton holds stitch definition well and blocks crisply, and the mesh stays open when it hangs in a window. Use a smooth DK yarn of around 115 m per 50 g.
Avoid fuzzy or very stretchy yarns. A halo blurs the puff petals, and soft acrylic mesh sags under the weight of the strands over time. If you substitute a yarn, make the flower first, because a slightly thicker DK quickly pushes the motif past 6″ (15.2 cm).
- Color A, light blue: 50 g / 115 m (flower centers, stars)
- Color B, silver-gray: 150 g / 345 m (motif rings, moons, tassels)
- Color C, navy: 150 g / 345 m (motif mesh, top band, points, teardrops)
Tools:
- 4.0 mm (G-6) crochet hook
- Tapestry needle and scissors
- Stitch markers
- 4″ (10.2 cm) piece of cardboard for winding tassels
- About 6 yd (5.5 m) of fine silver-tone chain, plus jump rings
- 30 silver beads, 8 mm, with large holes or bead caps
- 15 curtain clip rings
- Rustproof pins, blocking mats, spray starch
All yarn quantities include a margin of roughly 15–20%.
Abbreviations (US Terms)
- ch – chain
- sl st – slip stitch
- sc – single crochet
- hdc – half double crochet
- dc – double crochet
- tr – treble crochet
- dtr – double treble crochet
- sk – skip
- sp – space
- st(s) – stitch(es)
- RS – right side
Tall puff (puff): (Yo, insert hook in the stitch, yo, pull up a loop to 3/4″ (1.9 cm)) 4 times, which leaves 9 loops on the hook. Yo, draw through all 9 loops, then ch 1 to close.
Gauge and Checkpoints
Make one complete motif before you start anything else, and block it.
- After Round 2 (flower): 2.5″ (6.4 cm)
- After Round 4 (gray ring): 3.75″ (9.5 cm)
- After Round 5: 4.75″ (12.1 cm)
- After Round 6, blocked: 6″ (15.2 cm)
Border gauge: 17 sc = 4″ (10.2 cm) along the top band.
If the flower is over 2.5″ (6.4 cm), go down half a hook size. If it is under, go up half a size. Remember that every 0.25″ (0.6 cm) of extra width per motif adds 1.75″ (4.4 cm) to the valance. Gauge errors in Rounds 1–4 carry into every round after them, so fix the flower first.
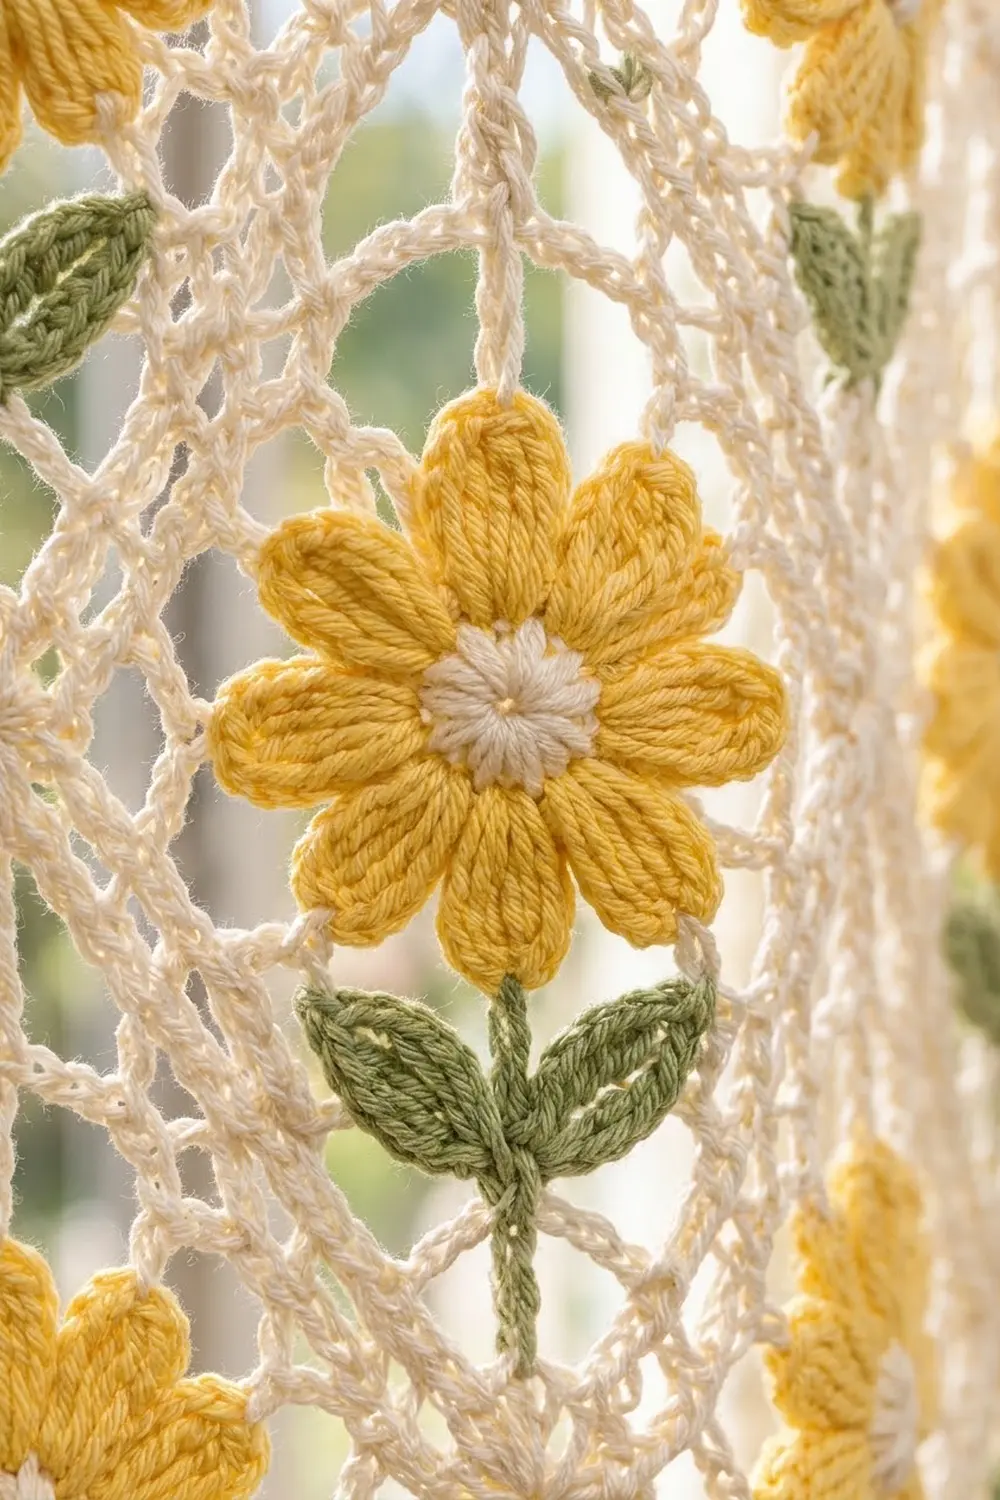
Motif (Make 7)
Number the twelve chain-6 loops of Round 6 in the order you make them, from Loop 1 to Loop 12. Loop 1 sits at top center, Loop 7 at bottom center, and Loops 4 and 10 are the side loops.
Round 1 (A): Magic ring. Ch 3 (counts as dc), 15 dc in ring. Join with sl st to top of ch-3. (16 dc)
Round 2 (A): Sl st in the space between the ch-3 and the next dc. [Puff in next dc, ch 3, sk next dc] 8 times. Join with sl st to top of first puff. Fasten off. (8 puffs, 8 ch-3 sps)
The petals touch at their bases and fan outward to form the eight-petal flower.
Round 3 (B): Join B in any ch-3 sp. Ch 1. [4 sc in ch-3 sp, sc in top of next puff] 8 times. Join. (40 sc)
Round 4 (B): Ch 2 (does not count). [Hdc in next 4 sts, 2 hdc in next st] 8 times. Join. Fasten off. (48 hdc)
Round 5 (C): Join C in any st. Ch 1, sc in same st. [Ch 5, sk 3, sc in next st] 11 times, ch 5, sk 3. Join with sl st to first sc. (12 ch-5 loops)
The math: 12 loops × 4 sts each (1 sc + 3 skipped) = 48.
Round 6, Motif 1 only (C): Sl st into the next 3 ch to reach the center of the loop. Ch 1, sc in same loop. [Ch 6, sc in next loop] 11 times, ch 6. Join with sl st to first sc. Fasten off. (12 ch-6 loops)
Weave in the ends and block Motif 1 to 6″ (15.2 cm) before joining any other motif to it.
Make All Pieces
| Piece | Quantity | Color |
|---|---|---|
| Motifs | 7 | A, B, C |
| Stars | 8 | A |
| Moons | 7 | B |
| Teardrops | 15 | C |
| Tassels | 15 | B |
Layout (M = motif, S = star strand, L = moon strand):
[M1]  [M2]  [M3]  [M4]  [M5]  [M6]  [M7]
S  L  S  L  S  L  S  L  S  L  S  L  S  L  S
Star (make 8, A): Magic ring. Ch 3 (counts as dc), 14 dc in ring, join. (15 dc)
Make the points: [ch 6, sc in 2nd ch from hook, hdc in next ch, dc in next ch, tr in next 2 ch, sk 2 dc, sl st in next dc] 5 times. (5 points) Each point uses 3 dc (2 skipped + 1 sl st): 5 × 3 = 15. Star: 2.25″ (5.7 cm).
Moon (make 7, B): Ch 16.
Row 1: Work into the chain starting in the 2nd ch from the hook: sl st, sc, hdc, dc, 2 dc in next, tr, 2 tr in next, tr, 2 tr in next, tr, 2 dc in next, dc, hdc, sc, sl st. (15 ch used, 19 sts)
Row 2: Ch 1, turn. Sc in each st across the outer curve, adding a picot (ch 3, sl st in the sc just made) after every 3rd sc. (19 sc, 6 picots)
Now sl st tightly along the foundation chain to the start. The 4 increases on the outer edge and the tight inner edge bend the strip into a crescent. Moon: 2.5″ (6.4 cm) tip to tip.
Teardrop (make 15, C): Ch 24 and join with sl st to form a ring.
Round 1: Ch 1. Sc in next 3 ch, hdc in next 3, dc in next 12, hdc in next 3, sc in next 3. Join. (24 sts)
Round 2: Ch 1. Sc in first 6 sts, [2 sc in next st, sc in next st] 6 times, sc in last 6 sts. (30 sc) Ch 6 and sl st at the join to make the hanging loop at the tip.
The dc section rounds out the base while the short sc ends meet at the tip, which keeps the center open. Teardrop: 2.5″ × 1.5″ (6.4 × 3.8 cm).
Tassel (make 15, B): Wrap B 25 times around the 4″ (10.2 cm) card. Tie the wraps at the top and cut them at the bottom. Wrap the neck 0.25″ (0.6 cm) below the top tie, then trim the tassel to 3.5″ (8.9 cm).
Joining
Join Motifs 2–7 as you go on Round 6. Each new motif joins to the previous one at a single side loop.
Round 6, Motifs 2–7: Work as for Motif 1 through Loop 9. For Loop 10, ch 3, then sl st into the center of Loop 4 on the previous motif. Ch 3, then sc in the next Round 5 loop. Finish Loops 11 and 12 as usual and join.
Stitch-to-stitch logic: Each joined loop is still 6 chains (3 + 3), so the motif keeps its shape. Lay the motifs flat with Loop 1 at the top and Loop 7 at the bottom before you sl st, so all seven sit upright. Always join to Loop 4 of the previous motif, never Loop 3 or 5. If you miss by one loop, the whole row tilts.
Tension: Make the joining sl st snug but not tight. If it is too tight, the motifs pucker inward. If it is too loose, they tilt.
Size checkpoint: Measure after all seven are joined. The row should be 43″ × 6″ (109.2 × 15.2 cm): seven 6″ (15.2 cm) motifs plus about 1″ (2.5 cm) in total across the six joining bridges.
Border
Border gauge: 17 sc = 4″ (10.2 cm).
Top Band
Row 1 (RS, C): Work across the top of the strip. Join C in the free Loop 10 of Motif 1 and ch 5 (counts as dtr).
Per motif: ch 4, tr in Loop 11, ch 3, dc in Loop 12, ch 3, sc in Loop 1, ch 3, dc in Loop 2, ch 3, tr in Loop 3, ch 4. (25 sts per motif, not counting the dtrs)
After each motif, work 1 dtr into the joining sl st (6 joins). After Motif 7, work 1 dtr into its free Loop 4 instead.
Total: 7 motifs × 25 + 8 dtr (2 ends + 6 joins) = 183 sts. No other stitches are added at the seams.
The graded heights (dtr, tr, dc, sc) fill the curved valleys and give you a straight line.
Row 2: Ch 1, turn. Sc in each st, working into the chains themselves (not around the spaces). (183 sc)
Row 3: Ch 1, turn. Sc in each st across. (183 sc) Fasten off.
Why the math works: The dtrs fall on stitches 1, 27, 53, 79, 105, 131, 157 and 183, and the center sc of each motif falls on stitches 14, 40, 66, 92, 118, 144 and 170. That means a key stitch lands on every 13th stitch (1 + 14 × 13 = 183). Clip the 15 rings at those stitches, spacing them about 3″ (7.6 cm) apart. At gauge, 183 sc ÷ 4.25 per inch = 43″ (109.2 cm), which matches the joined strip.
Points (Under Each Motif)
Row 1: With RS facing, join C in the center of Loop 5. Ch 1, sc in same loop. [Ch 6, sc in next loop] 4 times, ending in Loop 9. (4 loops)
Row 2: Turn. Sl st 3 to the center of the first loop, ch 1, sc in same loop. [Ch 6, sc in next loop] 3 times. (3 loops)
Row 3: Work as Row 2. (2 loops)
Row 4: Work as Row 2. (1 loop)
Row 5: Turn, sl st 3, then work (sc, ch 8, sc) in the last loop. Fasten off.
You lose one loop per row, so each point narrows evenly from 5 loops to a single 0.75″ (1.9 cm) hanging loop. Each point is 2.5″ (6.4 cm) deep.
Strand Assembly
Moon strands (7): Hang one from each point’s ch-8 loop. Use 1″ (2.5 cm) of chain, then the moon, 1″ (2.5 cm) of chain, a bead, a teardrop, a bead and a tassel.
Star strands (8): Hang one from each of the six joining bridges and one from each outer side loop. Use 4″ (10.2 cm) of chain, then the star, 2″ (5.1 cm) of chain, a bead, a teardrop, a bead and a tassel.
Adjust the chain lengths so that every tassel ends about 14″ (35.6 cm) below the point tips.
Final Blocking
- Wet-block the body before attaching the strands. Soak it, then press out the water in a towel.
- Pin Row 3 of the top band in a straight line exactly 43″ (109.2 cm) long.
- Pin each motif round at 6″ (15.2 cm), with a pin in every Round 6 loop.
- Pin each point tip 2.5″ (6.4 cm) below its motif. Check that each point is centered under Loop 7.
- Lightly starch the stars, moons and teardrops, then pin them flat and open.
- Let everything dry completely before unpinning, then assemble the strands.
Final Quality-Control Checklist
- Each motif has 16, 8, 40, 48, 12 and 12 in Rounds 1–6.
- All motifs measure 6″ (15.2 cm) and sit upright.
- The top band has 183 sts in every row.
- The body measures 43″ × 9″ (109.2 × 22.9 cm).
- There are 7 points of 2.5″ (6.4 cm), each centered.
- You have 15 strands with tassels ending level.
- All ends are woven in, and the jump rings are fully closed.
Troubleshooting
- Petals lean or twist: Pull up the puff loops evenly, all to the same 3/4″ (1.9 cm).
- Gray ring ruffles: Your hdc is too loose. Go down a hook size for Round 4.
- Gray ring cups: You missed an increase. Recount for 48.
- Top edge waves: Recount Row 1 per motif. If you get anything other than 25, rework that section.
- Points twist: Turn after every row. Never work points in rounds.
- Moon stays straight: Tighten the sl sts along the inner edge.
- Strands spin: Starch the pieces and use beads to add a little weight.
- Valance sags between rings: Check that the rings sit exactly on every 13th stitch.
Care
Gently hand wash in cool water, then reshape the valance and lay it flat to dry. Remove the metal findings first if your chain isn’t rustproof.

Final Notes
The measurement chain: a 2.5″ (6.4 cm) flower grows to a 6″ (15.2 cm) motif. Seven joined motifs make 43″ (109.2 cm), the 183-stitch band keeps that width, and the points add 2.5″ (6.4 cm) to reach the 9″ (22.9 cm) body. The strands bring the total drop to 23″ (58.4 cm). If each checkpoint matches, the finished valance will match too.
Happy crocheting!