
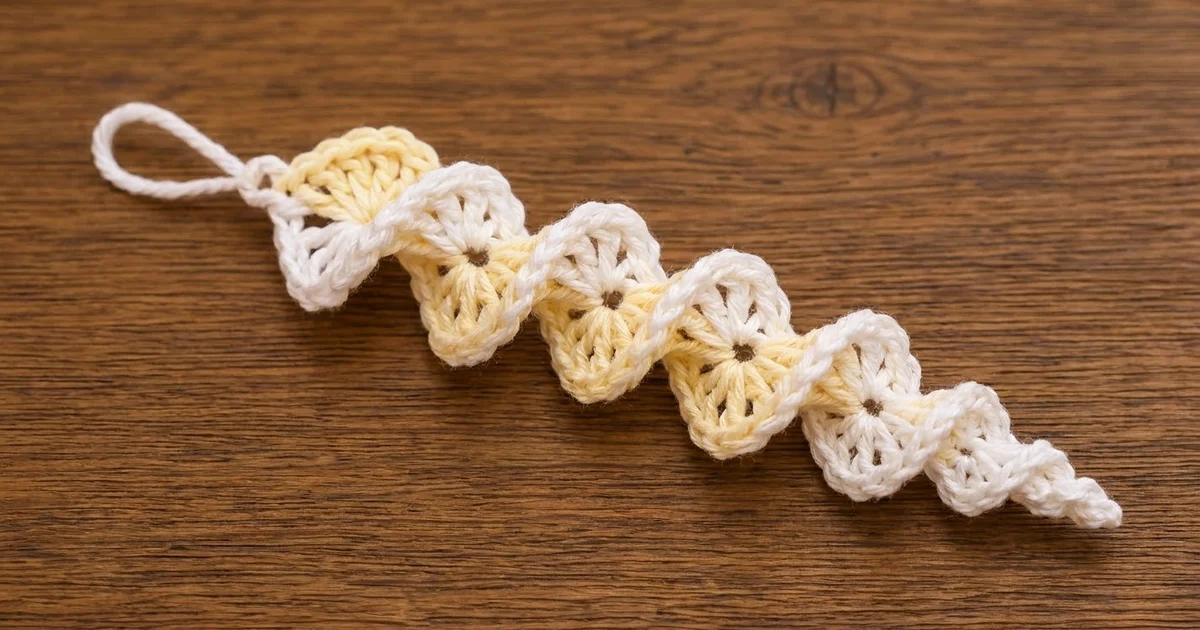
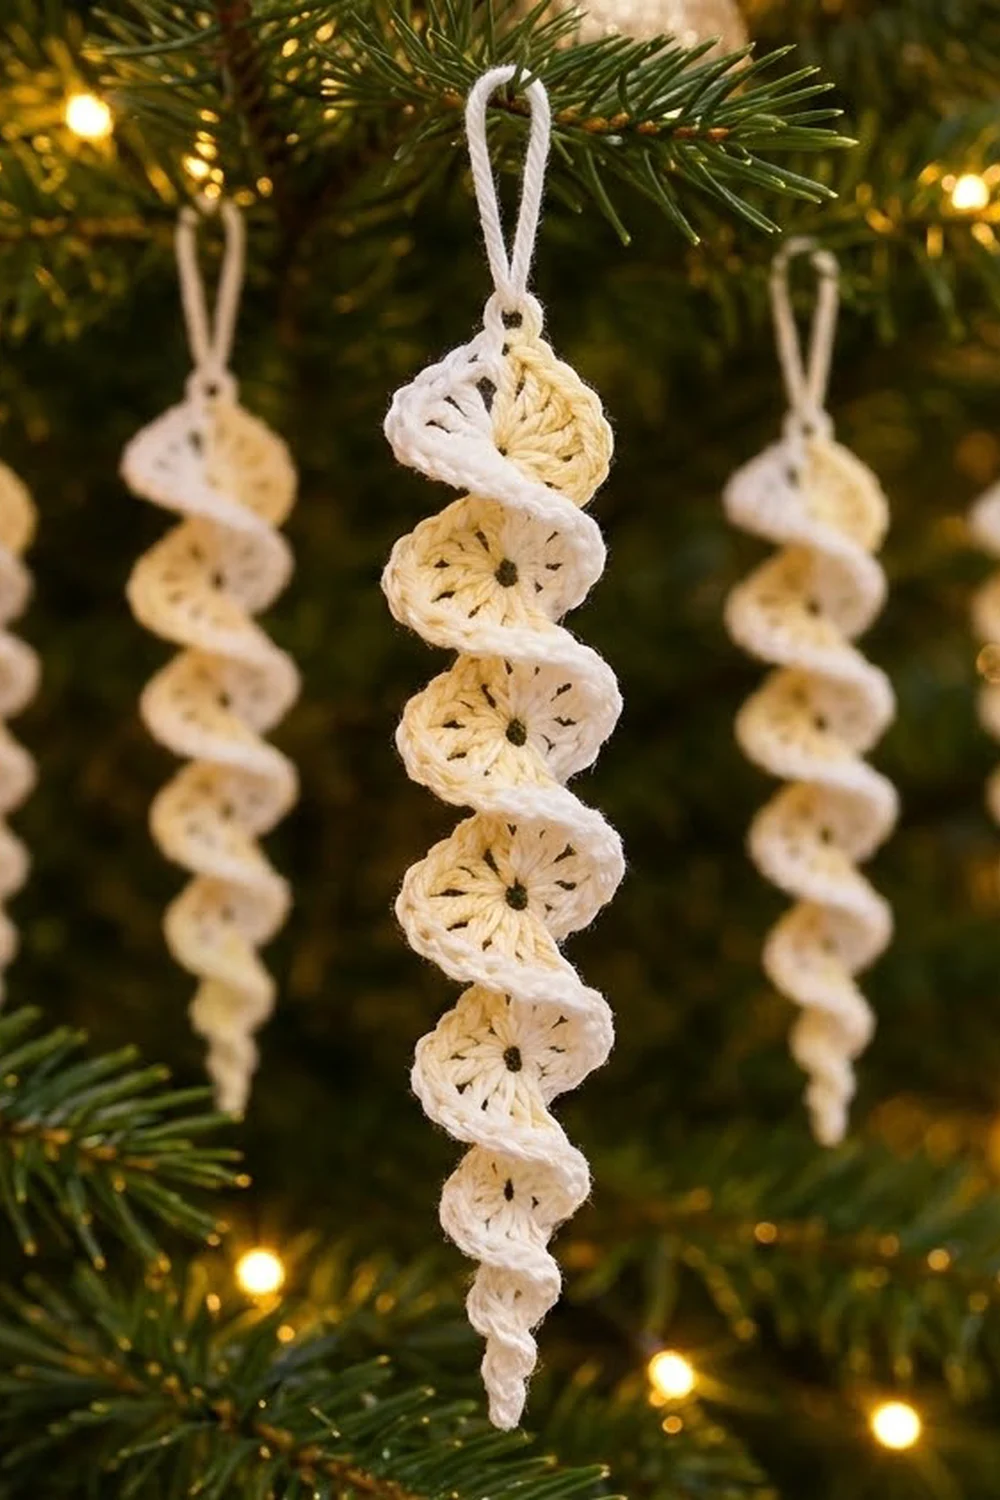
Frosted Twist is a small spiral icicle ornament made in two soft colors. The body is a column of pale butter-yellow fans. A crisp white edge runs around each fan and twists the whole strip into a corkscrew that catches the light on a tree.
The ornament is made as one single piece. Each fan has a small open “eye” at its base, and the fans shrink toward a narrow tip, so the finished icicle looks hand-twisted and slightly frosted. A white chain loop at the top is used for hanging.
This pattern uses US crochet terms. The finished ornament is about 5 in (12.7 cm) long and 1.25 in (3.2 cm) wide at the top, tapering to 0.5 in (1.3 cm) at the tip. With the loop it measures about 6.25 in (15.9 cm).
You will make a yellow chain spine, work six fans along it in one row, then add one white edging round. That round has two jobs: it outlines the fans and creates the twist. The hanging loop is chained at the end of the same round, so there are only two tails to weave in.
Finished Size and Construction
- Finished size: 5 in (12.7 cm) long, 1.25 in (3.2 cm) wide at the top, 0.5 in (1.3 cm) at the tip
- Total length with loop: 6.25 in (15.9 cm)
- Skill level: Easy / advanced beginner
- Terminology: US crochet terms
- Yarn weight: Sport weight (#2), cotton or cotton blend
- Hook: 3.0 mm (US C/2–D/3)
- Number of pieces: 1
- Layout: One vertical strip of 6 fans on a chain spine, twisted into a spiral
- Piece size before edging (flat): 5 in (12.7 cm) long, top fan 0.6 in (1.5 cm) tall from the spine
- Edging depth: about 0.125 in (0.3 cm)
Materials
Yarn: Use a smooth, tightly plied cotton in sport weight. Mercerized cotton gives clear stitches and holds the twist well. Acrylic works but relaxes more, so the spiral will be looser.
- Color A – Pale Butter Yellow: 4 g, about 13 m (14 yd)
- Color B – Bright White: 3 g, about 11 m (12 yd)
These quantities include a margin of about 25% for swatching and weaving in ends. One 50 g ball of each color makes many ornaments.
Tools:
– 3.0 mm crochet hook
– Tapestry needle
– Scissors
– Rust-proof pins and a foam blocking mat
– Spray bottle with water
– Optional: fabric stiffener or a light sugar-water solution
Abbreviations (US Terms)
- ch – chain
- sl st – slip stitch
- sc – single crochet
- hdc – half double crochet
- dc – double crochet
- st(s) – stitch(es)
- sk – skip
- BB – back bump of the chain
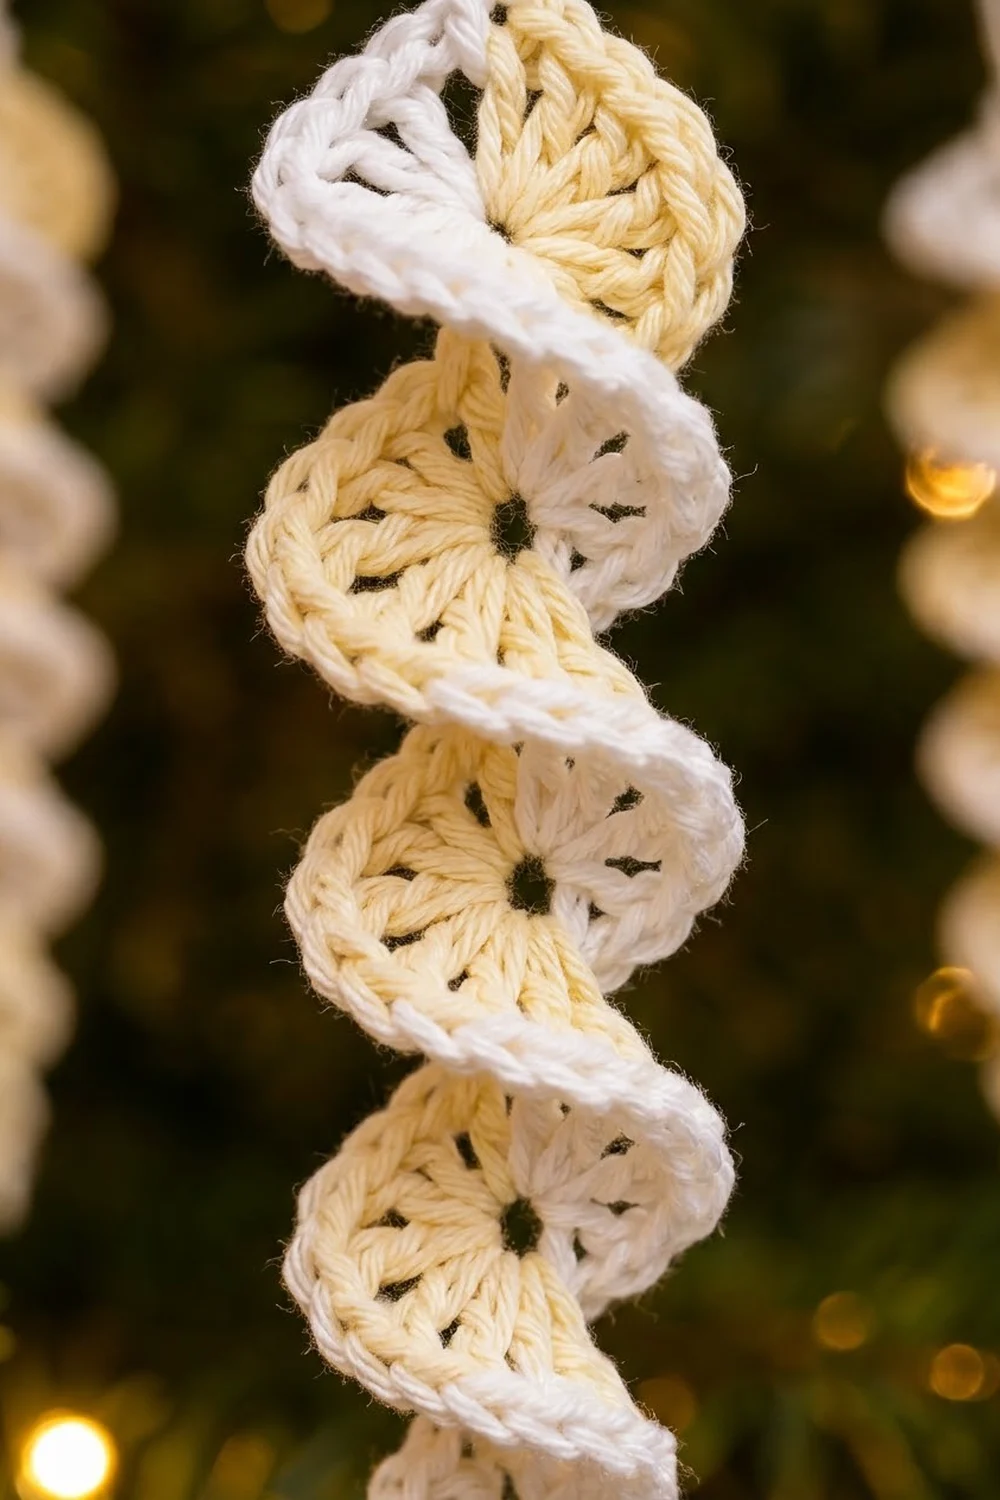
Special stitch – Fan: Work the stated number of hdc or dc into one single chain. Because every stitch shares the same base, the fan opens into a semicircle with a small hole at the center of its straight edge. This hole is the “eye” in each fan.
Gauge and Checkpoints
Make one test strip before your first finished ornament. It is quick, and it shows whether your twist will be tight or loose.
- Chain gauge: 5 ch = 1 in (2.5 cm), measured relaxed and not stretched.
- Fan gauge: An 8-dc fan measures 0.6 in (1.5 cm) from the spine to its outer edge, and 1.2 in (3.0 cm) across its widest point.
Checkpoint 1 – foundation: The 25 chains after the first chain measure 5 in (12.7 cm).
Checkpoint 2 – fan row: The flat strip is still 5 in (12.7 cm) long. The top fan is 0.6 in (1.5 cm) tall, and the bottom fan is about 0.4 in (1.0 cm) tall.
Checkpoint 3 – after edging: The strip twists by itself into about 3 full turns. When it hangs, the body is 5 in (12.7 cm) long and 1.25 in (3.2 cm) wide at the top.
If your piece is too big: Change to a 2.75 mm hook, or pull each chain a little snugger. A loose spine makes a long, lazy spiral.
If your piece is too small: Change to a 3.25 mm hook. Very tight fans can cup instead of lying in a semicircle, and the edging becomes hard to work.
Body (Color A)
Work all fans along one side of the foundation chain, into the back bumps. The free front loops stay unused for the white spine later.
Foundation: With A, ch 26.
Row 1 (fan row): Work from the hook end. This end becomes the bottom tip.
- Sl st in BB of 2nd ch from hook. (This is ch 2. Ch 1 is skipped.)
- Fan 1: Sk next ch, 5 hdc in BB of next ch, sk next ch, sl st in BB of next ch.
- Fan 2: Sk next ch, 6 hdc in BB of next ch, sk next ch, sl st in BB of next ch.
- Fan 3: Sk next ch, 6 dc in BB of next ch, sk next ch, sl st in BB of next ch.
- Fan 4: Sk next ch, 7 dc in BB of next ch, sk next ch, sl st in BB of next ch.
- Fan 5: Sk next ch, 8 dc in BB of next ch, sk next ch, sl st in BB of next ch.
- Fan 6: Sk next ch, 8 dc in BB of next ch, sk next ch, sl st in BB of last ch.
Fasten off A, leaving a 4 in (10.2 cm) tail.
Chain check: After the first sl st in ch 2, each fan uses exactly 4 chains (sk 1, fan in 1, sk 1, sl st in 1). That gives 6 fans × 4 = 24 chains. Add ch 2 for the first sl st and ch 1 skipped at the start: 24 + 1 + 1 = 26. The last sl st lands in ch 26, which is the top of the icicle.
Row 1 stitch count: 40 fan sts (5 + 6 + 6 + 7 + 8 + 8) and 7 sl sts on the spine.
The 7 sl sts sit at the tip (ch 2), at the 5 gaps between fans, and at the top (ch 26). These are the “spine points” used in the edging.
The skipped chain on each side of a fan gives the fan room to open flat. The open eye forms where all the fan’s sts share one chain.
Edging and Hanging Loop (Color B)
This single white round outlines every fan, adds the white line down the spine, and makes the hanging loop.
Border gauge
Edging is worked 2 sc in every fan st. That is about twice the stitches the fan edge needs to lie flat. The extra fabric can’t stay flat, so it pushes each fan to lean and the strip twists. On the other side, the slip-stitch spine stays short and firm, so the whole piece coils around it.
Edging round
Hold the strip with the top (ch 26 end) at the right and the fans facing up.
Join: Join B with a sl st in the top spine point (the last sl st of Row 1). This is spine point 1.
Fan side: Work from the top down toward the tip.
- Fan 6: 2 sc in each of the 8 dc = 16 sc. Sl st in next spine point.
- Fan 5: 2 sc in each of the 8 dc = 16 sc. Sl st in next spine point.
- Fan 4: 2 sc in each of the 7 dc = 14 sc. Sl st in next spine point.
- Fan 3: 2 sc in each of the 6 dc = 12 sc. Sl st in next spine point.
- Fan 2: 2 sc in each of the 6 hdc = 12 sc. Sl st in next spine point.
- Fan 1: 2 sc in each of the 5 hdc = 10 sc. Sl st in the tip spine point (ch 2).
Fan side count: 80 sc (16 + 16 + 14 + 12 + 12 + 10) + 7 sl st (the joining sl st plus 6 more) = 87 sts.
Spine side: Turn the strip so the unused front loops of the foundation chain face you. Work back up toward the top.
- Sl st in the free front loop of each ch from ch 3 through ch 26 = 24 sl sts.
Ch 2 is not worked again because the tip sl st already sits in it. Ch 1 was skipped at the start and is hidden under the tip edging.
Hanging loop: Ch 12, then sl st in the joining sl st at the top.
Round total: 87 (fan side) + 24 (spine side) + 12 ch (loop) = 123 sts and chains.
Fasten off B, leaving a 4 in (10.2 cm) tail.
Why the math works
Each fan’s edging count is exactly twice its own stitch count, so the frill is the same in every fan, and the twist stays even from top to tip. The 24 spine sl sts match the 24 chains between the tip point and the top point, one sl st per chain. Nothing is added or skipped, so the spine stays exactly 5 in (12.7 cm) long. The loop’s 12 ch at 5 ch per in (2.5 cm) fold in half to about 1.25 in (3.2 cm) high.
Final Blocking
- Weave in both tails along the white spine sl sts, where they are hidden. Trim close.
- Mist the ornament lightly until it is damp, not soaked.
- Hold the loop and roll the tip between your fingertips in the direction the spiral already leans. Aim for about 3 full turns over the 5 in (12.7 cm) body.
- Hang the ornament from a pin pushed into the edge of a foam mat or a box, so the spiral hangs free.
- Check the body: 5 in (12.7 cm) long, 1.25 in (3.2 cm) wide at the top, 0.5 in (1.3 cm) at the tip.
- Optional: For a firmer spiral, brush on a thin coat of diluted fabric stiffener while it hangs. Then re-twist gently.
- Let it dry completely, at least 6 hours, before hanging it on a tree.
Final Quality-Control Checklist
- Six yellow fans, getting smaller from top to tip
- Each fan has a visible open eye at its base
- Fan edging counts: 16, 16, 14, 12, 12, 10 sc
- 7 white sl sts at the spine points and 24 sl sts up the spine
- No yellow stitches showing through the white edge
- About 3 even turns from top to tip
- Loop centered at the top and about 1.25 in (3.2 cm) high
- All tails woven in along the spine and trimmed
Troubleshooting
The strip lies flat and won’t twist. The edging is too loose, or you worked 1 sc per fan stitch. Rework it with 2 sc per fan stitch on a smaller hook.
The spiral is lopsided. One fan has the wrong count. Check the counts against 5, 6, 6, 7, 8, 8 and redo that fan.
The fans cup instead of opening. The skipped chains were missed. Make sure you skip one chain on each side of every fan.
The fan eyes are closed up. The yarn is too heavy or the tension is too tight. Go up 0.25 mm in hook size for Row 1 only.
The loop is twisted. Untwist the chain before the final sl st.
The ornament is too long. The foundation chain is loose. Check Checkpoint 1 before you work the fans.
Care
Hand wash in cool water, press out excess water in a towel, and re-twist while damp. Store the ornament hanging or loosely wrapped so the spiral isn’t crushed.
Final Notes
The measurement chain is short and easy to check:
- 25 working chains = 5 in (12.7 cm) of spine.
- Six fans of 5, 6, 6, 7, 8, and 8 stitches make the taper.
- A 2-sc-per-stitch white edging of 80 sc, with 7 spine sl sts and 24 sl sts up the spine, makes the twist.
- A 12-chain loop adds 1.25 in (3.2 cm), for a finished ornament of 6.25 in (15.9 cm).
If you hit the gauge at Checkpoint 1, everything after it falls into place. Make one, check it, then make a whole set for the tree.
Happy crocheting!