

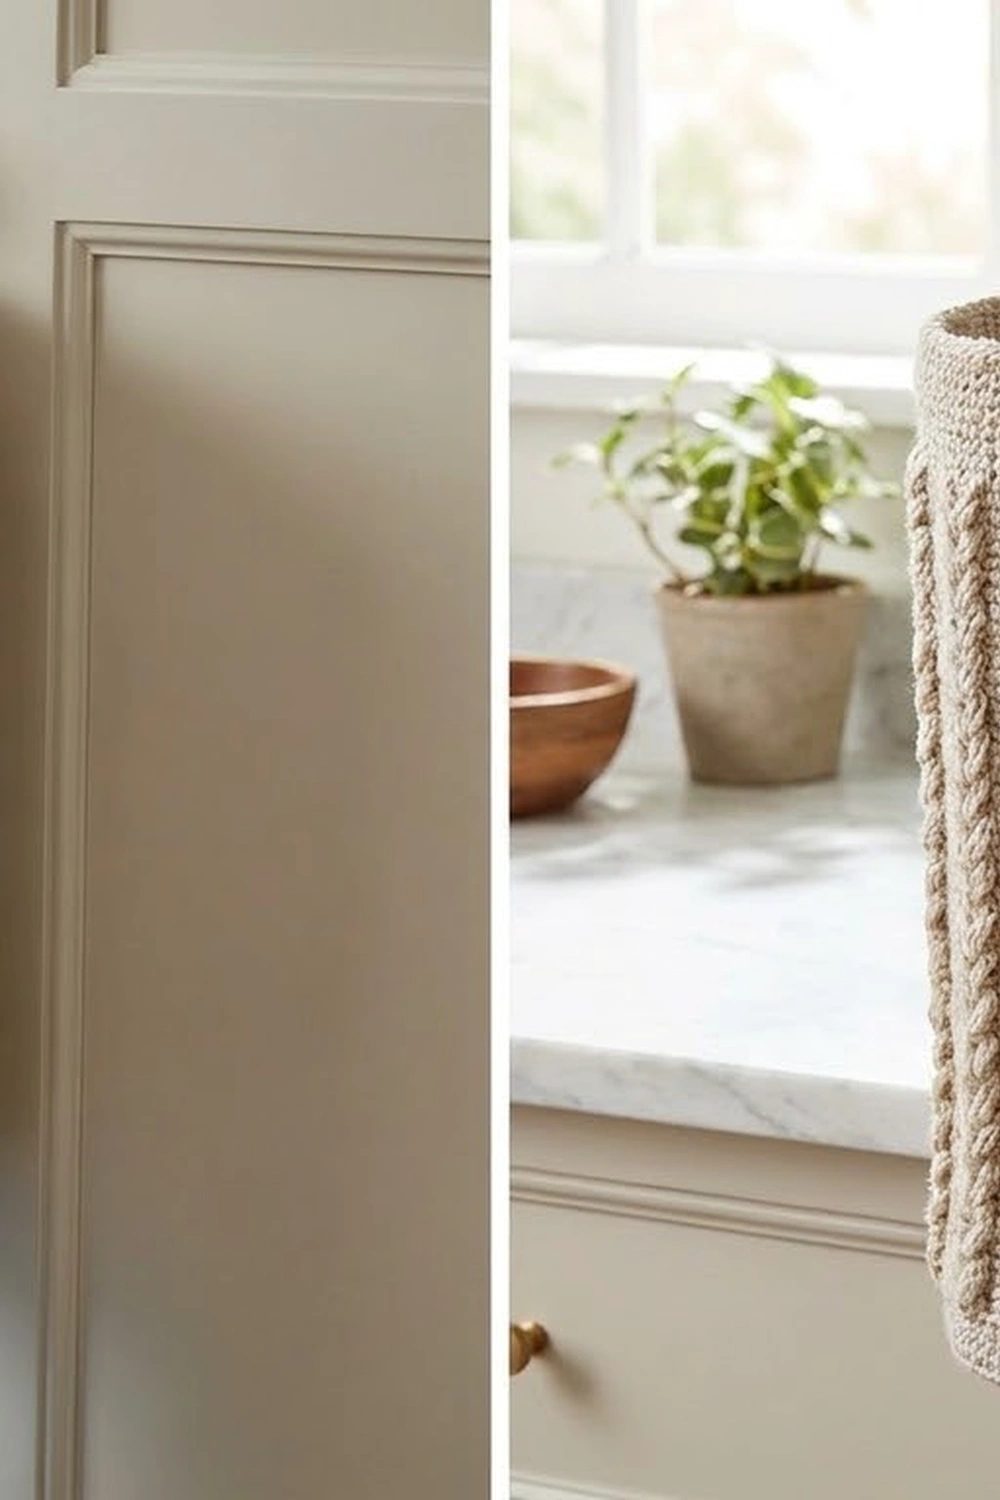
This plastic bag holder is a tall, sturdy tube with a hanging ring on top and a small dispensing hole in the bottom. You stuff grocery bags in through the open top and pull them out one at a time from below. It hangs neatly from a cabinet knob or hook and keeps the clutter out of sight.
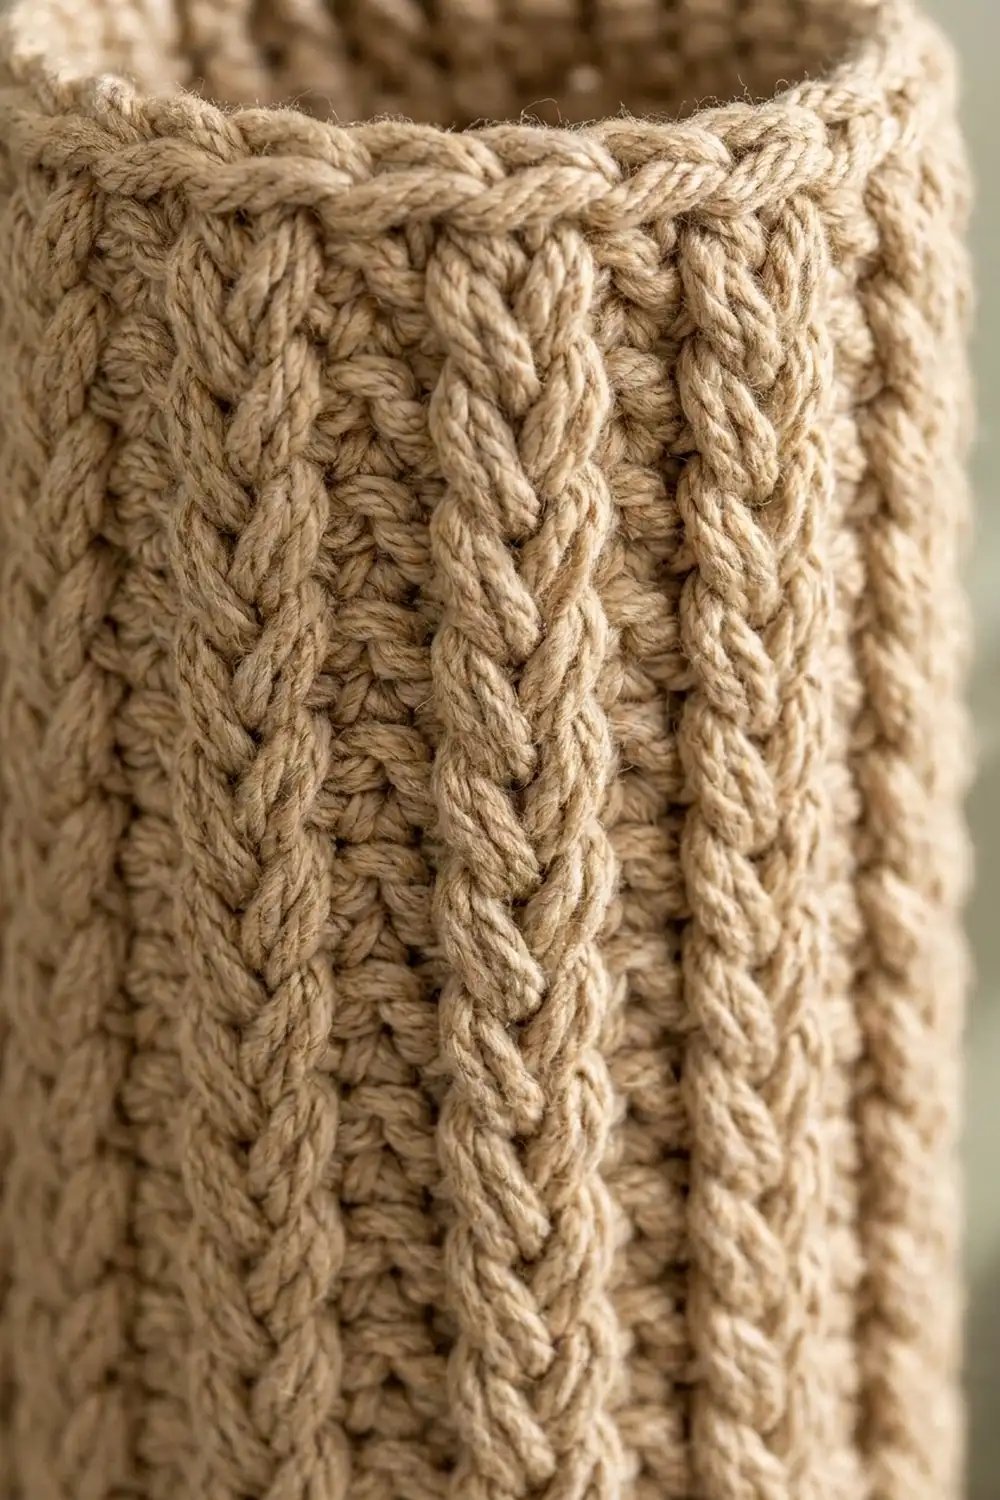
Fourteen raised, braided columns run the full height of the tube, with narrow recessed grooves between them. The holder uses one warm oatmeal shade, so the texture does all the work. The top rim and the ring edge are finished with reverse single crochet, which gives a soft, corded edge.
This pattern uses US crochet terms. The finished tube measures about 4.75 in (12.1 cm) across and 12 in (30.5 cm) tall. With the ring attached, the holder hangs about 16.5 in (41.9 cm) long.
Construction is simple:
– Start with a flat base worked in rounds around a center hole.
– Turn the corner with a back-loop round.
– Work the braided wall straight up, with no seams.
– Make a separate hanging ring with a short tab last, and sew it inside the back of the rim.
Finished Size and Construction
- Finished size: 4.75 in (12.1 cm) diameter x 12 in (30.5 cm) tall tube; about 16.5 in (41.9 cm) total hanging length
- Skill level: Easy-intermediate
- Terminology: US
- Yarn weight: Aran / worsted (#4)
- Hook: 5.0 mm (H-8)
- Number of pieces: 2 (body with base; hanging ring with tab)
- Layout: Ring sits above the tube; tab is sewn inside the back rim
- Piece sizes: body 4.75 in (12.1 cm) across; ring about 3.75 in (9.5 cm) across
- Size before border: tube 11.5 in (29.2 cm) tall
- Border depth: 0.5 in (1.3 cm), 2 rounds at the top rim
Materials
Choose a smooth, firm aran or heavy worsted yarn. Cotton, cotton blends, and sturdy acrylic all work well. A slightly rustic, plied yarn shows the braided columns best. Avoid very fuzzy or splitty yarns, because the knit-look stitch is worked between the legs of each stitch below.
- Oatmeal (main color): 150 g, approximately 270 m (295 yd)
Quantities include a margin of about 20% for gauge differences and a test swatch.
Tools:
- 5.0 mm (H-8) crochet hook
- 1 locking stitch marker, plus 2 extra markers
- Tapestry needle
- Scissors
- Measuring tape
- A cylinder about 4.75 in (12.1 cm) across for blocking (a large canister or a rolled towel)
Abbreviations (US Terms)
- ch – chain
- sl st – slip stitch
- sc – single crochet
- hdc – half double crochet
- inc – 2 stitches in the same stitch
- BLO – back loop only
- rev sc – reverse single crochet (crab stitch)
- st(s) – stitch(es)
- Rnd – round
Special stitches
- Ksc (knit stitch / waistcoat stitch): Insert the hook through the center of the next stitch, between its two vertical legs (below the top loops). Yo, pull up a loop, yo, pull through both loops. Ksc stitches stacked on top of each other form vertical V columns that look like knitting.
- BPsc (back post single crochet): Insert the hook from the back, around the post of the next stitch, and out to the back again. Yo, pull up a loop, yo, pull through both loops. This pushes the stitch to the inside and forms a groove.
- Rev sc: Working from left to right, insert the hook into the next stitch to the right. Yo, pull up a loop, yo, pull through both loops.
Gauge and Checkpoints
Gauge: 15 sts and 17 rnds = 4 in (10.2 cm) in the braided rib pattern, worked in the round.
Test one piece first: work the base, Rnds 1–5. It should lie flat and measure 4.75 in (12.1 cm) across. This is your best gauge check, because the base sets the circumference of the whole tube.
Checkpoints:
- Base Rnd 1: about 2 in (5.1 cm) across
- Base Rnd 3: about 3.4 in (8.6 cm) across
- Base Rnd 5: 4.75 in (12.1 cm) across
- Wall after Rnd 20: 3.5 in (8.9 cm) above the base
- Wall after Rnd 36: 7.3 in (18.5 cm) above the base
- Wall after Rnd 54: 11.5 in (29.2 cm) above the base
- Ring after Rnd 3: about 3.5 in (8.9 cm) across
If your base is too big, go down a hook size. If it is too small, go up a hook size. Ksc is a tight stitch, so many crocheters need a hook 0.5 mm bigger than usual. Keep the stitch counts the same and change only the hook.
Body Pattern
The body is one piece: the base and wall are worked continuously. After Rnd 6, work in spiral rounds without joining, and move the marker up to the first stitch of each round.
Base
Start: Ch 12, sl st to the first ch to form a ring.
Rnd 1: Ch 1, work 24 hdc into the ring (over the chain). Sl st to the first hdc. (24 sts)
The center hole now measures about 1.4 in (3.6 cm) across. This is the dispensing hole.
Rnd 2: Ch 1, [hdc 2, inc] 8 times. Sl st to the first hdc. (32 sts)
Rnd 3: Ch 1, [hdc 3, inc] 8 times. Sl st to the first hdc. (40 sts)
Rnd 4: Ch 1, [hdc 4, inc] 8 times. Sl st to the first hdc. (48 sts)
Rnd 5: Ch 1, [hdc 5, inc] 8 times. Sl st to the first hdc. (56 sts)
Measure: the base should lie flat at 4.75 in (12.1 cm) across. Eight increases per round match the height of an hdc round, so the disc stays flat.
Turning the Corner
Rnd 6: Ch 1, sc in BLO of each st around. (56 sts) Place the marker in the first st and begin working in a spiral.
The unworked front loops form a crisp ridge, and the work starts to rise into a cup.
Rnd 7: Sc in each st around. (56 sts)
Braided Wall
Rnd 8: [Ksc in next 3 sts, BPsc around next st] 14 times. (56 sts: 42 Ksc + 14 BPsc)
Rnds 9–54: [Ksc in next 3 Ksc, BPsc around next BPsc] 14 times. (56 sts each round)
Always line up each group of 3 Ksc above the group below it, and work each BPsc around the BPsc below it. The 3 Ksc stack into one braided column about 1 in (2.5 cm) wide. The BPsc forms the recessed groove between columns. You will have 14 braids around the tube.
The tube is worked straight, with no increases or decreases. It should measure 11.5 in (29.2 cm) from the base to the top edge, and the circumference should stay at about 14.9 in (37.8 cm). Do not fasten off; go straight on to the border.
Hanging Ring
Start: Ch 24, sl st to the first ch to form a ring, taking care not to twist.
Rnd 1: Ch 1, [sc 3, inc] 6 times. Sl st to the first sc. (30 sts)
Rnd 2: Ch 1, [sc 4, inc] 6 times. Sl st to the first sc. (36 sts)
Rnd 3: Ch 1, [sc 5, inc] 6 times. Sl st to the first sc. (42 sts)
Measure: the ring should lie flat at about 3.5 in (8.9 cm) across, with a center opening of about 2 in (5.1 cm).
Rnd 4: Ch 1, rev sc in each of the next 35 sts, leaving the last 7 sts of Rnd 3 unworked. Sl st into the first unworked st. (35 rev sc + 7 unworked sts = 42)
After Rnd 4, the ring measures about 3.75 in (9.5 cm) across.
Tab
Row 1: Ch 1, sc in each of the 7 unworked sts of Rnd 3. Turn. (7 sts)
Rows 2–6: Ch 1, sc in each st across. Turn. (7 sts each row)
The tab measures about 1.9 in (4.8 cm) wide and 1.4 in (3.6 cm) long. Fasten off, leaving a 16 in (40.6 cm) tail for sewing.
Make All Pieces
Make 1 body and 1 ring, both in Oatmeal.
- Body (base and braided wall): about 120 g
- Ring with tab: about 10 g
The remaining yarn is your margin.
Layout (front view):
      ( RING )
        |TAB|
   +-----------+   <- top rim, border
   | | | | | | |   <- 14 braids around
   | | | | | | |
   | | | | | | |
   +-----( )---+   <- base with center hole
Joining
Sew on the ring after the border is finished, so the tab sits against completed stitches.
- Lay the body flat and choose which side is the back. Find the 7 border stitches centered on the back half (border sts 39–45, counting from the start of the round).
- Slide the tab down inside the tube so that Rows 4–6 overlap the inside of the wall and Rows 1–3 stand above the rim. That gives about 0.7 in (1.8 cm) of overlap and 0.7 in (1.8 cm) showing.
- Line up tab st 1 with border st 39 and tab st 7 with border st 45, so each of the 7 tab stitches sits over 1 rim stitch.
- Using the tail, whipstitch the side edges of the tab and its last row (Row 6) to the inside of the wall. Then sew along the top of the rim through both layers, stitch for stitch.
Keep your sewing firm but not tight. Stitches pulled too tight make the rim pucker; loose ones let the ring flop forward.
Checkpoint: the ring should stand straight up, centered over the back, and the total hanging length should be about 16.5 in (41.9 cm).
Border
The border goes on the top rim of the tube only. Its gauge is the same as the body: 15 sts = 4 in (10.2 cm).
For counting, split the 56 stitches into two halves: front (sts 1–28) and back (sts 29–56).
Rnd 55: Sc in each st around. Sl st to the first sc. (56 sts: 28 front + 28 back)
Rnd 56: Ch 1, rev sc in each st around. Sl st to the first rev sc. (56 sts: 28 front + 28 back) Fasten off and weave in the end.
Why the math works: each border round has 1 stitch in each existing stitch. That keeps the rim at exactly 56 stitches and the same 14.9 in (37.8 cm) circumference as the wall, so it will neither flare nor pull in. The 2 rounds add 0.5 in (1.3 cm), taking the tube from 11.5 in (29.2 cm) to 12 in (30.5 cm).
Final Blocking
- Weave in all ends on the inside of the tube.
- Slide the body over a cylinder about 4.75 in (12.1 cm) across.
- Gently straighten the braids so they run straight up. Ksc makes the tube twist slightly; ease it back by hand.
- Steam lightly, holding the iron above the fabric. Do not press.
- Lay the ring flat, pat it into a circle 3.75 in (9.5 cm) across, and steam it.
- Let everything dry completely before hanging.
Final Quality-Control Checklist
- Base lies flat at 4.75 in (12.1 cm) across
- Center hole is about 1.4 in (3.6 cm) across
- Every wall round has 56 stitches
- 14 braids of 3 Ksc each, separated by 14 BPsc grooves
- Braids run straight, not twisted
- Tube is 12 in (30.5 cm) tall including the border
- Rim has 56 rev sc with no gaps
- Ring is about 3.75 in (9.5 cm) across; tab is 7 sts wide
- Tab is centered on the back and sewn firmly
- All ends are woven in
Troubleshooting
The base cups upward. Your hdc rounds are too short. Go up a hook size or loosen your yarn-overs.
The base ruffles. Your hdc rounds are too tall. Go down a hook size.
Ksc is very hard to work. Go up 0.5 mm and keep the loop on the hook loose.
The braids twist around the tube. This is normal for Ksc. Block over a cylinder and straighten the columns by hand.
The grooves look shallow. Make sure each BPsc goes around the post of the BPsc below, not into its top.
The stitch count drifts. Count to 56 every few rounds and check that you still have 14 BPsc.
The ring tips forward. Sew more of the tab overlap to the inside wall.
Care
Hand wash in cool water and lay flat to dry, reshaping the tube while damp. Do not tumble dry.
Final Notes
The measurement chain is short and reliable:
– A 56-stitch base at 4.75 in (12.1 cm) across sets a circumference of 14.9 in (37.8 cm).
– The braided wall keeps all 56 stitches and grows to 11.5 in (29.2 cm).
– Two border rounds bring the tube to 12 in (30.5 cm).
– The 3.75 in (9.5 cm) ring and tab add the rest, for a total hanging length of about 16.5 in (41.9 cm).
If your base matches, everything above it will too. Hang it, fill it, and enjoy a tidier kitchen.
Happy crocheting!