

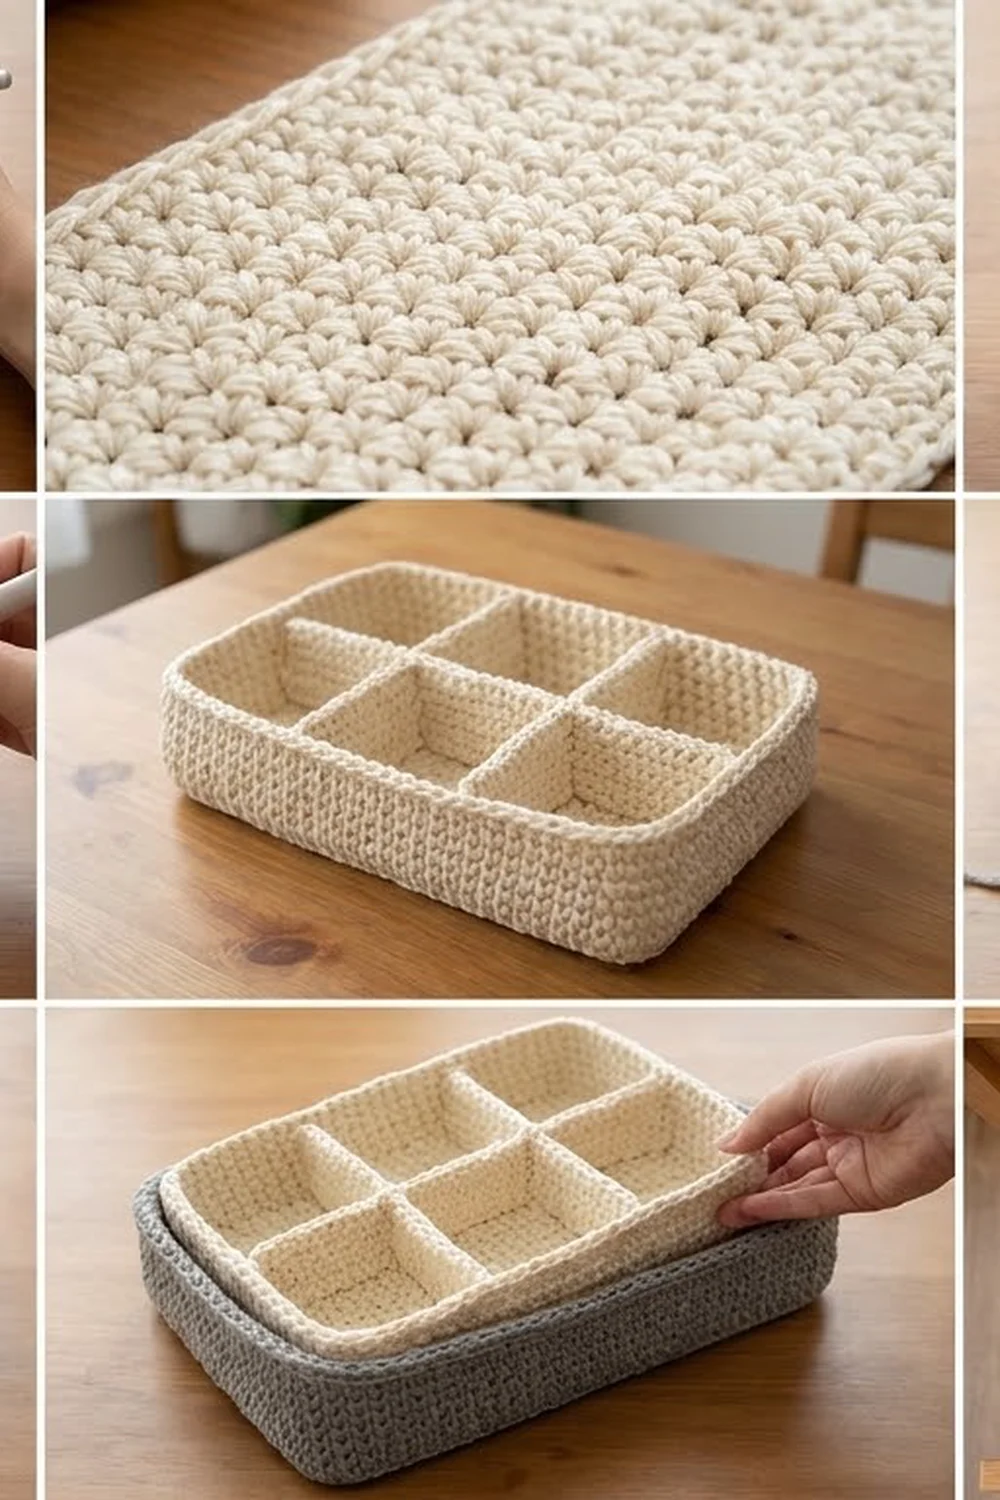
This drawer organizer set has two nesting trays: a soft gray outer tray and a cream insert divided into six small compartments. The insert holds rings, earrings and bracelets. The open area of the gray tray beside it holds rolled socks, scarves or cables.
Both trays are worked in plain single crochet with a firm, slightly stiff texture, so the walls stand up without plastic inserts. The colors are calm and neutral: warm cream and a mid gray that suit wood drawers and fit almost any room. The pattern uses US crochet terms throughout.
The gray tray is 13 x 10 in (33.0 x 25.4 cm) and 3 in (7.6 cm) tall. The cream insert is 9 x 6 in (22.9 x 15.2 cm) and 2.5 in (6.4 cm) tall, with compartments of about 2.7 in (6.9 cm).
Each tray starts as a flat base worked in rows, finished with one edge round. You then work a back-loop round to make the fold, crochet the walls up in joined rounds and finish with a slip-stitch rim. The insert’s dividers are made flat and sewn in last.
Finished Size and Construction
- Gray tray: 13 x 10 in (33.0 x 25.4 cm), 3 in (7.6 cm) tall
- Cream insert: 9 x 6 in (22.9 x 15.2 cm), 2.5 in (6.4 cm) tall
- Skill level: Easy / Advanced Beginner
- Terminology: US
- Yarn weight: Aran / worsted (#4), cotton or cotton blend
- Hook: 4.5 mm (US 7)
- Number of pieces: 7 (1 gray tray, 1 cream tray, 1 long divider, 4 short dividers)
- Layout: cream insert divided 2 x 3, set into the gray tray with its 9 in (22.9 cm) side along the tray’s 10 in (25.4 cm) side
- Base size before the edge round: 36 sts x 27 rows (insert) and 52 sts x 45 rows (tray)
- Rim depth: one slip-stitch round, adding about 1/16 in (0.2 cm)
Materials
Choose a smooth, firm cotton or cotton blend. Cotton holds its shape better than acrylic and won’t fuzz under jewelry. Avoid very soft or loosely plied yarns, because they make floppy walls.
- Cream: 140 g, about 240 m
- Gray: 200 g, about 340 m
These quantities include a margin of about 20% for gauge differences and swatching.
Tools:
– 4.5 mm (US 7) crochet hook
– Yarn needle
– 4 locking stitch markers
– Scissors
– Measuring tape
– Pins and a spray bottle for blocking
Abbreviations (US Terms)
- ch – chain
- sc – single crochet
- sl st – slip stitch
- BLO – back loop only
- st(s) – stitch(es)
- rnd – round
Special technique – sc in BLO: Insert the hook under the back loop only of the stitch, then complete a normal sc. The unused front loops form a ridge on the outside, and that ridge lets the walls fold up at a sharp right angle.
Gauge and Checkpoints
Gauge: 16 sc and 18 rows = 4 in (10.2 cm) in sc, worked firmly. That is 4 sts and 4.5 rows per inch (2.5 cm).
Make the cream insert first. It is the smaller piece and works as a full-size test of your gauge.
Checkpoints:
– Insert base after Row 27: 9 x 6 in (22.9 x 15.2 cm)
– Insert after Rnd 12: walls 2.4 in (6.1 cm) tall, perimeter 30 in (76.2 cm)
– Tray base after Row 45: 13 x 10 in (33.0 x 25.4 cm)
– Tray after Rnd 14: walls 2.9 in (7.4 cm) tall, perimeter 46 in (116.8 cm)
If your base is too big, go down to a 4 mm hook. If it is too small, go up to a 5 mm hook. Change hooks rather than stitch counts, because the divider lengths depend on the insert’s inner size. Firm tension matters more than exact yardage: if the fabric shows light through the stitches, go down a hook size.
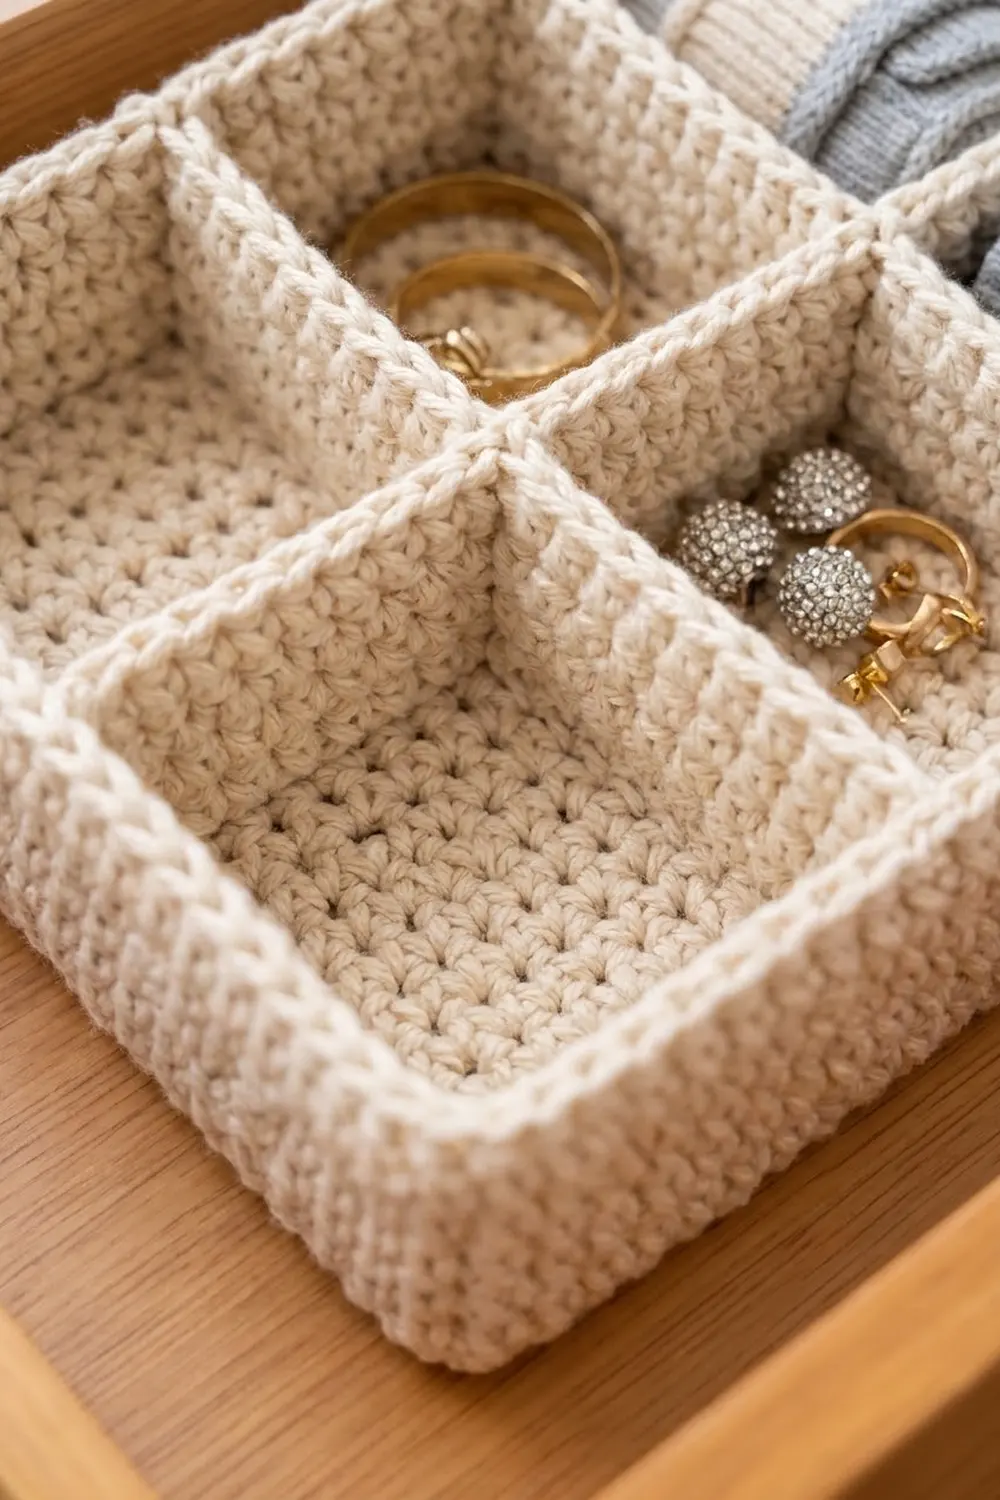
Cream Insert Tray
Base
Foundation: With cream, ch 37.
Row 1: Sc in 2nd ch from hook and in each ch across, turn. (36 sc)
Rows 2–27: Ch 1 (does not count as a st), sc in each st across, turn. (36 sc each row)
Checkpoint: 9 in (22.9 cm) wide x 6 in (15.2 cm) tall. Do not fasten off.
Edge Round
Rnd 1: Ch 1, then work around all four sides as follows:
– Top edge: sc in each of the 36 sts. (36)
– First side: work 24 sc evenly over the 27 row ends, skipping every 9th row end. (24)
– Bottom edge: sc in the free loop of each of the 36 foundation chains. (36)
– Second side: work 24 sc evenly over the 27 row ends, skipping every 9th row end. (24)
Join with sl st to the first sc. (120 sc)
There are no extra corner stitches, so each side count already includes its corner. Place a marker in the first st of each side.
Walls
Rnd 2 (fold round): Ch 1, sc in BLO of each st around, join. (120 sc)
Rnds 3–12: Ch 1, sc in both loops of each st around, join. (120 sc each round)
Keep the base flat on the table while you work. The walls should rise straight up from the ridge.
Checkpoint: walls 2.4 in (6.1 cm) tall; the tray still measures 9 x 6 in (22.9 x 15.2 cm) across.
Rim
Work the rim now. See the Border section for the full instructions and the stitch math.
Gray Outer Tray
Base
Foundation: With gray, ch 53.
Row 1: Sc in 2nd ch from hook and in each ch across, turn. (52 sc)
Rows 2–45: Ch 1, sc in each st across, turn. (52 sc each row)
Checkpoint: 13 in (33.0 cm) wide x 10 in (25.4 cm) tall.
Edge Round
Rnd 1: Ch 1, then work around all four sides as follows:
– Top edge: sc in each of the 52 sts. (52)
– First side: work 40 sc over the 45 row ends, skipping every 9th row end. (40)
– Bottom edge: sc in the free loop of each of the 52 foundation chains. (52)
– Second side: work 40 sc over the 45 row ends, skipping every 9th row end. (40)
Join. (184 sc)
Walls
Rnd 2: Ch 1, sc in BLO of each st around, join. (184 sc)
Rnds 3–14: Ch 1, sc in each st around, join. (184 sc each round)
Checkpoint: walls 2.9 in (7.4 cm) tall. Work the rim as given in the Border section.
Dividers (Cream)
Each divider is worked flat with the stitches running across its height and the rows running along its length.
Long Divider (make 1)
Foundation: Ch 11.
Row 1: Sc in 2nd ch from hook and in each ch across, turn. (10 sc)
Rows 2–38: Ch 1, sc in each st across, turn. (10 sc each row)
Size: 8.4 in (21.3 cm) long x 2.5 in (6.4 cm) tall. Leave a 24 in (61.0 cm) tail for sewing.
Short Dividers (make 4)
Foundation: Ch 11.
Row 1: Sc in 2nd ch from hook and in each ch across, turn. (10 sc)
Rows 2–12: Ch 1, sc in each st across, turn. (10 sc each row)
Size: 2.7 in (6.9 cm) long x 2.5 in (6.4 cm) tall. Leave a 16 in (40.6 cm) tail on each.
Divider Top Edge
On one long edge of each divider (this becomes the top), sl st loosely in each row end:
– Long divider: 38 sl st
– Short dividers: 12 sl st each
This matches the tray rim.
Make All Pieces
| Color | Piece | Quantity |
|---|---|---|
| Gray | Outer tray | 1 |
| Cream | Insert tray | 1 |
| Cream | Long divider | 1 |
| Cream | Short dividers | 4 |
Insert layout (viewed from above):
+--------+--------+--------+
|  A1    |  A2    |  A3    |
+========+========+========+   <- long divider (row 14 of base)
|  B1    |  B2    |  B3    |
+--------+--------+--------+
     ^ short      ^ short
   dividers at sts 12/13 and 24/25
Joining the Dividers
The insert’s inner length is about 8.5 in (21.6 cm), because each wall takes up about 0.25 in (0.6 cm). The long divider is 8.4 in (21.3 cm), so it fits snugly without bowing.
Long divider:
1. Pin it along base Row 14, the center row of 27.
2. Each end meets a short wall between edge sts 12 and 13 of that side’s 24 sts.
3. Whipstitch the bottom edge to the base, one stitch through each row end and the matching base stitch: 38 stitches across 36 base sts, easing in 2.
4. Whipstitch each 10-st end to the wall, one stitch per round from Rnd 2 to Rnd 12.
Short dividers:
1. Place two on each side of the long divider, lined up across from each other.
2. Center them on the boundary between sts 12/13 and between sts 24/25 of the long walls.
3. Each half-space is about 2.6 in (6.6 cm) wide, so the 2.7 in (6.9 cm) dividers press lightly against both the long divider and the wall.
4. Whipstitch each short divider to the base, the outer wall and the long divider.
Tension: Pull each whipstitch just snug. If you pull too hard, the tray walls pucker; if you sew too loosely, the dividers lean.
Checkpoint: six compartments of about 2.7 in (6.9 cm) each; the outside of the tray still measures 9 x 6 in (22.9 x 15.2 cm).
Border (Slip-Stitch Rim)
Both trays and all the dividers finish with a single slip-stitch round. It gives the smooth, rolled-looking top edge shown in the photo.
Rim gauge: 1 sl st per sc, worked loosely enough that the edge does not pull in. If your slip stitches are tight, use a hook one size larger for this round only.
Insert, Rnd 13: Sl st in each st around. Join and fasten off.
– Per side: 36 / 24 / 36 / 24 = 120 sl st
– Final height: 2.5 in (6.4 cm)
Gray tray, Rnd 15: Sl st in each st around. Join and fasten off.
– Per side: 52 / 40 / 52 / 40 = 184 sl st
– Final height: 3 in (7.6 cm)
Why the math works: At 4 sts per inch:
– 36 sts = 9 in (22.9 cm) and 24 sts = 6 in (15.2 cm), so the insert perimeter is 30 in (76.2 cm).
– 52 sts = 13 in (33.0 cm) and 40 sts = 10 in (25.4 cm), so the tray perimeter is 46 in (116.8 cm).
Each side count already includes its corner stitches. No stitches are added or skipped on any wall round, so the walls stay exactly the size of the base.
Final Blocking
- Weave in all ends along the inside seam lines.
- Spray both trays until damp, but not soaked.
- Square each base on a flat surface and check that opposite sides match.
- Push the walls straight up and fill the trays snugly with folded towels or small boxes.
- Pin the corners at a sharp 90 degrees.
- Let them dry completely for 24 hours.
- Remove the stuffing and set the insert into the gray tray.
Final Quality-Control Checklist
- Insert base is 9 x 6 in (22.9 x 15.2 cm); tray base is 13 x 10 in (33.0 x 25.4 cm)
- Edge round counts: 120 sts (insert) and 184 sts (tray)
- The back-loop fold ridge runs all the way around both trays
- Walls are 2.5 in (6.4 cm) and 3 in (7.6 cm) tall and vertical
- All dividers stand upright and reach the rim height
- Six compartments are roughly equal
- The insert sits flat inside the tray and leaves an open strip of about 6.5 in (16.5 cm) for socks
- No visible tails or loose seams
Troubleshooting
Walls flare outward: Your tension is too loose. Go down a hook size and keep the counts exactly at 120 or 184 sts.
Walls lean inward: You have dropped stitches. Count every few rounds, using the side markers.
Corners are rounded: Block with boxes inside, and make sure Rnd 2 is worked in the back loops only.
Dividers bow: Your divider rows are too long or too loose. Remove 1 row, or re-sew with firmer stitches.
Insert won’t fit inside the tray: Check the gray tray’s gauge. Its inner size should be about 12.5 x 9.5 in (31.8 x 24.1 cm).
Visible seam line on the walls: Rotate the joining point to a corner on each round, or work in a continuous spiral instead.
Care
Hand wash in cool water, press out the moisture in a towel and reshape around a box to dry flat. Do not tumble dry, because the heat softens the walls.
Final Notes
The measurement chain is simple. Gauge of 4 sts per inch gives bases of 36 x 24 sts and 52 x 40 sts. Those give edge rounds of 120 and 184 sts, which become straight walls of 2.5 in (6.4 cm) and 3 in (7.6 cm), each finished with a matching slip-stitch rim. Check each stage before moving on and both trays will nest neatly in your drawer. Happy crocheting!