

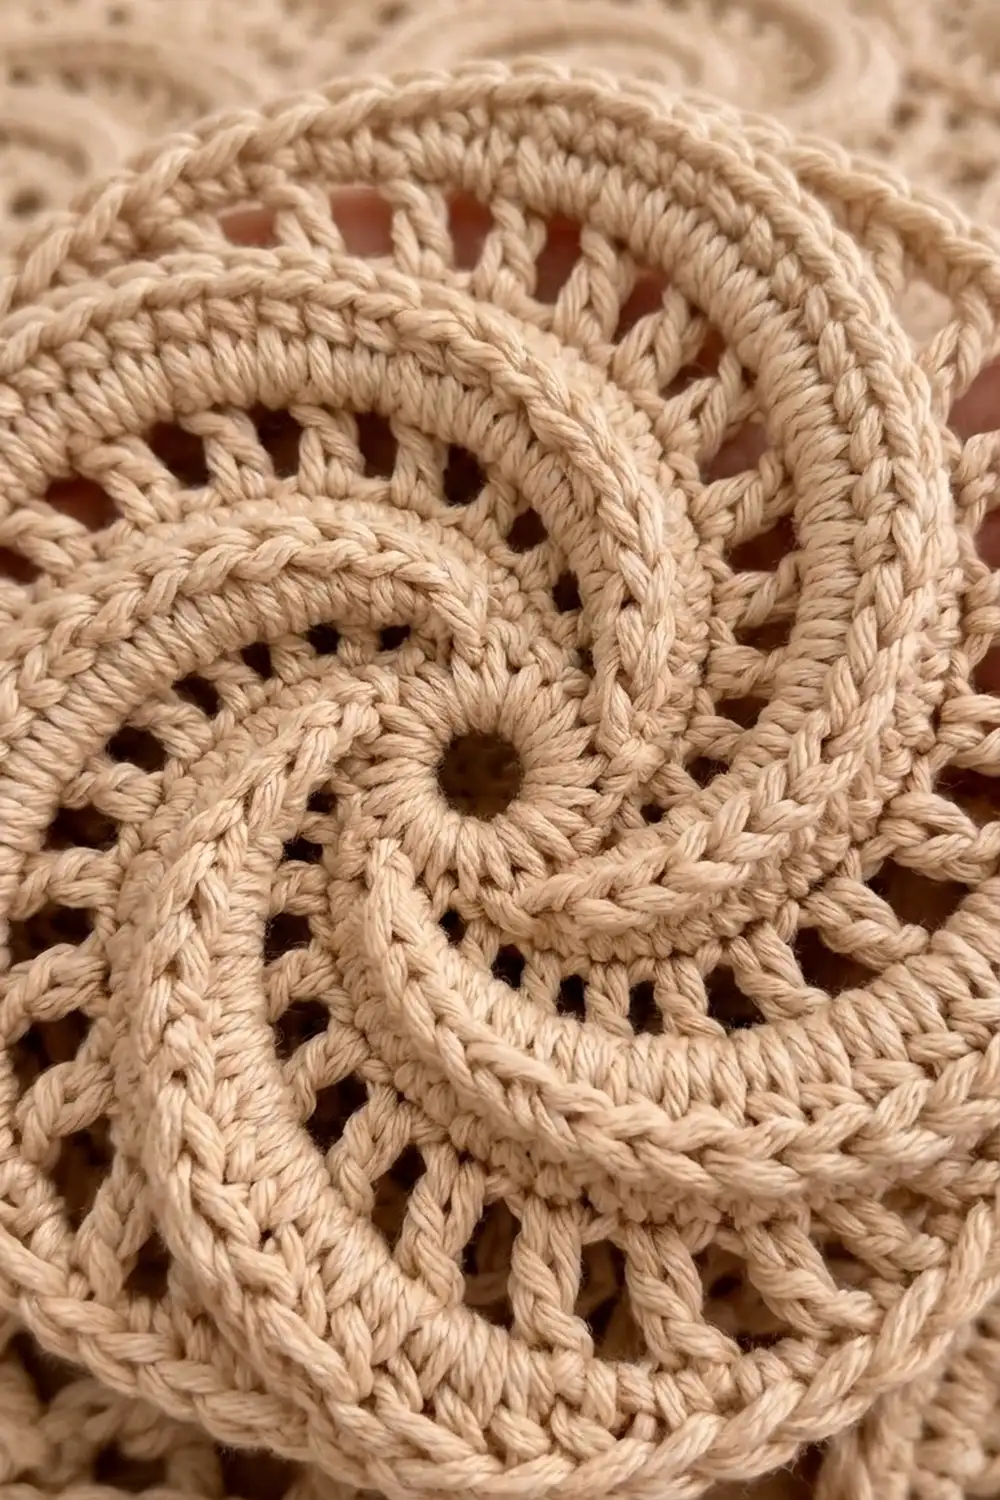
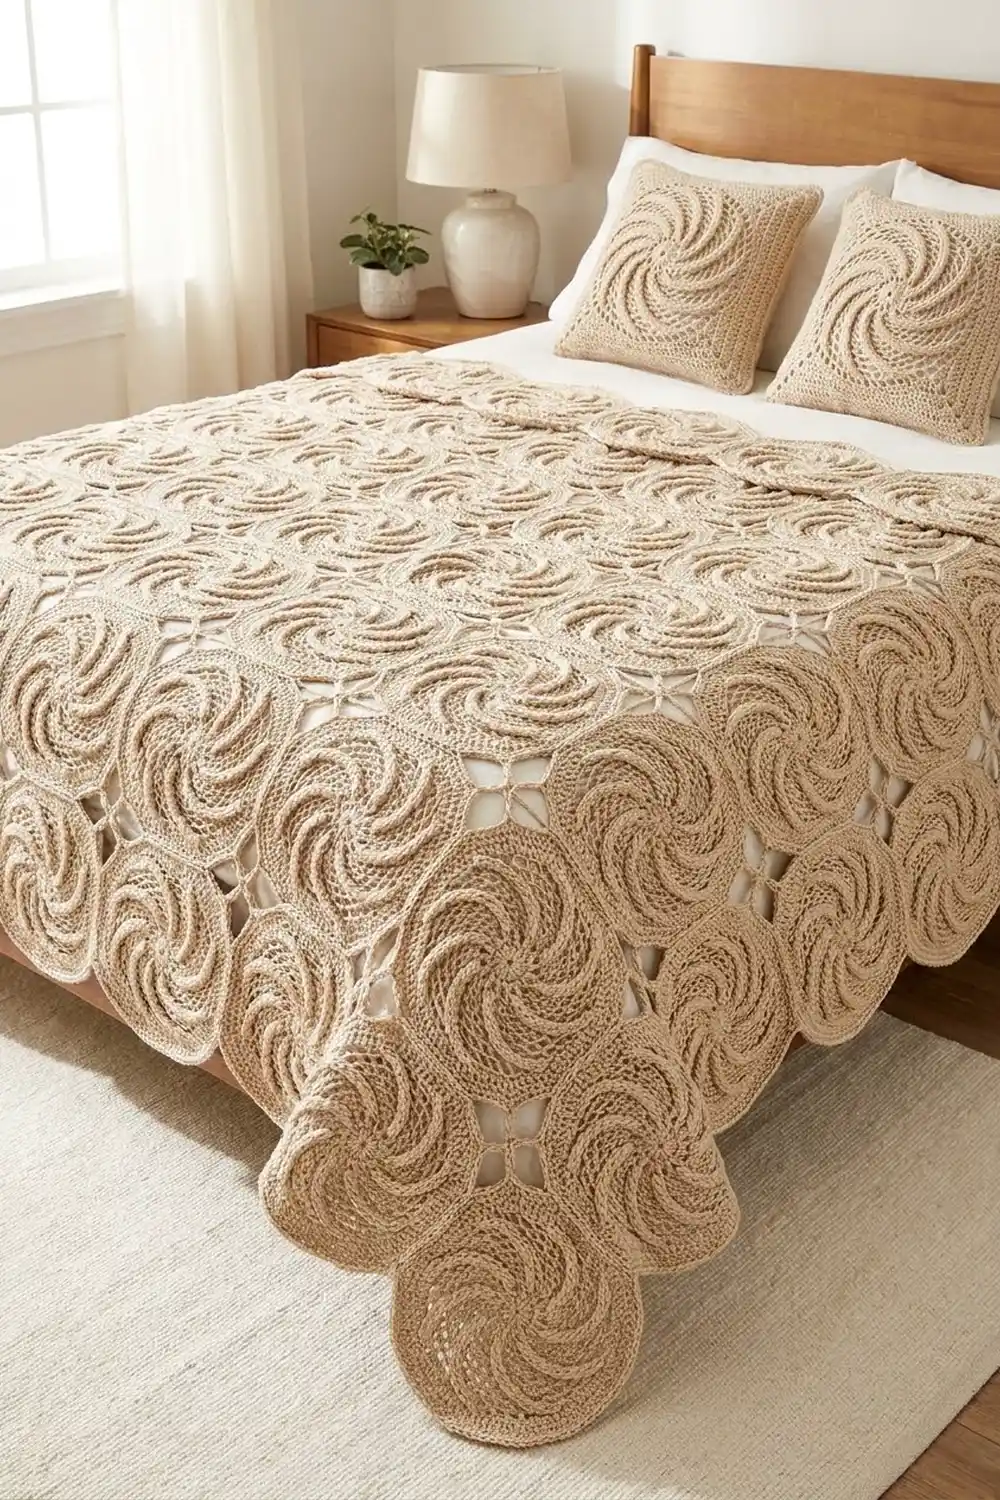
The Oatmeal Whirl Swirl Bedspread is made from round motifs. Each motif has eight raised arms that curve out from a small open center. Short ladder-style openings sit between the arms, and a smooth single crochet rim finishes the outer edge. Joined in a grid, the circles give the bedspread a sculpted surface and a soft scalloped edge.
The whole piece uses one oatmeal shade, so the texture carries the design. A smooth cotton blend makes the front post arms stand out clearly.
This pattern uses US crochet terms. The finished bedspread measures 82 x 98 in (208.3 x 248.9 cm), which fits over a queen bed with some drop at the sides.
You make 120 identical motifs in the round and join them in a 10 x 12 grid at four short contact points per motif. Then you work a four-round border that follows the scalloped edge.
Finished Size and Construction
- Finished size: 82 x 98 in (208.3 x 248.9 cm)
- Skill level: Intermediate
- Terminology: US terms
- Yarn weight: Worsted (#4)
- Hook: 5.0 mm (H-8)
- Number of pieces: 120 round motifs
- Layout: 10 across x 12 down
- Piece size: 8 in (20.3 cm) diameter
- Size before border: 80 x 96 in (203.2 x 243.8 cm)
- Border depth: 1 in (2.5 cm) per side
Materials
Use a smooth worsted-weight cotton or cotton blend with good stitch definition. These amounts assume 100 g balls of about 192 m. Fuzzy yarns hide the swirl, so avoid them.
Oatmeal / light beige: 4,300 g (8,256 m) total
- Motifs: 3,600 g (6,912 m), about 30 g (58 m) each
- Joining: 60 g (115 m)
- Border: 150 g (288 m)
- Margin: 490 g (941 m)
Tools: 5.0 mm (H-8) hook, 4 locking stitch markers, yarn needle, scissors, measuring tape, blocking mats, rust-proof pins and a spray bottle.
All amounts include a margin for gauge differences and a test motif.
Abbreviations (US Terms)
- ch: chain
- sl st: slip stitch
- sc: single crochet
- dc: double crochet
- sk: skip
- sp: space
- st(s): stitch(es)
- sc2tog / sc3tog: single crochet 2 / 3 together
- rep: repeat
Front post double crochet (fpdc): Yarn over. Insert the hook from front to back to front around the post of the stitch below, then complete a dc. This stitch makes the raised arms.
Reverse single crochet (rev sc): Work sc from left to right (right to left if you’re left-handed). This makes a corded edge.
Gauge and Checkpoints
Gauge: 15 sc and 16 rows = 4 in (10.2 cm).
Make one full test motif first. It shows your gauge, how much yarn one motif uses and whether the motif lies flat.
Diameter checkpoints:
- Round 1: 1.5 in (3.8 cm)
- Round 3: 3 in (7.6 cm)
- Round 5: 5 in (12.7 cm)
- Round 7: 7.25 in (18.4 cm)
- Round 8: 8 in (20.3 cm)
Too big (over 8.25 in / 21.0 cm): change to a 4.5 mm hook. Too small (under 7.75 in / 19.7 cm): change to a 5.5 mm hook. If the edge ruffles, tighten the ch-1 spaces. If the motif cups, loosen your post stitches.
Swirl Motif (make 120)
The motif has 8 sections. From Round 4 on, each section has one arm of 3 sts (fpdc, fpdc, leading dc) followed by lace (ch-1 spaces and dc spokes). In every round you skip the first arm stitch and work a new leading dc into the lace. This moves each arm forward one stitch per round, which forms the swirl.
Round 1: Make a magic ring. Ch 3 (counts as dc), work 15 dc in the ring and join to the top of the ch-3. Leave a small center hole. (16 dc)
Round 2: Ch 4 (counts as dc + ch 1), dc in next dc, ch 1; rep from * around. Join to the 3rd ch of the beginning ch-4. (16 dc + 16 ch = 32 sts)*
Round 3: Sl st in the first ch-1 sp, then sl st in the next dc. Ch 3 (counts as dc), dc in next ch-1 sp, dc in next dc, ch 2, sk next ch-1 sp. Dc in next dc, dc in next ch-1 sp, dc in next dc, ch 2, sk next ch-1 sp; rep from * 6 more times. Join to the top of the beginning ch-3. (24 dc + 16 ch = 40 sts; 5 per section)*
Round 4: The join stitch counts as the skipped first arm stitch. Ch 2 (does not count). Fpdc around each of the next 2 dc, dc in the ch-2 sp (leading dc), ch 1, dc in the same ch-2 sp, ch 1, sk the first dc of the next arm; rep from * around. Join to the first fpdc. (Arm 3 + lace 3 = 6 per section; 48 sts)*
Round 5: Ch 2 (does not count). Fpdc around the next fpdc, fpdc around the leading dc, dc in the next ch-1 sp (new leading dc), ch 1, dc in next dc, ch 1, dc in next ch-1 sp, ch 1, sk the first fpdc of the next arm; rep from * around. Join to the first fpdc. (Arm 3 + lace 5 = 8 per section; 64 sts)*
Round 6: Ch 2 (does not count). Fpdc around the next fpdc, fpdc around the leading dc, dc in the next ch-1 sp, ch 1, dc in next dc, ch 1, dc in next ch-1 sp, ch 1, dc in next dc, ch 1, sk the last ch-1 sp and the first fpdc of the next arm; rep from * around. Join. (Arm 3 + lace 7 = 10 per section; 80 sts)*
Round 7: Ch 2 (does not count). Fpdc around the next fpdc, fpdc around the leading dc, dc in the next ch-1 sp, ch 1, dc in next dc, [ch 1, sk next ch-1 sp, dc in next dc] 2 times, ch 1, dc in the last ch-1 sp, sk the first fpdc of the next arm; rep from * around. Join. (Arm 3 + lace 8 = 11 per section; 88 sts)*
Round 8 (rim, conversion round): Ch 1. Sc in each of the 2 fpdc, 2 sc in the leading dc, sc in each of the next 8 sts and ch-1 sps; rep from * around. Join to the first sc. (88 sts worked 1-per-stitch + 8 extra = 96 sc; 12 per section)* Fasten off and weave in the ends.
Marking the join zones: Starting at any sc, count 4 sts for a join zone, then 20 free sts. Repeat this 4 times (4 x 24 = 96). Mark each zone and label them N, E, S and W.
Make All Pieces
You need 120 motifs, all in oatmeal: 4 corner motifs (C), 36 edge motifs (E) and 80 interior motifs (M). All of them are made the same way. The letters only show where each motif goes.
CEEEEEEEEC
EMMMMMMMME
EMMMMMMMME
EMMMMMMMME
EMMMMMMMME
EMMMMMMMME
EMMMMMMMME
EMMMMMMMME
EMMMMMMMME
EMMMMMMMME
EMMMMMMMME
CEEEEEEEEC
Each row is 10 motifs across. There are 12 rows.
Joining
Method: Flat whipstitch through the back loops, right sides up, using a yarn needle and a 15.2 cm (6 in) tail at each end.
Stitch-to-stitch logic: Lay two motifs edge to edge so that the E zone of the left motif touches the W zone of the right motif. Match the stitches in mirror order (1st to 4th, 2nd to 3rd, 3rd to 2nd, 4th to 1st) and work one whipstitch per pair, for 4 whipstitches per join. Join S zones to N zones in the same way for vertical joins. Keep all 20 free stitches between zones unjoined.
Join each horizontal row first (9 joins per row, 108 in total). Then join the rows together (10 joins per seam, 110 in total).
Tension: Pull each stitch snug enough to close the gap but not tight enough to pucker the rims. Small curved openings remain where four motifs meet. These are part of the design.
Checkpoint: The joined piece should measure 80 x 96 in (203.2 x 243.8 cm), with motif centers 8 in (20.3 cm) apart.
Border
Border gauge: 4 sc rounds = 1 in (2.5 cm).
Exposed stitches: An edge motif has 2 free sections of 20 sts plus its unjoined outer zone of 4 sts, for 44 sts. A corner motif has 3 free sections of 20 sts plus 2 unjoined zones, for 68 sts. Split that 34/34 at the middle of its diagonal section. The corners need no extra stitches because the motif’s own curve turns the corner.
Round 1: Join the yarn at the start of any free stitch. Sc in each exposed stitch. At each valley between two motifs, ch 2 and carry on into the next motif.
- Short side: 2 x 34 + 8 x 44 + 9 valleys x 2 ch = 68 + 352 + 18 = 438
- Long side: 2 x 34 + 10 x 44 + 11 x 2 = 68 + 440 + 22 = 530
- Total: 2 x 438 + 2 x 530 = 1,936
Round 2: Sc in each sc. Work sc2tog over each valley ch-2 (2 sts become 1). Add 2 increases evenly spaced on each edge scallop, and 2 increases on each 34-st corner portion.
- Short side: 438 + 16 + 4 − 9 = 449
- Long side: 530 + 20 + 4 − 11 = 543
- Total: 1,984
Round 3: Sc in each st. Work sc3tog centered on each valley stitch (−2 per valley). Repeat the scallop and corner increases from Round 2.
- Short side: 449 + 16 + 4 − 18 = 451
- Long side: 543 + 20 + 4 − 22 = 545
- Total: 1,992
Round 4: Rev sc in each st. (1,992) Fasten off.
Why the math works: Round 1 picks up the motifs’ own stitches 1:1. The only extra stitches are the valley chains, and every one is counted above. A 44-st scallop covers about 165 degrees, so each 0.25 in (0.6 cm) round adds about 0.72 in (1.8 cm) of edge length, or roughly 2.75 sts. Two increases keep the edge flat and slightly firm. The valleys curve inward, so they need decreases. Increases on the scallops and decreases in the valleys roughly balance, so each straight side stays the same length.
Final Blocking
- Lay the bedspread on mats or a clean carpet in sections, right side up.
- Mist it until damp, but not soaked.
- Pin each side straight, measuring 82 in (208.3 cm) across and 98 in (248.9 cm) down.
- Pin out each scallop so it curves evenly.
- Press the swirl arms gently with your fingertips. Don’t flatten them.
- Let the piece dry completely, then move to the next section.
Final Quality-Control Checklist
- Every motif measures 8 in (20.3 cm) and has 96 rim sts.
- All 8 arms in each motif curve the same way.
- Every join uses exactly 4 stitch pairs.
- The grid is 10 x 12 with no twisted motifs.
- The border counts are 1,936 / 1,984 / 1,992 / 1,992.
- The scallops are even and the valleys don’t pucker.
- All ends are woven in securely.
Troubleshooting
- The arms look straight, not swirled: You probably forgot to skip the first arm stitch. Check this every round.
- The motif ruffles: Your ch-1 spaces are too loose. Tighten them or go down one hook size.
- The motif cups: Your fpdc are too tight. Pull up a taller loop.
- Joins pucker: Loosen the whipstitches, and make sure the zones line up in mirror order.
- The border waves: Leave out one increase per scallop in Round 3.
- Valleys pull in: Work sc2tog in Round 3 instead of sc3tog.
Care
Hand wash or machine wash on a cold, gentle cycle inside a large mesh bag. Dry flat and reshape the scallops while the bedspread is damp.
Final Notes
The measurement chain is short. A gauge of 15 sc = 4 in (10.2 cm) gives an 8 in (20.3 cm) motif with 96 rim stitches. A 10 x 12 grid then measures 80 x 96 in (203.2 x 243.8 cm). The 1 in (2.5 cm) border brings the bedspread to 82 x 98 in (208.3 x 248.9 cm). Check your first motif carefully, and the remaining 119 will follow.
Happy crocheting!