

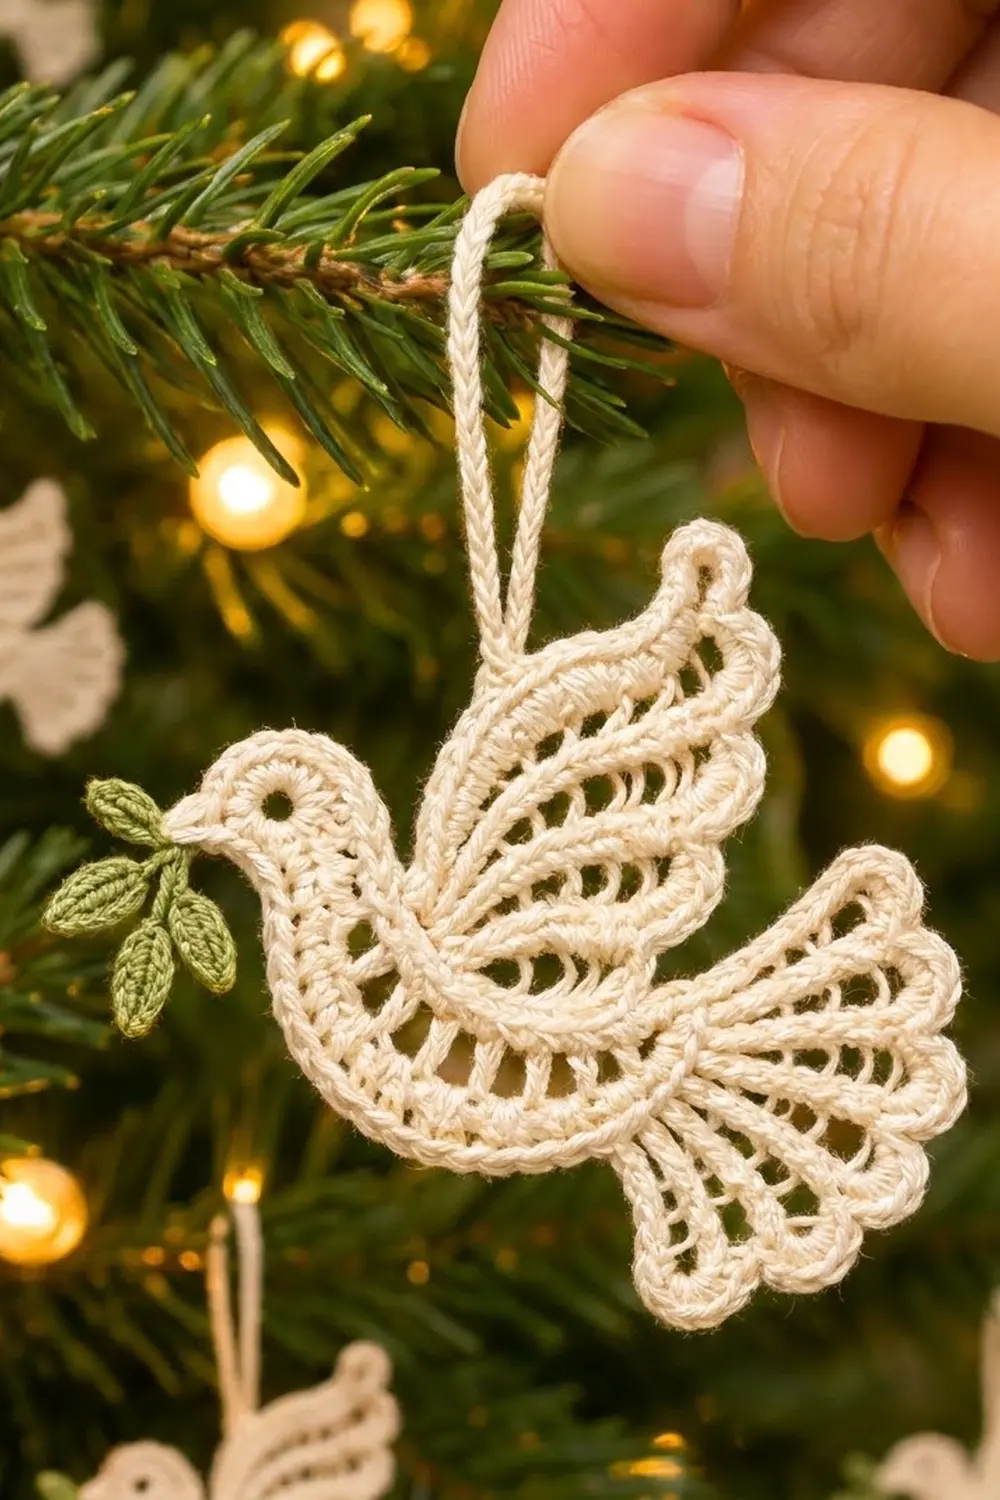
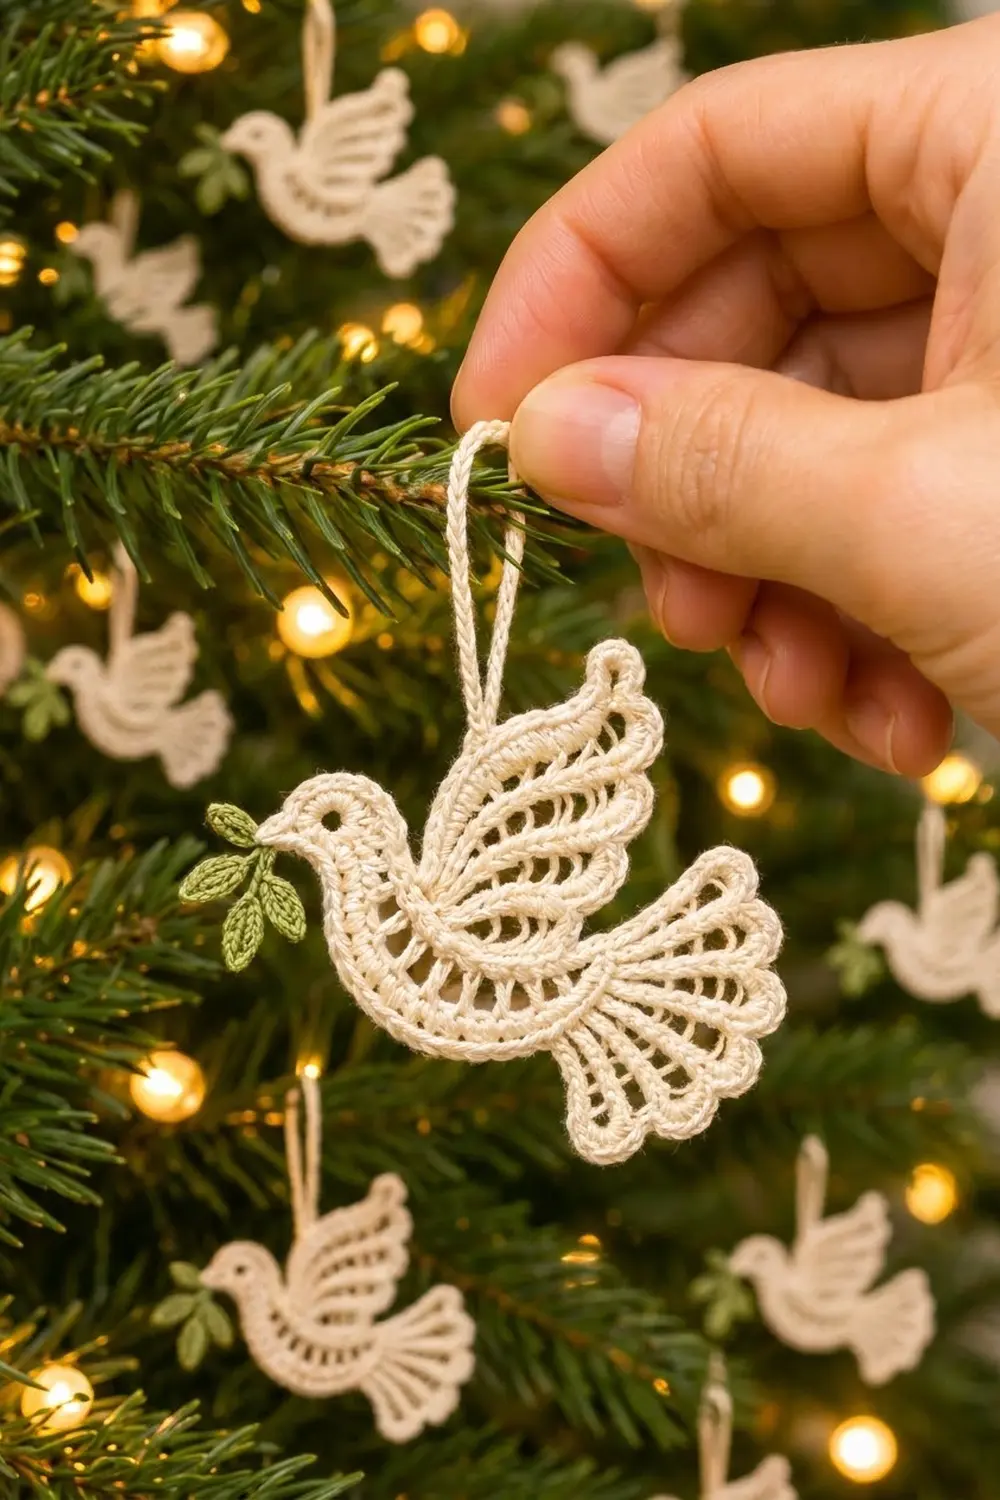
This lacy peace dove is a classic holiday ornament. It has a curved crescent body, an open fan wing that sweeps upward, a scalloped tail, and a tiny green olive sprig held at the beak. Cream cotton thread gives it a soft, vintage, heirloom look that suits a tree, a gift tag, or a window.
The design uses one main color, cream, plus a small amount of sage-olive green for the sprig. The style is light filet-and-scallop lace. It uses only basic stitches, but the shaping is precise. All terms are US crochet terms.
The finished ornament measures 5 in (12.7 cm) wide by 3 3/4 in (9.5 cm) tall. That does not include the 2 in (5.1 cm) hanging loop.
Construction overview: You first work a short strip in rows that curls into a crescent. Next you work the head, wing, and tail in rows directly into the free loops of the foundation chain. One sc outline round then ties every edge together and adds the beak and wing tip. Finally you add the hanging loop and sew on the olive sprig.
Finished Size and Construction
- Finished size: 5 in × 3 3/4 in (12.7 cm × 9.5 cm), plus a 2 in (5.1 cm) loop
- Skill level: Intermediate
- Terminology: US terms
- Yarn weight: Size 3 crochet cotton thread (fingering weight, #1)
- Hook: 2.25 mm (US B-1)
- Number of pieces: 1 dove motif, plus 1 small sprig sewn on
- Layout: Single standalone motif, no joining
- Piece size before border: 4 3/4 in × 3 1/2 in (12.1 cm × 8.9 cm)
- Border depth: 1/8 in (0.3 cm) on every edge, one round
Materials
Use a mercerized cotton thread. It gives crisp stitch definition and holds its shape after starching. Avoid fuzzy or acrylic yarns, because the arches will blur and droop.
- Cream: 6 g (about 20 m)
- Sage-olive green: 1 g (about 4 m)
Both quantities include a margin of about 25% for your gauge swatch and tails.
Tools:
– 2.25 mm (US B-1) crochet hook
– Tapestry needle (small eye)
– 2 locking stitch markers
– Rust-proof pins and a foam blocking mat
– Spray starch or a diluted fabric stiffener
– Small scissors
– Ruler or tape measure
Abbreviations (US Terms)
- ch – chain
- sl st – slip stitch
- sc – single crochet
- hdc – half double crochet
- dc – double crochet
- tr – treble crochet
- dtr – double treble crochet (yarn over 3 times, then work off loops in pairs)
- sp – space
- sc2tog – single crochet 2 together
- st(s) – stitch(es)
Special stitches:
Point: Ch 4. Sl st in 2nd ch from hook, sc in next ch, hdc in next ch. You use this for both the beak and the wing tip. Its stitches are never counted in round totals.
Leaf (green sprig): Worked over 5 ch. Sl st in 2nd ch from hook, sc in next ch, hdc in next ch, sc in next ch, sl st in last ch.
Gauge and Checkpoints
Gauge: 16 sc and 18 sc rows = 2 in (5.1 cm) over a sc swatch.
Test the strip first. Body Row 1 works as your gauge test. It is 33 sc long and should measure 4 1/8 in (10.5 cm) when relaxed and flat.
- If Row 1 is longer than 4 1/4 in (10.8 cm), go down one hook size and start again.
- If it is shorter than 4 in (10.2 cm), go up one hook size.
Checkpoints:
1. After Body Row 1: a straight strip 4 1/8 in (10.5 cm) long.
2. After Body Row 3: the strip curls into a crescent with a chord of about 3 3/4 in (9.5 cm) and a depth of 3/4 in (1.9 cm).
3. After the wing: the wing fan stands about 1 3/4 in (4.4 cm) above the body edge.
4. After the tail: the tail extends about 1 1/4 in (3.2 cm) from the body.
5. Before the border: 4 3/4 in × 3 1/2 in (12.1 cm × 8.9 cm).
6. After the border and blocking: 5 in × 3 3/4 in (12.7 cm × 9.5 cm).
If you are off by more than 1/4 in (0.6 cm) at checkpoint 2, fix your gauge before you go on. Every later section is worked into this strip.
Body (Crescent)
Use cream.
Row 1: Ch 34. Sc in 2nd ch from hook and in each ch across. Turn. (33 sc)
Place a marker in the free loop of the first foundation ch (directly under the last sc you worked). This end is the front of the dove. Later sections are worked into these 33 free foundation loops. Number them 1 to 33, starting from the marked front end.
Row 2 (openwork): Ch 4 (counts as dc + ch 1), skip next sc, dc in next sc. Ch 1, skip next sc, dc in next sc; repeat from * across. Turn. (17 dc, 16 ch-1 sps)
The dc land on sc 1, 3, 5, … 33.
Row 3 (belly edge, conversion row): Ch 1. Sc in first dc. 2 sc in next ch-1 sp, sc in next dc; repeat from * across, ending with sc in the 3rd ch of the turning ch. Fasten off.
- Count: 17 sc worked 1-per-dc + 32 sc in the spaces = 49 sc
- Put another way, that is 33 stitches and spaces worked 1-for-1, plus 16 extra stitches.
Those 16 extra stitches make the belly edge longer than the foundation edge, which curls the strip into a crescent. The longer edge (Row 3) is the belly. The foundation edge is the back, and it curves inward.
Checkpoint: the chord is 3 3/4 in (9.5 cm) and the depth is 3/4 in (1.9 cm).
Head
Work into the free foundation loops 1–8.
Row 1: With the back edge facing up, join cream with a sl st in loop 1. Ch 3 (counts as dc), then dc in loops 2–8. Turn. (8 dc)
Row 2 (eye row): Ch 3 (counts as dc), dc in next 2 dc, ch 2, skip next 2 dc (this makes the eye), dc in next 2 dc, 2 dc in last st. Turn. (7 dc, 1 ch-2 sp)
Row 3 (crown): Ch 1. 2 sc in first dc, sc in next 2 dc, 3 sc in ch-2 sp, sc in next 3 dc, 2 sc in last st. Fasten off.
- Count: 7 sc worked 1-per-dc + 3 sc in the eye space + 2 end increases = 12 sc
The ch-2 space stays open below the crown sc and reads clearly as an eyelet eye. You will add the beak in the border round.
Wing
Skip loops 9–10. These two stay free and become the “neck gap.”
Row 1: Join cream with a sl st in loop 11. Ch 1, then sc in loops 11–21. Turn. (11 sc)
Row 2 (spokes): Ch 5 (counts as dtr), dtr in same st. Ch 2, skip next sc, 2 dtr in next sc; repeat from * 4 more times. Turn. (6 groups = 12 dtr, 5 ch-2 sps)
Row 3 (arches): Ch 1. Sc in first dtr. Ch 7, sc in next ch-2 sp; repeat from * 4 more times. Ch 7, sc in top of the turning ch. Turn. (7 sc, 6 ch-7 loops)
Row 4 (scallop cover, conversion row): Ch 1. Sc in first sc. 9 sc in next ch-7 loop, sc in next sc; repeat from * 5 more times. Fasten off.
- Count: 7 sc worked 1-per-sc + 54 sc in the loops = 61 sc
The packed 9-sc covers make each arch stand out as a smooth, rounded feather. The tall dtr spokes underneath show through as the open lace lines of the wing.
Checkpoint: the wing stands 1 3/4 in (4.4 cm) above the back edge.
Tail
Skip loops 22–24. These three stay free and become the “back gap.”
Row 1: Join cream with a sl st in loop 25. Ch 1, then sc in loops 25–33. Turn. (9 sc)
Row 2 (spokes): Ch 4 (counts as tr), tr in same st. Ch 2, skip next sc, 2 tr in next sc; repeat from * 3 more times. Turn. (5 groups = 10 tr, 4 ch-2 sps)
Row 3 (arches): Ch 1. Sc in first tr. Ch 5, sc in next ch-2 sp; repeat from * 3 more times. Ch 5, sc in top of the turning ch. Turn. (6 sc, 5 ch-5 loops)
Row 4 (scallop cover, conversion row): Ch 1. Sc in first sc. 7 sc in next ch-5 loop, sc in next sc; repeat from * 4 more times. Fasten off.
- Count: 6 sc worked 1-per-sc + 35 sc in the loops = 41 sc
Checkpoint: the tail extends 1 1/4 in (3.2 cm). Flatten the tail so it angles down and to the right, away from the wing.
Checkpoint before the border: 4 3/4 in × 3 1/2 in (12.1 cm × 8.9 cm).
Border (Outline Round)
Border gauge: this round uses the same gauge as the body, 16 sc = 2 in (5.1 cm). It adds 1/8 in (0.3 cm) to every outer edge.
Weave in all tails before you start, so they don’t show under the outline.
Round 1: Join cream with a sl st in the first sc of the belly, at the front end. Ch 1. Work sc around the whole outline, going clockwise, as follows:
- Belly: sc in each Row 3 sc. 49 sc
- Back body end: sc in the row ends (Row 3: 1, Row 2: 2, Row 1: 1). 4 sc
- Tail outer side: sc in the row ends (1 + 2 + 2 + 1). 6 sc
- Tail scallops: sc in each Row 4 sc. 41 sc
- Tail inner side: sc in the row ends. 6 sc
- Back gap: sc in foundation loops 24, 23, 22. 3 sc
- Wing back side: sc in the row ends (Row 1: 1, Row 2: 3, Row 3: 2, Row 4: 1). 7 sc
- Wing tip: work 1 Point (not counted).
- Wing scallops: sc in each Row 4 sc. 61 sc
- Wing front side: sc in the row ends. 7 sc
- Neck gap: sc in foundation loops 10 and 9. 2 sc
- Head back side: sc in the row ends (Row 1: 2, Row 2: 2, Row 3: 1). 5 sc
- Crown: sc in each Row 3 sc. 12 sc
- Beak: work 1 Point (not counted).
- Head front side: sc in the row ends. 5 sc
- Front body end: sc in the row ends. 4 sc
Sl st to the first sc. Do not fasten off yet.
Total: 49 + 4 + 6 + 41 + 6 + 3 + 7 + 61 + 7 + 2 + 5 + 12 + 5 + 4 = 212 sc, plus 2 Points.
Why the math works:
– Along finished edges (belly, scallops, crown), the border places exactly 1 sc per existing stitch. Those edges keep their length and simply gain a clean rim.
– On row-end edges, the counts match row heights: 1 sc per sc row, 2 per dc or tr row, 3 per dtr row, and 2 per arch row. That keeps the sides flat instead of ruffled or pulled tight.
– The two gaps get exactly 1 sc per free loop. Do not add stitches at these inner corners. If they pucker, work sc2tog across the last gap sc and the first row-end sc, then count that sc2tog as one gap stitch.
Hanging Loop
You are still holding the working loop at the end of the border.
- Sl st along the outline to the first neck-gap sc.
- Ch 36, then sl st in the second neck-gap sc.
- Turn and work 40 sc into the ch-36 loop. The extra 4 stitches keep the loop round and firm.
- Sl st in the first neck-gap sc and fasten off.
The loop stands 2 in (5.1 cm) tall.
Olive Sprig
Use sage-olive green.
- Ch 13.
- Tip leaf: work Leaf over ch 2–6 counted from the hook.
- Sl st in ch 7.
- First pair of leaves: ch 6, work Leaf over those 5 new chains, sl st in ch 7 again; repeat from * once more.
- Sl st in ch 8, 9, and 10.
- Second pair of leaves: repeat step 4, sl st-ing back into ch 10 each time.
- Sl st in ch 11, 12, and 13. Fasten off and leave a 6 in (15.2 cm) tail.
Count: 5 leaves, each about 1/2 in (1.3 cm) long. The sprig is about 1 1/4 in (3.2 cm) long.
Block the dove before you sew on the sprig (see below). Then lay the stem end just under the beak Point, angled down and forward. Tack it with 3–4 small stitches through the head’s border sc. Keep the stitches on the back so the dove reads as “holding” the branch.
Final Blocking
- Soak the dove (without the sprig) in cool water for 5 minutes. Press out the water in a towel without wringing.
- Lay it on the mat with the right side up and the dove facing left.
- Pin the belly into a smooth crescent first. Check the 3 3/4 in (9.5 cm) chord.
- Fan the wing upward. Pin the tip of every scallop and the wing Point so each dtr spoke runs straight.
- Fan the tail down and to the right. Pin each of the 5 scallops.
- Pin the beak Point and make sure the eye opens round.
- Measure: 5 in × 3 3/4 in (12.7 cm × 9.5 cm).
- Spray it with starch, let it dry completely, and then remove the pins.
- Sew on the sprig.
Final Quality-Control Checklist
- Body: 33 / 17 dc / 49 sc
- Head: 8 / 7 / 12, with an open eye
- Wing: 11 / 12 dtr / 6 loops / 61 sc
- Tail: 9 / 10 tr / 5 loops / 41 sc
- Border: 212 sc plus 2 Points
- The neck gap and back gap lie flat
- Size: 5 in × 3 3/4 in (12.7 cm × 9.5 cm)
- The loop is centered over the neck gap and 2 in (5.1 cm) tall
- The sprig is secure and no tails show from the front
Troubleshooting
The crescent curls too much. Your Row 3 tension is tight. Rework it a little looser, or block the curve flatter.
The crescent stays straight. Make sure you worked 2 sc into every ch-1 space, for 49 total.
The wing arches sag. The ch-7 loops are too loose for 9 sc. Crowd the sc in, or chain more firmly.
The border ruffles. Count the row-end stitches against the list. Extra stitches usually creep into the dtr rows.
The inner corners pucker. Use the sc2tog fix described in the Border section.
The eye has closed up. Pin it open with a toothpick while the starch dries.
Care
Hand wash in cool water and lay flat to dry. Re-starch as needed. Store the ornament flat between tissue paper so the wing and tail scallops keep their shape.
Final Notes
Everything builds from one measurement:
– The 33-sc strip at 4 1/8 in (10.5 cm) becomes a 3 3/4 in (9.5 cm) crescent.
– The head, a 1 3/4 in (4.4 cm) wing, and a 1 1/4 in (3.2 cm) tail grow from it, giving 4 3/4 in × 3 1/2 in (12.1 cm × 8.9 cm).
– A 212-sc outline adds 1/8 in (0.3 cm) all around, for a finished 5 in × 3 3/4 in (12.7 cm × 9.5 cm).
Check that first strip and the rest falls into place. Make one for your tree, then a handful for gifts.
Happy crocheting!