

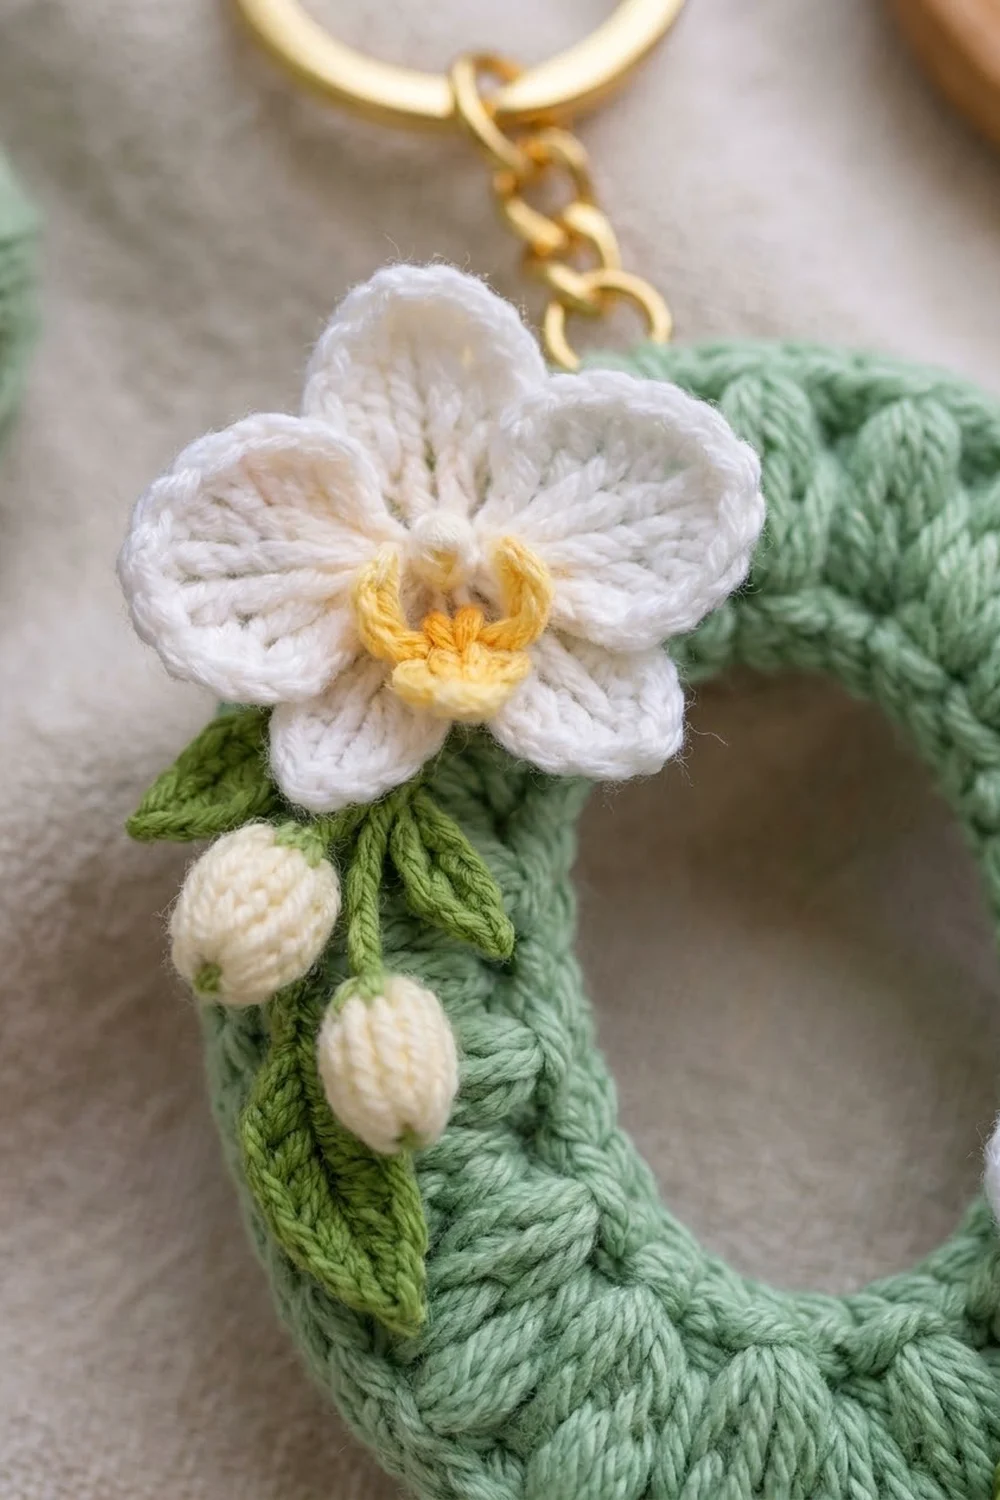
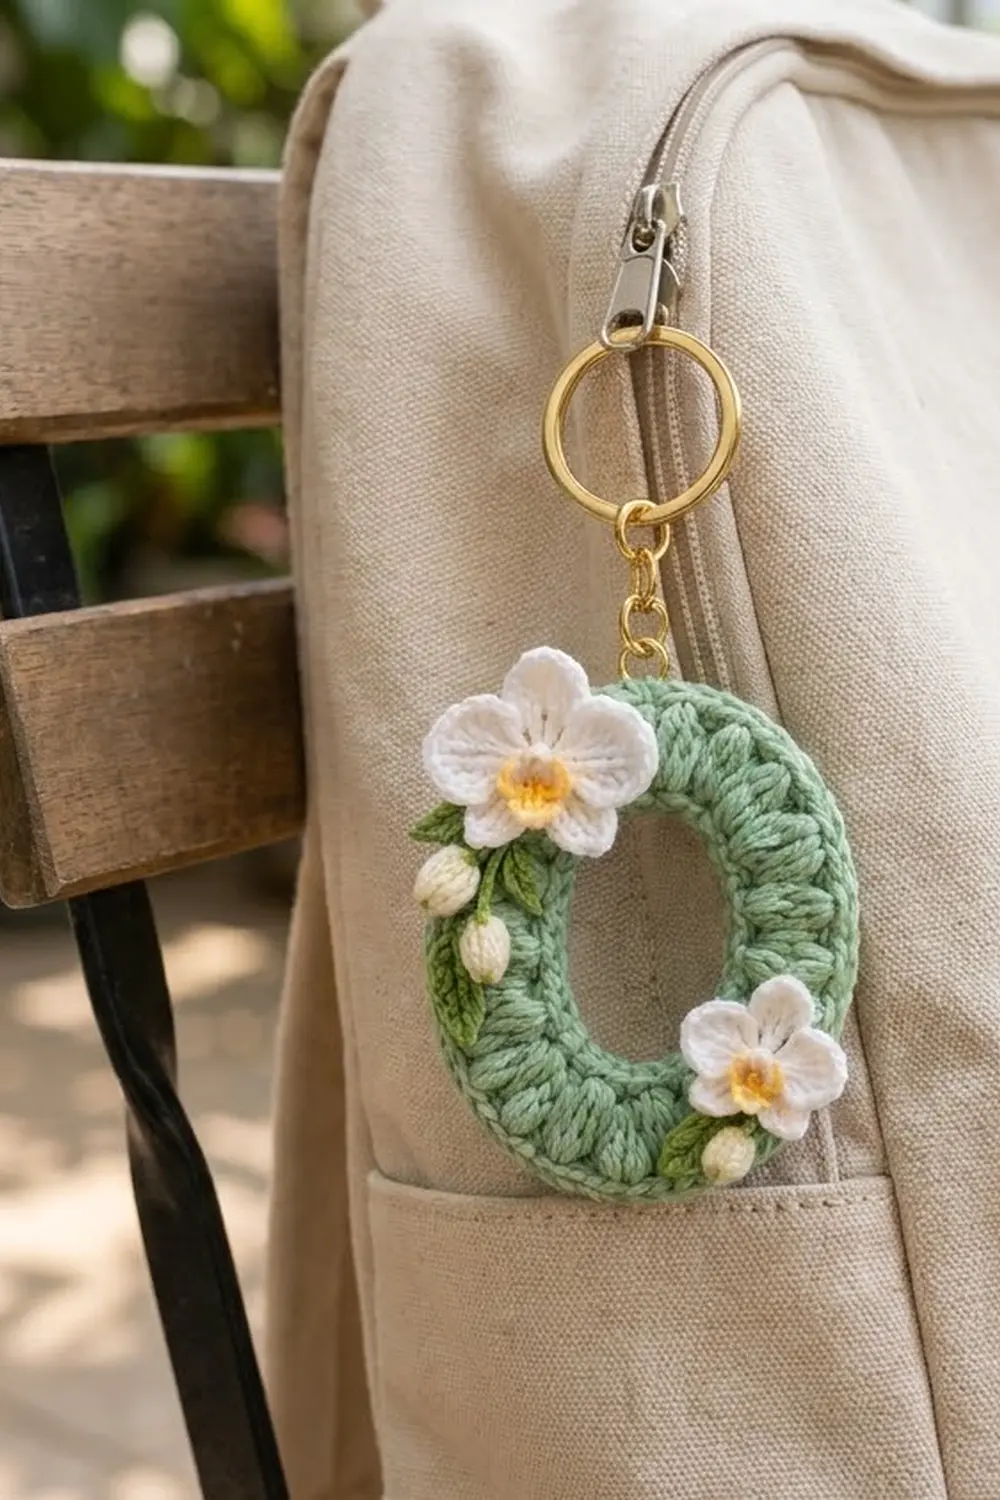
This little keychain is a chunky letter “O” in soft sage green. It is covered in rounded puff stitches and decorated with two white orchids. Small cream buds and leaf-green leaves sit under each flower, and a gold keyring hangs from the top. It looks good on a pouch, a bag zipper, or a set of keys.
The palette is calm: sage green for the ring, white for the petals, warm yellow for the orchid centers, cream for the buds, and a deeper leaf green for the foliage. The overall style is botanical and tidy, with plenty of texture packed into a small piece.
This pattern uses US crochet terms. The finished keychain measures about 3.75 in (9.5 cm) tall and 3 in (7.6 cm) wide, and the oval opening is about 1.75 in (4.4 cm) by 1 in (2.5 cm).
You will start with a chain loop and work outward in joined rounds: one single-crochet round, two puff-stitch rounds, and a two-round trim. Then you make the small appliqués, sew them on, block the piece, and attach the hardware.
Finished Size and Construction
- Finished size: 3.75 in (9.5 cm) tall × 3 in (7.6 cm) wide
- Opening: 1.75 in (4.4 cm) × 1 in (2.5 cm)
- Skill level: Easy–Intermediate
- Terminology: US
- Yarn weight: DK / light (3), cotton
- Hook: 3.5 mm (E-4)
- Number of pieces: 1 ring, plus small appliqués (2 orchids, 3 buds, 3 leaves) sewn on to make one finished piece
- Layout: a single oval ring with the keyring at the top center, one orchid at the upper left and one at the lower right
- Ring band width: 1 in (2.5 cm) all the way around
- Size before trim: 3.25 in (8.3 cm) × 2.5 in (6.4 cm)
- Trim depth: 0.25 in (0.6 cm)
Materials
Use a smooth mercerized or matte cotton in DK weight. Cotton shows the puff stitches clearly and holds the oval shape well. Avoid fuzzy yarns, because they blur the texture.
- Color A – Sage green (ring): 8 g, about 18 m
- Color B – White (orchid petals): 3 g, about 7 m
- Color C – Yellow (orchid centers and lips): 1 g, about 2 m
- Color D – Cream (buds): 1 g, about 2 m
- Color E – Leaf green (leaves and stems): 1 g, about 2 m
All quantities include a margin for swatching and tails.
Tools:
– 3.5 mm (E-4) crochet hook
– Tapestry needle and a sharp embroidery needle
– 4 stitch markers
– 1 in (2.5 cm) gold split keyring with a short chain, plus an 8 mm jump ring
– 2 pairs of flat-nose pliers
– Blocking mat, rust-proof pins, and a spray bottle
– A small amount of fiberfill, or yarn scraps, for the buds
Abbreviations (US Terms)
- ch – chain
- sl st – slip stitch
- sc – single crochet
- hdc – half double crochet
- dc – double crochet
- tr – treble crochet
- sc2tog – single crochet 2 together
- MR – magic ring
- sp – space
- st(s) – stitch(es)
Special stitch – Puff: (Yarn over, insert hook in the indicated st or sp, yarn over, and pull up a loop to the height of a hdc) 3 times. You now have 7 loops on the hook. Yarn over and pull through all 7 loops. The puff counts as 1 stitch. It has no closing chain; the ch-1 that follows it in the pattern is a separate stitch.
Gauge and Checkpoints
Gauge: 10 sc and 11 rows = 2 in (5.1 cm) in Color A. Each puff round adds about 0.25 in (0.6 cm) of band width.
The piece is small, so the ring itself is your gauge swatch. Measure it at each checkpoint:
- After Round 1: 2.25 in (5.7 cm) × 1.5 in (3.8 cm)
- After Round 2: 2.75 in (7.0 cm) × 2 in (5.1 cm)
- After Round 3: 3.25 in (8.3 cm) × 2.5 in (6.4 cm)
- After Round 5: 3.75 in (9.5 cm) × 3 in (7.6 cm)
Too big? Go down to a 3.25 mm hook, or make your puff loops shorter.
Too small? Go up to a 3.75 mm hook. Do not add stitches, because the counts below are what keep the oval shape.
Ring Pattern
The oval comes from placing the increases only at the two curved ends. The two short straight sides never get increases.
Section map: Every round has four sections in this order: Curve A (top), Side 1, Curve B (bottom), and Side 2. Put a marker in the first stitch of each section in Round 1, and move the markers up as you go.
Foundation: With Color A, ch 24. Join with a sl st to the first ch to form a loop, making sure the chain is not twisted. The inner edge measures about 4.8 in (12.2 cm), which matches the perimeter of the opening.
Round 1: Ch 1 (does not count). Work 1 sc in each ch around: 8 sc for Curve A, 4 sc for Side 1, 8 sc for Curve B, and 4 sc for Side 2. Join with a sl st to the first sc.
(24 sts: 8 + 4 + 8 + 4)
Round 2 (growth round): Ch 1 (does not count).
– Curve A: (Puff, ch 1) in each of the next 8 sts.
– Side 1: (Puff in the next st, ch 1, skip 1 st) 2 times.
– Curve B: (Puff, ch 1) in each of the next 8 sts.
– Side 2: (Puff in the next st, ch 1, skip 1 st) 2 times.
Join with a sl st to the top of the first puff.
(Round 2 total: 20 puffs and 20 ch-1 sps = 40 sts. Each curve has 16 sts and each side has 4 sts.)
Round 3 (growth round): Sl st into the first ch-1 sp, then ch 1 (does not count). From here on you work into the ch-1 sps, so the new puffs sit between the puffs below them and the rows look staggered.
– Curve A (8 sps): (Puff, ch 1) in the 1st sp. (Puff, ch 1) twice in the next sp, then (puff, ch 1) in the next sp. Repeat from * to * 2 more times. Finish with (puff, ch 1) twice in the 8th sp. This puts doubles in sps 2, 4, 6, and 8.
– Side 1 (2 sps): (Puff, ch 1) in each sp.
– Curve B: Work as Curve A.
– Side 2: Work as Side 1.
Join with a sl st to the top of the first puff.
(Round 3 total: 28 puffs and 28 ch-1 sps = 56 sts. Each curve has 12 puffs, or 24 sts, and each side has 2 puffs, or 4 sts.)
Checkpoint: The ring should measure 3.25 in (8.3 cm) × 2.5 in (6.4 cm) and lie mostly flat. A slight cup at this stage is normal, because the trim and blocking will flatten it.
Border (Trim)
Border gauge: 5 sc = 1 in (2.5 cm).
Round 4 (conversion round): Ch 1 (does not count). Work 1 sc in the top of each puff and 1 sc in each ch-1 sp around. Join with a sl st to the first sc.
(56 sc = 56 worked 1 per existing st + 0 added. Each curve has 24 sc and each side has 4 sc: 24 + 4 + 24 + 4 = 56.)
Round 5 (trim round): Working loosely, sl st in each sc around. Join to the first sl st.
(56 sl sts = 56 worked 1 per existing st + 0 added.)
Fasten off, leaving a 6 in (15.2 cm) tail. Weave in all ends on the back.
Why the math works: The outer edge is two semicircles 3 in (7.6 cm) across, joined by two straight sides of 0.75 in (1.9 cm). That gives a perimeter of 2 × 0.75 + 3.14 × 3 = 10.92 in (27.7 cm). At 5 sc per inch, 56 sc measure 11.2 in (28.4 cm). The extra 0.3 in (0.8 cm) is enough ease to stop the edge pulling inward, but not enough to make it ruffle. The straight sides stay at 4 sts in every round, so the opening keeps its oval shape.
Orchid (Make 2)
Round 1: With Color C, make 5 sc in a MR, pull it closed, and join with a sl st to the first sc. Fasten off Color C.
(5 sts)
Round 2 (petals): Join Color B in any sc. Work these petals in order, with each one entirely in a single stitch:
– St 1 – top sepal: (Ch 3, 2 tr, ch 3, sl st) in the same st.
– St 2 – right petal: (Ch 2, 2 dc, tr, 2 dc, ch 2, sl st).
– St 3 – lower right sepal: (Ch 3, 2 tr, ch 3, sl st).
– St 4 – lower left sepal: (Ch 3, 2 tr, ch 3, sl st).
– St 5 – left petal: (Ch 2, 2 dc, tr, 2 dc, ch 2, sl st).
(5 petals: 3 narrow sepals and 2 wide petals)
Fasten off, leaving a 10 in (25.4 cm) tail for sewing. Each orchid measures about 1.25 in (3.2 cm) across.
Lip: With Color C, work 4–5 small satin stitches just below the center, between the two lower sepals, to form the yellow lip. Add 1 French knot in Color B at the very center for the column.
Buds (Make 3)
With Color D:
– Round 1: 4 sc in a MR. (4 sts)
– Round 2: 2 sc in each st. (8 sts)
– Round 3: Sc in each st. (8 sts)
– Round 4: Sc2tog 4 times. (4 sts)
Stuff lightly with fiberfill or scraps. Fasten off and leave a tail for sewing. Each bud measures about 0.5 in (1.3 cm) tall.
Leaves (Make 3)
With Color E:
Long leaf (make 2): Ch 7. Starting in the 2nd ch from the hook, work sc, hdc, dc, dc, hdc, sc. Ch 1 at the tip. Working along the opposite side of the chain, work sc, hdc, dc, dc, hdc, sc. Join with a sl st to the first sc.
(12 sts + tip ch; about 1 in / 2.5 cm long)
Small leaf (make 1): Ch 5. Starting in the 2nd ch from the hook, work sc, hdc, hdc, sc. Ch 1 at the tip. Along the opposite side, work sc, hdc, hdc, sc. Join with a sl st.
(8 sts + tip ch; about 0.75 in / 1.9 cm long)
Assembly
- Upper left group: Pin one orchid over Rounds 3–4 at about the 10–11 o’clock position, with the left petal slightly overhanging the outer edge. Tuck the small leaf under its left petal, and tuck 2 buds and 1 long leaf below it, angled down the left side.
- Lower right group: Pin the second orchid at about 4 o’clock. Tuck 1 long leaf under its left petal and 1 bud below it.
- Sew each piece on with small stitches through the back loops of the ring, so the stitches don’t show on the back.
- With Color E, backstitch a short stem, about 0.25 in (0.6 cm), from each bud to its flower.
- Hardware: Thread the jump ring through Round 4 between the 12th and 13th sc of Curve A, which is the top center. Use the pliers to attach it to the chain of the keyring.
Final Blocking
- Lightly mist the ring, avoiding the orchids if possible.
- Pin it face up to 3.75 in (9.5 cm) × 3 in (7.6 cm), with one pin at each end and two on each side.
- Shape the opening with your fingers until it measures 1.75 in (4.4 cm) × 1 in (2.5 cm).
- Puff up each orchid petal with your fingertips. Do not pin the flowers flat.
- Leave to dry completely, then unpin.
Final Quality-Control Checklist
- Round counts are correct: 24, 40, 56, 56, 56.
- Both straight sides have 4 sts in every round.
- The band is 1 in (2.5 cm) wide all the way around.
- The outer edge lies flat, without cupping or ruffling.
- Each orchid has 3 sepals, 2 wide petals, a yellow lip, and a center knot.
- All appliqué stitches are hidden.
- The jump ring is closed tight and centered at the top.
- All ends are woven in securely.
Troubleshooting
- The ring cups: Your puffs are too tight. Pull the loops up a little taller, or go up a hook size.
- The ring ruffles: You have extra stitches. Recount the curves in Round 3, which should have 12 puffs each.
- The opening looks round, not oval: You probably increased on the sides. Each side must stay at 4 sts.
- The puffs lean to one side: Start every round of puffs in a ch-1 sp, not on top of a puff.
- The petals curl: Steam them lightly and shape them by hand.
- The keyring tears the edge: Pass the jump ring through both Round 4 and Round 3 for extra strength.
Care
Spot clean or hand wash cool, press out the water in a towel, and dry flat. Remove the keyring before washing if it is not stainless.
Final Notes
Here is the measurement chain from start to finish. The 24-chain loop makes a 1.75 in (4.4 cm) × 1 in (2.5 cm) opening. Round 1 brings the piece to 2.25 in (5.7 cm) × 1.5 in (3.8 cm), and Round 2 to 2.75 in (7.0 cm) × 2 in (5.1 cm). Round 3 reaches 3.25 in (8.3 cm) × 2.5 in (6.4 cm). The 56-stitch trim then finishes the ring at 3.75 in (9.5 cm) × 3 in (7.6 cm). If your ring matches each checkpoint, the orchids will sit where they should and the keychain will hang straight.
Happy crocheting!