

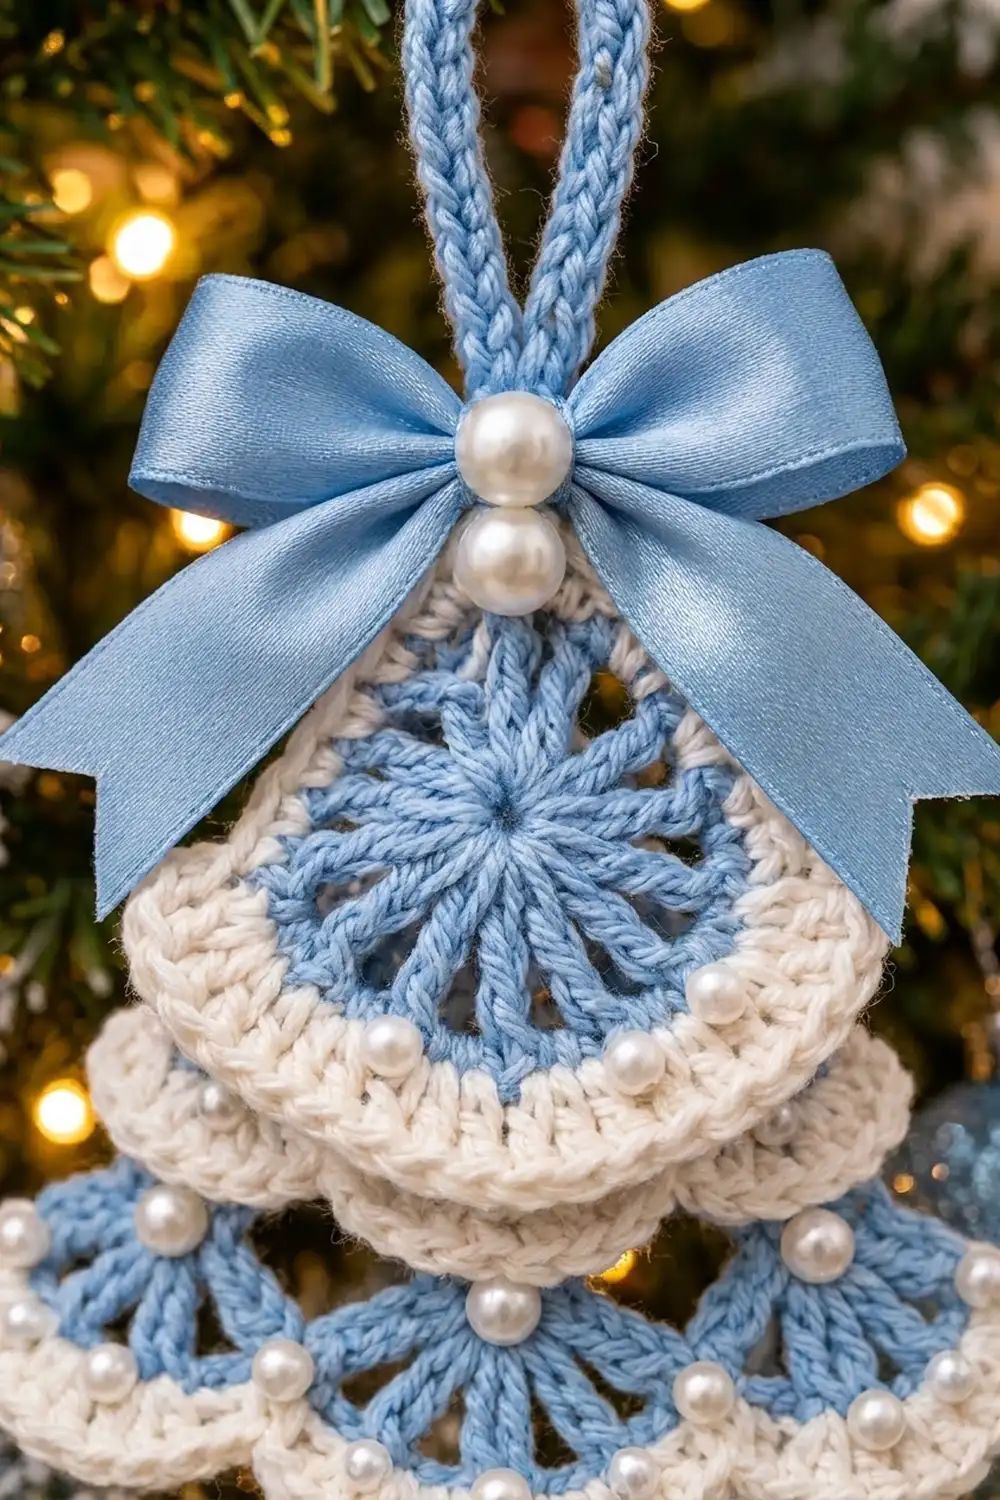
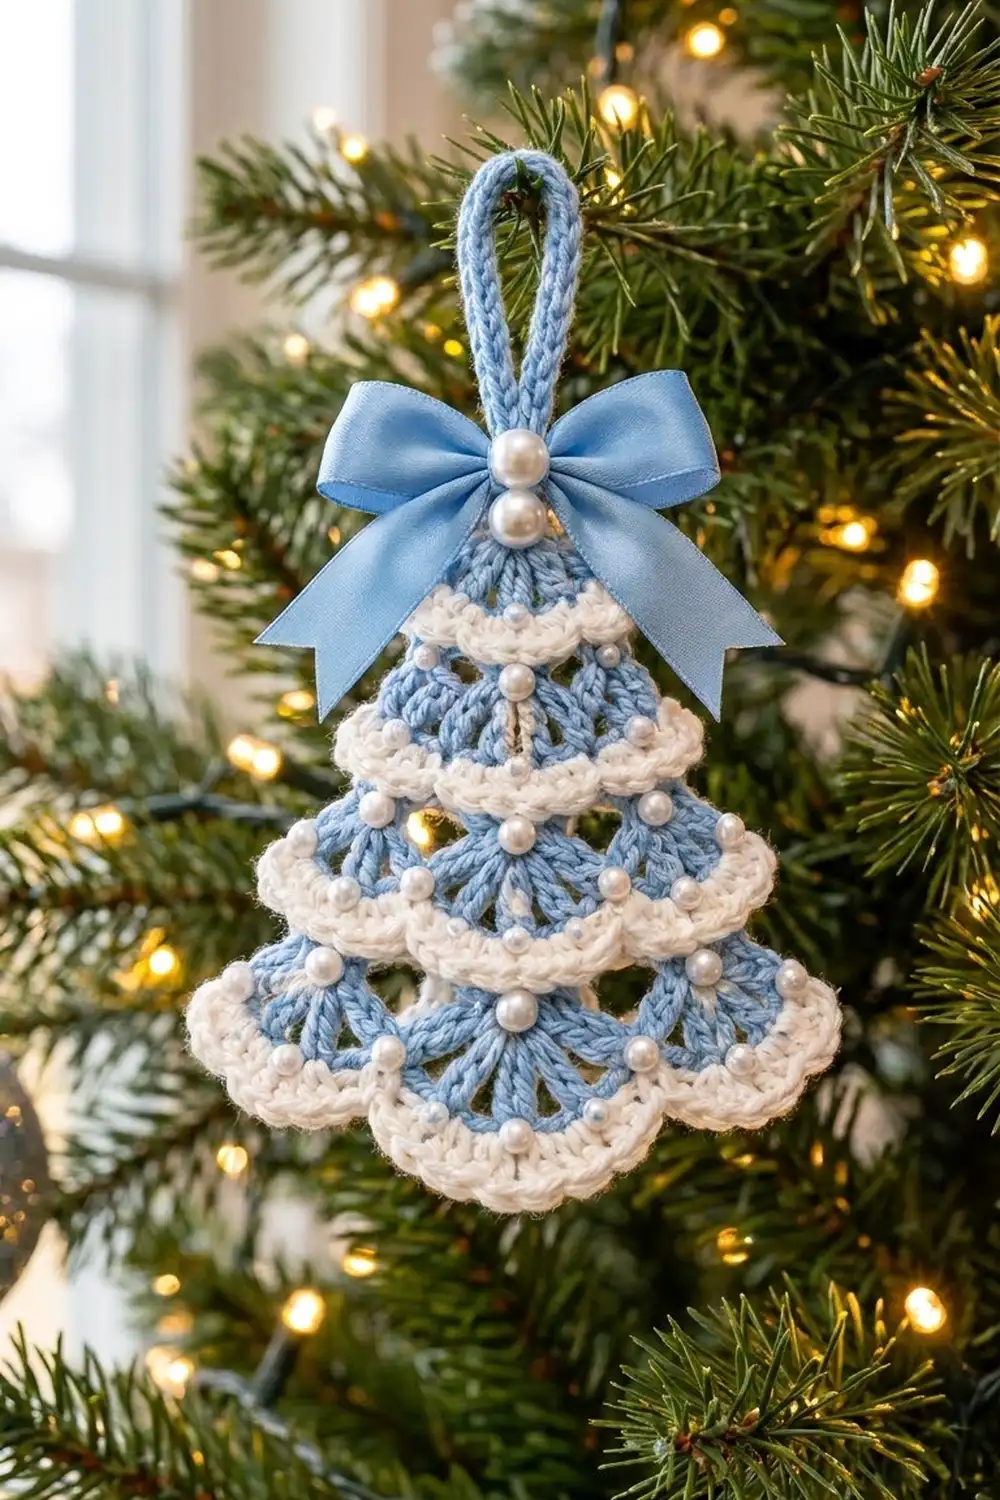
The Pearl Frost Christmas Tree is a small, flat lace ornament made from stepped rows of open blue fans. Each tier ends in a crisp white scalloped edge, so the tree looks frosted. Pearl beads sit at the fan points and scallop joins, and a satin bow with two larger pearls finishes the top.
The palette is soft powder blue and creamy white, a cool winter look that suits silver and glass ornaments. The style is vintage-lacy but still sturdy enough to hang from a branch, tie onto a gift or clip to a garland.
This pattern uses US crochet terms. The finished tree measures 4.5 in (11.4 cm) wide by 4.2 in (10.7 cm) tall, plus a 2 in (5.1 cm) hanging loop, for a total height of 6.2 in (15.7 cm).
The tree is worked in one piece from the top tip down. Blue fan rows and white edging rows alternate, and each blue row has one more fan than the row before. A second white row trims the bottom edge. Finally you add the loop, sew on the pearls and attach the bow.
Finished Size and Construction
- Finished size: 4.5 in (11.4 cm) wide × 4.2 in (10.7 cm) tall, plus a 2 in (5.1 cm) loop
- Skill level: Easy+ (fans, color changes, simple sewing)
- Terminology: US crochet terms
- Yarn weight: Light (3) / DK cotton
- Hook: 3.25 mm (US D/3)
- Number of pieces: 1 crocheted piece, plus a ribbon bow
- Layout: 5 tiers with 1, 2, 3, 4 and 5 fans
- Piece size before border: 4.5 in (11.4 cm) wide × 4.0 in (10.2 cm) tall
- Border depth: 0.2 in (0.5 cm), bottom edge only
Materials
Yarn: Use a smooth mercerized cotton or cotton blend in DK weight, about 125 m per 50 g. Cotton gives clear fan spokes and holds its shape after blocking. Avoid fuzzy yarns, because they blur the lace.
- Color A, Light Blue: 8 g / 20 m (fans and hanging loop, which uses the yarn doubled)
- Color B, Cream White: 5 g / 13 m (edging rows and bottom border)
These quantities include about a 30% margin for gauge swatching and tails.
Tools and notions:
- 3.25 mm (US D/3) crochet hook
- 30 white pearl beads, 4 mm (15 for fan points, 15 for scallop joins)
- 2 white pearl beads, 6 mm (bow center)
- 12 in (30.5 cm) of light blue satin ribbon, 5/8 in (1.6 cm) wide
- White sewing thread and a beading needle
- Tapestry needle
- 2 locking stitch markers
- Blocking mat, rust-proof pins and a spray bottle
- Clear fabric glue (optional, for the ribbon ends)
Abbreviations (US Terms)
- ch – chain
- sl st – slip stitch
- sc – single crochet
- dc – double crochet
- sk – skip
- st(s) – stitch(es)
- sp – space
- beg – beginning
- rep – repeat
Special stitches
- Fan: (dc, ch 1) 4 times, then dc, all in the same stitch. That makes 5 dc and 4 ch-1 spaces, or 9 stitches across the fan’s curved lower edge.
- Beg fan: ch 3 (counts as the first dc), (ch 1, dc) 4 times in the same stitch. This is also 9 stitches.
Counting rule: When you count the next row’s stitches, every dc and every ch-1 space counts as one stitch.
Gauge and Checkpoints
Gauge is measured on the tree itself. Work Rows 1–4 (Tiers 1 and 2) and then check:
- One tier depth (blue fan row plus white edge): 0.8 in (2.0 cm)
- Fan pitch (width each new fan adds to the row): 0.9 in (2.3 cm)
Lay the work flat without stretching it and measure at these checkpoints:
| After | Fans in tier | Width | Height |
|---|---|---|---|
| Tier 1 (Row 2) | 1 | 0.9 in (2.3 cm) | 0.8 in (2.0 cm) |
| Tier 2 (Row 4) | 2 | 1.8 in (4.6 cm) | 1.6 in (4.1 cm) |
| Tier 3 (Row 6) | 3 | 2.7 in (6.9 cm) | 2.4 in (6.1 cm) |
| Tier 4 (Row 8) | 4 | 3.6 in (9.1 cm) | 3.2 in (8.1 cm) |
| Tier 5 (Row 10) | 5 | 4.5 in (11.4 cm) | 4.0 in (10.2 cm) |
If Tier 2 is too big (more than about 1.9 in / 4.8 cm wide), go down to a 3.0 mm hook. If it is too small (less than about 1.7 in / 4.3 cm wide), go up to a 3.5 mm hook. Small differences are fine for an ornament, but keep both colors on the same hook so the white edges lie flat against the fans.
Pattern
How the tree grows
Each blue row is worked into the white row above it. Every new fan is placed at an anchor stitch: the first stitch of the row, the last stitch, and each sc that sits between two fans. Between anchors, a single sc grabs the center of each scallop above. Each tier therefore has exactly one more fan than the one above it, and the new fans hang from the scallop joins.
Row-count formula: A blue row with k fans has 9k fan stitches plus (k − 1) sc between fans, for a total of 10k − 1 stitches. The white row after it has the same count.
Carrying the yarns
Both yarns always end up at the same side of the work, so neither one needs to be cut.
- Each blue row is turned.
- Each white row is worked in the same direction as the blue row it edges, without turning. Start at the beginning of that blue row, which is where White is waiting.
- When you put a color down, place its loop on a stitch marker.
Tier 1
Row 1 (Blue): Make a magic ring. Work a beg fan into the ring, then pull the ring tight. (9 sts: 5 dc, 4 ch-1 sps)
Place the Blue loop on a marker. Do not turn.
Row 2 (White): Join White with a sl st in the top of the beg ch-3 of Row 1. Ch 1, then sc in each dc and each ch-1 sp across. (9 sc)
Place the White loop on a marker.
Checkpoint: 0.9 in (2.3 cm) wide, 0.8 in (2.0 cm) tall.
Tier 2
Row 3 (Blue): Turn. Insert the hook in the last White sc, pick up the held Blue loop and pull it through. Then work:
beg fan in the first st, sk 3 sts, sc in the next st (st 5), sk 3 sts, fan in the last st (st 9).
(19 sts: 2 fans of 9 + 1 sc)
Place the Blue loop on a marker.
Row 4 (White): Do not turn. Pick up White at the beg ch-3 of Row 3. Ch 1, then sc in each st across, including the sc between the fans. (19 sc)
Checkpoint: 1.8 in (4.6 cm) wide, 1.6 in (4.1 cm) tall.
Tiers 3–5
From here, each blue row follows the same sequence, worked into the white row above. Pick up Blue as in Row 3:
Turn, beg fan in the first st, sk 3, sc in the next st, *sk 4, fan in the next st, sk 4, sc in the next st; rep from * as stated, sk 3, fan in the last st.
Each white row follows this sequence:
Do not turn, pick up White at the beg ch-3, ch 1, sc in each st across.
Row 5 (Blue): Work the * repeat once. (29 sts: 3 fans + 2 sc)
Row 6 (White): (29 sc)
Checkpoint: 2.7 in (6.9 cm) wide, 2.4 in (6.1 cm) tall.
Row 7 (Blue): Work the * repeat 2 times. (39 sts: 4 fans + 3 sc)
Row 8 (White): (39 sc)
Checkpoint: 3.6 in (9.1 cm) wide, 3.2 in (8.1 cm) tall.
Row 9 (Blue): Work the * repeat 3 times. (49 sts: 5 fans + 4 sc)
Fasten off Blue and leave a 6 in (15.2 cm) tail.
Row 10 (White): (49 sc)
Checkpoint: 4.5 in (11.4 cm) wide, 4.0 in (10.2 cm) tall.
Checking the skips: In Row 7, the fans land on sts 1, 10, 20 and 29, and the sc land on sts 5, 15 and 25. That covers all 29 stitches of Row 6. Every row follows the same pattern of 3 skips at each end and 4 skips in between.
Border
The border is one more white row along the bottom edge only. The two slanted sides are left as they are, because the scalloped tier ends already form the tree’s outline.
Border gauge: each bottom scallop takes 10 sc along an arc about 1.3 in (3.3 cm) long, and the border adds 0.2 in (0.5 cm) of depth.
Row 11 (White, trim row): Turn, ch 1. Sc in each st across, working 2 sc in the center st (the 5th st) of each fan.
(49 sts worked one into each existing stitch + 5 extra sts = 54 sc)
Fasten off.
Bottom edge count: 5 scallops × 10 sc + 4 junction sc = 54. Side edges: 0 sts added.
Why the math works: The outer border row sits on a slightly longer curve than Row 10. Adding one extra stitch at the widest point of each scallop gives that extra length, so the edge does not pull the fans inward. Adding stitches only at the fan centers keeps the 4 junction stitches exactly where they were, so the scallop dips stay sharp.
Hanging loop
- Cut two 40 in (101.6 cm) lengths of Blue and hold them together.
- Join them with a sl st at the top tip of Row 1, at the closed magic ring.
- Ch 18 with the doubled strand, then sl st into the same tip stitch to form a loop about 2 in (5.1 cm) tall.
- Fasten off and weave the tails into the back of Row 1.
Pearls and bow
- With sewing thread, sew one 4 mm pearl at the point of each fan, where the dc spokes meet. That is 15 pearls.
- Sew one 4 mm pearl at each scallop join in the white rows: 1 + 2 + 3 + 4 = 10 joins in Rows 2–8, plus the 5 scallop centers on the border. That is 15 pearls.
- Tie the ribbon into a bow about 2.5 in (6.4 cm) wide and cut the ends at an angle. Seal the cut ends with a dab of glue if you like.
- Stack the two 6 mm pearls vertically on the bow knot and sew through the knot and pearls into the top of Row 1, just below the loop.
Final Blocking
- Weave in all ends along the white rows, where they hide best.
- Lay the tree right side up on the blocking mat.
- Mist it until it is evenly damp, but not dripping.
- Pin the top tip and the two bottom corners so the base measures 4.5 in (11.4 cm) and the height measures 4.2 in (10.7 cm).
- Pin the center of each bottom scallop and each tier’s outer scallop so they curve evenly.
- Spread each fan’s spokes with your fingertip so the ch-1 spaces open.
- Let it dry completely, at least 6 hours.
- Unpin it and fluff the bow loops.
You can block before sewing on the pearls if you prefer. Avoid steaming near the satin ribbon.
Final Quality-Control Checklist
- [ ] Tiers have 1, 2, 3, 4 and 5 fans
- [ ] Row 10 has 49 sts and Row 11 has 54 sc
- [ ] Each fan has 5 dc and 4 open ch-1 spaces
- [ ] Each new fan hangs from a scallop join, and the sc between fans grabs a scallop center
- [ ] The tree is 4.5 in (11.4 cm) wide and 4.2 in (10.7 cm) tall
- [ ] The loop is about 2 in (5.1 cm) tall and secure
- [ ] There are 30 small pearls, and the 2 bow pearls are firmly sewn
- [ ] No ends or carried loops show on either face
Troubleshooting
The tree is lopsided. You probably skipped 4 instead of 3 at one end. Recount the anchors: first st, every sc between fans, and the last st.
The white edges ruffle. Your white tension is looser than your blue. Use a smaller hook for the white rows, or sc a little more firmly.
The fans cup or curl. Your dc are too tight. Pull each dc’s first loop up a little taller, and block with pins in every scallop.
The bottom border pulls in. You likely missed some of the extra center stitches. Check for 54 sc in Row 11.
A gap appears at the color change. Tug the held loop snug before you work the first stitch with it.
The bow droops forward. Add a second stitch through the back of the bow knot into the top of the tree.
Care
Spot clean or hand wash cold. Press gently in a towel and dry flat, then reshape the scallops and bow.
Final Notes
The measurement chain is short and easy to check. One tier is 0.8 in (2.0 cm) deep and each fan adds 0.9 in (2.3 cm) of width. Five tiers give a 4.5 × 4.0 in (11.4 × 10.2 cm) body, and the 0.2 in (0.5 cm) border brings the height to 4.2 in (10.7 cm). The stitch counts follow the 10k − 1 rule: 9, 19, 29, 39 and 49, then 54 after the border.
If each checkpoint matches, the finished ornament will too. Make a few for your own tree, or tie one onto a winter gift.
Happy crocheting!