

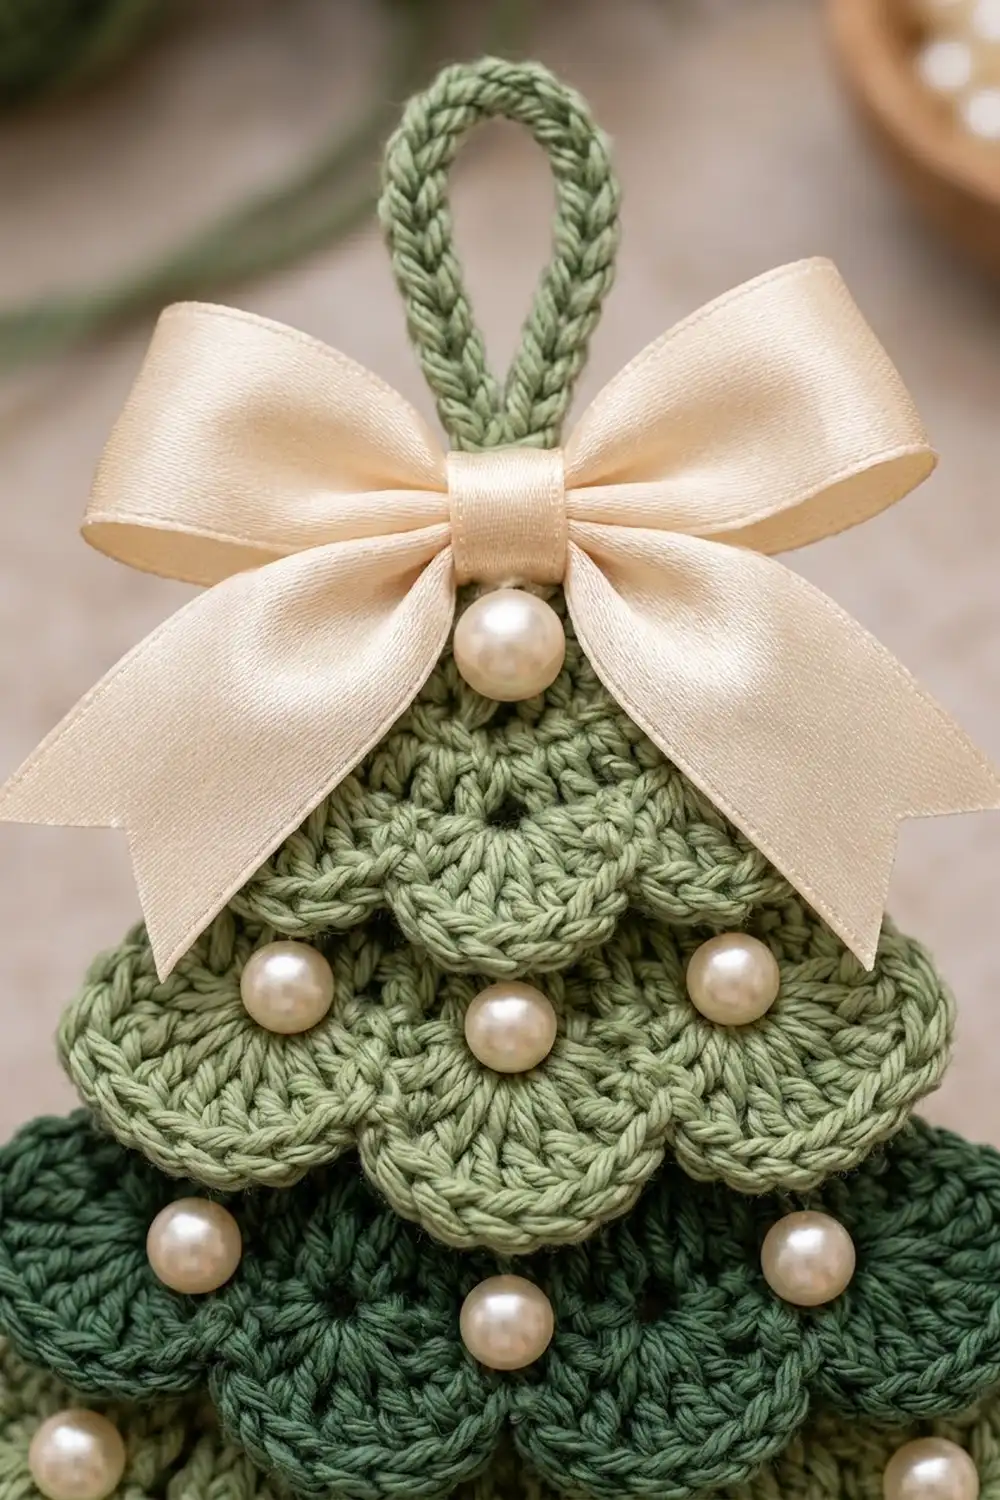
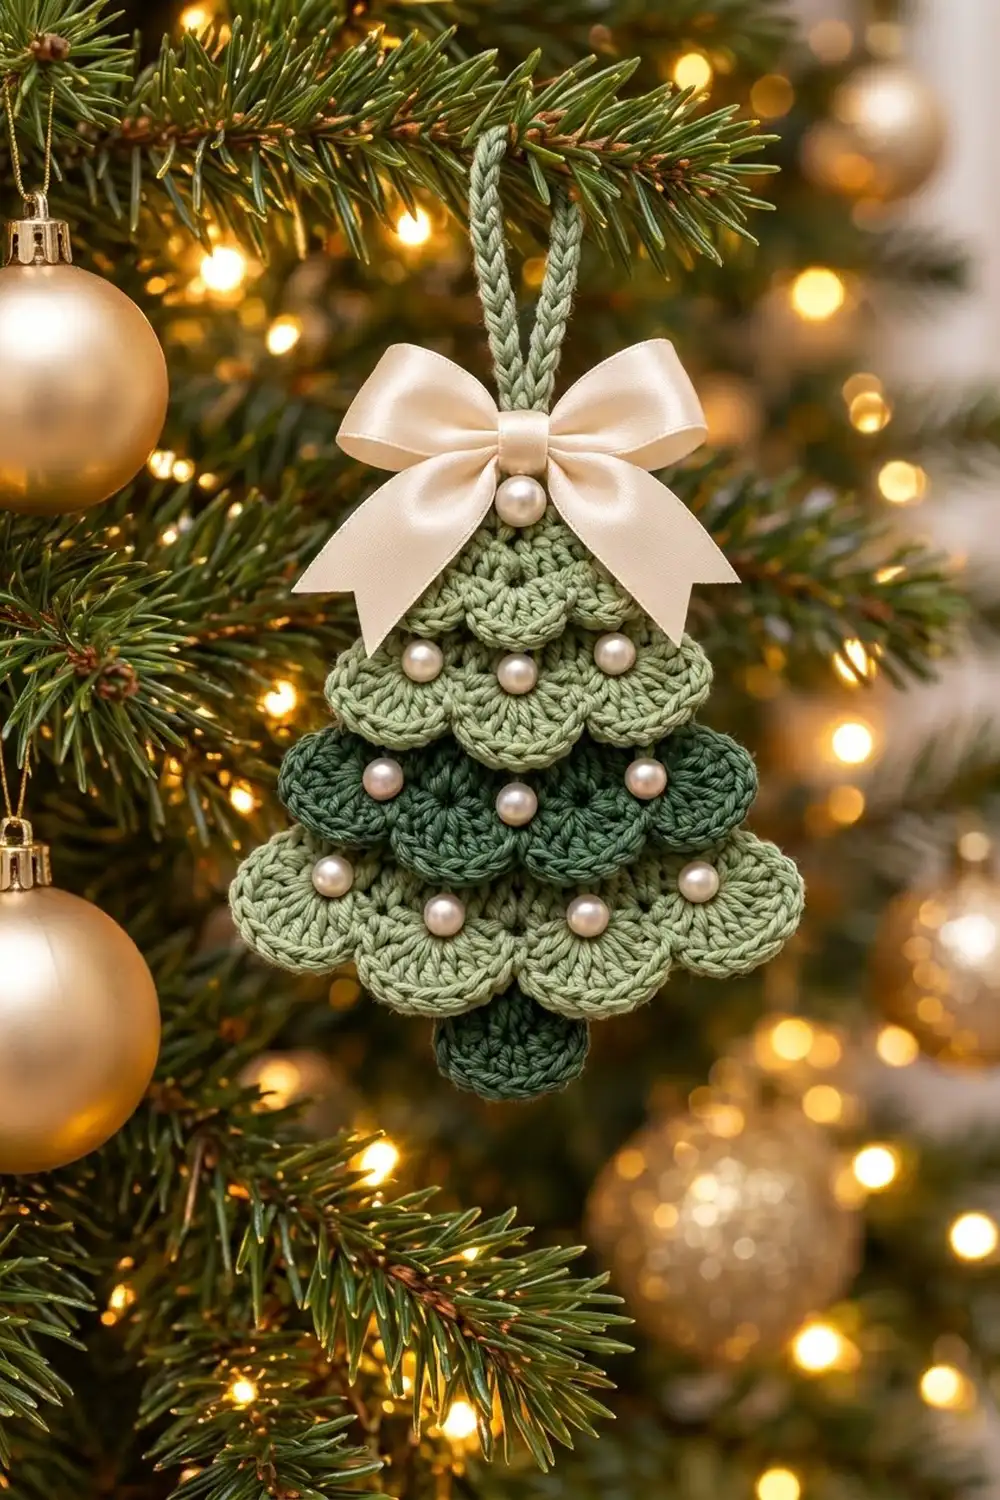
This little tree ornament is made of four layered scalloped tiers. Each tier ends in a row of fan-shaped scallops that hangs down over the tier below. A cream satin bow sits at the tip, a pearl bead is sewn to the center of every scallop, and a small round trunk peeks out at the bottom.
The palette is soft and wintry: a muted sage green for the top, second, and bottom tiers, a deep forest green for the third tier and the trunk, cream ribbon, and ivory pearls. The style is classic and slightly vintage. It looks good on a tree, on a gift, or hanging in a window.
The pattern uses US crochet terms. The finished ornament measures about 4.5 in (11.4 cm) wide across the bottom tier and 5 in (12.7 cm) tall from tip to trunk, not counting the hanging loop.
You work the tree as one flat piece from the tip down, in turned rows of double crochet that grow by 2 stitches every row. After every second row (from Row 4 on), you work a scallop flap into the front loops only, then work the next tier into the back loops left behind. That is what gives the stacked, layered look without any sewing. Last come the trunk, a single crochet edging with a corded hanging loop, and then the pearls and bow.
Finished Size and Construction
- Finished size: 4.5 in (11.4 cm) wide x 5 in (12.7 cm) tall, plus a 2 in (5.1 cm) loop
- Skill level: Easy+ (you need to be comfortable with front loop and back loop work)
- Terminology: US
- Yarn weight: DK (#3), cotton or cotton blend
- Hook: 3.5 mm (E/4)
- Number of pieces: 1 crocheted piece, plus a ribbon bow
- Layout: a single triangle with 4 scallop tiers and a trunk
- Body size at Row 10: 4.2 in (10.7 cm) wide x 4 in (10.2 cm) tall
- Size before border: 4.2 in (10.7 cm) body width, 4.8 in (12.2 cm) height including trunk
- Border depth: 1 row of single crochet, about 0.1 in (0.3 cm) on each side and 0.2 in (0.5 cm) at the tip
Materials
Choose a smooth, mercerized or soft cotton DK. Cotton gives crisp scallops and holds blocking well. The quantities assume about 120 m per 50 g (2.4 m per gram).
- Color A, sage green: 12 g (29 m), for Rows 1–6, Rows 9–10, Flaps 1, 2, and 4, the edging, and the loop
- Color B, forest green: 6 g (14 m), for Rows 7–8, Flap 3, and the trunk
These quantities include a safety margin of about 40 percent. One ornament uses roughly 8 g of A and 3 g of B.
Tools and notions:
- 3.5 mm (E/4) crochet hook
- 15 pearl beads, 6 mm (14 for the scallops, 1 for the bow)
- 14 in (35.6 cm) of cream satin ribbon, 5/8 in (1.6 cm) wide
- Sewing needle and cream or green sewing thread
- Tapestry needle
- Scissors, tape measure, rust-proof pins, and a blocking surface
- Optional: fabric glue or a fray stopper for the ribbon ends
Abbreviations (US Terms)
- ch: chain
- sl st: slip stitch
- sc: single crochet
- hdc: half double crochet
- dc: double crochet
- st(s): stitch(es)
- sk: skip
- FLO: front loop only (the loop closest to you)
- BLO: back loop only (the loop farthest from you)
- RS / WS: right side / wrong side
Special stitch: Shell. Work 5 dc in the same stitch.
Scallop repeat: sk 1 st, shell in next st, sk 1 st, sc in next st. Each repeat uses 4 stitches. A flap therefore needs a stitch count of (4 x number of shells) + 1.
Gauge and Checkpoints
Gauge: 20 dc and 10 rows = 4 in (10.2 cm) in dc rows. That works out to 5 dc per inch, and each dc row is 0.4 in (1.0 cm) tall.
Use the tree itself as your test piece. Work Rows 1–4 and measure before you make the first flap:
- After Row 4 (9 sts): 1.8 in (4.6 cm) wide, 1.6 in (4.1 cm) tall
- After Row 6 (13 sts): 2.6 in (6.6 cm) wide, 2.4 in (6.1 cm) tall
- After Row 8 (17 sts): 3.4 in (8.6 cm) wide, 3.2 in (8.1 cm) tall
- After Row 10 (21 sts): 4.2 in (10.7 cm) wide, 4 in (10.2 cm) tall
- After the trunk: 4.8 in (12.2 cm) tall
- After the edging: 5 in (12.7 cm) tall, 4.4 in (11.2 cm) body width, 4.5 in (11.4 cm) across the bottom flap
Measure the width along the top of the last row and the height straight down the center. If Row 4 is wider than 2 in (5.1 cm), go down to a 3.25 mm hook. If it is narrower than 1.6 in (4.1 cm), go up to a 3.75 mm hook. Height matters less than width, but if your rows are very short, pull up the first loop of each dc a little more.
Pattern: Tree Body
Edge method for every body row: Ch 3 (counts as dc), dc in the first st, dc in each st across to the last st, 2 dc in the last st (the top of the turning chain). Each row gains 2 sts, 1 at each edge.
Tier 1 (Color A)
Row 1 (RS): With A, ch 4. Work 2 dc in the 4th ch from the hook (the skipped 3 ch count as the first dc). Turn. (3 sts)
Row 2 (WS): Ch 3, dc in the first st, dc in the next st, 2 dc in the last st. Turn. (5 sts)
Row 3 (RS): Ch 3, dc in the first st, dc in the next 3 sts, 2 dc in the last st. Turn. (7 sts)
Row 4 (WS): Ch 3, dc in the first st, dc in the next 5 sts, 2 dc in the last st. Turn so the RS faces you. (9 sts)
Flap 1 (RS, FLO): Working in the front loops of Row 4 only, ch 1, sc in the first st, sk 1, shell in the next st, sk 1, sc in the next st. Repeat from * 1 more time. (2 shells and 3 sc: 9 Row 4 sts used, 13 sts made.) Fasten off.
The flap now hangs freely toward the bottom of the tree. The back loops of Row 4 are still unworked.
Tier 2 (Color A)
Row 5 (RS): With the RS facing, join A in the back loop of the right-hand edge st of Row 4 (the st where Flap 1 began). Ch 3, dc in the same st, dc in the BLO of the next 7 sts, 2 dc in the BLO of the last st. Turn. (11 sts)
Row 6 (WS): Through both loops, ch 3, dc in the first st, dc in the next 9 sts, 2 dc in the last st. Turn so the RS faces you. (13 sts)
Flap 2 (RS, FLO): Ch 1, sc in the first st, sk 1, shell, sk 1, sc. Repeat from * 2 more times. (3 shells and 4 sc: 13 sts used, 19 sts made.) Fasten off.
Tier 3 (Color B)
Row 7 (RS): Join B in the BLO of the right-hand edge st of Row 6. Ch 3, dc in the same st, dc in the BLO of the next 11 sts, 2 dc in the BLO of the last st. Turn. (15 sts)
Row 8 (WS): Ch 3, dc in the first st, dc in the next 13 sts, 2 dc in the last st. Turn. (17 sts)
Flap 3 (RS, FLO): Ch 1, sc in the first st, sk 1, shell, sk 1, sc. Repeat from * 3 more times. (4 shells and 5 sc: 17 sts used, 25 sts made.) Fasten off.
Tier 4 (Color A)
Row 9 (RS): Join A in the BLO of the right-hand edge st of Row 8. Ch 3, dc in the same st, dc in the BLO of the next 15 sts, 2 dc in the BLO of the last st. Turn. (19 sts)
Row 10 (WS): Ch 3, dc in the first st, dc in the next 17 sts, 2 dc in the last st. Turn. (21 sts)
Flap 4 (RS, FLO): Ch 1, sc in the first st, sk 1, shell, sk 1, sc. Repeat from * 4 more times. (5 shells and 6 sc: 21 sts used, 31 sts made.) Fasten off.
Checkpoint: The body should measure 4.2 in (10.7 cm) wide across Row 10 and 4 in (10.2 cm) tall. From top to bottom, the flaps have 2, 3, 4, and 5 shells.
Pattern: Trunk (Color B)
Row 10 has 21 back loops: 8 + 5 + 8. The trunk is worked over the center 5.
Row T1 (RS): With the RS facing, fold Flap 4 up out of the way. Count 8 back loops in from the right-hand edge and join B in the BLO of the 9th st. Ch 3 (counts as dc), dc in the BLO of the next 4 sts. Turn. (5 sts)
Row T2 (WS): Ch 1, sc in the first st, hdc in the next st, 3 dc in the next st, hdc in the next st, sc in the last st. (7 sts: 5 sts worked into + 2 extra dc in the center.) Fasten off.
The 3-dc center rounds off the bottom of the trunk. The trunk measures about 1.2 in (3.0 cm) wide and adds 0.8 in (2.0 cm) of height, which brings the tree to 4.8 in (12.2 cm). Flap 4 falls over the top of the trunk, so only its rounded lower half shows.
Border: Side Edging and Hanging Loop (Color A)
This one edging row hides the dc row ends behind the flaps, firms up the sides, and makes the hanging loop in the same pass.
Border gauge: 2 sc per dc row end, or 5 sc per 1 in (2.5 cm) of row height.
With the RS facing, fold the flaps up as you go so that you are working into the body only.
- Right side: Join A at the row end of Row 10 on the right-hand edge. Work 2 sc in each row end up to Row 1. (20 sc: 10 rows x 2.)
- Tip: In the top of the foundation chain at the tip, work sc, ch 22, sl st in the same spot. Then work 1 sl st in each of the 22 ch around the loop and sl st into the tip again. (1 sc + 22-ch loop covered with 22 sl sts.)
- Left side: Work 2 sc in each row end from Row 1 down to Row 10. (20 sc.) Fasten off.
Edging total: 20 + 1 + 20 = 41 sc, plus the corded loop.
Why the math works: Each dc row is 0.4 in (1.0 cm) tall, and 2 sc at 5 sc per inch also cover 0.4 in (1.0 cm). So 20 sc match the 4 in (10.2 cm) of body height. Because each row steps out by 1 st, or 0.2 in (0.5 cm), the slanted edge actually measures about 4.5 in (11.4 cm). The sc stretches gently across that difference, so the edge stays flat and slightly firm instead of rippling. The sl sts on the loop give it a corded look and stop it from stretching.
Finishing: Pearls and Bow
- Sew 1 pearl to the 3rd (center) dc of every shell. That is 2 + 3 + 4 + 5 = 14 pearls. Stitch through the pearl twice and secure the thread on the WS.
- Tie the ribbon into a bow with 1 in (2.5 cm) loops and 1.5 in (3.8 cm) tails, about 2.5 in (6.4 cm) wide in total. Cut the tails at an angle and seal them.
- Sew the bow over the base of the loop, covering Flap 1’s top edge. Sew the last pearl to the knot.
Final Blocking
- Weave in all ends on the WS, running them through stitches of their own color.
- Lightly mist the ornament or soak it for 5 minutes, then press out the excess water in a towel. If the bow is already attached, keep it dry and steam only.
- Lay the ornament RS up on a blocking mat.
- Pin the body to a triangle 4.4 in (11.2 cm) wide at Row 10 and 5 in (12.7 cm) tall.
- Smooth each flap down so its shells fan out evenly, and pin the tip of each end shell. The bottom flap should reach 4.5 in (11.4 cm).
- Shape the trunk into a neat half-circle.
- Let it dry completely, then lightly steam the loop straight.
Final Quality-Control Checklist
- Row 10 has 21 sts, and each flap has the correct number of shells (2, 3, 4, 5)
- Every flap is attached through the front loops only and lies flat
- Tier 3 is forest green, and the other three tiers are sage
- The trunk is centered under the tree, with 8 back loops free on each side
- Each side edge has 20 sc and does not ripple
- The loop is 2 in (5.1 cm) tall and firm
- There are 14 pearls on the shells and 1 on the bow, all sewn securely
- The ornament measures 4.5 in (11.4 cm) x 5 in (12.7 cm)
- No ends are visible from the front
Troubleshooting
- The flap stands up instead of hanging down: You worked it in the back loops, or with the WS facing. Rip it out and work it in the FLO with the RS facing.
- The shells crowd or cup: Your tension is too tight on the dc. Loosen up or use a 3.75 mm hook for the flaps only.
- The shells look stretched or gappy: Use a 3.25 mm hook for the flaps.
- The stitch count is off by 1: Check that you worked 2 dc in the top of the turning chain at the end of each row.
- The trunk is off-center: Recount: there should be 8 free back loops on each side.
- The sides pucker after the edging: Work 3 sc in every third row end.
- The tree leans: Block it again and pin the center line straight.
Care
Hand wash in cool water with mild soap, press dry in a towel, and dry flat. Do not machine wash, because the ribbon and pearls are fragile.
Final Notes
The measurement chain is simple:
- At 5 dc per inch, Row 10’s 21 sts give 4.2 in (10.7 cm) of width.
- Ten rows at 0.4 in (1.0 cm) each give 4 in (10.2 cm) of height.
- The trunk adds 0.8 in (2.0 cm), and the edging adds 0.2 in (0.5 cm) at the tip, for a height of 5 in (12.7 cm).
- The edging adds 0.1 in (0.3 cm) per side, for a 4.4 in (11.2 cm) body width. The shells of the bottom flap flare to 4.5 in (11.4 cm).
Every flap uses (4 x shells) + 1 stitches, which is why the flap rows fall at 9, 13, 17, and 21 sts. Check your gauge at Row 4, and the rest of the tree will follow.
Happy crocheting!