

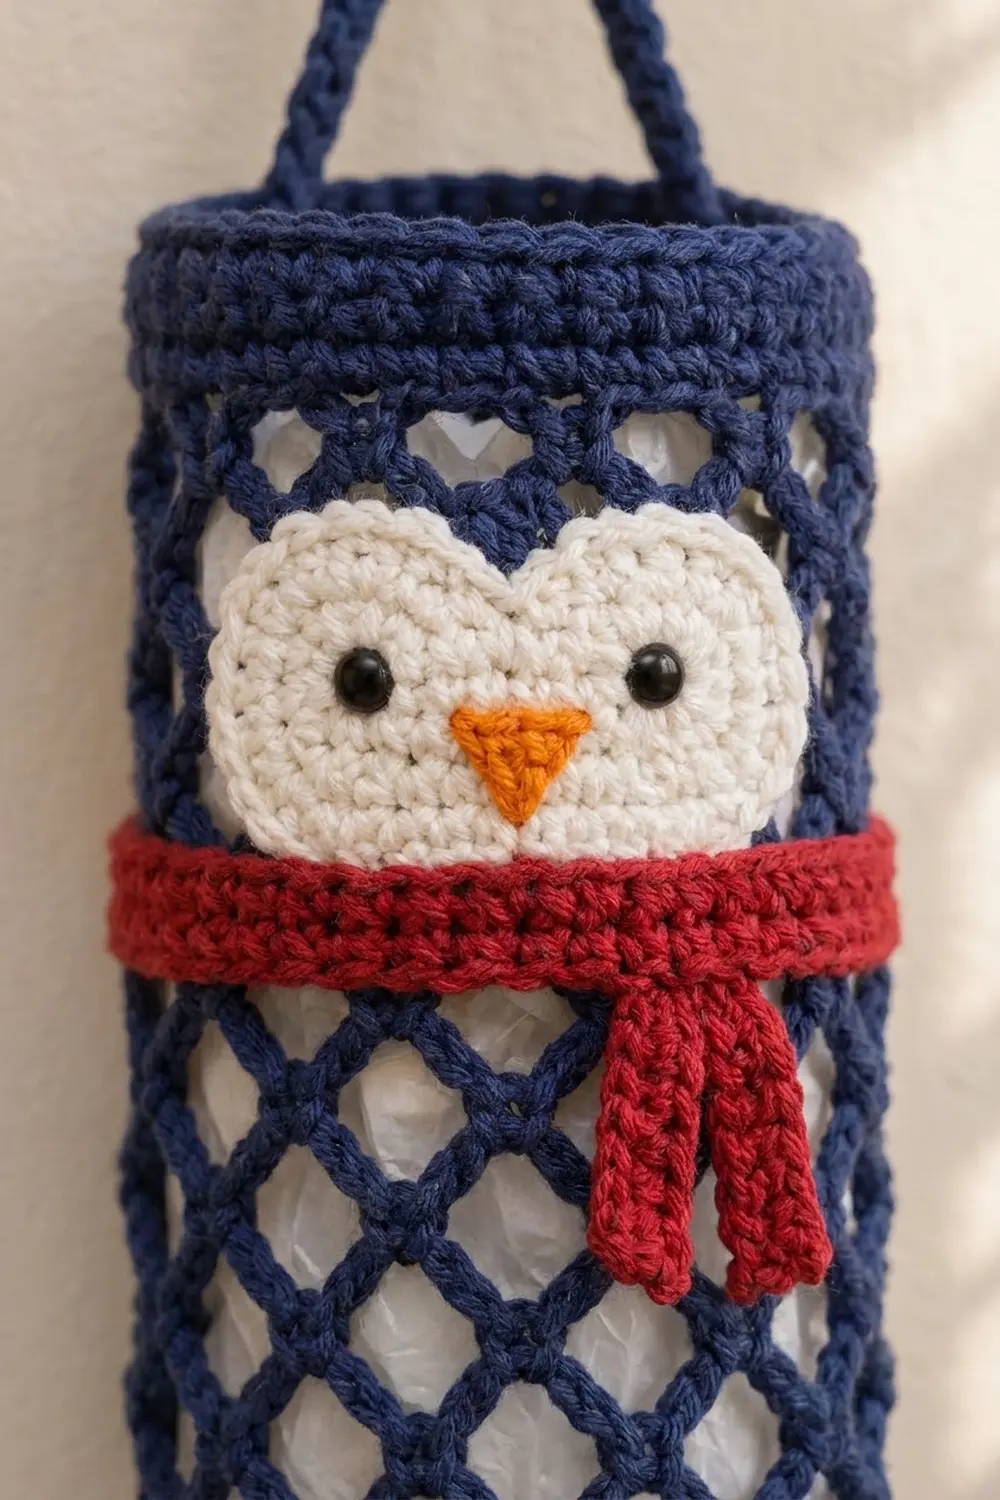
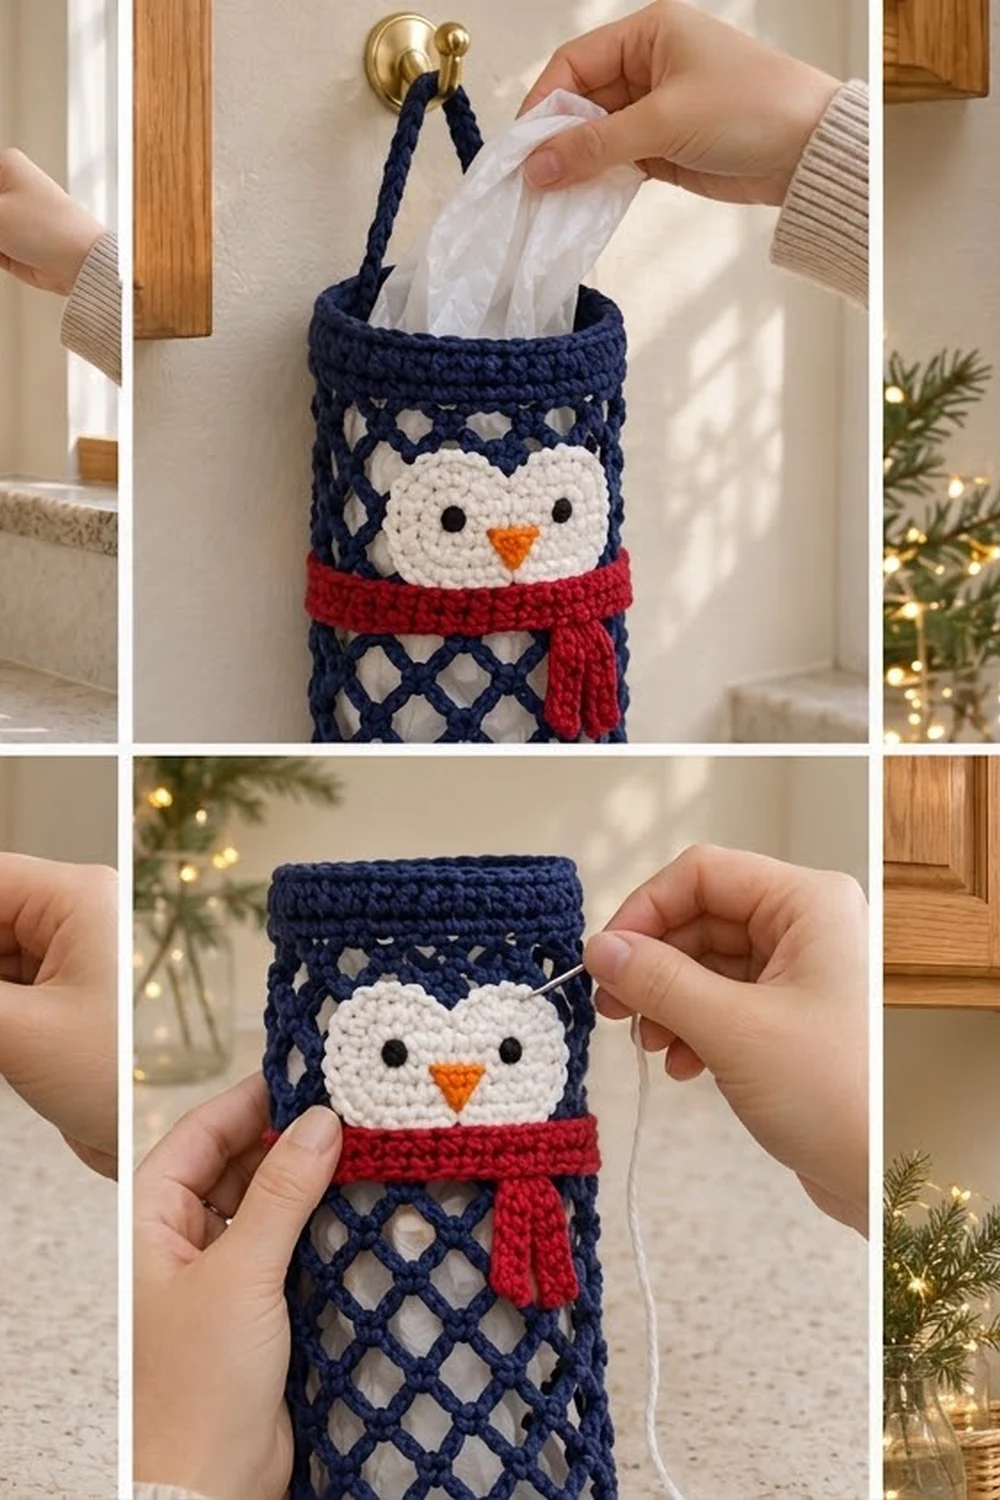
Penny the Penguin is a cheerful winter plastic-bag holder that hangs on a hook and keeps your kitchen bags in one place. The navy body is an open diamond mesh, so you can see how many bags are left. The ends are solid single crochet bands that keep the opening round and firm.
The color scheme is navy, cream white, red, orange and black. A white heart-shaped face with a small orange beak sits near the top, and a ribbed red scarf with two hanging tails wraps around the penguin’s “neck.” The look is cozy and simple, and it works for the holidays and all winter.
This pattern uses US crochet terms. The finished holder is a tube 10 in (25.4 cm) around, which is 5 in (12.7 cm) wide when flat, and 16 in (40.6 cm) long, not counting the strap. The strap adds about 3 in (7.6 cm), so the total hanging length is about 19 in (48.3 cm).
Construction is simple. You chain a ring and work the mesh body in joined rounds. Then you add a solid border band to the top edge and another to the bottom edge, crochet the strap across the top, and sew on the face, beak and scarf.
Finished Size and Construction
- Finished size: 10 in (25.4 cm) around × 16 in (40.6 cm) long; 5 in (12.7 cm) wide when flat
- Skill level: Easy
- Terminology: US
- Yarn weight: Worsted (#4), cotton or cotton blend
- Hook: 5.0 mm (H-8)
- Number of pieces: 1 tube body, plus 4 small appliqué parts (face, beak, scarf band and 2 scarf tails)
- Layout: a single vertical tube that is open at both ends
- Body size before border (mesh only): 10 in (25.4 cm) around × 13.5 in (34.3 cm) tall
- Border depth: top band 1.5 in (3.8 cm); bottom band 1 in (2.5 cm)
Materials
Use a smooth worsted-weight cotton, about 190 m per 100 g. Cotton holds the mesh shape and doesn’t sag as much as acrylic. Choose a firm, round-plied yarn so the chain loops show clearly.
- Navy: 70 g / 133 m (body, borders, strap)
- Cream white: 10 g / 19 m (face)
- Red: 12 g / 23 m (scarf)
- Orange: 2 g / 4 m (beak)
- Black: 1 g / 2 m (eyes, embroidered)
Tools:
- 5.0 mm (H-8) hook
- Stitch markers
- Tapestry needle
- Scissors
- Measuring tape
- Rustproof pins
- A rolled towel or a 3 in (7.6 cm) cardboard tube to support the body while you sew
All quantities include a margin of about 15%.
Abbreviations (US Terms)
- ch – chain
- sl st – slip stitch
- sc – single crochet
- hdc – half double crochet
- st(s) – stitch(es)
- sk – skip
- blo – back loop only
- sc2tog – single crochet 2 together
- sc3tog – single crochet 3 together
- ch-5 loop – the chain-5 space in the mesh
- MR – magic ring (not used; the body starts on a chain ring)
Special stitch: mesh loop. Ch 5, then sc into the center (3rd chain) of the next ch-5 loop of the round below. When these loops are stacked round after round, they form the diamond net.
Gauge and Checkpoints
Solid gauge: 16 sc × 16 rounds = 4 in (10.2 cm) in sc worked in rounds.
Mesh gauge: 10 loops around = 10 in (25.4 cm); 4 mesh rounds = 3 in (7.6 cm), measured flat and unstretched.
Test one piece first: make the foundation ring and 4 mesh rounds, then measure.
- Checkpoint 1 (foundation ring): 40 ch, joined. Laid flat without stretching, it should measure 5 in (12.7 cm) across.
- Checkpoint 2 (after mesh Rnd 4): 3 in (7.6 cm) tall.
- Checkpoint 3 (after mesh Rnd 18): 13.5 in (34.3 cm) tall.
- Checkpoint 4 (after borders): 16 in (40.6 cm) long.
Too big? Go down to a 4.5 mm (7) hook. Too small? Go up to a 5.5 mm (I-9). Keep the stitch counts as written. The 40-stitch ring is the base for all of the border math.
Body (Mesh Tube)
Worked in joined rounds with the right side facing. Do not turn.
Foundation: With navy, ch 40. Check that the chain is not twisted, then join with a sl st to the first ch to make a ring. (40 ch)
Rnd 1: Ch 1, sc in the same ch as the join, *ch 5, sk 3 ch, sc in the next ch; repeat from * 8 more times, ch 5, sk 3 ch, sl st to the first sc. (10 sc, 10 ch-5 loops)
Check the math: 1 sc + 9 × (3 skipped + 1 sc) + 3 skipped = 40 ch used.
Rnd 2: Sl st in each of the next 3 ch so you are at the center of the first loop. Ch 1, sc in the same loop, *ch 5, sc in the next ch-5 loop; repeat from * 8 more times, ch 5, sl st to the first sc. (10 ch-5 loops)
Rnds 3–18: Repeat Rnd 2. (10 ch-5 loops in each round)
The mesh now has 18 rounds and is 13.5 in (34.3 cm) tall. Do not fasten off. Place a marker on the last sc.
Border
Border gauge: 16 sc = 4 in (10.2 cm), so 40 sc fits the 10 in (25.4 cm) circumference exactly. Each edge of the tube counts as one “side” of the border.
Top Border
Rnd 1 (conversion round): Ch 1, work 4 sc in each ch-5 loop around, then sl st to the first sc.
(10 loops × 4 sc) + 0 extra sts = 40 sc.
Rnds 2–6: Ch 1, sc in each st around, then sl st to the first sc. (40 sc)
The top border is 6 rounds, or 1.5 in (3.8 cm). Do not fasten off yet. Go straight on to the strap.
Hanging Strap
Row 1: Ch 32 and sl st in the 21st st of the last round, on the opposite side of the tube. (32 ch)
Row 2: Sl st in the next st (st 22), turn, sc in each of the 32 ch, then sl st in st 40 of the rim. (32 sc)
Fasten off.
The strap is about 8 in (20.3 cm) long and forms a loop that rises about 3 in (7.6 cm) above the rim.
Bottom Border
Turn the tube upside down. Join navy in any ch of the foundation, working into the free loop on the other side of the chain.
Rnd 1: Ch 1, sc in each of the 40 foundation ch, then sl st to the first sc. (40 sc)
Rnds 2–4: Ch 1, sc in each st around, then sl st to the first sc. (40 sc)
The bottom border is 4 rounds, or 1 in (2.5 cm). Fasten off with an invisible join.
Why the math works: The foundation has 40 ch and the top conversion round also has 40 sc (10 loops × 4). Both edges therefore have exactly 40 sts, which equals 10 in (25.4 cm) at 4 sc per inch. No stitches are added or lost at either edge, so the bands sit flat without flaring or pulling in.
Total length: 1 in (2.5 cm) + 13.5 in (34.3 cm) + 1.5 in (3.8 cm) = 16 in (40.6 cm).
Face (Cream White)
Worked in turned rows from the bottom point up. Begin each row with ch 1 (it does not count as a stitch).
Row 1: Ch 2, then 3 sc in the 2nd ch from the hook. (3)
Row 2: 2 sc in the first st, sc in the next st, 2 sc in the last st. (5)
Row 3: 2 sc in the first st, sc in the next 3 sts, 2 sc in the last st. (7)
Row 4: 2 sc in the first st, sc in the next 5 sts, 2 sc in the last st. (9)
Row 5: 2 sc in the first st, sc in the next 7 sts, 2 sc in the last st. (11)
Row 6: 2 sc in the first st, sc in the next 9 sts, 2 sc in the last st. (13)
Row 7: 2 sc in the first st, sc in the next 11 sts, 2 sc in the last st. (15)
Rows 8–9: Sc in each st. (15)
First lobe, Row 10: Working over sts 1–7 only: sc2tog, sc in the next 3 sts, sc2tog. (5)
First lobe, Row 11: Sc2tog, sc in the next st, sc2tog. (3) Fasten off.
Second lobe: Leave st 8 unworked to form the center notch of the heart. Join cream in st 9 and work Rows 10–11 over sts 9–15. (5, then 3) Fasten off.
The face measures about 3.75 in (9.5 cm) wide × 2.75 in (7.0 cm) tall.
Eyes: Using black, work a small satin-stitch dot over 1 st in Row 8 for each eye, placing the eyes 5 sts apart.
Beak (Orange)
Row 1: Ch 4, then sc in the 2nd ch from the hook and in the next 2 ch. (3)
Row 2: Ch 1, turn, sc3tog. (1)
Fasten off and leave a tail for sewing. The beak is about 0.75 in (1.9 cm) wide × 0.5 in (1.3 cm) tall. Sew it point-down, centered just below the eyes.
Scarf (Red)
Band:
Ch 5.
Row 1: Sc in the 2nd ch from the hook and in the next 3 ch. (4)
Rows 2–40: Ch 1, turn, sc blo in each st. (4)
The band is 1 in (2.5 cm) wide × 10 in (25.4 cm) long, with vertical ridges.
Tail A: Ch 11, then hdc in the 3rd ch from the hook and in each ch across. (9 hdc), about 2.25 in (5.7 cm) long.
Tail B: Ch 13, then hdc in the 3rd ch from the hook and in each ch across. (11 hdc), about 2.75 in (7.0 cm) long.
Assembly
- Slide the towel roll or cardboard tube inside the body.
- Pin the face centered on the front, with the lobes 0.25 in (0.6 cm) below the top border.
- Using cream, whipstitch the face to the mesh bars and the border. Leave the lower 0.75 in (1.9 cm) unsewn.
- Wrap the scarf band around the tube with its top edge 3.75 in (9.5 cm) below the top rim, so it covers the bottom of the face. Seam the two short ends together at the back.
- Tack the scarf band to the mesh every 1 in (2.5 cm) around.
- Sew both tails beneath the scarf at the right front, side by side, so they hang straight down.
Final Blocking
- Lightly mist the whole holder with water.
- Slide a 3 in (7.6 cm) roll inside and press the tube flat to 5 in (12.7 cm) wide.
- Pin the length to 16 in (40.6 cm). Do not stretch the mesh any longer than that.
- Smooth the face lobes and straighten the scarf tails.
- Let it dry completely, then remove the roll.
Final Quality-Control Checklist
- [ ] Each border round has 40 sc
- [ ] Every mesh round has 10 loops
- [ ] Length measures 16 in (40.6 cm) and flat width measures 5 in (12.7 cm)
- [ ] The strap is centered across the opening
- [ ] The face is centered and both lobes match
- [ ] The scarf covers the bottom of the face
- [ ] All ends are woven in
Troubleshooting
- The tube twisted into a spiral. The foundation chain was twisted when you joined it. Rip back and rejoin.
- The mesh is lopsided. You lost or gained a loop. Count to 10 every round.
- The border flares. You worked 5 sc in some loops. Keep it to exactly 4 sc per loop.
- The border cups inward. Your tension is too tight. Go up a hook size for the border only.
- The scarf slides down. Tack it to the mesh more often.
- Bags fall out of the bottom. Work one extra round of sc2tog every 10th st (36 sts) on the bottom border.
Care
Hand wash in cool water and lay flat to dry. Reshape the tube while it is damp.
Final Notes
The whole size comes from one chain of numbers. 40 foundation ch make 10 loops, and 10 loops make 10 in (25.4 cm) around. Eighteen mesh rounds give 13.5 in (34.3 cm). Two 40-stitch borders add 2.5 in (6.4 cm), for a total of 16 in (40.6 cm). If you check your gauge at each checkpoint, Penny will hang straight and hold plenty of bags. Happy crocheting!