

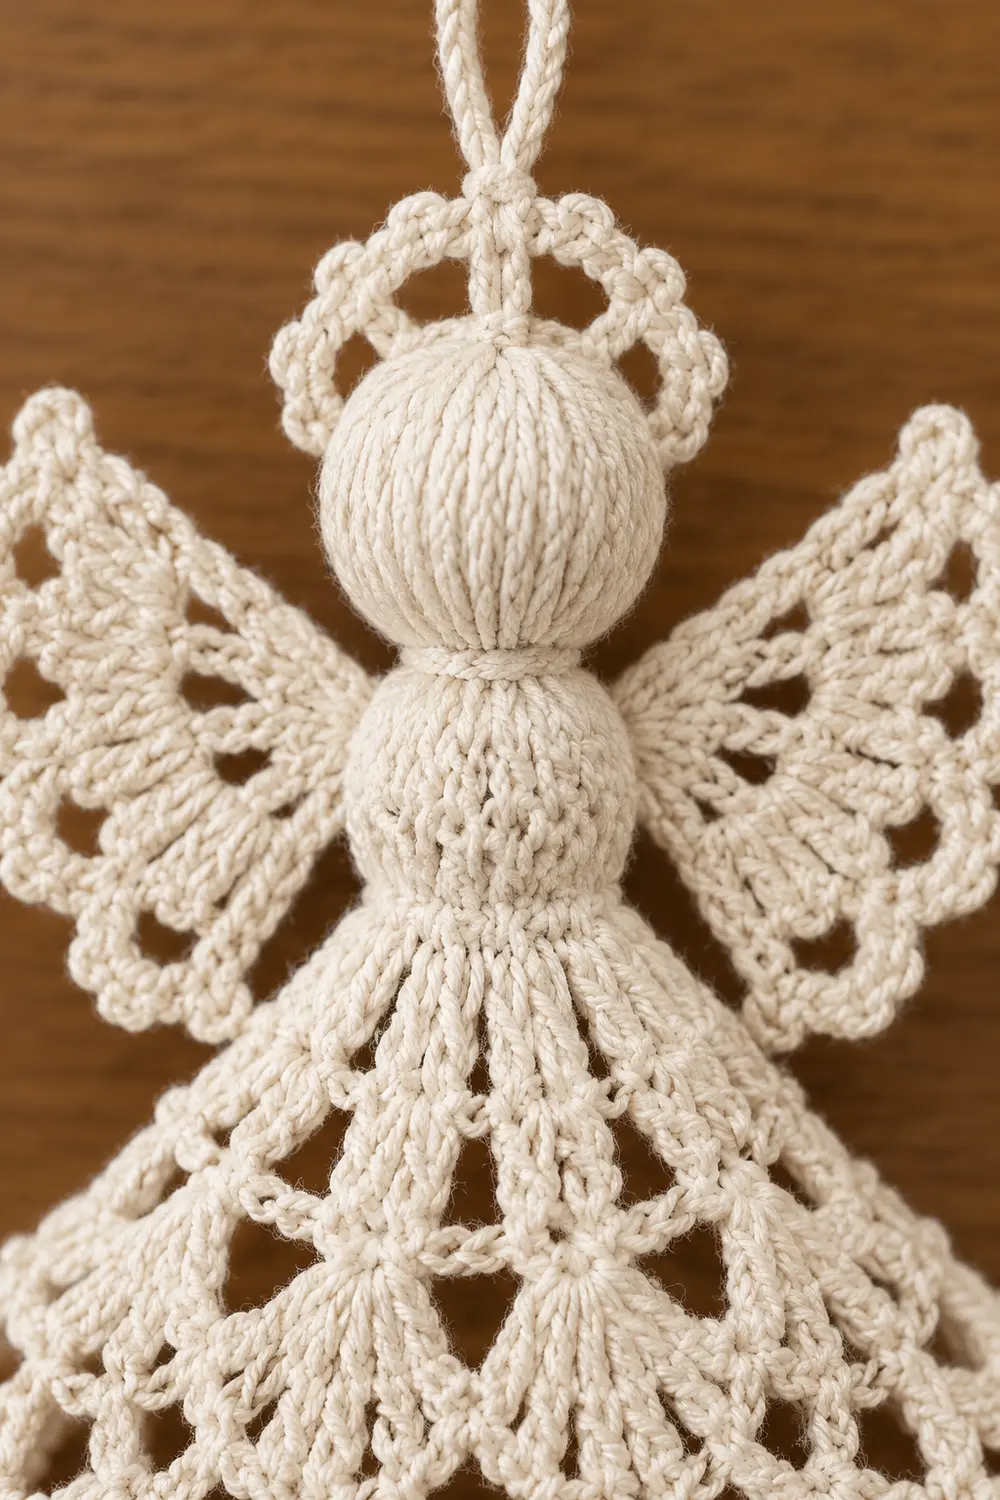
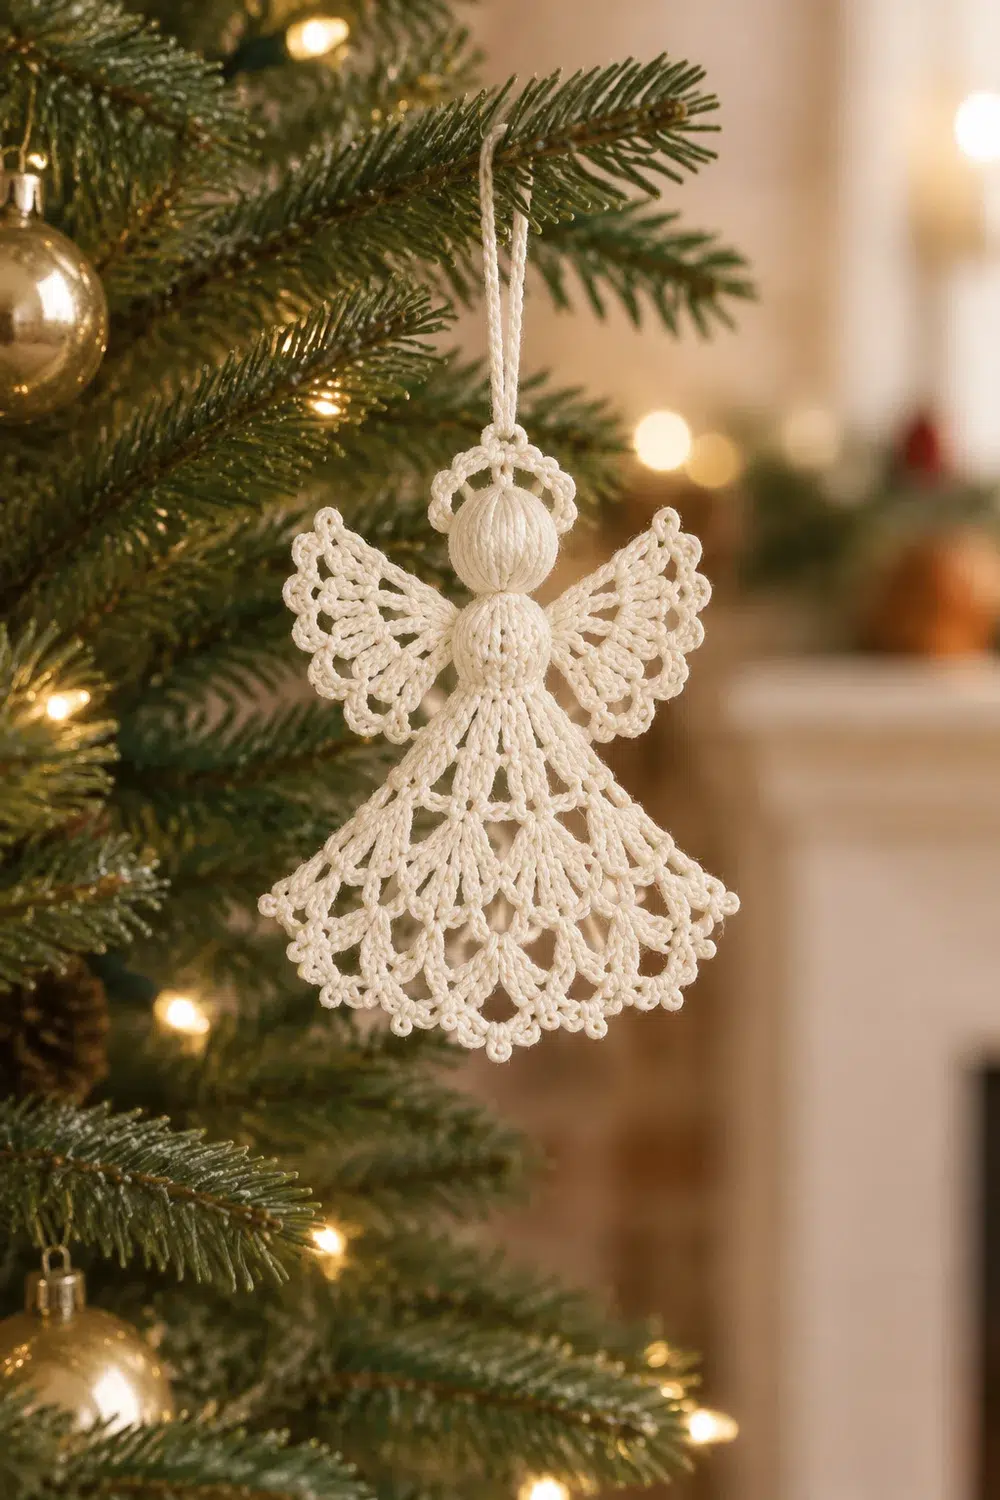
This little angel is a classic heirloom ornament. She has a smooth, round ball head, two lacy fan-shaped wings with a feathered picot edge, and a full bell skirt worked in open mesh and shells. A scalloped picot hem finishes the bottom.
The sample is made in cream crochet thread, which shows off the lace and looks right on any tree. White, ivory, or soft gold work just as well. The style is light and airy, and starch gives it a crisp shape.
This pattern uses US crochet terms. The finished angel is about 3.5 in (8.9 cm) tall, not counting the hanging loop, and about 3.25 in (8.3 cm) across the wings.
The angel is worked as one piece, with no sewing. You crochet the head from the top down in amigurumi-style rounds, stuff it, and continue straight into the shoulders and the openwork skirt. The picot hem is the final round. The wings are then worked directly into free loops at the back of the shoulders, and a chain loop is added at the top of the head.
Finished Size and Construction
- Finished size: 3.5 in (8.9 cm) tall x 3.25 in (8.3 cm) wide across the wings
- Skill level: Intermediate (small thread, working in rounds, stuffing)
- Terminology: US crochet terms
- Yarn weight: Size 3 crochet thread, lace weight (category 0)
- Hook: 2.0 mm steel hook
- Number of pieces: 1 (wings and loop are worked onto the body, not sewn)
- Layout: Ball head on top, bell skirt below, one wing on each side at the back of the shoulders
- Piece size: Head 0.75 in (1.9 cm) across; skirt hem about 3.0 in (7.6 cm) in diameter; each wing about 1.1 in (2.8 cm) wide x 1.0 in (2.5 cm) tall
- Size before border: 3.0 in (7.6 cm) tall
- Border depth: 0.5 in (1.3 cm)
Materials
Yarn: Use mercerized cotton crochet thread in size 3. Mercerized cotton holds starch well and gives clean stitch definition. A matte or fuzzy thread blurs the mesh and picots.
- Cream: 10 g (about 27 m / 30 yd)
This quantity includes a margin for your gauge test and the hanging loop. The angel itself uses about 6 g.
Tools:
- 2.0 mm steel crochet hook
- A small pinch of polyester fiberfill for the head
- Stitch marker
- Fine tapestry needle
- Scissors
- Fabric stiffener or spray starch
- A paper cone or small plastic cup about 3.0 in (7.6 cm) across at the rim, for blocking the skirt
- Rustproof pins and a foam blocking mat
Abbreviations (US Terms)
- ch – chain
- sl st – slip stitch
- sc – single crochet
- inc – 2 sc in the same stitch
- dec – sc 2 together
- dc – double crochet
- st(s) – stitch(es)
- sp(s) – space(s)
- rnd – round
- FLO / BLO – front loop only / back loop only
Special stitches:
- V-st: (dc, ch 2, dc) in the same space.
- Fan: (2 dc, ch 2, 2 dc) in the same space.
- Shell: (3 dc, ch 2, 3 dc) in the same space.
- Picot: Ch 3, then sl st in the 3rd ch from the hook.
Gauge and Checkpoints
Gauge: 8 sc and 9 rnds = 1 in (2.5 cm) in sc worked in the round.
Test one piece first. The head is your gauge swatch. Work Rnds 1–8, stuff, and measure before you continue. The head should be about 0.75 in (1.9 cm) across.
Checkpoints (height measured from the top of the head):
- After Rnd 8 (head): 0.8 in (2.0 cm)
- After Rnd 11 (shoulders): 1.1 in (2.8 cm); the shoulder circumference is about 3.0 in (7.6 cm)
- After Rnd 14 (mesh): 2.1 in (5.3 cm)
- After Rnd 16 (shells): 3.0 in (7.6 cm)
- After Rnd 17 (border): 3.5 in (8.9 cm)
If you are off gauge:
- Head larger than 0.8 in (2.0 cm): Go down 0.25 mm in hook size.
- Head smaller than 0.7 in: Go up 0.25 mm.
Fix this now. Every later round builds on the head and shoulder counts.
Pattern
Head (Rounds 1–8)
Work in a continuous spiral. Do not join. Mark the first stitch of each round.
- Rnd 1: 6 sc in a magic ring. Pull the ring closed. (6)
- Rnd 2: Inc in each st around. (12)
- Rnd 3: (Sc in next st, inc) 6 times. (18)
- Rnds 4–6: Sc in each st around. (18 per rnd)
- Rnd 7: (Sc in next st, dec) 6 times. (12)
Stuff the head firmly with a small pinch of fiberfill. Shape it into a smooth ball with your fingers.
- Rnd 8: Dec 6 times. (6)
Rnd 8 is the neck. Add a few more fibers of stuffing if the head looks soft. The 6-stitch opening is small enough to hold the stuffing in.
Checkpoint: The head is 0.75 in (1.9 cm) across and 0.8 in (2.0 cm) tall.
Shoulders (Rounds 9–11)
Continue in the spiral.
- Rnd 9: Inc in each st around. (12)
- Rnd 10: (Sc in next st, inc) 6 times. (18)
- Rnd 11: (Sc in next 2 sts, inc) 6 times. (24)
Sl st in the next st to smooth the end of the spiral. Rotate the angel so this point sits at the center back. The opposite side becomes the front.
Checkpoint: The angel is 1.1 in (2.8 cm) tall. The shoulder circumference is about 3.0 in (7.6 cm).
Skirt (Rounds 12–16)
From here, work joined rounds. Do not turn. Rnd 12 is worked in the FLO of Rnd 11, which leaves the back loops free for the wings.
Rnd 12 (mesh): Ch 5 (counts as dc + ch 2). Skip the next st. Dc in the FLO of the next st, ch 2, skip the next st. Repeat from * 10 more times. Join with a sl st to the 3rd ch of the beginning ch-5.
Count: 12 dc and 12 ch-2 sps. Rnd 12 uses all 24 stitches of Rnd 11, one dc for every 2 sts.
Rnd 13 (V-sts): Sl st into the first ch-2 sp. Ch 5 (counts as dc + ch 2), dc in the same sp. Ch 1. V-st in the next ch-2 sp, ch 1. Repeat from * 10 more times. Join to the 3rd ch of the beginning ch-5.
Count: 12 V-sts (24 dc), 12 ch-2 sps inside the V-sts, and 12 ch-1 sps between them.
Rnd 14 (wide V-sts): Sl st into the first V-st ch-2 sp. Ch 5, dc in the same sp. Ch 2. Skip the ch-1 sp. V-st in the next V-st sp, ch 2. Repeat from * 10 more times. Join.
Count: 12 V-sts (24 dc) and 24 ch-2 sps (12 inside the V-sts, 12 between them). The stitch count stays the same. The skirt widens because the gaps between repeats grow from ch 1 to ch 2.
Checkpoint: The angel is 2.1 in (5.3 cm) tall.
Rnd 15 (fans): Sl st into the first V-st sp. Ch 3 (counts as dc), work (dc, ch 2, 2 dc) in the same sp. Ch 2. Skip the ch-2 sp between the V-sts. Fan in the next V-st sp, ch 2. Repeat from * 10 more times. Join to the top of the beginning ch-3.
Count: 12 fans (48 dc), 12 fan ch-2 sps, and 12 ch-2 sps between the fans.
Rnd 16 (shells): Sl st across to the first fan ch-2 sp. Ch 3 (counts as dc), work (2 dc, ch 2, 3 dc) in the same sp. Ch 2. Shell in the next fan sp, ch 2. Repeat from * 10 more times. Join.
Count: 12 shells (72 dc), 12 shell ch-2 sps, and 12 ch-2 sps between the shells.
Checkpoint: The angel is 3.0 in (7.6 cm) tall, and the hem opens to about 3.0 in (7.6 cm) across.
Do not fasten off. Continue to the border.
Wings (make 2, worked onto the body)
Hold the angel upside down with the back facing you. Look for the ring of free back loops left on Rnd 11.
Count the free loops outward from the center back. The 24 loops are numbered starting just right of center.
- Right wing: Uses loops 2–4.
- Left wing: Uses loops 21–23.
This leaves 2 loops (24 and 1) free at the center back between the wings. Work each wing flat in rows, turning at the end of each row.
Row 1: Join thread in the first loop of the wing. Ch 1, sc in the same loop, sc in the next 2 loops. Turn. (3 sc)
Row 2: Ch 4 (counts as dc + ch 1), dc in the first sc. Ch 1. (Dc, ch 1, dc) in the next sc. Ch 1. (Dc, ch 1, dc) in the last sc. Turn.
Count: 6 dc and 5 ch-1 sps.
Row 3: Ch 5 (counts as dc + ch 2). Dc in the next ch-1 sp, ch 2. Repeat from * 4 more times. Dc in the 3rd ch of the turning ch-4. Turn.
Count: 7 dc and 6 ch-2 sps.
Row 4 (feather edge): Ch 1, sc in the first dc. (2 dc, picot, 2 dc) in the next ch-2 sp, sc in the next dc. Repeat from * 5 more times. Work the last sc in the 3rd ch of the turning ch-5.
Count: 7 sc, 24 dc, and 6 picots.
Fasten off and weave in the ends. Repeat for the second wing.
Checkpoint: Each wing is about 1.1 in (2.8 cm) wide and 1.0 in (2.5 cm) tall. The wingspan is 3.25 in (8.3 cm).
Hanging Loop
Join thread at the center top of the head, through Rnd 1. Ch 15, then sl st into the same spot. Fasten off and weave in the ends through the head.
The loop is about 1.5 in (3.8 cm) long and is not included in the finished height.
Border
Border gauge: 12 scallops around a hem circumference of about 9.4 in (23.9 cm). That is one scallop every 0.8 in (2.0 cm).
Rnd 17 (scalloped picot hem): Sl st across to the first shell ch-2 sp. Ch 3 (counts as dc), picot. Work (dc, picot) 3 times in the same sp, then dc in the same sp. This makes 1 scallop. Sc in the next ch-2 sp between the shells. In the next shell sp, work (dc, picot) 4 times, then dc. Sc in the next ch-2 sp. Repeat from * 10 more times. Join to the top of the beginning ch-3. Fasten off and weave in the ends.
Count: 12 scallops (60 dc and 48 picots) and 12 sc.
Per side: Lay the skirt flat. The front half has 6 scallops (30 dc, 24 picots, 6 sc), and the back half has the same.
Why the math works: Rnd 12 sets 12 repeats by placing one dc in every second stitch of the 24-stitch shoulder round. Every later round, including the border, places exactly one unit into each space of the round before. The repeat count never changes, so each scallop sits centered on its shell, and the 6 front and 6 back scallops mirror each other.
The skirt flares to the 3.0 in (7.6 cm) hem for two reasons. The dc count grows from 24 to 48 to 72, and the chain gaps widen from ch 1 to ch 2. The flare is not caused by adding extra repeats.
Final Blocking
- Mix fabric stiffener as directed, or have spray starch ready.
- Dip the angel and squeeze out the excess. Keep the stiffener out of the head stuffing as much as you can, or block the head lightly with spray only.
- Slide the skirt over a paper cone or cup with a rim about 3.0 in (7.6 cm) across.
- Pull each scallop down evenly and open each picot with a pin.
- Spread the wings flat against the foam behind the cone. Pin each feather picot so the wings fan out symmetrically.
- Open the mesh holes with the tip of a pin.
- Let the angel dry completely, which usually takes 12–24 hours.
- Unpin it and check the measurements: 3.5 in (8.9 cm) tall and 3.25 in (8.3 cm) wide.
Final Quality-Control Checklist
- The head is round and smooth, about 0.75 in (1.9 cm) across, and no stuffing shows.
- Rnd 11 has exactly 24 sc.
- Rnds 12–16 each have 12 evenly spaced repeats.
- Rnd 16 has 72 dc in 12 shells.
- The border has 12 scallops, each with 4 picots.
- The wings match each other: 7 sc, 24 dc, and 6 picots each.
- The wings sit at the same height, with 2 free loops between them at center back.
- The skirt hem lies in an even bell shape, about 3.0 in (7.6 cm) across.
- The hanging loop is centered on the head.
- All ends are woven in and trimmed.
Troubleshooting
- Skirt ruffles: Your dc stitches are too loose, or the chain gaps are too long. Go down a hook size for Rnds 12–16, or keep your chains snug.
- Skirt cups inward: Your tension is too tight. Go up 0.25 mm in hook size from Rnd 12 onward.
- Lumpy head: Pull the stuffing apart into a soft wisp before you insert it. Use less stuffing and roll the head between your palms.
- Uneven repeats: Count your spaces after Rnd 13. A missed space here throws off every round below it.
- Wings droop: Re-block them with stronger stiffener, and pin the feather picots taut while they dry.
- Picots look flat: Make sure each picot is ch 3 with the sl st in the 3rd ch from the hook. Open them with a pin while blocking.
- Hanging loop stretches: Work the loop chain tighter, or use a doubled strand.
Care
Hand wash the angel in cool water with mild soap. Reshape it over the cone and let it dry, then re-stiffen if needed. Store it flat in a box so the wings are not crushed.
Final Notes
The measurement chain is simple to follow:
- An 18-stitch head measures 0.75 in (1.9 cm).
- The 24-stitch shoulders reach 1.1 in (2.8 cm) tall.
- Twelve repeats carry the mesh to 2.1 in (5.3 cm) and the shells to 3.0 in (7.6 cm).
- Twelve picot scallops add 0.5 in (1.3 cm), for a finished angel of 3.5 in (8.9 cm) tall and 3.25 in (8.3 cm) across the wings.
If you check gauge at the head and count repeats after Rnd 13, the rest falls into place.
Optional: For a matching set, make several angels in white or gold thread and hang them together.
Happy crocheting!