

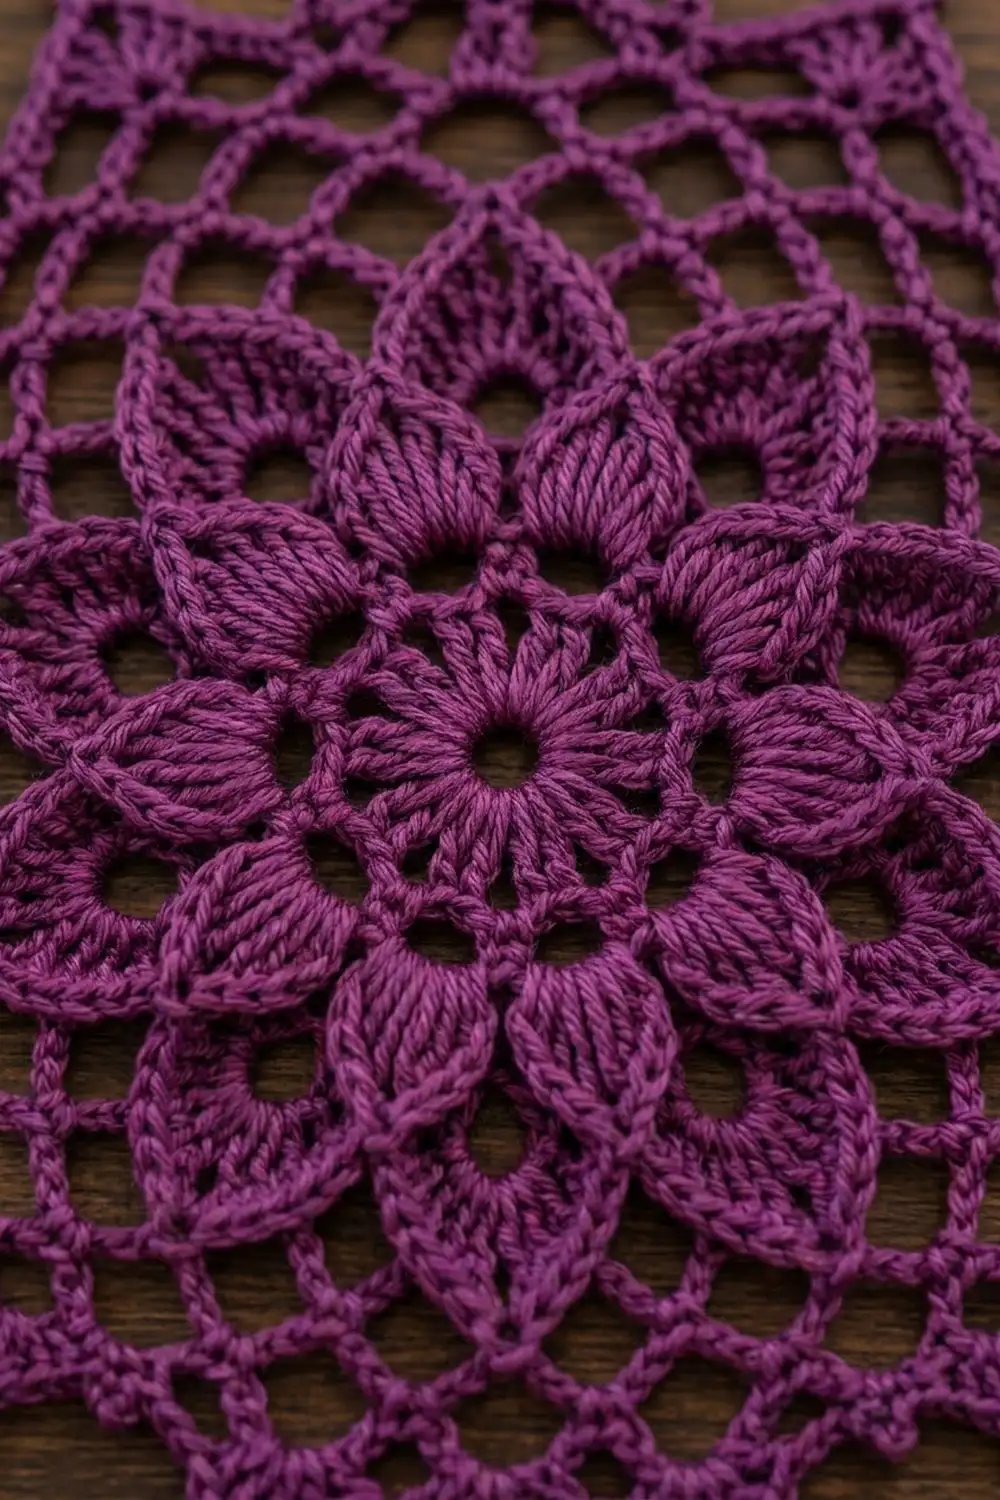
The Plum Lotus Mandala is a small, layered lace doily. A tight flower center opens into a ring of pointed leaf petals, then into airy chain mesh, and it finishes with a crisp picot-point edge. It is made in one solid color, so the texture does the work, and every layer of petals stays easy to see.
The sample uses a deep plum cotton thread. Cotton gives clear stitch definition and blocks flat. Any solid, smooth color will work well, but dark jewel tones like plum, wine, or forest green show the layers best.
This pattern uses US crochet terms. The finished doily measures 6.5 in (16.5 cm) across from point to point after blocking.
The doily is worked in the round as one piece. You make the center ring and small petals first, then work a round of chain loops behind them as the base for the large leaf petals. After that come three mesh rounds and a two-round pointed picot border. Nothing is sewn or joined.
Finished Size and Construction
- Finished size: 6.5 in (16.5 cm) across, point to point
- Skill level: Intermediate (adventurous advanced beginner)
- Terminology: US crochet terms
- Yarn weight: Size 3 cotton crochet thread (fine, fingering-like)
- Hook: 2.25 mm (US B-1)
- Number of pieces: 1
- Layout: Single round motif worked in continuous joined rounds
- Piece size: 6.5 in (16.5 cm)
- Size before border (after Rnd 8): 5.75 in (14.6 cm)
- Border depth: 0.375 in (1.0 cm) per side, adding 0.75 in (1.9 cm) to the diameter
Materials
Yarn: Use a mercerized cotton crochet thread in size 3. Mercerized thread has a slight sheen and holds the pointed petals and picots well. Avoid fuzzy or very stretchy fibers, because they blur the lace.
- Plum (main and only color): 20 g, about 110 m
The quantity above includes a margin of about 40% for your gauge swatch and a little frogging. The doily itself uses about 12–14 g.
Tools:
- 2.25 mm (US B-1) crochet hook
- Tapestry needle
- Scissors
- Locking stitch marker
- Blocking mat or folded towel
- Rust-proof pins
- Spray bottle with water (optional: light spray starch)
Abbreviations (US Terms)
- ch – chain
- sl st – slip stitch
- sc – single crochet
- hdc – half double crochet
- dc – double crochet
- tr – treble crochet
- sk – skip
- sp – space
- st(s) – stitch(es)
- BL – back loop
- rep – repeat
- Rnd – round
Special stitch: Picot. Ch 4, then sl st into the 4th ch from the hook (the first ch made). This makes a small closed ring.
Gauge and Checkpoints
Exact gauge matters less for a doily than for a garment, but it controls the final size and whether the doily lies flat. Work Rnds 1–3 as a test before you go on.
Gauge: Rnds 1–3 measure 2.25 in (5.7 cm) across, measured flat from petal tip to petal tip.
Checkpoints after each stage:
- After Rnd 1: 1.0 in (2.5 cm)
- After Rnd 3: 2.25 in (5.7 cm)
- After Rnd 5: 4.0 in (10.2 cm), measured tip to tip of the large petals
- After Rnd 6: 4.5 in (11.4 cm)
- After Rnd 7: 5.0 in (12.7 cm)
- After Rnd 8: 5.75 in (14.6 cm)
- After Rnd 10 (blocked): 6.5 in (16.5 cm)
A difference of up to 0.25 in (0.6 cm) at any checkpoint is fine.
If your work is too big: use a 2.0 mm hook, or pull the chain loops a little tighter.
If your work is too small: use a 2.5 mm hook. If the work cups or curls, your chains are too tight. Loosen them before you change hooks.
Pattern
Center Ring
Rnd 1: Ch 6, sl st to the first ch to form a ring. Ch 3 (counts as dc), work 15 dc into the ring. Join with sl st to the top of the beginning ch-3. (16 dc)
The ch-6 ring leaves the small open hole you see in the center. Pull the starting tail gently to close it a little, but don’t close it completely.
Small Inner Petals
Rnd 2: Ch 1, sc in the same st as the join. Ch 4, sk 1 dc, sc in the next dc; rep from * 6 more times. Ch 4, sk the last dc, and join with sl st to the first sc. (8 sc, 8 ch-4 sps)
Rnd 3: Sl st into the first ch-4 sp. In the same sp, work (sc, hdc, 3 dc, hdc, sc). In the next ch-4 sp, work (sc, hdc, 3 dc, hdc, sc); rep from * 6 more times. Join with sl st to the first sc. (8 petals; 7 sts each = 56 sts)
Each petal is a small rounded fan. The center dc of each petal (the 4th st) is the petal’s tip. You will use it as an anchor in the next round.
Checkpoint: 2.25 in (5.7 cm).
Loop Base for the Large Petals
Rnd 4: Fold the petals of Rnd 3 toward you so you are working behind them. Sl st across the first petal to reach its center dc (the 4th st), and work 1 sc into the BL of that center dc. Ch 6, working behind the next petal, sc into the BL of its center dc; rep from * 6 more times. Ch 6 and join with sl st to the first sc. (8 sc, 8 ch-6 loops)
Because each loop runs from one small petal tip to the next, the loops sit between the small petals. This is what staggers the two petal layers.
Large Pointed Leaf Petals
Rnd 5: Sl st into the first ch-6 loop. In the same loop, work (sc, hdc, 2 dc, 2 tr, ch 3, 2 tr, 2 dc, hdc, sc). In the next ch-6 loop, work (sc, hdc, 2 dc, 2 tr, ch 3, 2 tr, 2 dc, hdc, sc); rep from * 6 more times. Join with sl st to the first sc. (8 petals; 12 sts each = 96 sts, plus 8 ch-3 tip sps)
The sts climb from sc up to tr, so each petal swells out from its base. The ch-3 at the top gives it a sharp point. These large petals peek out between the small petals of Rnd 3, which creates the layered lotus look.
Checkpoint: 4.0 in (10.2 cm), tip to tip.
Lace Mesh
Rnd 6: Sl st in each of the next 5 sts of the first petal, then sl st into its ch-3 tip sp. Ch 1, sc in the tip sp. Ch 6, sc in the gap between this petal and the next (between the last sc of one petal and the first sc of the next), ch 6, sc in the next ch-3 tip sp; rep from * 6 more times. Ch 6, sc in the last gap, ch 6, and join with sl st to the first sc. (16 sc, 16 ch-6 loops)
This round doubles the number of loops from 8 to 16: one loop runs from each petal tip down to the valley, and one runs from the valley up to the next tip.
Checkpoint: 4.5 in (11.4 cm).
Rnd 7: Sl st in each of the first 3 ch of the first loop. Ch 1, sc in the same loop. Ch 7, sc in the next loop; rep from * 14 more times. Ch 7 and join with sl st to the first sc. (16 sc, 16 ch-7 loops)
Checkpoint: 5.0 in (12.7 cm).
Rnd 8: Sl st in each of the first 3 ch of the first loop. Ch 1, sc in the same loop. Ch 8, sc in the next loop; rep from * 14 more times. Ch 8 and join with sl st to the first sc. (16 sc, 16 ch-8 loops)
Each round places its sc in the middle of the loop below. This gives the open diamond mesh, and the slightly longer chains each round let the doily grow flat.
Checkpoint: 5.75 in (14.6 cm). This is your size before the border.
Border
Border gauge: 10 sc fit along each ch-8 loop. Worked over the loop, they should lie flat and snug without bunching. The border adds 0.375 in (1.0 cm) all around.
Rnd 9 (point base): Sl st into the first ch-8 loop. Ch 1. In the same loop, work (5 sc, ch 3, 5 sc). In the next ch-8 loop, work (5 sc, ch 3, 5 sc); rep from * 14 more times. Join with sl st to the first sc. (16 points; 10 sc each = 160 sc, plus 16 ch-3 tip sps)
Rnd 10 (picot points, conversion round): Ch 1. Sc in each of the next 5 sc, then in the ch-3 tip sp work (2 sc, picot, 2 sc), then sc in each of the next 5 sc; rep from * 15 more times. Join with sl st to the first sc. Fasten off.
Count for Rnd 10: 160 sc worked 1 per existing sc, plus 64 sc added at the tips (4 per tip × 16) = 224 sc, plus 16 picots.
Why the math works: After Rnd 8, the doily’s circumference is about 3.14 × 5.75 in = 18.1 in (45.9 cm). Split over 16 loops, that is about 1.13 in (2.9 cm) per loop. Ten sc in size 3 thread cover about 1.13 in, so the sc lie flat. The ch-3 tips and the extra sc in Rnd 10 push the edge into 16 clear points instead of a flat ring. Each point lines up with one Rnd 8 loop, which keeps the scallops evenly spaced.
Final Blocking
- Weave in all ends along the back of the sts. Leave about 6 in (15.2 cm) of each tail to weave, and don’t trim until after blocking.
- Soak the doily in cool water for 10 minutes, then gently press out the water. Don’t wring it.
- Roll it in a towel to remove extra moisture.
- Lay it face up on a blocking mat. Pin the center flat first.
- Pin out the tips of the 8 large petals evenly, about 4.0 in (10.2 cm) across.
- Pin each of the 16 border picots out to a 6.5 in (16.5 cm) circle. Work in opposite pairs (top/bottom, then left/right) to keep it symmetrical.
- Open each mesh loop with your fingers so the diamonds are even.
- If you want a crisper finish, mist lightly with spray starch.
- Let it dry completely, at least 12 hours. Then remove the pins and trim the tails.
Final Quality-Control Checklist
- Center hole is open and round
- 8 small petals, each with 7 sts
- 8 large pointed petals, sitting evenly between the small petals
- 16 mesh loops in each of Rnds 6, 7, and 8
- 16 points, each with a picot at the tip
- Rnd 10 count is 224 sc plus 16 picots
- Doily lies flat with no cupping or ruffling
- Diameter is 6.5 in (16.5 cm), give or take 0.25 in (0.6 cm)
- All ends secure and invisible from the front
Troubleshooting
Large petals line up directly behind the small petals. In Rnd 4, the sc was placed between the small petals instead of in their center dc. Redo Rnd 4 and anchor into the BL of each center dc.
Doily cups like a bowl. Your chain loops are too tight. Redo the mesh rounds with looser chains, or go up one hook size for Rnds 6–8 only.
Doily ruffles. Your chains are too loose, or the sc are crowding the loops in the border. Tighten your chains, or check that you have exactly 10 sc per loop in Rnd 9.
Points look rounded instead of sharp. Pin each picot firmly during blocking, and check that you worked the ch-3 at the tip of each point in Rnd 9.
Count is off in the mesh. Place a marker in the first loop of every round and count all 16 loops before you join.
Care
Hand wash in cool water with mild soap, then lay flat and reshape to dry. Re-block with pins if the points start to curl.
Final Notes
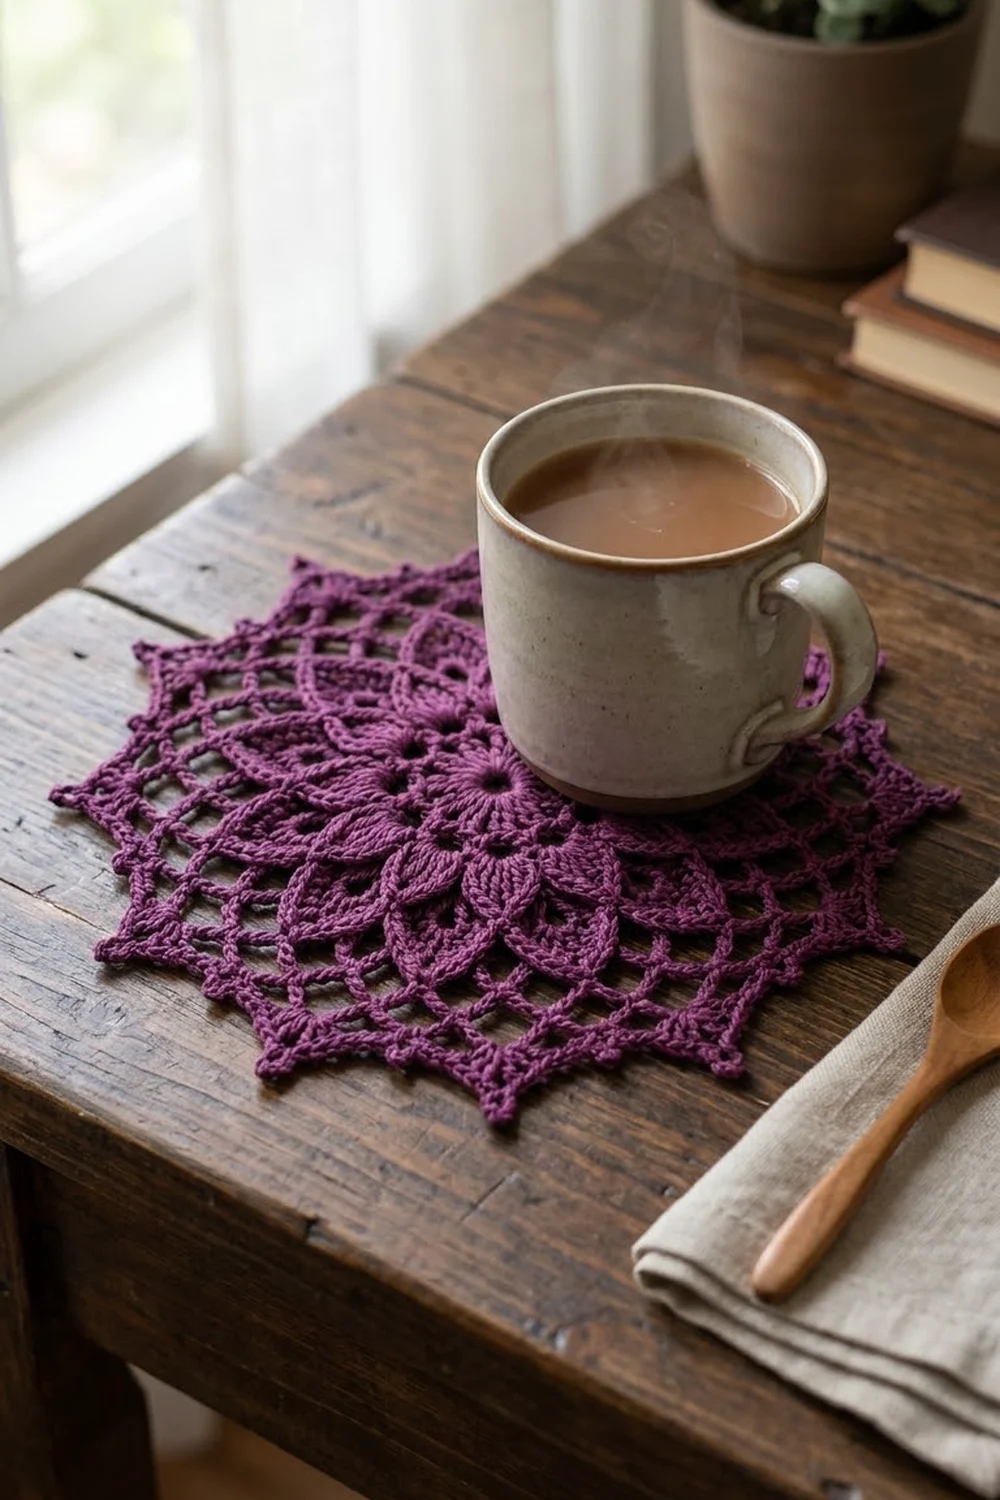
The measurement chain is simple: the center measures 1.0 in (2.5 cm) after Rnd 1, the small petals reach 2.25 in (5.7 cm), and the large leaf petals reach 4.0 in (10.2 cm). The mesh grows to 4.5 in (11.4 cm), then 5.0 in (12.7 cm), then 5.75 in (14.6 cm). The 0.375 in (1.0 cm) picot border brings the doily to 6.5 in (16.5 cm). If you check each stage as you go, the finished doily will lie flat with even, layered petals.
Happy crocheting!