

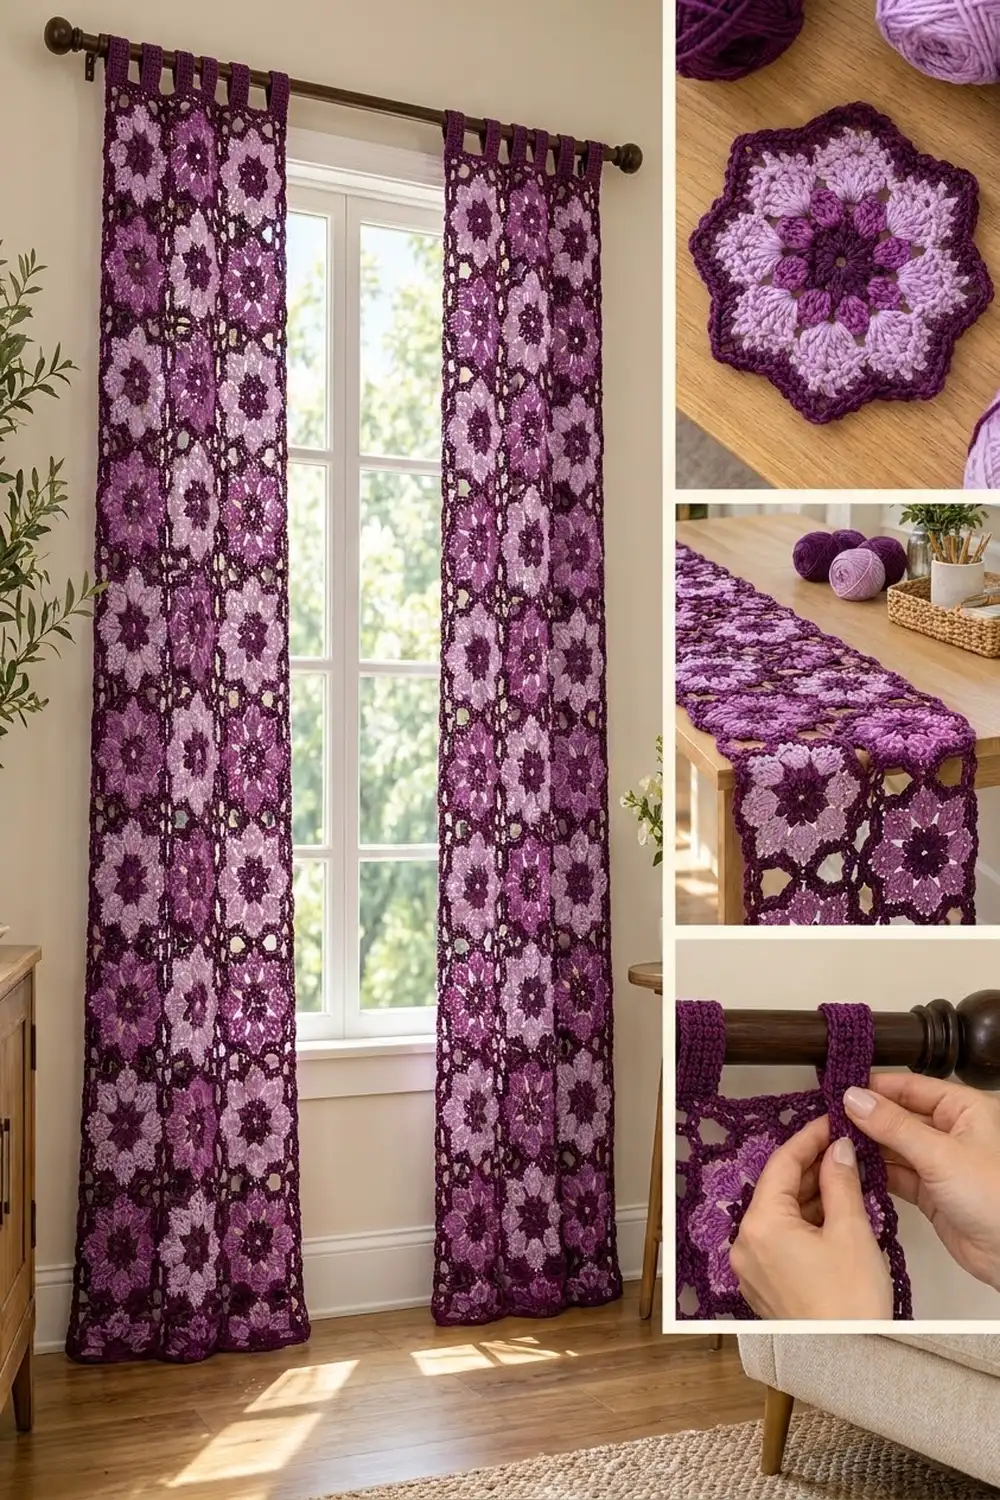
These tab-top curtain panels are built from octagon flower motifs in three shades of purple. Each motif has a deep plum center, eight puffy medium purple petals, a lilac shell ring, and a crisp plum outline. Joined in a grid, the octagons leave small diamond windows that let light through.
The palette is dark plum, medium purple, and light lilac. The style is vintage-inspired but tidy, and the firm outlines keep the lace from looking busy. All instructions use US crochet terms.
Each finished panel measures 19 in wide x 73 in long (48.3 cm x 185.4 cm), not counting the tabs. The tab loops add about 4 in (10.2 cm) above the top edge. The pattern makes a pair of panels.
Construction overview:
- Crochet 36 motifs per panel.
- Join them with slip stitches into a grid 3 motifs wide and 12 motifs tall.
- Work a two-round border that follows the octagon outlines.
- Add three tabs to the top edge.
Finished Size and Construction
- Finished panel size: 19 in x 73 in (48.3 cm x 185.4 cm), not counting tabs
- Skill level: Intermediate
- Terminology: US crochet terms
- Yarn weight: Worsted (#4)
- Hook: 5 mm (H-8)
- Number of pieces: 36 motifs per panel (72 for the pair), plus 3 tabs per panel
- Layout: 3 motifs wide x 12 motifs tall per panel
- Motif size: 6 in (15.2 cm) from one flat side to the opposite flat side; each of the 8 sides is 2.5 in (6.4 cm) long
- Size before border: 18 in x 72 in (45.7 cm x 182.9 cm)
- Border depth: 0.5 in (1.3 cm) on each edge, worked in two rounds
Materials
Choose a smooth cotton or cotton-blend worsted yarn. Cotton holds the puff stitches crisply, hangs straight, and stands up well to sunlight and washing. The amounts below assume about 200 m per 100 g.
- Color A, dark plum: 800 g / 1,600 m (motif centers, outlines, joining, border, tabs)
- Color B, medium purple: 200 g / 400 m (puff petals)
- Color C, light lilac: 500 g / 1,000 m (shell rounds)
These amounts cover both panels and include a margin of about 10 to 15 percent.
Tools:
- 5 mm (H-8) crochet hook
- Tapestry needle
- Stitch markers
- Measuring tape
- Blocking mats, rust-proof pins, and a spray bottle or steamer
- Scissors
Abbreviations (US Terms)
- ch: chain
- sl st: slip stitch
- sc: single crochet
- dc: double crochet
- sc3tog: single crochet 3 together
- sp: space
- st(s): stitch(es)
- RS / WS: right side / wrong side
Puff stitch (puff): Yarn over, insert the hook in the stitch, yarn over, and pull up a loop to the height of a dc. Do this 4 times in the same stitch. Yarn over, pull through all 9 loops on the hook, then ch 1 to close. The closing ch 1 does not count as a stitch.
Gauge and Checkpoints
Before you start the full set, make one complete motif and block it. Gauge is measured on the motif itself:
- Sc gauge (Rounds 5–6 and border): 11 sc = 2.5 in (6.4 cm), about 4.4 sc per inch
- Finished motif: 6 in (15.2 cm) from one flat side to the opposite flat side
Measure across the motif after each round:
- After Round 1: 1.5 in (3.8 cm)
- After Round 2: 2.5 in (6.4 cm)
- After Round 3: 3.5 in (8.9 cm)
- After Round 4: 5 in (12.7 cm)
- After Round 5: 5.5 in (14.0 cm)
- After Round 6: 6 in (15.2 cm)
Motif too big: Use a hook 0.5 mm smaller. Small errors add up: 0.25 in (0.6 cm) too much per motif makes the panel 3 in (7.6 cm) too long.
Motif too small: Use a hook 0.5 mm larger, or check that you are pulling your puff loops up to full dc height.
Motif cups: Round 4 is usually too tight. Loosen the chains at the shell points.
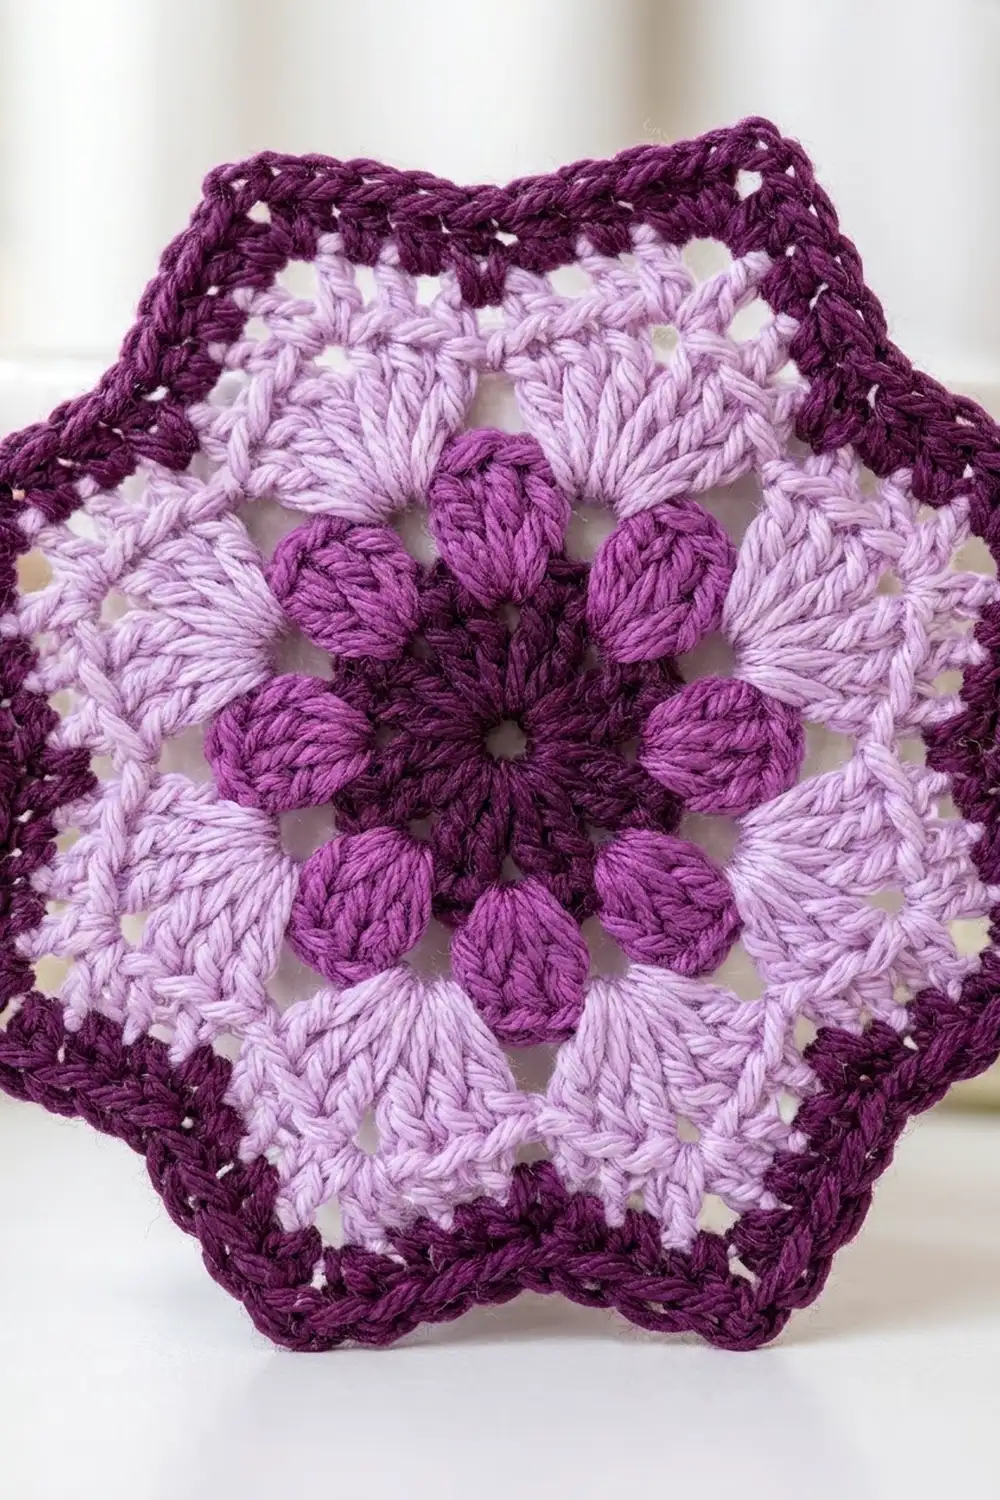
Motif (Make 36 per Panel)
Round 1 (Color A)
Make a magic ring. Ch 3 (counts as dc), then work 15 dc in the ring. Sl st to the top of the beginning ch-3. Pull the ring closed and fasten off. (16 dc)
Round 2 (Color B): Puff Petals
Join B with a sl st in any dc. Ch 2 (does not count as a stitch). Work a puff in the same st, ch 2, and skip the next dc. Puff in the next dc, ch 2, skip the next dc. Repeat from * 6 more times. Sl st to the top of the first puff and fasten off. (8 puffs, 8 ch-2 sps)
This uses all 16 dc from Round 1: 8 have a puff and 8 are skipped.
Round 3 (Color C)
Join C in any ch-2 sp. Ch 3 (counts as dc), work 2 dc in the same sp, then ch 1. 3 dc in the next ch-2 sp, ch 1. Repeat from * 6 more times. Sl st to the top of the beginning ch-3. (24 dc, 8 ch-1 sps)
Each 3-dc group sits directly above a puff petal.
Round 4 (Color C): Lilac Petal Points
Sl st in the next dc, which is the center dc of the first group. Ch 1 and sc in the same st. (3 dc, ch 2, 3 dc) in the next ch-1 sp, then sc in the center dc of the next 3-dc group. Repeat from * 6 more times. Work (3 dc, ch 2, 3 dc) in the last ch-1 sp. Sl st to the first sc and fasten off. (8 sc, 48 dc, 8 ch-2 sps)
The 8 shells form the pointed lilac petals. Their ch-2 sps become the 8 corners of the octagon.
Round 5 (Color A): First Outline Round
Join A in any ch-2 corner sp and ch 1. (Sc, ch 2, sc) in the corner sp, sc in the next 3 dc, sc in the next sc, sc in the next 3 dc. Repeat from * 7 more times. Sl st to the first sc. (72 sc, 8 ch-2 corner sps)
Each side now has 9 sc: 7 between the corners plus 2 corner sc. Check: 8 sides x 9 sc = 72 sc.
Round 6 (Color A): Second Outline Round
Sl st into the first ch-2 sp and ch 1. (Sc, ch 2, sc) in the ch-2 sp, then sc in the next 9 sc. Repeat from * 7 more times. Sl st to the first sc. Fasten off, leaving a 6 in (15.2 cm) tail. (88 sc, 8 ch-2 corner sps)
Each side now has 11 sc: the 9 from Round 5 plus 2 new corner sc. Check: 8 sides x 11 sc = 88 sc. Throughout this pattern, “11 sc per side” includes the 2 corner sc.
Weave in all ends except the A tail. You can use that tail to start a seam.
Make All Motifs
Make 36 motifs for one panel, or 72 for the pair. Every motif uses the colors in the same order:
- Color A: Rounds 1, 5, and 6
- Color B: Round 2
- Color C: Rounds 3 and 4
Block the motifs lightly to 6 in (15.2 cm) before joining. Matching edges make the seams much easier.
Layout grid for one panel (M = motif; T = tab position):
        T     T     T
Row 1:  [M]  [M]  [M]
Row 2:  [M]  [M]  [M]
Row 3:  [M]  [M]  [M]
  ...   (repeat)
Row 12: [M]  [M]  [M]
Each motif is joined only to the motifs above, below, left, and right of it. Its four diagonal sides stay free and frame the diamond-shaped gaps.
Joining
Method: Use a slip stitch seam in color A. Hold the motifs wrong sides together and work through the back loops of both. This leaves a neat chain ridge on the RS.
Stitch-to-stitch logic: Line up two motifs. Sl st through both matching ch-2 corner sps, then work 11 sl sts through the matching pairs of sc. Finish with a sl st through the next pair of ch-2 corner sps. That makes 13 sl sts per seam. Each sc on one motif meets exactly one sc on the other, so no stitches are added or skipped.
Order:
- Join the motifs into 12 horizontal rows of 3. That is 2 seams per row, or 24 seams.
- Join the rows together. Each motif gets its own separate seam to the motif below it, so each row join takes 3 seams. The 11 row joins take 33 seams.
- That gives 57 seams per panel.
Fasten off after each seam and weave the tails along the seam on the WS.
Tension: Keep your slip stitches as loose as your sc. If a seam pulls the motifs into a curve, redo it with a hook one size larger.
Size checkpoint: Lay the panel flat. It should measure 18 in x 72 in (45.7 cm x 182.9 cm), which is 3 motifs x 6 in across and 12 motifs x 6 in down. The diamond gaps should be open squares about 2.5 in (6.4 cm) on each side.
Border
The border follows the octagon outline all the way around the panel. It does not straighten the edge, so the scalloped shape stays.
Border gauge: Same as the motif outline, 11 sc = 2.5 in (6.4 cm).
Edge terms:
- An exposed side is any motif side on the outer edge of the panel. Each exposed side has 11 sc.
- A convex corner is an outward-pointing ch-2 sp between two exposed sides of the same motif.
- A notch is the inward V-point where two neighboring motifs meet at the end of a seam.
One panel has 86 exposed sides, 60 convex corners, and 26 notches: 2 along each short edge and 11 along each long edge.
Which sides belong to which edge:
- Top edge: Each of the 3 top-row motifs contributes its NW, N, and NE sides, for 9 sides.
- Each long edge: Each corner motif contributes 2 sides and each of the 10 middle motifs contributes 3, for 34 sides.
- Bottom edge: Mirrors the top edge, with 9 sides.
Border Round 1 (Color A)
Join A in the first sc of any exposed side and ch 1. Work 1 sc in every sc of every exposed side. At each convex corner, ch 2 over the corner sp. At each notch, work 1 sc through both joined ch-2 corner sps together. This is the notch sc. Sl st to the first sc.
Counts:
- Top edge: 9 sides x 11 sc = 99 sc, plus 2 notch sc = 101 sc
- Each long edge: 34 sides x 11 sc = 374 sc, plus 11 notch sc = 385 sc
- Bottom edge: 101 sc
- Total: 101 + 385 + 101 + 385 = 972 sc, with 60 ch-2 sps
Check: 86 sides x 11 sc = 946 sc, plus 26 notch sc = 972 sc.
Border Round 2 (Color A)
Ch 1. Sc in each sc along the sides. Work 3 sc in each convex ch-2 sp. At each notch, sc3tog over the last sc of one side, the notch sc, and the first sc of the next side. Sl st to the first sc and fasten off.
Counts:
- Top edge: 99 side sc minus 4 used in the notches = 95 sc. Add 2 sc3tog and 18 corner sc (6 corners x 3 sc) for 115 sc.
- Each long edge: 374 side sc minus 22 used in the notches = 352 sc. Add 11 sc3tog and 66 corner sc (22 corners x 3 sc) for 429 sc.
- The 4 panel corners: 4 x 3 sc = 12 sc.
- Total: 115 + 429 + 115 + 429 + 12 = 1,100 sc.
Why the math works: Each exposed side keeps the same 11 sc it had in the motif, so the border is exactly as long as the edge it covers. The 3-sc groups add the extra length that outward points need. The sc3tog takes up the extra length at the inward V-points, so the notches don’t ripple. The border adds 0.5 in (1.3 cm) to each edge, or 1 in (2.5 cm) to each dimension, bringing the panel to 19 in x 73 in (48.3 cm x 185.4 cm).
Tabs (Make 3 per Panel, Color A)
After Border Round 2, the N side of each top-row motif has 11 straight sc. Each tab is centered on one of these sides.
- Row 1: With the RS facing, join A in the 2nd sc of the N side. Ch 1, then sc in the same st and in the next 8 sc. (9 sc)
- Rows 2–36: Ch 1, turn, and sc in each sc across. (9 sc)
Each tab should be about 2 in (5.1 cm) wide and 8 in (20.3 cm) long. Fold it to the WS and whipstitch the last row to Round 6 of the same motif. This makes a loop about 4 in (10.2 cm) deep, which fits rods up to 1.5 in (3.8 cm) in diameter.
Final Blocking
- Soak the panel in cool water. Press the water out by rolling it in a towel. Do not wring it.
- Lay it flat on blocking mats. Use the floor if you need the space.
- Pin each long edge to 73 in (185.4 cm), with a pin at every notch.
- Pin each short edge to 19 in (48.3 cm).
- Pin the convex corners outward so the scallops are even.
- Open each diamond gap into a square about 2.5 in (6.4 cm) on each side.
- Use your fingers to gently lift each puff petal.
- Let the panel dry completely, which usually takes 24 to 48 hours. Unpin it, then block the tabs flat.
Final Quality-Control Checklist
- Each panel has 36 motifs arranged 3 wide and 12 tall.
- Every motif has 8 puffs, 8 lilac shells, and an outline of 88 sc with 8 ch-2 corners.
- All 57 seams have 13 sl sts and lie flat without puckering.
- The diamond gaps are open and all the same size.
- Border Round 2 has 1,100 sc in total.
- The panel measures 19 in x 73 in (48.3 cm x 185.4 cm).
- The 3 tabs are centered on the top motifs and are all the same length.
- All ends are woven in on the WS.
Troubleshooting
- Puffs lean or twist: Close each puff firmly with the ch 1 and keep all the loops the same height.
- Lilac points look rounded: Check that every shell point in Round 4 has a full ch 2.
- Motif sides are uneven: Count every side. Each one needs exactly 11 sc after Round 6.
- Panel is longer than 72 in (182.9 cm) before the border: Your seams are probably too loose. Measure 3 motifs in a column; together they should be 18 in (45.7 cm).
- Border ripples at the notches: Make sure you worked a sc3tog at each notch, not 3 separate sc.
- Panel hangs crooked: Block it again, pinning both long edges along a straight guide.
Care
Hand wash in cool water, or machine wash on a gentle cycle in a mesh bag. Lay the panels flat to dry and re-pin them to size if needed. Don’t hang them while wet, because the weight will stretch them.
Final Notes
Here is how each measurement builds on the last. At 11 sc = 2.5 in (6.4 cm) per side, each motif comes out at 6 in (15.2 cm). Three motifs across and 12 down give 18 in x 72 in (45.7 cm x 182.9 cm). The 0.5 in (1.3 cm) border brings the panel to 19 in x 73 in (48.3 cm x 185.4 cm), and three 8 in (20.3 cm) tabs finish it. If your first motif measures correctly, every later stage will too.
Happy crocheting!