
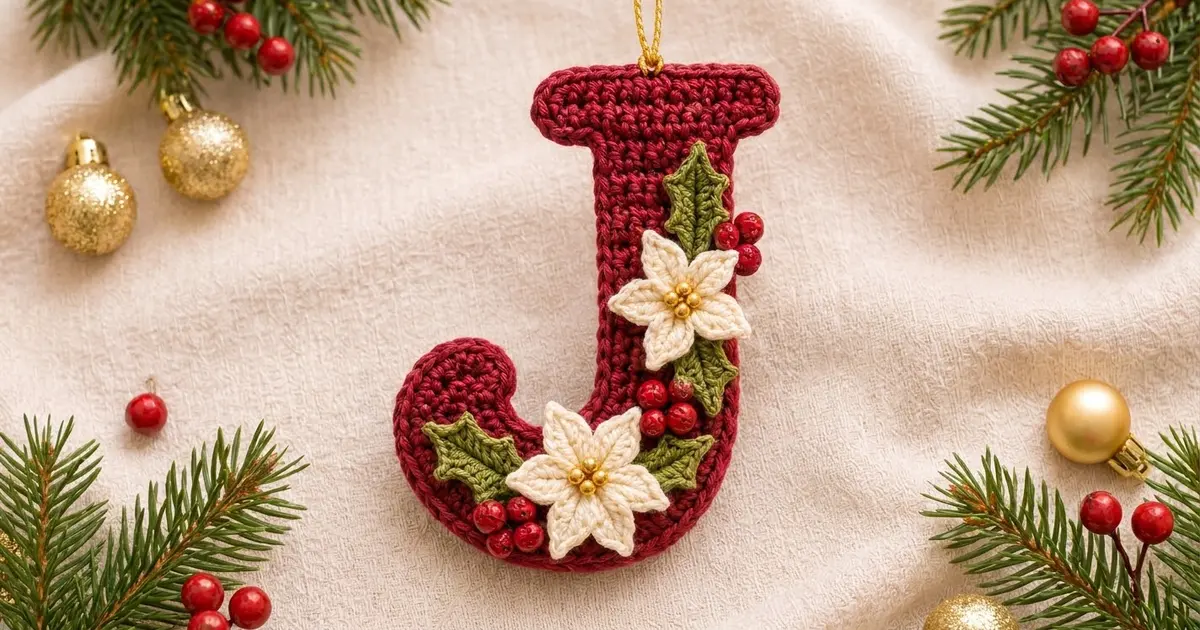
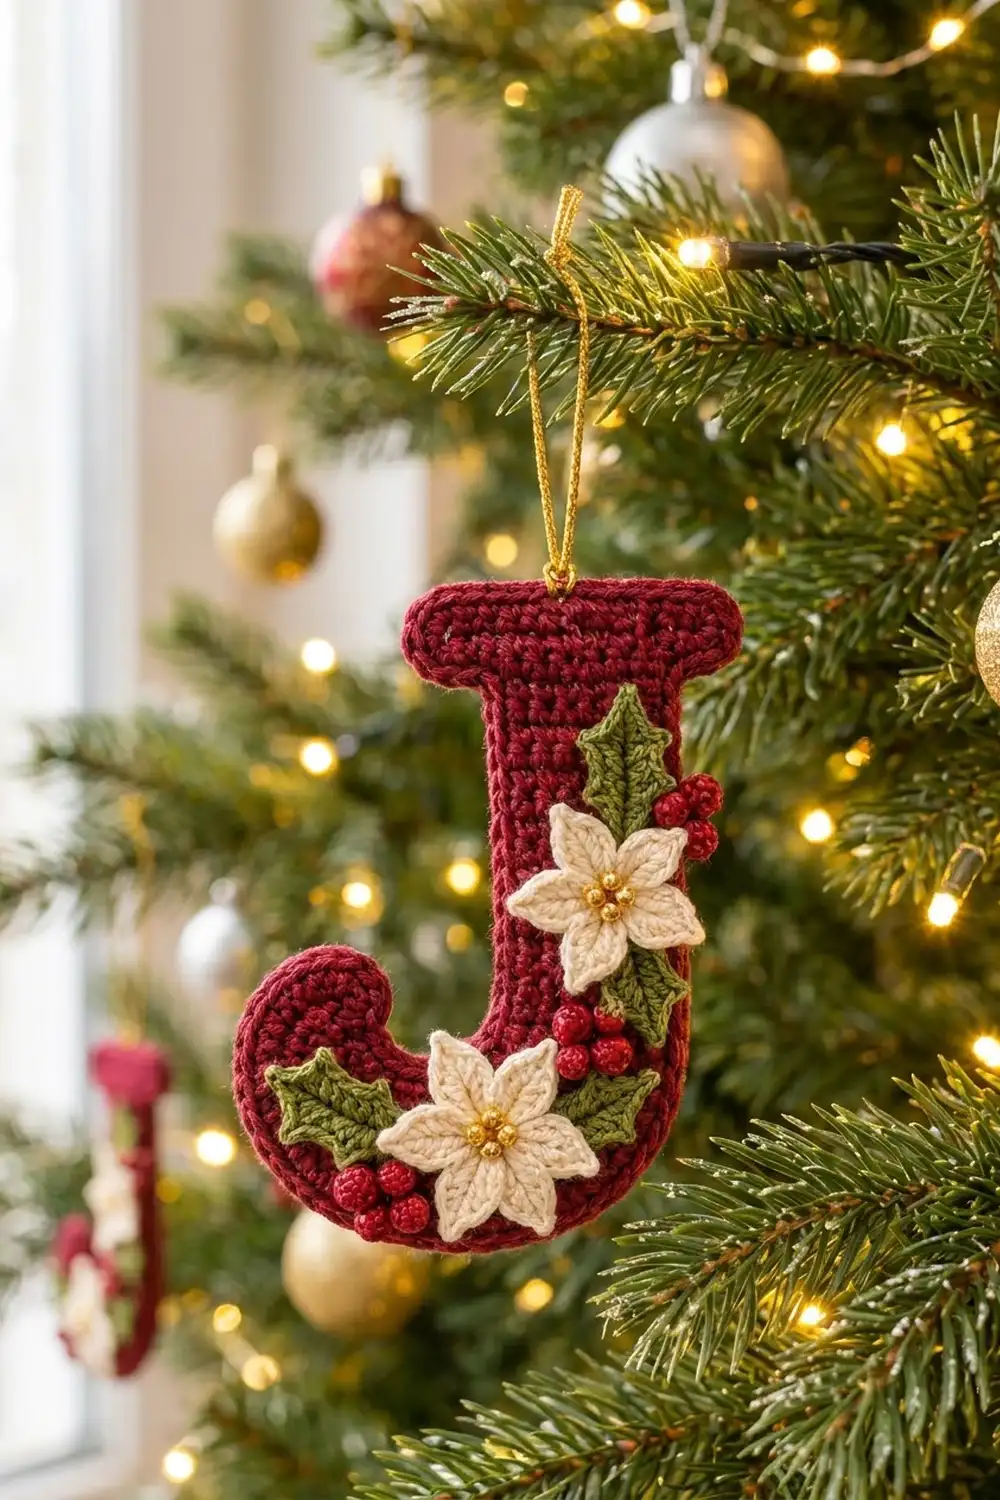
This Christmas ornament is a capital letter J in deep cranberry red, decorated with cream poinsettias, olive holly leaves and glossy red berries. Gold bead centers and a gold hanging cord give it a warm, classic holiday look that suits a tree, a gift tag or a wreath.
The letter is worked flat in tight single crochet, so it holds its shape without stiffener. A corded outline round finishes the edge and frames the letter.
The pattern uses US crochet terms. The finished ornament is about 3.2 in (8.1 cm) wide at the bowl and 5.1 in (13.0 cm) tall, including the border.
Construction is simple. You work the bowl from the bottom up, then the stem and the crossbar, and finally a short tip that rises from the left side of the bowl. You add a two-round border and block the letter. Then you sew on two poinsettias, four holly leaves, the beads and the hanging loop.
Finished Size and Construction
- Finished size: 3.2 in (8.1 cm) wide x 5.1 in (13.0 cm) tall
- Skill level: Easy to Intermediate
- Terminology: US crochet terms
- Yarn weight: DK / light worsted (#3)
- Hook: 3.5 mm (US E-4)
- Number of pieces: 1 letter body plus 6 small appliqués (2 poinsettias, 4 holly leaves)
- Layout: single piece, no joining
- Piece size before border: 2.8 in (7.1 cm) wide x 4.7 in (11.9 cm) tall
- Crossbar before border: 2.6 in (6.6 cm) wide; stem 1.4 in (3.6 cm) wide
- Border depth: about 0.2 in (0.5 cm) on every edge
Materials
Use a smooth mercerized cotton or cotton blend in DK weight. Avoid fuzzy or very stretchy yarns, because the letter shape depends on clean edges.
- Burgundy / cranberry red (MC): 8 g, about 18 m
- Cream (CC1): 3 g, about 7 m
- Olive green (CC2): 3 g, about 7 m
These amounts include extra for the gauge swatch and for weaving in ends.
Tools and notions:
- 3.5 mm (US E-4) crochet hook
- Tapestry needle and a fine sewing needle
- Cream and red sewing thread
- 12 gold beads, 4 mm (6 per poinsettia)
- 12 glossy red pearl beads, 6 mm, for the berries
- 8 in (20.3 cm) of thin gold metallic cord
- Stitch markers
- Rust-proof pins and a blocking mat
- Spray bottle with water
Abbreviations (US Terms)
- ch – chain
- sl st – slip stitch
- sc – single crochet
- hdc – half double crochet
- dc – double crochet
- sc2tog – single crochet 2 together
- BLO – back loop only
- st(s) – stitch(es)
- RS / WS – right side / wrong side
- MR – magic ring
Foundation single crochet (fsc): Insert the hook into the chain at the base of the last stitch made, yarn over and pull up a loop. Yarn over and pull through 1 loop (this makes the new base chain), then yarn over and pull through both loops. Each fsc adds one stitch to the end of a row without a separate chain.
Picot: Ch 2, sl st in 2nd ch from hook.
Point picot: Ch 3, sl st in 3rd ch from hook.
Gauge and Checkpoints
Gauge: 5 sc and 6 rows = 1 in (2.5 cm) in sc worked in rows.
Make a swatch 10 sc wide and work 12 rows. It should measure 2 in (5.1 cm) square. This is a firm fabric, so if your swatch feels soft, go down a hook size.
The best test, though, is the letter itself. Work Rows 1–6 and measure:
- After Row 6: 14 sts = 2.8 in (7.1 cm) wide and 1 in (2.5 cm) tall.
- After Row 24: total height 4 in (10.2 cm).
- After Row 28: total height 4.7 in (11.9 cm); crossbar 2.6 in (6.6 cm) wide.
- After the tip: the tip rises 0.7 in (1.8 cm) above Row 6.
- After the border: 3.2 in (8.1 cm) x 5.1 in (13.0 cm).
If Row 6 is wider than 2.9 in (7.4 cm), go down half a hook size or one full size. If it is narrower than 2.7 in (6.9 cm), go up a size. Differences of 0.1 in (0.3 cm) are fine and will block out.
Letter Body
Row 1 is the RS. Odd rows are RS rows and even rows are WS rows. Put a marker on the RS so you always know which side is facing you. The ch 1 at the start of each row does not count as a stitch.
Bowl
With MC, ch 11.
Row 1 (RS): Sc in 2nd ch from hook and in each ch across, turn. (10 sts)
Row 2: Ch 1, 2 sc in first st, sc in next 8 sts, 2 sc in last st, turn. (12 sts)
Row 3: Ch 1, 2 sc in first st, sc in next 10 sts, 2 sc in last st, turn. (14 sts)
Rows 4–6: Ch 1, sc in each st across, turn. (14 sts)
The increases in Rows 2 and 3 round off both lower corners of the bowl. Check your width now: it should be 2.8 in (7.1 cm).
Stem
The stem is built on the 7 stitches at the right edge (as seen from the RS). The other 7 stitches stay unworked for now.
Row 7 (RS): Ch 1, sc in first 7 sts, turn, leaving the remaining 7 sts unworked. (7 sts)
Rows 8–24: Ch 1, sc in each st across, turn. (7 sts)
At the end of Row 24 the yarn sits at the right edge of the stem. The piece is now 4 in (10.2 cm) tall.
Crossbar
Row 25 (RS): Ch 4, sc in 2nd ch from hook and in next 2 ch (3 sts), sc in each of the 7 stem sts, then work 3 fsc off the last sc, turn. (13 sts: 3 + 7 + 3)
The crossbar now sticks out past the stem by 3 sts on each side.
Rows 26–28: Ch 1, sc in each st across, turn. (13 sts)
Fasten off and weave in the end. The piece is 4.7 in (11.9 cm) tall and the crossbar is 2.6 in (6.6 cm) wide.
Tip
Look at Row 6 with the RS facing and count stitches from the right edge. Stitches 1–7 carry the stem. Stitches 8 and 9 stay empty to form the notch. Stitches 10–14 become the tip.
Tip Row 1 (RS): Join MC in the 10th st from the right, ch 1, sc in same st and in next 4 sts, turn. (5 sts)
Tip Rows 2–3: Ch 1, sc in each st across, turn. (5 sts)
Tip Row 4: Ch 1, sc2tog, sc in next st, sc2tog. (3 sts)
Fasten off. The tip rows sit level with Rows 7–10, so the tip rises 0.7 in (1.8 cm) above the bowl, with a 2-stitch notch beside the stem.
Poinsettias (Make 2)
With CC1, make a MR.
Round 1: Ch 1, 5 sc in ring, sl st to first sc to join. Pull the ring closed. (5 sts)
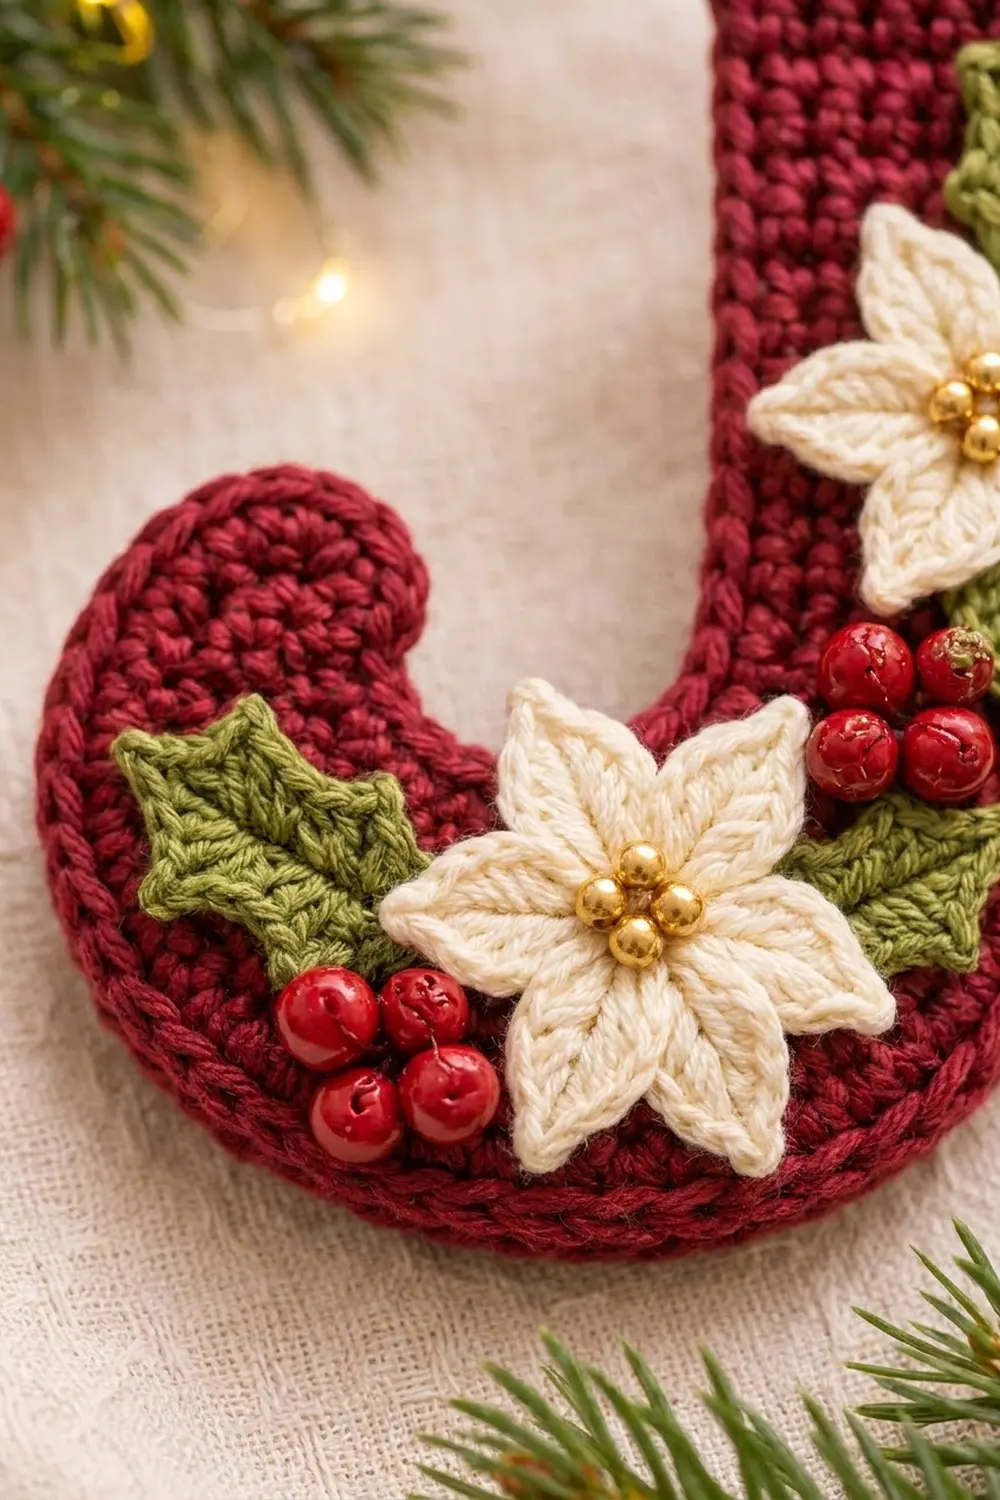
Round 2 (petals): *Ch 6, sl st in 2nd ch from hook, sc in next ch, hdc in next ch, dc in next 2 ch, sl st in same sc of Round 1, sl st in next sc; rep from * 4 more times, working the last sl st into the joining st. (5 petals)
Each petal has 5 stitches along its chain and narrows from the dc down to a sl st point. Fasten off with a 10 in (25.4 cm) tail for sewing. Each flower is about 1.5 in (3.8 cm) across.
Sew 6 gold beads in a tight cluster over the center ring with cream thread.
Holly Leaves (Make 4)
With CC2, ch 9. Number the working chains 2–9, counting from the hook. Ch 9 is the first chain you made, and it becomes the leaf point.
Side 1: Sl st in 2nd ch from hook, sc in next ch, hdc in next ch, picot, dc in next 2 ch, picot, hdc in next ch, sc in next ch.
Point: In the last ch, work (sc, point picot, sc).
Side 2: Turn the leaf and work along the other side of the foundation chain: sc in next ch, hdc in next ch, picot, dc in next 2 ch, picot, hdc in next ch, sc in next ch, sl st in last ch.
Fasten off with an 8 in (20.3 cm) tail. Each leaf has 2 picot lobes on each side plus a point, and is about 1.25 in (3.2 cm) long.
Border
The border is worked in MC around the whole letter in two rounds. Round 1 is single crochet. Round 2 is a back-loop slip stitch that makes the raised, corded outline.
Border gauge: Work 1 sc in each stitch along the top and bottom edges (5 per inch), and 1 sc in each row-end along the sides (6 per inch). This matches your fabric gauge exactly, so the edge lies flat.
Corner rules: Each outer corner gets 3 sc in the corner stitch. Don’t work a separate stitch into the row-end next to a corner stitch. Inner corners (where the crossbar meets the stem, and both sides of the notch) get no extra stitches: just work 1 sc into each stitch or row-end as usual.
Round 1: With the RS facing, join MC in the top right corner stitch of Row 28. Work around counterclockwise:
- Top of crossbar: 3 sc in corner st, sc in next 11 sts, 3 sc in last st. (17)
- Left end of crossbar: 1 sc in each row-end of Rows 27 and 26. (2)
- Lower left crossbar corner: 3 sc in the base of the last fsc. (3)
- Underside of left overhang: sc in the base of the next 2 fsc. (2)
- Left side of stem: 1 sc in each row-end of Rows 24 down to 7. (18)
- Notch floor: sc in each of the 2 unworked sts of Row 6. (2)
- Right side of tip: 1 sc in each tip row-end. (4)
- Top of tip: 2 sc in each of the 3 sts. (6)
- Left side: 1 sc in each tip row-end (4), then 1 sc in each row-end of Rows 6 down to 2 (5). (9)
- Bottom: 3 sc in the first foundation ch, sc in next 8 ch, 3 sc in last ch. (14)
- Right side: 1 sc in each row-end of Rows 2 up to 24. (23)
- Underside of right overhang: sc in the next 2 ch, 3 sc in the last ch. (5)
- Right end of crossbar: 1 sc in each row-end of Rows 26 and 27. (2)
Sl st to the first sc to join. Total: 107 sc.
Round 2: Ch 1, sl st in BLO of each sc around. (107 sl sts) Join and fasten off.
Why the math works: The segment counts add up: 17 + 2 + 3 + 2 + 18 + 2 + 4 + 6 + 9 + 14 + 23 + 5 + 2 = 107. Every edge gets one stitch per stitch or row, so it lies flat. Each 3-sc corner adds the 2 stitches needed to turn a square corner. The top of the tip gets 6 sc over 3 stitches, so it curves smoothly. One round of sc adds about 0.2 in (0.5 cm) to each edge. That turns 2.8 in (7.1 cm) into 3.2 in (8.1 cm), and 4.7 in (11.9 cm) into 5.1 in (13.0 cm).
Final Blocking
- Weave in all MC ends.
- Mist the letter lightly until it is damp but not soaked.
- Pin it RS up on the mat. Pin the crossbar first, straight and 3.0 in (7.6 cm) wide.
- Pin the stem straight down, keeping it 1.8 in (4.6 cm) wide.
- Ease the bowl to 3.2 in (8.1 cm) wide, and use pins to round the lower corners and the tip.
- Check the total height: 5.1 in (13.0 cm).
- Block the poinsettias and leaves the same way, pinning out each petal and leaf point.
- Let everything dry completely before sewing.
Assembly: Sew the upper poinsettia onto the stem with its center about 2 in (5.1 cm) below the top edge. Place it a little right of center so the petals overlap the right edge. Tuck one holly leaf behind its upper right, pointing toward the crossbar, and one behind its lower right. Sew the lower poinsettia onto the bowl, with its center about 0.75 in (1.9 cm) above the bottom edge. Add one leaf to its left, pointing toward the tip, and one to its right. Sew the red beads in 4 clusters of 3: above the top leaf, between the two flowers, at the lower left of the bowl, and below the lower flower. Fold the gold cord in half and knot the ends. Stitch the knot behind the center of the crossbar so the loop stands 3 in (7.6 cm) tall.
Final Quality-Control Checklist
- Size is 3.2 in (8.1 cm) x 5.1 in (13.0 cm).
- The crossbar sticks out the same amount on both sides of the stem.
- Stem edges are straight and parallel.
- The notch between tip and stem is open and clear.
- The border has exactly 107 stitches, with no gaps at the corners.
- The corded edge is on the RS all the way around.
- Petals and leaf points are crisp and pinned flat.
- Beads are secure and don’t wobble.
- The ornament hangs straight from its loop.
Troubleshooting
Letter is too wide: Your gauge is loose. Go down one hook size and start again.
Stem leans or twists: Count 7 sts on every row. Missing the first or last stitch is the usual cause.
Border ruffles: You are adding stitches. Recount each segment against the list above.
Border pulls in: Loosen your tension, or work the sl st round with a hook one size larger.
Corners look pointed: Ease them into a curve while blocking and pin firmly.
Petals curl: Dampen them again and pin each point until dry.
Care
Spot clean with cool water and mild soap, press out the moisture and dry flat. Store flat in tissue paper to protect the petals and beads.
Final Notes
Everything rests on a short chain of measurements. A gauge of 5 sc and 6 rows = 1 in (2.5 cm) gives a bowl 2.8 in (7.1 cm) wide after Row 6. The stem takes you to 4 in (10.2 cm) at Row 24, and the crossbar finishes the body at 4.7 in (11.9 cm). The 107-stitch border adds 0.2 in (0.5 cm) to each edge, for a finished ornament of 3.2 in (8.1 cm) x 5.1 in (13.0 cm).
Happy crocheting!