
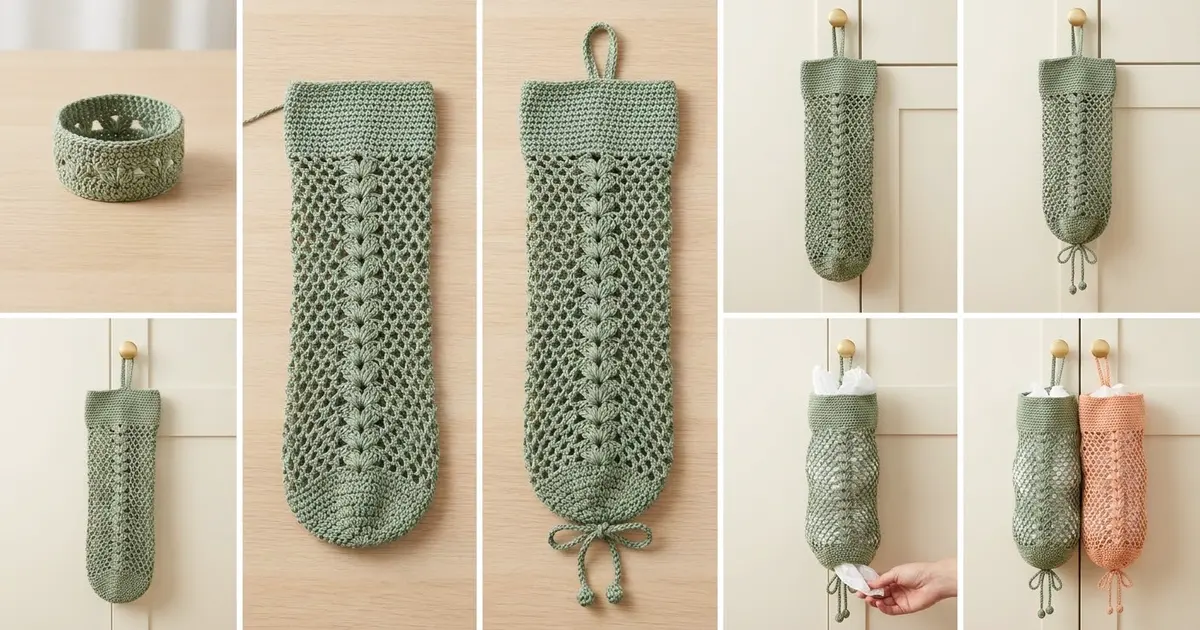
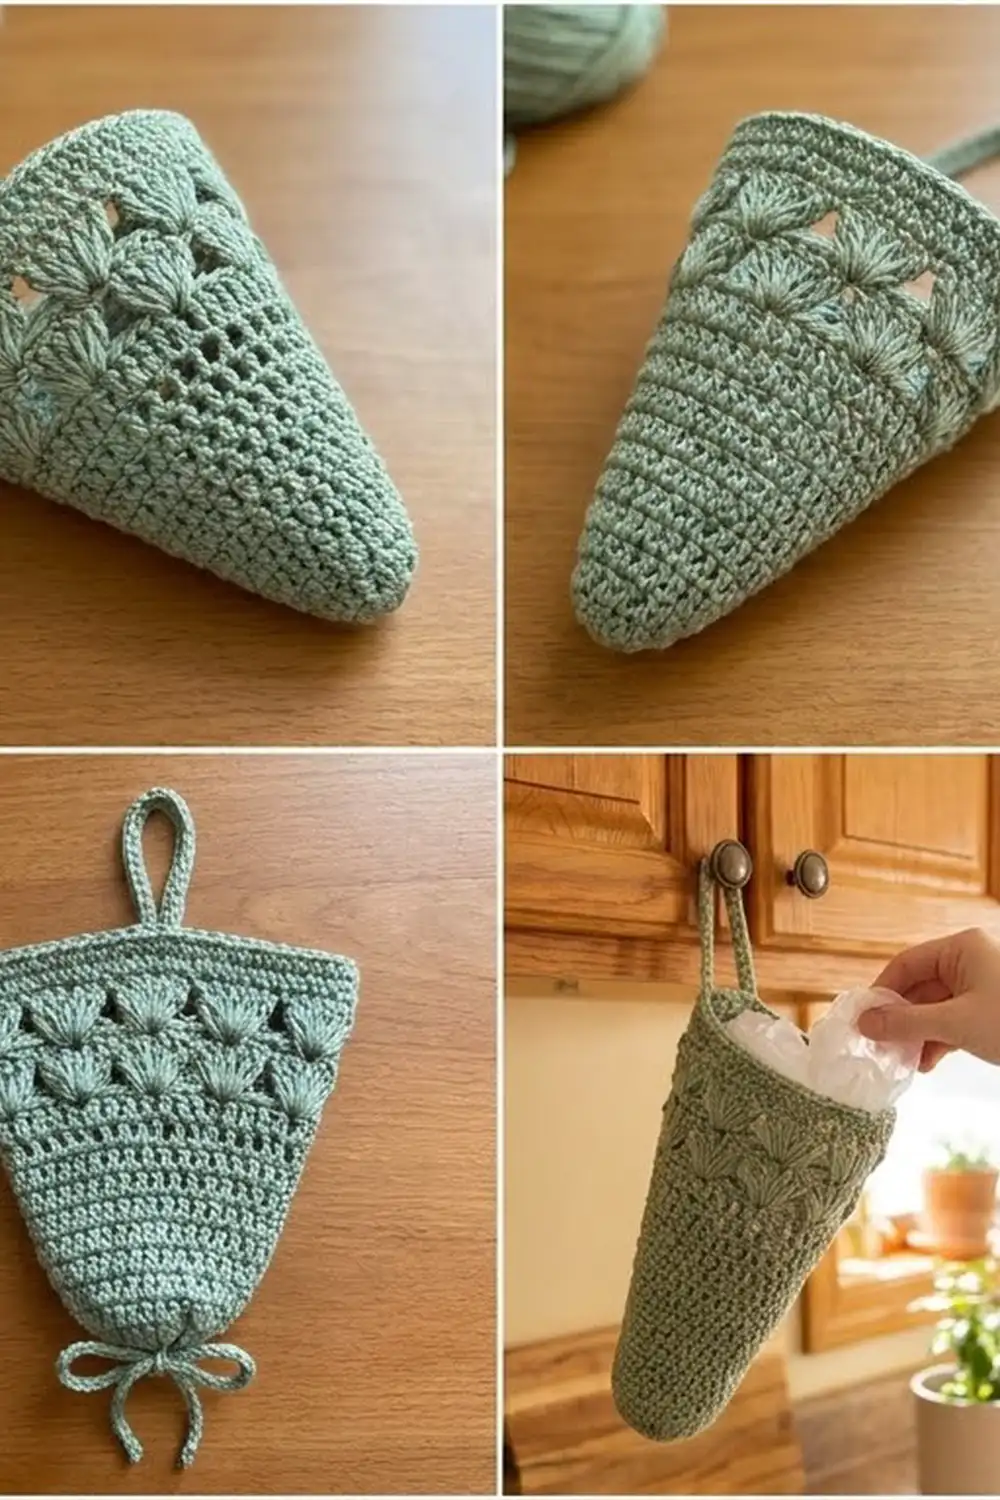
This cone-shaped bag holder keeps plastic grocery bags neat and easy to reach. You push bags in at the wide top and pull them out one at a time through the small opening at the bottom. It hangs from a cabinet knob, hook, or door handle by a sturdy crocheted strap.
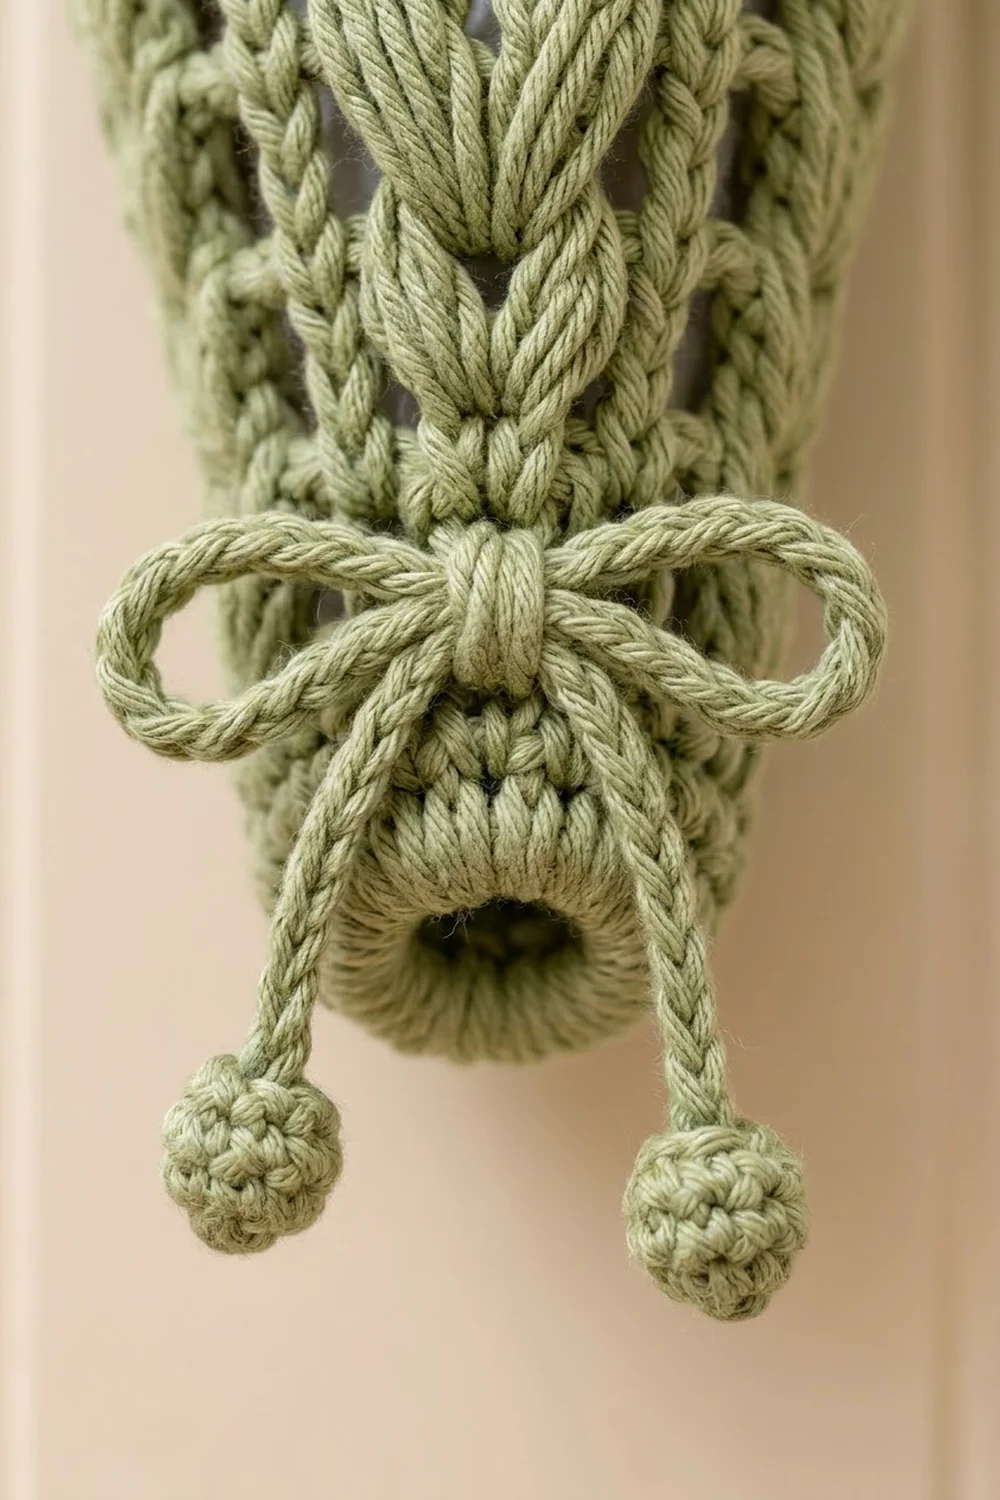
The design pairs raised leaf columns made of stacked clusters with airy filet-mesh panels, so the bags show softly through the lattice. The sample is sage green, and the same holder also looks lovely in peach. A chain cord with tiny ball ends ties into a bow just above the bottom ring. It’s purely decorative and finishes the cone nicely.
The pattern uses US crochet terms. The finished holder is 15.75 in (40.0 cm) long without the strap, 10.5 in (26.7 cm) wide flat at the top, and 3 in (7.6 cm) wide flat at the bottom ring.
Construction is seamless. You start with a ring of single crochet, then work the leaf-and-mesh body in joined rounds, adding one mesh post to each panel every third round to shape the cone. A solid single-crochet band finishes the top, and then you add the strap, cord, and ball ends.
Finished Size and Construction
- Finished size: 15.75 in (40.0 cm) long; 10.5 in (26.7 cm) flat width at top; top circumference 21 in (53.3 cm)
- Skill level: Intermediate
- Terminology: US crochet terms
- Yarn weight: Aran / heavy worsted (#4 medium) cotton or cotton blend
- Hook: 5.0 mm (H-8)
- Number of pieces: 1 body, plus a strap, cord, and 2 balls attached afterward
- Layout: 4 leaf columns alternating with 4 mesh panels around the cone
- Body size before top band: 14.5 in (36.8 cm) long; 84 stitches around
- Top band (border) depth: 1.25 in (3.2 cm), 5 rounds of sc
Materials
Yarn: Use a smooth, firmly plied cotton or cotton blend. Cotton holds the cone’s shape and doesn’t stretch out under the weight of the bags. Avoid fuzzy yarns, because they hide the leaf texture.
- Sage green (main color): 150 g, about 270 m
- Optional colorway: Peach, the same 150 g, about 270 m, if you want a matching second holder
These quantities include a margin of about 15% for your gauge swatch and tension differences.
Tools:
– 5.0 mm (H-8) crochet hook
– 4 stitch markers (1 in a contrasting color for the start of the round)
– Tapestry needle
– Scissors
– Tape measure
– Small amount of fiberfill or yarn scraps for the balls
– Rust-proof pins and a rolled towel for blocking
Abbreviations (US Terms)
- ch – chain
- sl st – slip stitch
- sc – single crochet
- dc – double crochet
- dc2tog – double crochet 2 together
- sc2tog – single crochet 2 together
- sp – space
- st(s) – stitch(es)
- sk – skip
- rnd – round
Special stitches:
- Cluster (cl): *Yarn over, insert hook in the indicated st or sp, pull up a loop, yarn over, pull through 2 loops; repeat from * 2 more times in the same place (4 loops on hook), yarn over, pull through all 4 loops.
- Beginning cluster (beg cl): Ch 2, then dc2tog in the same st or sp. This counts as 1 cl.
- Leaf: (Cl, ch 2, cl) in the same st or sp. Each Leaf counts as 4 sts: cl, 2 ch, cl. When you stack Leaves round after round, they form the raised chevron columns.
Counting rule: Every cl, dc, and ch counts as 1 st. A mesh panel with n posts is ch 1, (dc, ch 1) n times, or 2n + 1 sts. One full repeat is Leaf + mesh panel = 2n + 5 sts, so a round has 8n + 20 sts.
Gauge and Checkpoints
Gauge:
– 16 sc and 16 rnds = 4 in (10.2 cm)
– In the leaf-and-mesh pattern, 16 sts = 4 in (10.2 cm), and 8 rnds = 5 in (12.7 cm), so each pattern round is 0.625 in (1.6 cm) tall.
Because the holder is one continuous piece, use the first rounds as your test. Work through Rnd 11, then stop and measure before going further.
Checkpoints (measured flat):
– After Rnd 3: 3 in (7.6 cm) wide; 0.75 in (1.9 cm) tall. The bottom opening is about 1.9 in (4.8 cm) across.
– After Rnd 4: 4.5 in (11.4 cm) wide (36 sts, 9 in / 22.9 cm around).
– After Rnd 11: 6.5 in (16.5 cm) wide (52 sts, 13 in / 33.0 cm around); 5.75 in (14.6 cm) tall.
– After Rnd 19: 9.5 in (24.1 cm) wide (76 sts); 10.75 in (27.3 cm) tall.
– After Rnd 25: 10.5 in (26.7 cm) wide (84 sts, 21 in / 53.3 cm around); 14.5 in (36.8 cm) tall.
If your piece is too big: Change to a 4.5 mm hook and start again. If only the height is off, check that you aren’t pulling up tall loops in the clusters.
If your piece is too small: Change to a 5.5 mm hook. A slightly small cone still works, but the bags will be harder to stuff in.
Body
Work in joined rounds with the right side facing you throughout. Don’t turn.
Rnd 1 (bottom ring): Ch 24, then join with a sl st to the first ch to form a ring, taking care not to twist it. Ch 1, sc in each ch around, then join to the first sc. (24 sc)
Rnds 2–3: Ch 1, sc in each st around, then join. (24 sc)
Checkpoint: the ring measures 3 in (7.6 cm) flat and 0.75 in (1.9 cm) tall.
Rnd 4 (setup round): Beg cl in the first sc, ch 2, cl in the same sc (first Leaf made), ch 1, sk 1 sc, dc in the next sc, ch 1, sk 1 sc, dc in the next sc, ch 1, sk 1 sc. Leaf in the next sc, ch 1, sk 1 sc, dc in the next sc, ch 1, sk 1 sc, dc in the next sc, ch 1, sk 1 sc; repeat from * 2 more times. Join with a sl st to the top of the beg cl. (36 sts: 4 Leaves of 4 sts + 4 mesh panels of 5 sts; each panel has 2 posts)*
Each repeat uses 6 sc (24 ÷ 4). Place a marker in the ch-2 space of each Leaf so the columns are easy to follow.
Rnd 5 (plain round): Sl st into the first ch-2 sp. Beg cl in that sp, ch 2, cl in the same sp, ch 1, (dc in the next dc, ch 1) 2 times. Leaf in the next ch-2 sp, ch 1, (dc in the next dc, ch 1) 2 times; repeat from * 2 more times, then join to the beg cl. (36 sts)*
On plain rounds, the ch 1 right after each Leaf goes over the ch-1 space below it, and every dc goes into a dc. That keeps the posts lined up in straight vertical ladders.
Rnd 6 (increase round): Sl st into the first ch-2 sp. Beg cl, ch 2, cl in the same sp, ch 1, dc in the next ch-1 sp, ch 1, (dc in the next dc, ch 1) 2 times. Leaf in the next ch-2 sp, ch 1, dc in the next ch-1 sp, ch 1, (dc in the next dc, ch 1) 2 times; repeat from * 2 more times, then join. (44 sts; each panel has 3 posts)*
On every increase round, you add one new post to each mesh panel by working a dc into the first ch-1 space after the Leaf. That adds 2 sts per panel and 8 sts per round.
Rnds 7–8: Repeat Rnd 5, working (dc in the next dc, ch 1) 3 times in each panel. (44 sts)
Continue the same way: on each increase round, work the extra dc in the first ch-1 space of each panel. On plain rounds, work (dc in the next dc, ch 1) once for each post in the panel.
| Rounds | Type | Posts per panel (n) | Sts per round |
|---|---|---|---|
| 9 | Increase | 4 | 52 |
| 10–11 | Plain | 4 | 52 |
| 12 | Increase | 5 | 60 |
| 13–14 | Plain | 5 | 60 |
| 15 | Increase | 6 | 68 |
| 16–17 | Plain | 6 | 68 |
| 18 | Increase | 7 | 76 |
| 19–20 | Plain | 7 | 76 |
| 21 | Increase | 8 | 84 |
| 22–25 | Plain | 8 | 84 |
Each count is that round’s complete total. Check it with 8n + 20: for example, Rnd 21 is 8 × 8 + 20 = 84.
Checkpoint after Rnd 25: the cone measures 14.5 in (36.8 cm) tall from the bottom edge and 10.5 in (26.7 cm) flat across the top. The body has 22 pattern rounds (Rnds 4–25) × 0.625 in = 13.75 in (34.9 cm), plus the 0.75 in (1.9 cm) ring.
Top Band (Border)
The top band is the border of this piece. It closes up the lattice into a solid rim that holds the cone open and supports the strap.
Border gauge: 16 sc = 4 in (10.2 cm); 4 rnds = 1 in (2.5 cm).
Rnd 26 (conversion round): Ch 1. In each repeat, work 1 sc in each cl, 2 sc in the ch-2 sp of each Leaf, 1 sc in each dc, and 1 sc in each ch-1 sp. Join to the first sc.
Count per repeat:
– Leaf section: 2 cl + 2 sc in the ch-2 sp = 4 sc
– Mesh panel: 8 posts + 9 ch-1 sps = 17 sc
– Each repeat: 21 sc. Round total: 21 × 4 = 84 sc
This is a 1-for-1 conversion: 84 sts are worked as 84 sc, with nothing added or skipped.
Rnds 27–30: Ch 1, sc in each st around, then join. (84 sc) Fasten off after Rnd 30, leaving a 6 in (15.2 cm) tail.
Why the math works: Rnd 25 has exactly 84 sts at 4 sts per inch, which is 21 in (53.3 cm) around. Rnd 26 turns each of those sts into exactly 1 sc, at the same 4 sc per inch. Because the circumference stays at 21 in (53.3 cm), the rim sits straight and doesn’t ripple or pull in. Five rounds at 4 rounds per inch add 1.25 in (3.2 cm), bringing the total length to 15.75 in (40.0 cm).
Hanging Strap
Flatten the cone so a mesh panel is centered at the back. Count the 84 rim sts and mark the center 8 sts of the back panel.
Row 1: With the right side facing, join yarn in the first marked st. Ch 1, sc in the same st and in the next 3 sts, then turn. (4 sc)
Rows 2–32: Ch 1, sc in each st across, then turn. (4 sc)
The strap is now 8 in (20.3 cm) long and 1 in (2.5 cm) wide. Fasten off, leaving a 12 in (30.5 cm) tail. Fold the strap into a loop without twisting it, then whipstitch the last row to the remaining 4 marked sts, through both loops. The finished loop stands about 4 in (10.2 cm) above the rim.
Bow Cord and Ball Ends
Cord: Ch 90, then sl st in the back bump of the 2nd ch from the hook and in each ch across. (89 sl sts) The cord measures about 22 in (55.9 cm). Fasten off.
Starting at the center front Leaf, weave the cord in and out of the ch-1 spaces of Rnd 4 all the way around. Bring both ends out on either side of the front Leaf. Tie a bow, leaving the opening relaxed. Don’t cinch it, because the bags need to pass through freely.
Balls (make 2):
– Rnd 1: Make a magic ring, then work 6 sc into it. (6 sc)
– Rnd 2: Work 2 sc in each st around. (12 sc)
– Rnd 3: Sc in each st around. (12 sc)
– Rnd 4: Sc2tog 6 times. (6 sts)
Stuff the ball lightly, then close the hole and fasten off. Each ball is about 0.5 in (1.3 cm) across. Sew one ball firmly to each cord end and hide the tails inside the balls.
Final Blocking
- Weave in all ends along the posts or inside the sc band, where they won’t show through the mesh.
- Wet the holder in cool water and squeeze gently. Don’t wring it.
- Roll it in a towel to remove most of the water.
- Stuff a rolled towel or a cone of plastic bags inside so the cone keeps its shape.
- Straighten each mesh ladder so the posts run vertically, and pinch each Leaf column into a neat chevron.
- Flatten it to measure: 10.5 in (26.7 cm) at the top, 3 in (7.6 cm) at the bottom, and 15.75 in (40.0 cm) long.
- Let it dry completely, hanging from the strap or lying flat.
Final Quality-Control Checklist
- Rnd 25 counts 84 sts, and each panel has 8 posts.
- All 4 Leaf columns run straight up without spiraling.
- The mesh posts line up vertically in each panel.
- The top band lies flat and measures 21 in (53.3 cm) around.
- The strap is centered at the back and isn’t twisted.
- The bottom ring opening is about 1.9 in (4.8 cm) across and isn’t cinched closed.
- Both balls are sewn on securely.
- All ends are hidden.
Troubleshooting
The Leaf columns lean or spiral. You’re probably working the beg cl into the join instead of the ch-2 space. Always sl st into the ch-2 space first.
The round count is off. Check each panel against 2n + 1. A missing ch 1 after the Leaf is the most common error.
The top band flares. Your sc tension is looser than your pattern tension. Work Rnds 27–30 with a 4.5 mm hook.
The top band pulls in. Make sure you worked 2 sc in each ch-2 space on Rnd 26.
The clusters look flat. Pull each loop up to its full height before closing the cluster.
The cone is too short. Add 1 plain round of 84 sts before Rnd 26. It adds 0.625 in (1.6 cm).
Care
Hand wash in cool water and lay flat or hang to dry. Cotton can be reshaped while it’s damp, so stuff the cone again with a towel if it softens.
Final Notes
The measurements build in a simple chain. The 24 sc bottom ring measures 3 in (7.6 cm) flat. Rnd 4 sets 4 Leaves and 4 mesh panels at 36 sts. Six increase rounds add 8 sts each, for 84 sts and 21 in (53.3 cm) around. The 22 pattern rounds stand 13.75 in (34.9 cm) tall. Finally, the 84 sc band adds 1.25 in (3.2 cm), for a total length of 15.75 in (40.0 cm). If you check your counts at each checkpoint, the cone will hang straight and hold a whole stash of bags.
Happy crocheting!