

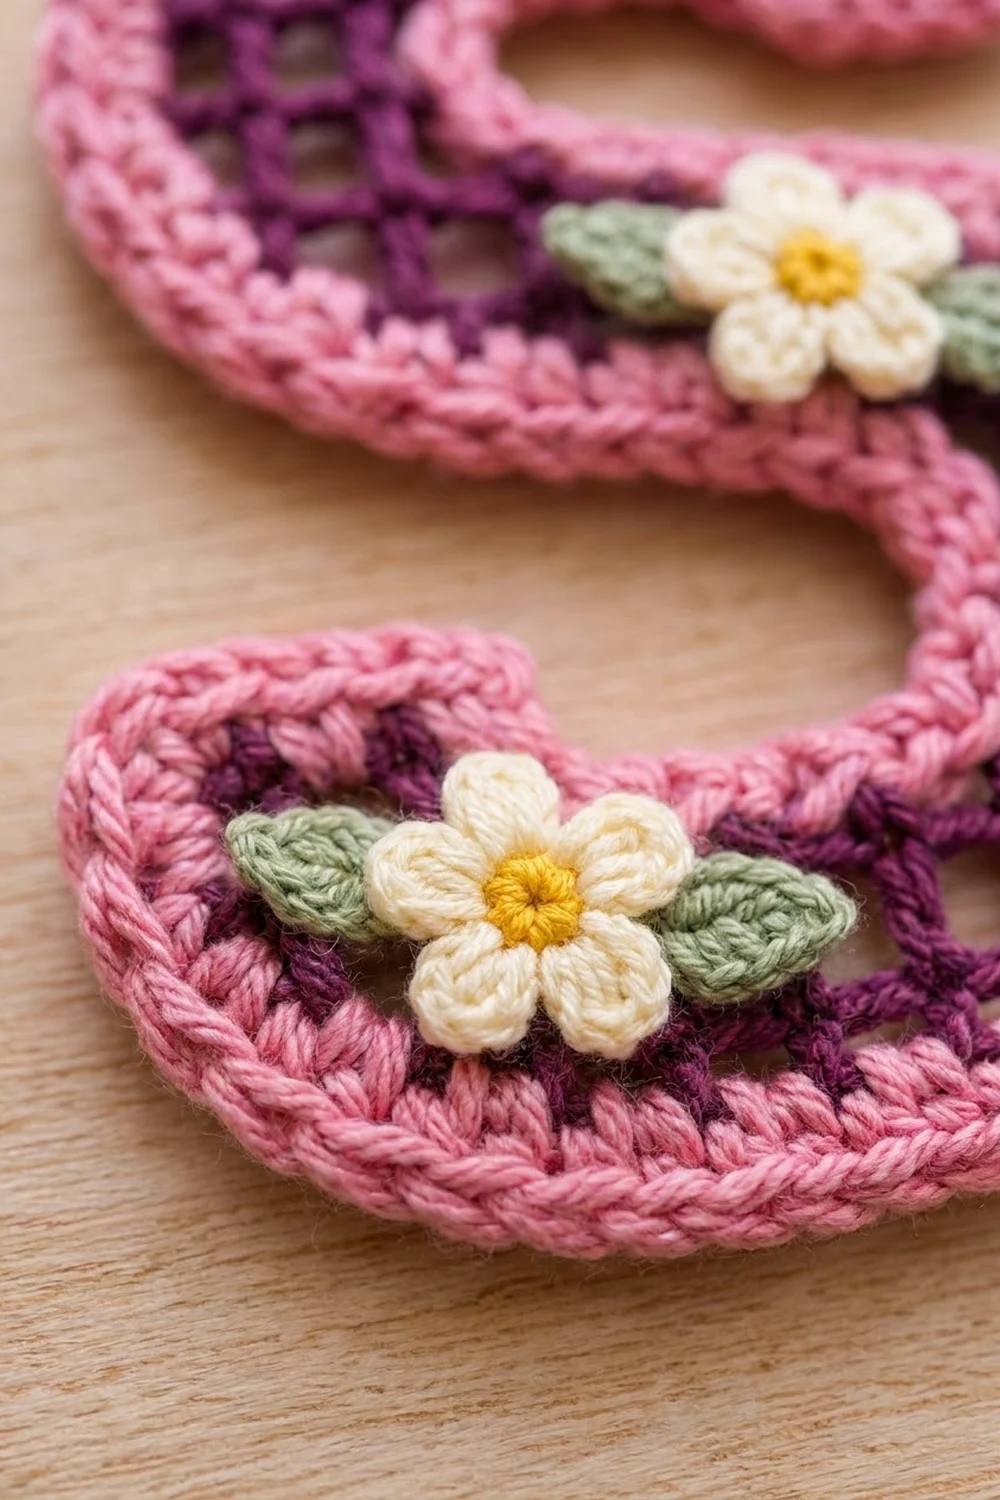
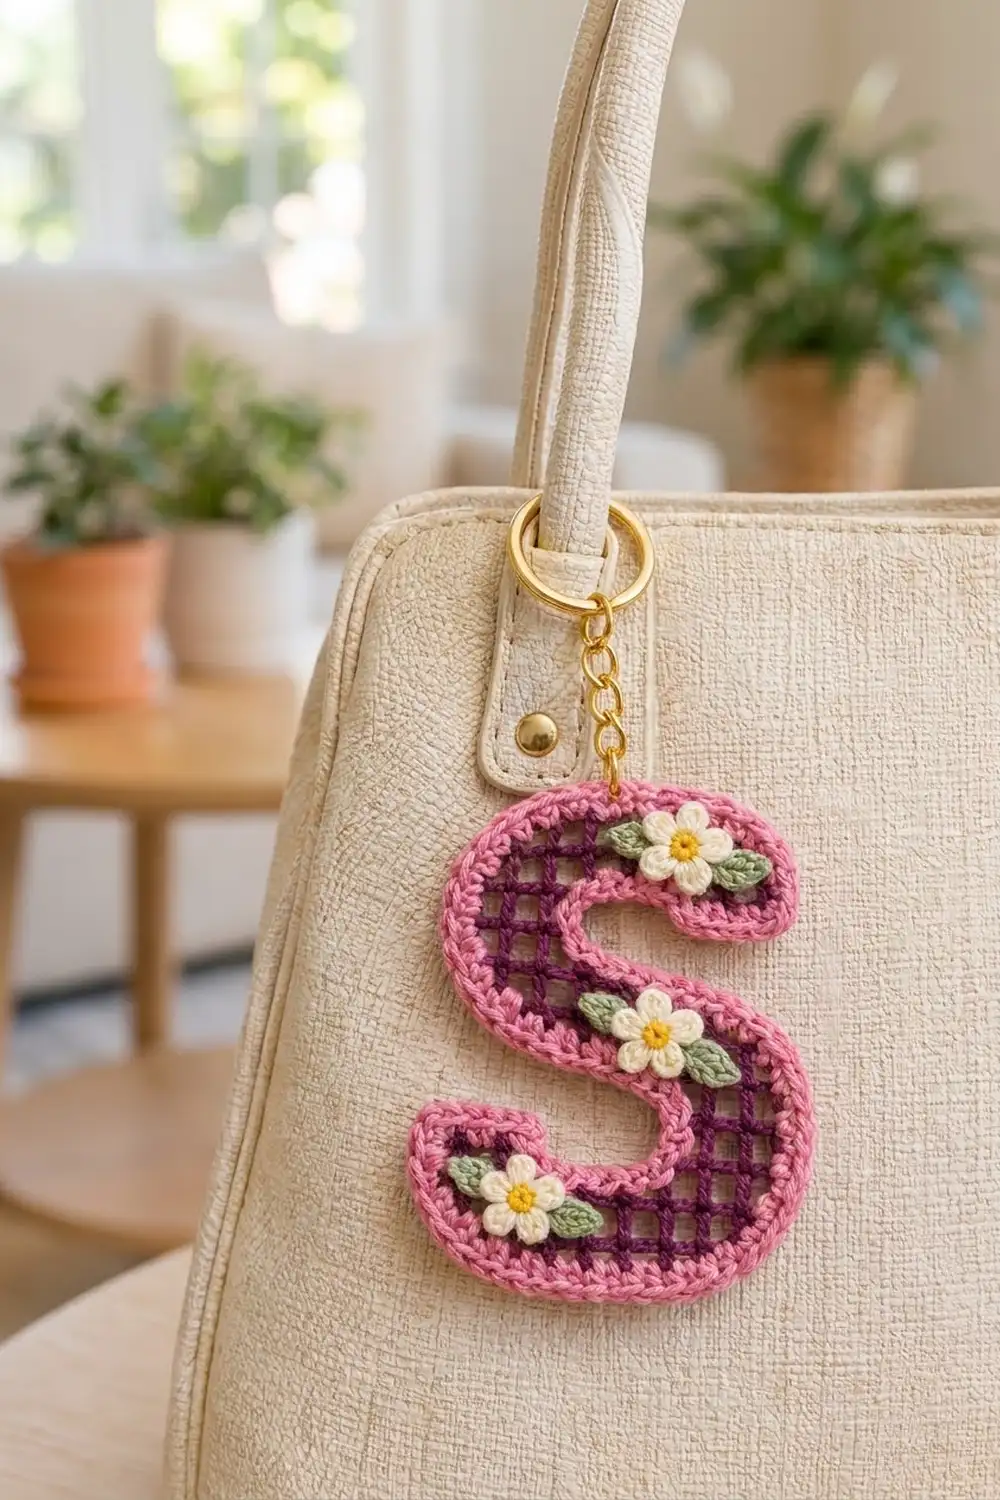
The Posy Mesh Letter S is a small, sturdy bag charm. It’s an open filet grid in deep plum, framed by a plump pink single crochet outline, with three tiny cream flowers that have yellow centers and sage green leaves. A gold split ring and short chain turn it into a keychain or handbag tag.
From a distance the look is crisp and graphic. Up close it’s soft and cottage-like. The plum grid shows the letter’s structure, the pink border rounds off every step in the mesh, and the flowers add a touch of spring garden.
This pattern uses US crochet terms. The finished letter is 2.83 in (7.2 cm) wide and 4.5 in (11.4 cm) tall, not counting the hardware.
The construction is easy to follow. First you crochet one filet mesh piece in 12 rows, adding and removing squares to build the S shape. Next you make three flowers and six leaves and sew them onto the mesh. Then you work two rounds of single crochet around the whole outline and attach the ring.
Finished Size and Construction
- Finished size: 2.83 in (7.2 cm) wide x 4.5 in (11.4 cm) tall
- Skill level: Intermediate (filet increases and decreases, working around an irregular edge)
- Terminology: US crochet terms
- Yarn weight: Sport (2), cotton or cotton blend
- Hook: 3.0 mm (US C/2–D/3)
- Number of pieces: 1 letter, plus 3 flower and 6 leaf appliqués
- Layout: single piece, no joining
- Mesh grid: 7 squares wide x 12 rows tall, 55 squares total
- Size before border: 2.33 in (5.9 cm) wide x 4 in (10.2 cm) tall
- Border depth: 0.25 in (0.6 cm), 2 rounds of single crochet
Materials
Pick a smooth cotton sport yarn, either mercerized or soft. Cotton keeps the open squares crisp and stands up to being handled on a bag. Avoid fuzzy yarns, because they blur the grid.
- Color A, plum (mesh): 4 g, about 12 m
- Color B, pink (border): 4 g, about 12 m
- Color C, cream (petals): 2 g, about 6 m
- Color D, yellow (flower centers): 1 g, about 3 m
- Color E, sage green (leaves): 2 g, about 6 m
All quantities include a margin for swatching and weaving in ends.
Tools:
- 3.0 mm (US C/2–D/3) crochet hook
- Tapestry needle
- Gold split key ring, 1 in (2.5 cm)
- Gold chain with jump ring, about 1.5 in (3.8 cm) long
- 2 pairs of small flat-nose pliers
- Rust-proof pins and a blocking mat
- Scissors and a ruler
Abbreviations (US Terms)
- ch – chain
- sl st – slip stitch
- sc – single crochet
- hdc – half double crochet
- dc – double crochet
- sk – skip
- sp – space
- sc2tog – single crochet 2 together
- sc3tog – single crochet 3 together
- tch – turning chain
- RS / WS – right side / wrong side
Mesh square: a dc post, ch 1, and the next dc post. Squares next to each other share a dc. A row of n squares has n + 1 posts and n ch-1 sps, for 2n + 1 stitches.
Beginning increase (k squares): At the end of the previous row, ch 2k + 3 and turn. Dc in 6th ch from hook, then [ch 1, sk next ch, dc in next ch] across the new chain. Finish with ch 1, sk last ch, dc in the edge dc of the previous row. For 1 square, ch 5 and dc directly into the edge dc.
Gauge and Checkpoints
Mesh gauge: 6 squares and 6 rows = 2 in (5.1 cm). Each square is 0.33 in (0.8 cm) wide and tall.
Border gauge: 6 sc = 1 in (2.5 cm); 8 rounds = 1 in (2.5 cm).
The letter is small enough to be its own test piece, so make it first. Check it at these points:
- After Row 2: 7 squares = 2.33 in (5.9 cm) wide; 2 rows = 0.67 in (1.7 cm) tall.
- After Row 6: 2 in (5.1 cm) tall.
- After Row 12: 2.33 in (5.9 cm) x 4 in (10.2 cm).
- After border Round 1: 2.58 in (6.6 cm) x 4.25 in (10.8 cm).
- After border Round 2: 2.83 in (7.2 cm) x 4.5 in (11.4 cm).
If Row 2 comes out wider than 2.33 in (5.9 cm), switch to a 2.75 mm hook. If it’s narrower, try a 3.25 mm hook. If only the height is off, change how far you pull up each dc loop and keep the same hook. Every later count is based on the 0.33 in (0.8 cm) square, so matching it early keeps the border flat.
Letter S Mesh
The chart shows which squares each row covers. Columns are numbered 1 to 7 from left to right with the RS facing you. RS rows run right to left, and WS rows run left to right.
Row 12:  . X X X X X .    cols 2-6  (5 squares)
Row 11:  . X X X X X X    cols 2-7  (6)
Row 10:  X X X . . . .    cols 1-3  (3)
Row 9:   X X X . . . .    cols 1-3  (3)
Row 8:   X X X . . . .    cols 1-3  (3)
Row 7:   X X X X X X .    cols 1-6  (6)
Row 6:   X X X X X X X    cols 1-7  (7)
Row 5:   . . . . X X X    cols 5-7  (3)
Row 4:   . . . . X X X    cols 5-7  (3)
Row 3:   . . . . X X X    cols 5-7  (3)
Row 2:   X X X X X X X    cols 1-7  (7)
Row 1:   . X X X X X X    cols 2-7  (6)
Work all rows in Color A.
Row 1 (RS): Ch 16. Dc in 6th ch from hook (the skipped chs count as the edge post and the first ch-1 sp), then [ch 1, sk next ch, dc in next ch] 5 times. (6 squares: 7 posts + 6 ch-1 sps = 13 sts)
Increase for Row 2: Ch 5, turn.
Row 2 (WS): Dc in last dc of Row 1 (1 new square), [ch 1, sk ch-1 sp, dc in next dc] 5 times, ch 1, sk ch-1 sp, dc in top of beginning chain. (7 squares: 1 new + 6 = 15 sts)
Row 3 (RS): Ch 4 (counts as dc and ch 1), turn, sk first ch-1 sp, dc in next dc, [ch 1, sk ch-1 sp, dc in next dc] 2 times. Leave the other 4 squares unworked. (3 squares, cols 7–5 = 7 sts)
Row 4 (WS): Ch 4, turn, sk first ch-1 sp, dc in next dc, ch 1, sk ch-1 sp, dc in next dc, ch 1, sk ch-1 sp, dc in 3rd ch of tch. (3 squares = 7 sts)
Row 5 (RS): Repeat Row 4. (3 squares = 7 sts)
Increase for Row 6: Ch 11, turn.
Row 6 (WS): Dc in 6th ch from hook, [ch 1, sk next ch, dc in next ch] 2 times, ch 1, sk last ch, dc in edge dc of Row 5 (4 new squares). [Ch 1, sk ch-1 sp, dc in next dc] 2 times, ch 1, sk ch-1 sp, dc in 3rd ch of tch. (7 squares: 4 new + 3 = 15 sts)
Row 7 (RS): Turn. Sl st in first dc, sl st in ch-1 sp, sl st in next dc (1 square decreased). Ch 4, sk next ch-1 sp, dc in next dc, [ch 1, sk ch-1 sp, dc in next dc] 4 times, ch 1, sk last ch-1 sp, dc in top of beginning chain. (6 squares, cols 6–1 = 13 sts)
Row 8 (WS): Ch 4, turn, sk first ch-1 sp, dc in next dc, [ch 1, sk ch-1 sp, dc in next dc] 2 times. Leave the rest unworked. (3 squares, cols 1–3 = 7 sts)
Rows 9–10: Repeat Row 4. (3 squares = 7 sts each)
Increase for Row 11: Ch 11, turn.
Row 11 (RS): Dc in 6th ch from hook, [ch 1, sk next ch, dc in next ch] 2 times, ch 1, sk last ch, dc in edge dc of Row 10 (4 new squares, cols 7–4). [Ch 1, sk ch-1 sp, dc in next dc] 2 times. Leave the last square unworked. (6 squares, cols 7–2 = 13 sts)
Row 12 (WS): Ch 4, turn, sk first ch-1 sp, dc in next dc, [ch 1, sk ch-1 sp, dc in next dc] 4 times. Leave the last square unworked. (5 squares, cols 2–6 = 11 sts)
Fasten off and weave in ends. Check your total: 6 + 7 + 3 + 3 + 3 + 7 + 6 + 3 + 3 + 3 + 6 + 5 = 55 squares.
Flowers and Leaves
Flower (make 3):
Round 1: With Color D, make a magic ring, ch 1, work 5 sc in the ring, and sl st to first sc. (5 sc) Fasten off D.
Round 2: Join Color C in any sc. [(Sl st, ch 2, 2 dc, ch 2, sl st) in same sc, move to next sc] 5 times. (5 petals) Fasten off, leaving a 6 in (15.2 cm) tail.
Each flower is about 0.75 in (1.9 cm) across.
Leaf (make 6): With Color E, ch 5. Sc in 2nd ch from hook, hdc in next 2 ch, sc in last ch. Ch 1, rotate, and work along the other side of the foundation: sc in first ch, hdc in next 2 ch, sc in last ch. Sl st to first sc. (8 sts) Fasten off, leaving a tail. Each leaf is about 0.5 in (1.3 cm) long.
Placement: Sew the flowers on before the border, while the mesh edges are still easy to see.
- Flower 1: right half of the top bar (Rows 11–12, cols 5–6)
- Flower 2: right end of the middle bar (Rows 6–7, cols 5–6)
- Flower 3: left end of the bottom bar (Rows 1–2, cols 2–3)
Tuck 2 leaves under each flower, one on each side, pointing outward along the bar. Sew each leaf down at its base and tip. Then sew around the flower’s yellow center with small stitches that catch the mesh posts and chains. Knot all ends and weave them in on the WS.
Border
Work every border round in Color B, with the RS facing, going counterclockwise around the letter.
Border gauge check: 6 sc = 1 in (2.5 cm), so exactly 2 sc fit along each 0.33 in (0.8 cm) side of a square.
Unit-edge rule: Each square side on the outline is one “unit edge,” and each unit edge gets 2 sc. On row ends, work 2 sc around the dc post. Along the top or bottom of a square, work 1 sc in the ch-1 sp and 1 sc in the dc beside it.
Outer corners (12): Work 1 extra sc into the corner point. This is the corner sc.
Inner corners (8): Work the last sc of one edge and the first sc of the next edge together as sc2tog.
Round 1: Join Color B at the bottom-left corner of Row 1 and ch 1. Work the segments below in order. Add a corner sc at each corner marked (O), and sc2tog at each corner marked (I):
- Bottom of Row 1: 6 units, 12 sc (O)
- Right side, Rows 1–6: 6 units, 12 sc (O)
- Top of Row 6, col 7: 1 unit, 2 sc (I)
- Right side, Row 7: 1 unit, 2 sc (O)
- Top of Row 7, cols 6–4: 3 units, 6 sc (I)
- Right side, Rows 8–10: 3 units, 6 sc (I)
- Underside of Row 11, cols 4–7: 4 units, 8 sc (O)
- Right side, Row 11: 1 unit, 2 sc (O)
- Top of Row 11, col 7: 1 unit, 2 sc (I)
- Right side, Row 12: 1 unit, 2 sc (O)
- Top of Row 12: 5 units, 10 sc (O)
- Left side, Rows 12–11: 2 units, 4 sc (I)
- Top of Row 10, col 1: 1 unit, 2 sc (O)
- Left side, Rows 10–6: 5 units, 10 sc (O)
- Underside of Row 6, cols 1–4: 4 units, 8 sc (I)
- Left side, Rows 5–3: 3 units, 6 sc (I)
- Top of Row 2, cols 4–1: 4 units, 8 sc (O)
- Left side, Row 2: 1 unit, 2 sc (O)
- Underside of Row 2, col 1: 1 unit, 2 sc (I)
- Left side, Row 1: 1 unit, 2 sc (O, the starting corner)
Sl st to first sc. (54 units x 2 = 108 sc, + 12 corner sc − 8 for the sc2tog = 112 sts)
Round 2: Ch 1. Sc in each st around, working 3 sc in each outer corner sc and a sc3tog centered on each inner-corner sc2tog. Sl st to first sc. (112 + 24 − 16 = 120 sts) Fasten off.
Why the math works: The outline has 54 unit edges. At 6 sc per inch, 2 sc per edge makes the straight runs lie flat. The S has 12 outer corners and 8 inner corners. Outer corners need extra stitches to turn, and inner corners need fewer so they don’t ruffle. In Round 2, each outer corner gains 2 stitches and each inner corner loses 2. That’s a net gain of 8, the same as a plain rectangle, because any closed outline like this has 4 more outer corners than inner ones. Each round adds 0.125 in (0.3 cm) on every side. That takes the 2.33 in x 4 in (5.9 cm x 10.2 cm) mesh to 2.83 in x 4.5 in (7.2 cm x 11.4 cm).
Final Blocking
- Lightly spray the letter with water, or hover a steam iron 1 in (2.5 cm) above it without touching.
- Lay it RS up on the blocking mat.
- Pin the extreme corners so the letter measures 2.83 in (7.2 cm) wide and 4.5 in (11.4 cm) tall.
- Pin each inner corner so the curves of the S read cleanly.
- Use a pin tip to nudge each mesh square open until it’s square.
- Let it dry completely, about 2–3 hours, before you unpin.
- Use two pliers to open the jump ring on the chain. Thread it through the 2 middle sts of the outer corner at the top right of Row 12, then close it fully. Thread the split ring onto the other end of the chain.
Final Quality-Control Checklist
- The mesh matches the chart: 55 squares, 7 wide, 12 rows.
- The mesh measures 2.33 in x 4 in (5.9 cm x 10.2 cm).
- Round 1 has 112 sts and Round 2 has 120 sts.
- The border lies flat, with no ruffles at outer corners and no puckers at inner corners.
- The finished letter measures 2.83 in x 4.5 in (7.2 cm x 11.4 cm).
- All three flowers are sewn on firmly, with no petals lifting.
- The jump ring is fully closed and anchored through 2 sts.
- All ends are woven in on the WS.
Troubleshooting
Squares are taller than they are wide: Pull up a shorter loop before you yarn over on each dc.
Squares lean on increase rows: Snug up the new chain before you turn, and pin those squares firmly when blocking.
Border ruffles: Your sc is looser than gauge. Use a hook one size smaller for the border only.
Border cups or pulls in: Make sure every (O) corner got its extra sc and that you used sc2tog only at (I) corners.
Letter looks backwards: You read the chart from the WS. Row 1 must be a RS row, and the RS should face you while you work the border.
Flowers slip: Sew a second ring of stitches around the yellow center.
Care
Hand wash in cool water, press out the water in a towel, and dry flat. Don’t tumble dry, because the metal ring can scuff the yarn.
Final Notes
The whole design depends on one measurement: a 0.33 in (0.8 cm) mesh square. Seven squares give the 2.33 in (5.9 cm) width, and twelve rows give the 4 in (10.2 cm) height. The 54-unit outline takes 112 sc in Round 1 and 120 sc in Round 2. Together they add 0.25 in (0.6 cm) on every side, for a finished letter of 2.83 in x 4.5 in (7.2 cm x 11.4 cm). If your square matches gauge, everything else falls into place.
Happy crocheting!