

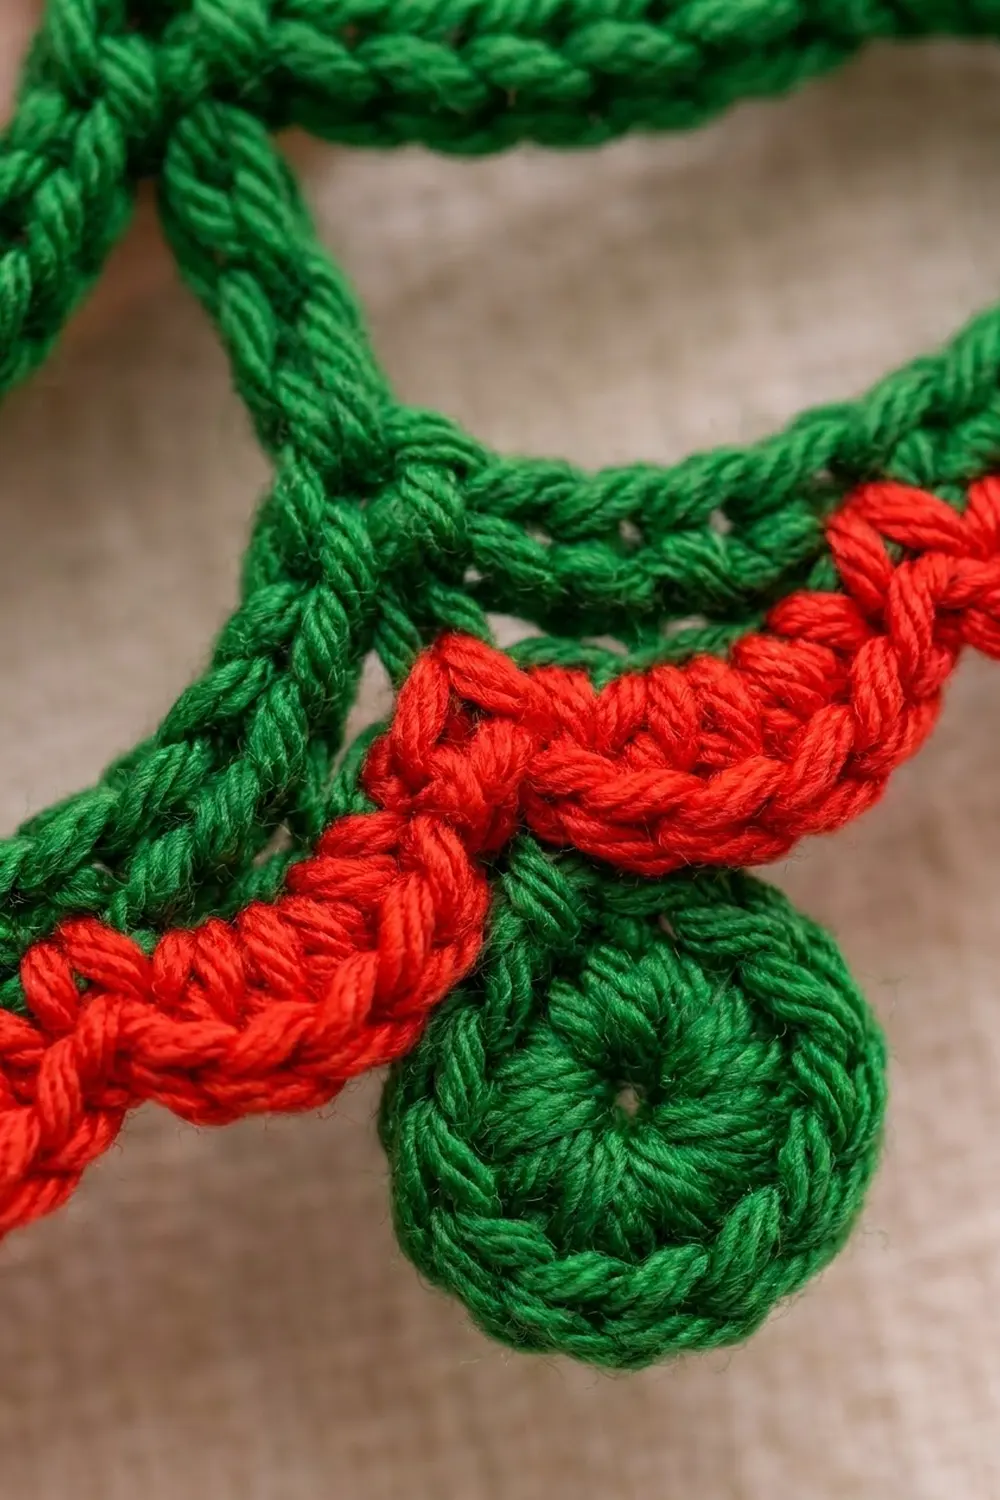
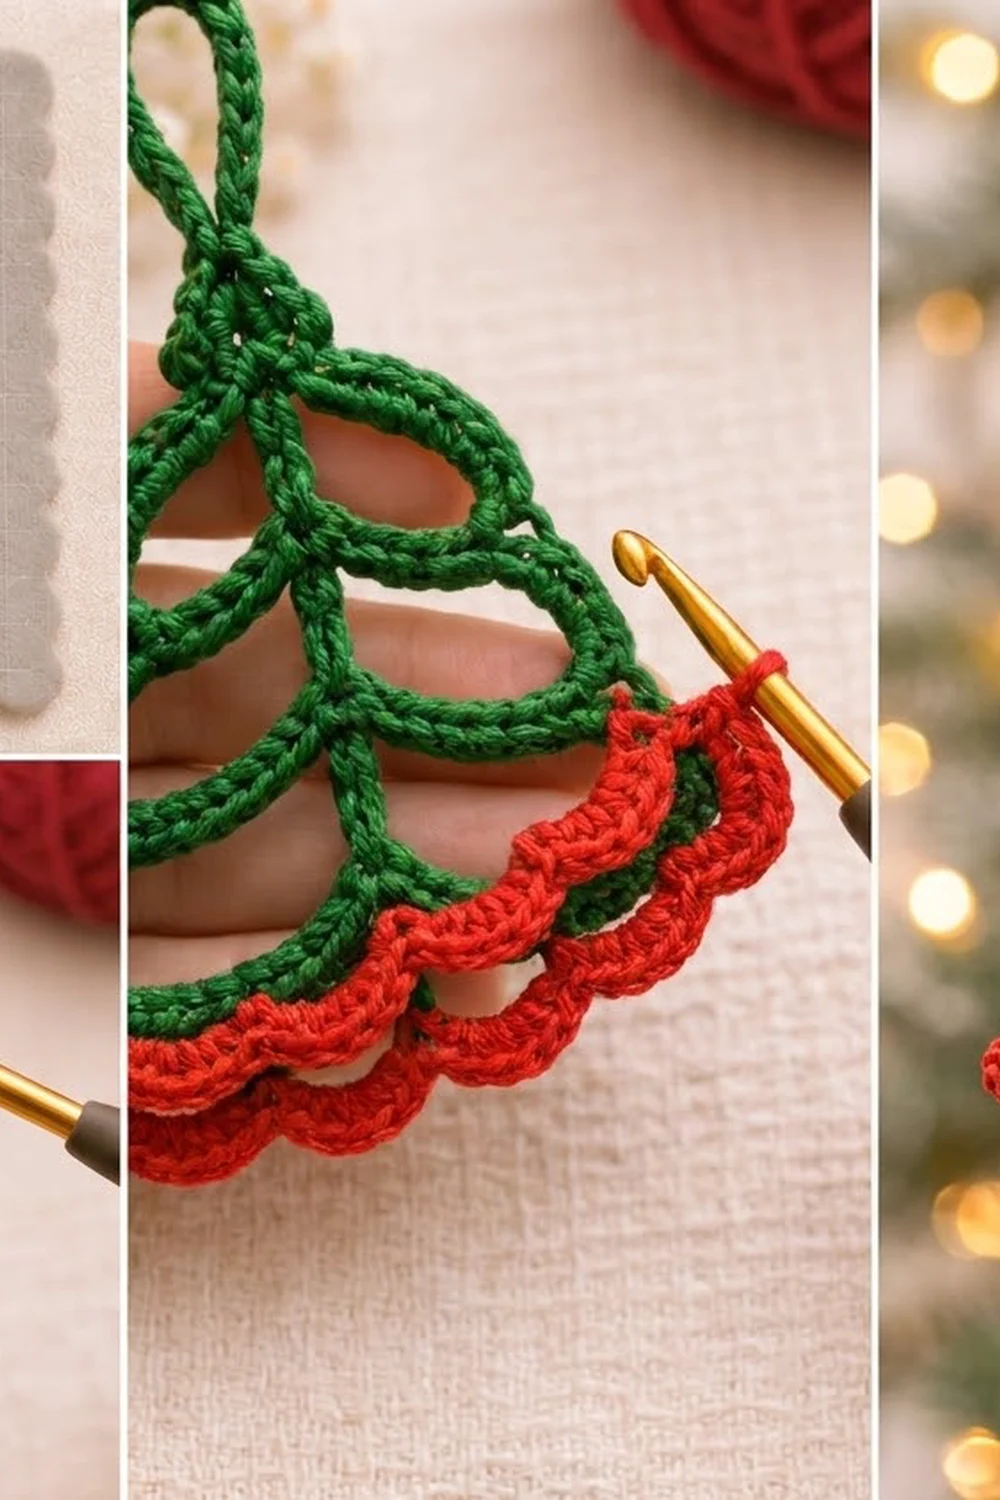
The Ribbon Pine is a lacy little tree ornament made from thick, rope-like cords. A central spine drops from a round hanging loop to a small round trunk. Four tiers of drooping arches branch out on each side and close into a gently flared outline, so light shows through every window of the tree.
The tree is a deep Christmas green, and a bright red scalloped hem runs along the lowest tier like a garland. It’s a clean, graphic style that looks good on a real tree, on a gift tag, or hung in a window.
This pattern uses US crochet terms. The finished ornament measures about 3.5 in (8.9 cm) wide and 4.6 in (11.7 cm) tall, including the hanging loop and the trunk.
Construction is simple. You make the trunk disk first, chain up the spine and the hanging loop, then cover the spine with single crochet. Each half of the tree is then built tier by tier: chain a frame, then cover the chains with single crochet so they become thick cords. A two-row red edging finishes the bottom tier.
Finished Size and Construction
- Finished size: 3.5 in (8.9 cm) wide × 4.6 in (11.7 cm) tall
- Skill level: Easy–Intermediate
- Terminology: US terms
- Yarn weight: Sport (#2), cotton recommended
- Hook: 2.75 mm (US C-2)
- Number of pieces: 1 (worked in one piece, no sewing)
- Layout: Central spine, 4 tiers per side, trunk disk at the bottom, hanging loop at the top
- Piece size (green frame): 3 in (7.6 cm) wide at the bottom tier
- Size before border: 3 in (7.6 cm) wide × 4.6 in (11.7 cm) tall
- Border depth: 3/8 in (1.0 cm) red scalloped edging on the bottom tier only
Materials
A smooth, mercerized sport-weight cotton gives the crisp, rope-like stitch definition this design depends on. Acrylic works too, but it blocks less sharply. Avoid fuzzy or brushed yarns, because they blur the open windows.
- Green (main color): 8 g / about 26 yd (24 m)
- Red (edging): 3 g / about 10 yd (9 m)
Both quantities include a margin for joining tails and a gauge test.
Tools:
– 2.75 mm (US C-2) crochet hook
– Tapestry needle
– Scissors
– 2–3 locking stitch markers
– Blocking board or foam mat, and rust-proof pins
– Spray bottle; spray starch (optional)
Abbreviations (US Terms)
- ch – chain
- sl st – slip stitch
- sc – single crochet
- hdc – half double crochet
- sk – skip
- st(s) – stitch(es)
- MR – magic ring
- sp – space
Special technique: covered chain (cord). “Work X sc around the ch-N” means you insert the hook into the opening beside the chain, not into the chain itself, so each sc wraps the whole chain. The stitches enclose the chain and turn it into a thick, round cord. Push the stitches together firmly as you go.
Shell: 5 hdc in the same stitch.
Gauge and Checkpoints
Gauge: 6 sc = 1 in (2.5 cm) along a covered cord or a sc-covered chain.
Make the trunk disk and spine first and treat them as your gauge test. They make up part of the finished piece, so nothing is wasted.
- Checkpoint 1 – Disk: 0.6 in (1.5 cm) across after Round 2.
- Checkpoint 2 – Spine: 3 in (7.6 cm) from the base of the hanging loop to the top of the disk.
- Checkpoint 3 – Hanging loop: about 1 in (2.5 cm) tall, lying flat.
- Checkpoint 4 – Tier widths (corner to corner, after both halves): Tier 1 = 1.2 in (3.0 cm), Tier 2 = 1.8 in (4.6 cm), Tier 3 = 2.4 in (6.1 cm), Tier 4 = 3 in (7.6 cm).
- Checkpoint 5 – Finished: 3.5 in (8.9 cm) wide including the red edging.
If the spine is longer than 3 in (7.6 cm): your stitches are too loose. Go down to a 2.5 mm hook.
If the spine is shorter than 3 in (7.6 cm): your stitches are too tight. Go up to a 3.0 mm hook.
Don’t change the stitch counts. Every tier is sized from the spine, so fixing the spine fixes the whole tree.
Pattern
Part 1: Trunk Disk (Green)
Round 1: MR, ch 1, 6 sc in ring. Pull the ring closed. (6 sc)
Round 2: 2 sc in each st around. Sl st in the first sc to join. (12 sc)
Checkpoint: 0.6 in (1.5 cm) across. Don’t fasten off.
Part 2: Spine and Hanging Loop (Green)
Spine chain: Ch 18. This is the spine and runs from the disk upward.
Hanging loop: Ch 12, then sl st into the 18th spine chain (the last spine chain, just before the loop chains). This closes a ring of 12 ch.
Cover the loop: Work 18 sc around the ch-12 ring. Sl st into the same spine chain to close. (18 sc in loop)
Cover the spine: Ch 1. Work 1 sc into the back bump of each spine chain, working downward toward the disk, so the front V of every chain stays free. (18 sc)
Number these stitches from the top. Spine sc 1 sits just under the hanging loop, and spine sc 18 sits just above the disk.
Sl st into the disk stitch where the spine chain began. Fasten off.
Checkpoint: spine 3 in (7.6 cm) long and loop about 1 in (2.5 cm) tall.
Place markers in spine sc 5, 9, and 13. These are the tier junctions.
Part 3: Right Half of the Tree (Green)
Work the right half into the sc tops of the spine. In each tier you chain out along the crossbar to the outer corner, chain up the slanted side, anchor, and then cover both chains with sc on the way back.
Tier 1 (top): Join green with a sl st in spine sc 5. Ch 5 (bar), ch 6 (side). Sl st in spine sc 1.
Work 6 sc around the ch-6 (side, working down to the corner), then 5 sc around the ch-5 (bar, working back to the spine). Sl st in spine sc 5.
(Tier 1 = 6 side sc + 5 bar sc = 11 sc)
The last of the 6 side sc is the Tier 1 corner sc. Mark it.
Sl st in each of the next 4 spine sc. You are now at spine sc 9.
Tier 2: Ch 7 (bar), ch 5 (side). Sl st in the Tier 1 corner sc.
Work 5 sc around the ch-5, then 7 sc around the ch-7. Sl st in spine sc 9.
(Tier 2 = 5 side sc + 7 bar sc = 12 sc)
The 5th side sc is the Tier 2 corner sc. Mark it.
Sl st in each of the next 4 spine sc. You are now at spine sc 13.
Tier 3: Ch 9 (bar), ch 5 (side). Sl st in the Tier 2 corner sc.
Work 5 sc around the ch-5, then 9 sc around the ch-9. Sl st in spine sc 13.
(Tier 3 = 5 side sc + 9 bar sc = 14 sc)
The 5th side sc is the Tier 3 corner sc. Mark it.
Sl st in each of the next 5 spine sc. You are now at spine sc 18.
Tier 4 (bottom): Ch 11 (bar), ch 6 (side). Sl st in the Tier 3 corner sc.
Work 6 sc around the ch-6, then 11 sc around the ch-11. Sl st in spine sc 18.
(Tier 4 = 6 side sc + 11 bar sc = 17 sc)
The 6th side sc is the Tier 4 corner sc. Mark it, because the red edging starts and ends at these corners. Fasten off.
Right half total: 11 + 12 + 14 + 17 = 54 sc (22 side sc + 32 bar sc).
Because the bars are slightly longer than the straight distance to the side, they droop into soft arches. That droop is what gives the tree its layered, ribbon-like look.
Part 4: Left Half of the Tree (Green)
Turn the piece over so the free front loops of the spine chain face up. Work the left half exactly like the right half, but make every sl st on the spine into the free front V of the spine chain behind the matching spine sc.
- Tier 1: Join at spine sc 5. Ch 5, ch 6, sl st at spine sc 1. 6 sc, 5 sc, sl st at spine sc 5. (11 sc)
- Sl st down 4 to spine sc 9.
- Tier 2: Ch 7, ch 5, sl st in the left Tier 1 corner sc. 5 sc, 7 sc, sl st at spine sc 9. (12 sc)
- Sl st down 4 to spine sc 13.
- Tier 3: Ch 9, ch 5, sl st in the left Tier 2 corner sc. 5 sc, 9 sc, sl st at spine sc 13. (14 sc)
- Sl st down 5 to spine sc 18.
- Tier 4: Ch 11, ch 6, sl st in the left Tier 3 corner sc. 6 sc, 11 sc, sl st at spine sc 18. (17 sc)
Fasten off. Left half total: 54 sc. Whole frame: 108 sc, plus the spine (18 sc), loop (18 sc), and disk (12 sc).
Checkpoint: measured corner to corner, the tiers are 1.2 in (3.0 cm), 1.8 in (4.6 cm), 2.4 in (6.1 cm), and 3 in (7.6 cm) wide.
Border: Red Scalloped Edging
The border runs only along the lower edge of Tier 4, from the left corner to the right corner. It passes over the spine junction just above the trunk disk.
Border gauge: same as the frame, 6 sc = 1 in (2.5 cm). Each red sc sits on one green sc, so the edging matches the curve of the bottom tier exactly without ruffling or pulling.
Row 1 (conversion row): With the front of the tree facing you, join red with a sc in the left Tier 4 corner sc.
Sc in each of the 11 left Tier 4 bar sc. Sc once into the spine base, where spine sc 18 meets the top of the disk. Sc in each of the 11 right Tier 4 bar sc. Sc in the right Tier 4 corner sc.
Count: 22 sc worked 1 per existing bar stitch + 3 added sc (2 corners + 1 center) = 25 sc.
Row 2 (scallops): Ch 1, turn. Sc in the first sc. Sk 1, shell (5 hdc) in the next st, sk 1, sc in the next st. Repeat from * 5 more times. Fasten off.
Count: 6 shells (30 hdc) + 7 sc = 37 sts.
Why the math works: one scallop uses 4 stitches, and the row needs one extra stitch to finish with a sc. That means the row has to be a multiple of 4 plus 1: 4 × 6 + 1 = 25, which gives exactly 6 scallops.
The sc of Row 2 land on Row 1 stitches 1, 5, 9, 13, 17, 21, and 25. Stitch 13 is the center sc, worked into the spine base. So the middle of the edging is a sc sitting right above the trunk disk, with 3 matching scallops on each side.
The edging adds about 0.25 in (0.6 cm) at each side, which brings the width from 3 in (7.6 cm) to 3.5 in (8.9 cm). Its depth is 3/8 in (1.0 cm).
Final Blocking
- Weave in all ends along the inside of the nearest cord, so nothing shows through the open windows.
- Lay the ornament face up on a blocking mat with a grid.
- Pin the top of the hanging loop and the center of the disk on a vertical grid line, 4.6 in (11.7 cm) apart.
- Pin the left and right Tier 4 corners on one horizontal line, 3 in (7.6 cm) apart.
- Pin the Tier 1, 2, and 3 corners so the tiers measure 1.2 in (3.0 cm), 1.8 in (4.6 cm), and 2.4 in (6.1 cm) across, giving a smooth, gently flared outline.
- Ease each bar into a soft downward arch and open each window evenly with your fingers.
- Shape each red scallop into a round curve.
- Mist until damp. Use spray starch if you want a stiffer ornament.
- Leave to dry completely, at least 6 hours, before unpinning.
Final Quality-Control Checklist
- Disk is flat and 0.6 in (1.5 cm) across, with 12 sc.
- Spine has 18 sc and measures 3 in (7.6 cm).
- Hanging loop has 18 sc and is about 1 in (2.5 cm) tall.
- Each half has 4 tiers of 11, 12, 14, and 17 sc (54 total).
- Left and right tiers meet the spine at the same heights (spine sc 5, 9, 13, and 18).
- Red Row 1 has 25 sc, and Row 2 has 6 even scallops.
- The center sc of the edging sits directly over the disk.
- Finished size is 3.5 in (8.9 cm) × 4.6 in (11.7 cm).
- No tails or loose chains show through the windows.
Troubleshooting
Cords look thin and the chain shows through. You’re working into the chain instead of around it. Insert the hook into the opening beside the chain so each sc encloses it, then slide the stitches together.
A bar is flat instead of arched. The chain is too tight. Chain a little more loosely, or go up half a hook size for the chains only.
The tree leans to one side. One half was anchored at the wrong spine stitch. Count spine stitches from the top and keep the markers in place until both halves are done.
The edging ruffles. Check that Row 1 has 25 sc, with no extra stitches beyond the 2 corners and the center.
The edging cups or pulls. Your red tension is tighter than your green. Loosen up, or use a 3.0 mm hook for the edging only.
The disk curls. Block it flat under a pin. If it still curls, rework Round 2 more loosely.
Care
Hand wash in cool water with mild soap, press out the water in a towel, and reshape flat to dry. Store flat or hanging so the arches keep their shape.
Final Notes
The whole ornament follows one measurement chain. A 12-sc disk measures 0.6 in (1.5 cm), and an 18-sc spine measures 3 in (7.6 cm). The four tiers per side (11, 12, 14, and 17 sc) build out to a 3 in (7.6 cm) base. The 25-stitch red edging (22 + 3) turns into 6 even scallops and finishes the tree at 3.5 in (8.9 cm) wide and 4.6 in (11.7 cm) tall. If your spine measures right, everything after it will too.
Happy crocheting!