

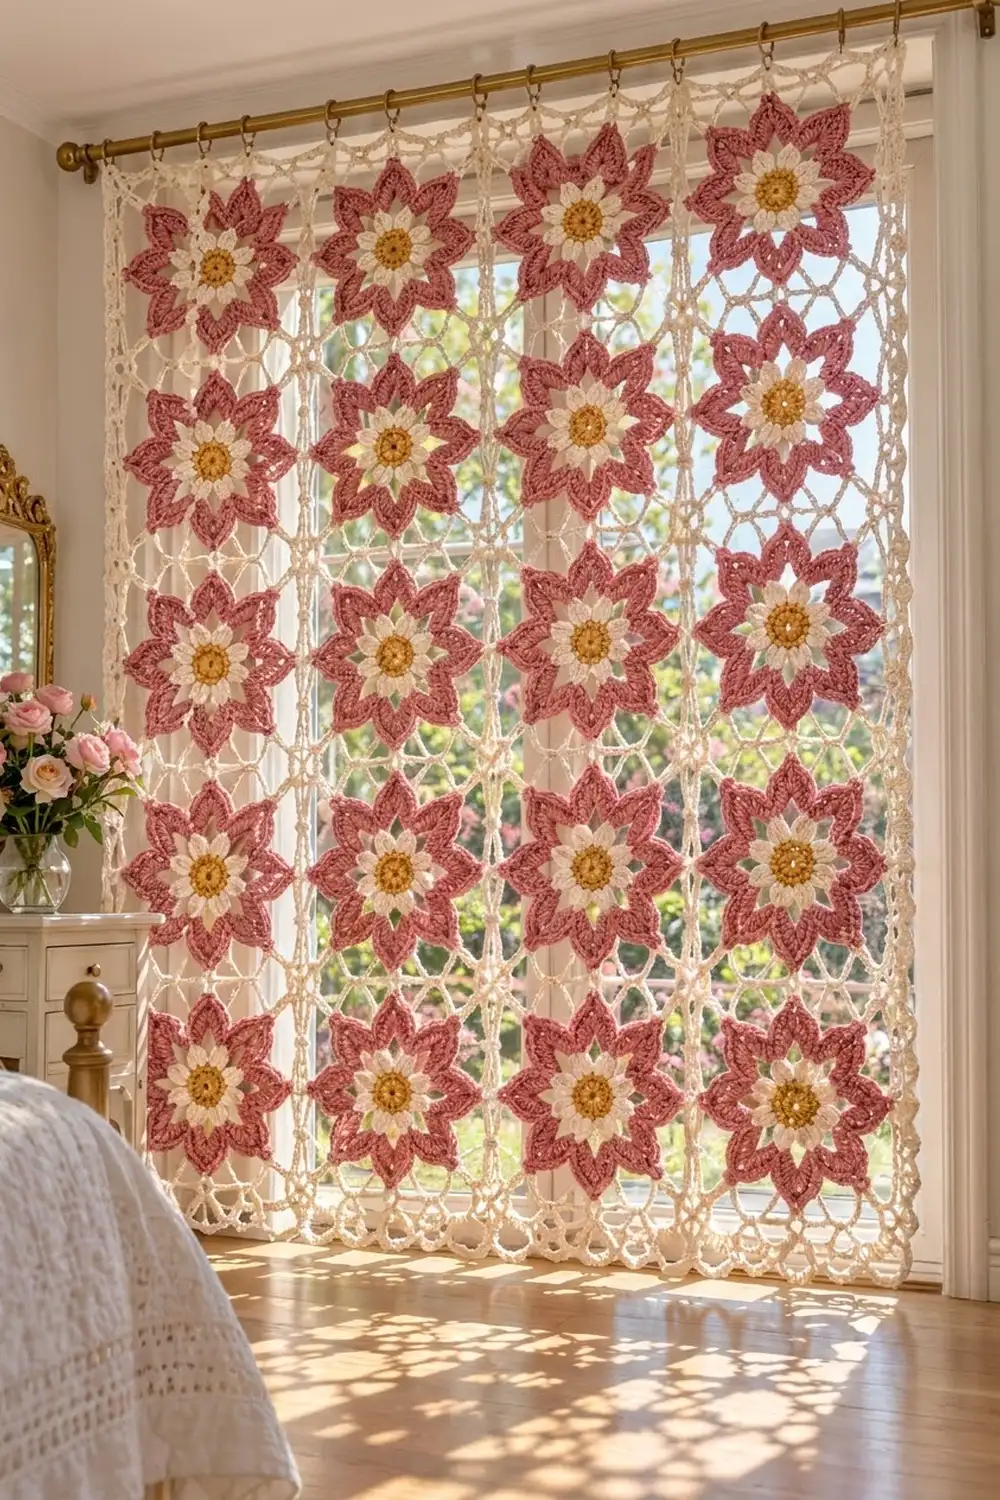
The Rose Lattice Flower Curtain is a lace panel made of layered flower motifs suspended in an airy cream chain mesh. Each bloom has a warm mustard center, a ring of soft cream petals and a dusty rose star of pointed petals behind it. When light comes through the window, the mesh nearly disappears and the flowers seem to float.
The palette is three colors: dusty rose, cream and mustard gold. The style is cottage romantic, but the construction is simple and repetitive. This pattern uses US crochet terms throughout.
The finished panel measures 35 in (88.9 cm) wide by 43 in (109.2 cm) long, including the border. It is made of 20 motifs set four across and five down. Each motif blocks to an 8 in (20.3 cm) square.
You build each flower in the round, from the center outward. Two cream mesh rounds turn the star into a square. You make the first motif on its own and join every motif after it as you go on its final round. A three-round border with a scalloped edge finishes the panel.
Finished Size and Construction
- Finished size: 35 in x 43 in (88.9 cm x 109.2 cm)
- Skill level: Intermediate
- Terminology: US crochet terms
- Yarn weight: Worsted (#4), cotton or cotton blend
- Hook: 5.0 mm (US H-8)
- Number of pieces: 20 identical motifs
- Layout: 4 motifs wide x 5 motifs long
- Piece size: 8 in (20.3 cm) square, blocked
- Size before border: 32 in x 40 in (81.3 cm x 101.6 cm)
- Border depth: 1.5 in (3.8 cm) on every side
Materials
Use a smooth mercerized or matte worsted cotton, about 190 m per 100 g. Cotton holds the petal points crisply and blocks well, and it won’t sag as much as acrylic when hung.
- Mustard gold (A): 100 g, about 190 m
- Dusty rose (B): 250 g, about 475 m
- Cream (C): 350 g, about 665 m
These quantities include a margin of roughly 25–30% for gauge differences and swatching.
Tools
- 5.0 mm (US H-8) crochet hook
- Tapestry needle
- Locking stitch markers
- Rust-proof pins and a blocking mat or folded towels
- Spray bottle
- Measuring tape
- About 9 curtain clip rings for hanging
Abbreviations (US Terms)
- ch – chain
- sl st – slip stitch
- sc – single crochet
- hdc – half double crochet
- dc – double crochet
- tr – treble crochet (yarn over twice)
- dtr – double treble crochet (yarn over three times)
- FLO / BLO – front loop only / back loop only
- sp – space
- sk – skip
- st(s) – stitch(es)
Special technique: join-as-you-go chain (JAYG). Where a ch-5 loop would be worked, ch 2, sl st into the matching loop of the neighboring motif, then ch 2. Where a ch-7 corner loop would be worked, ch 3, sl st into the neighbor’s corner loop, then ch 3.
Gauge and Checkpoints
Make one complete motif and block it before you start the rest. Lace gauge matters more for the final square than for the flower, so check both stages.
- After Round 2: the center measures 2.4 in (6.1 cm) across.
- After Round 3: the cream flower measures 3.75 in (9.5 cm) across, petal tip to petal tip.
- After Round 6: the rose star measures 6.25 in (15.9 cm) from point to opposite point.
- After Round 8, unblocked: the motif measures about 7.6 in (19.3 cm) square.
- After Round 8, blocked: the motif measures 8 in (20.3 cm) square, ±0.2 in (0.5 cm).
If your motif is too big, go down to a 4.5 mm hook. If it’s too small, go up to a 5.5 mm hook. If only the mesh is off and the flower is on target, keep your hook and adjust how firmly you pull the long chains.
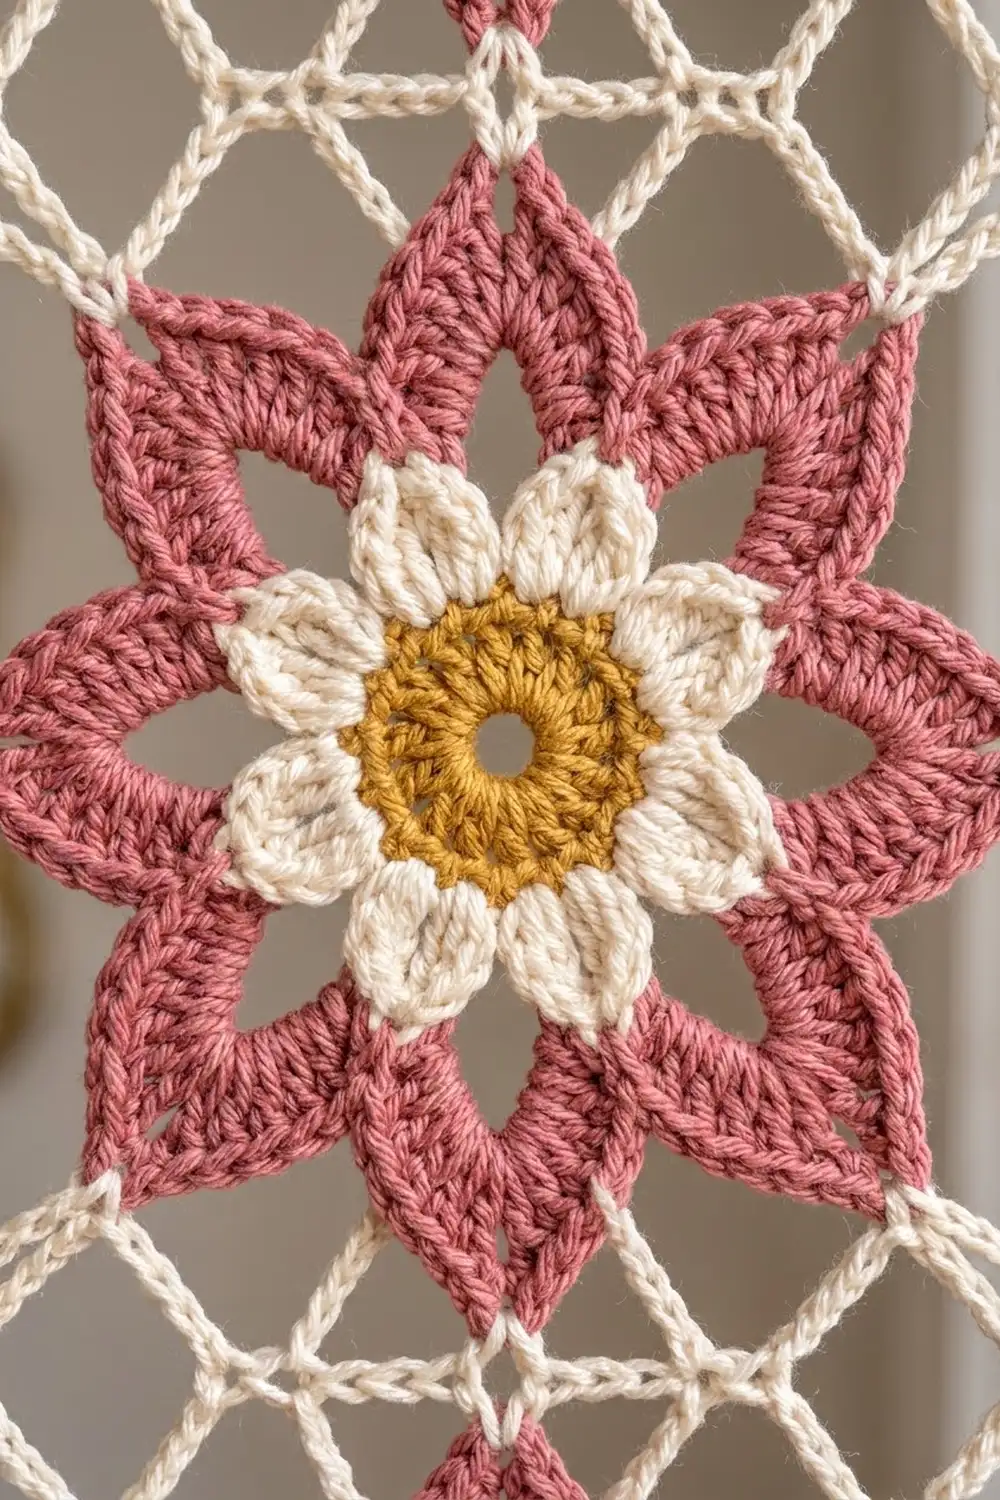
Motif (Make 20)
Round 1 (A)
Make a magic ring. Ch 3 (counts as dc), then work 15 dc into the ring. Pull the ring closed, leaving a small open center. Sl st to the top of the ch-3.
(16 dc)
Round 2 (A)
Ch 3 (counts as dc), dc in the same st. Work 2 dc in each remaining st around. Sl st to the top of the ch-3. Fasten off.
(32 dc)
Place a marker in any stitch and call it stitch 1. Rounds 3 and 4 both work into Round 2, so this marker keeps the layers lined up.
Round 3 – Cream Petals (C, FLO of Round 2)
Join C with a sl st in the front loop of stitch 1. Work every stitch of this round in front loops only.
Petal: sc in the next st, (hdc, 2 dc) in the next st, (2 dc, hdc) in the next st, sc in the next st.
Work the first petal starting in stitch 1. Repeat the petal 7 more times, for 8 petals that each use 4 stitches. Sl st to the first sc. Fasten off.
(8 petals; 64 sts)
The two sc that sit side by side between neighboring petals pull the petals apart, giving each one a rounded shape that narrows to a soft tip.
Round 4 – Rose Base (B, BLO of Round 2)
Fold the cream petals forward. Join B with a sl st in the free back loop of stitch 1. Ch 3 (counts as dc), then dc in the back loop of each remaining Round 2 stitch. Sl st to the top of the ch-3.
(32 dc)
This round sits behind the cream petals and gives the star a hidden base.
Round 5 – Rose Star Petals (B)
Ch 1.
Star petal: sc in the next st, (dc, 2 tr) in the next st, ch 3, (2 tr, dc) in the next st, sc in the next st.
Start the first star petal in the stitch at the top of the ch-3, so each star petal sits directly behind a cream petal. Repeat 7 more times. Sl st to the first sc.
(8 star petals; 64 sts and 8 ch-3 tips)
Round 6 – Rose Outline (B)
Ch 1.
Outline: sc in the sc, sc in the dc, hdc in the next tr, dc in the next tr, (dc, ch 3, dc) in the ch-3 tip, dc in the next tr, hdc in the next tr, sc in the dc, sc in the sc.
Repeat around all 8 star petals. Sl st to the first sc. Fasten off.
(80 sts and 8 ch-3 tips; 10 sts per petal)
This outline gives every rose petal a raised edge and a sharp point. The paired sc stitches between petals form deep V-shaped valleys.
Round 7 – Mesh Setup (C)
Label the 8 tips around the motif as alternating corner tips and side tips.
Join C with a sl st in any corner tip ch-3 sp. Ch 5 (counts as dtr), then ch 7 and dtr in the same sp. Ch 7, sc in the next side tip ch-3 sp, ch 7, (dtr, ch 7, dtr) in the next corner tip ch-3 sp. Repeat from * 2 more times. Ch 7, sc in the last side tip, ch 7. Sl st to the top of the beginning ch-5.
(8 dtr and 4 sc; 4 corner ch-7 loops and 8 side ch-7 loops)
The dtr pairs push the corners outward, so the round tips are pulled into a square.
Round 8 – Square Mesh (C)
Sl st into the first corner ch-7 loop. Ch 1, then (sc, ch 7, sc) in the same loop. Ch 5, sc in the next ch-7 loop, ch 5, sc in the next sc, ch 5, sc in the next ch-7 loop, ch 5, (sc, ch 7, sc) in the next corner loop. Repeat from * 2 more times. Ch 5, sc in the next ch-7 loop, ch 5, sc in the next sc, ch 5, sc in the next ch-7 loop, ch 5. Sl st to the first sc. Fasten off.
(20 sc; 16 side ch-5 loops and 4 corner ch-7 loops)
Each motif side has 6 loops: 4 side ch-5 loops plus the 2 ch-7 corner loops at its ends. Each corner loop is shared by two sides, so 4 sides x 6 loops − 4 shared corners = 20 loops. That matches the round’s total.
Complete Motif 1 through Round 8. For Motifs 2–20, work Rounds 1–7, then work Round 8 with the joins described below.
Make All Pieces
For 20 motifs, you’ll use about:
- A: 3 g per motif, 60 g total
- B: 10 g per motif, 200 g total
- C: 10 g per motif, 200 g total, plus about 50 g for the border
Layout, viewed from the right side (M = motif, numbered in joining order):
M1   M2   M3   M4
M5   M6   M7   M8
M9   M10  M11  M12
M13  M14  M15  M16
M17  M18  M19  M20
M1–M4 make the top row.
Joining
Use the JAYG method on Round 8 only.
Stitch-to-stitch logic. Work Round 8 as usual until you reach a corner that will touch a finished motif. Work (sc, ch 3, sl st into the neighbor’s corner ch-7 loop, ch 3, sc) in that corner. Then work each of the 4 side loops as ch 2, sl st into the neighbor’s matching ch-5 loop, ch 2, with the usual sc in between. Finish with the joined far corner.
Every shared edge gets 6 joins: 2 corners and 4 side loops. The loops face each other in mirror order, so your first side loop joins the neighbor’s last side loop on that edge.
Four-way corners. Where four motifs meet, sl st into the same join point as the first corner join instead of into the next free loop. This keeps the junction flat.
Tension. Keep the joining chains the same length as your regular ch-5 loops. A tight sl st draws the mesh in and puckers the flowers. Lay the work flat after each row to check.
Size checkpoint. After joining, the panel should measure 32 in x 40 in (81.3 cm x 101.6 cm) when lightly stretched and pinned.
Border
Border gauge: 15 sc = 4 in (10.2 cm), worked into the chain loops.
Border Round 1 (C)
With the right side facing, join C in the free top-right panel corner ch-7 loop. Ch 1, then work (3 sc, ch 3, 3 sc) in that corner loop.
Then work along each side as follows:
- 6 sc in each side ch-5 loop.
- 3 sc in the outer half of each joined corner loop at a seam.
- (3 sc, ch 3, 3 sc) in each of the remaining panel corner loops.
Join with a sl st to the first sc.
Per motif side, that is 3 + (4 x 6) + 3 = 30 sc. The 3 sc on each side of a panel corner count toward their own side, so no corner stitches are counted twice.
- Short sides: 4 motifs x 30 = 120 sc
- Long sides: 5 motifs x 30 = 150 sc
- Round total: (2 x 120) + (2 x 150) = 540 sc plus 4 corner ch-3 sps
Border Round 2 (C)
Sl st into the corner ch-3 sp. Ch 1, then (sc, ch 5, sc) in the same sp.
- Short sides: ch 4, sk 1 sc, sc in the next sc, [ch 5, sk 2 sc, sc in the next sc] 39 times, ch 4, sk the last sc. Work (sc, ch 5, sc) in the corner sp. This uses 1 + 1 + 117 + 1 = 120 sts and makes 40 sc and 41 loops.
- Long sides: work the same way, with the bracket repeated 49 times. This uses 150 sts and makes 50 sc and 51 loops.
Sl st to the first sc.
(188 sc and 188 loops)
Border Round 3 – Scallops (C)
Sl st into the corner ch-5 loop.
- Corner loops: (sc, hdc, 2 dc, ch 2, 2 dc, hdc, sc).
- Ch-4 loops: (sc, hdc, dc, hdc, sc).
- Ch-5 loops: (sc, hdc, 3 dc, hdc, sc).
Work a sl st in each sc between loops. Join and fasten off.
Each short side has 41 scallops (39 full and 2 small), and each long side has 51 scallops (49 full and 2 small), plus one pointed scallop at each corner.
Why the math works: 120 sc ÷ 3.75 sc per in = 32 in (81.3 cm), and 150 sc ÷ 3.75 = 40 in (101.6 cm). The border lies flat on the joined panel. Each side count is a multiple of 3 once 3 sts are set aside for the end loops (117 and 147), so the scallops end evenly at every corner.
Final Blocking
- Weave in all ends along the backs of the rose petals or inside the mesh chains, where they won’t show.
- Soak the panel in cool water for 15 minutes, then press out the water without wringing.
- Roll it in a towel to remove the excess moisture.
- Lay it flat and pin the four outer corners to 35 in x 43 in (88.9 cm x 109.2 cm).
- Pin each motif corner junction so the motif squares measure 8 in (20.3 cm).
- Pin out every rose star point and every border scallop.
- Shape the cream petals by hand so they sit forward over the rose layer.
- Let it dry completely, about 24 hours, before unpinning.
Final Quality-Control Checklist
- 20 motifs, each with 8 cream petals and 8 rose star points
- Every motif’s cream petals line up with its rose star points
- Every shared edge has 6 joins and every four-way junction lies flat
- The panel measures 32 in x 40 in (81.3 cm x 101.6 cm) before the border
- Border Round 1 has 120 sc per short side and 150 sc per long side
- Scallops end evenly at all four corners
- All ends are woven in securely, and the finished size is 35 in x 43 in (88.9 cm x 109.2 cm)
Troubleshooting
Cream petals lie flat instead of forward. Make sure Round 3 went into the front loops and Round 4 into the back loops of Round 2.
Rose points are rounded. Tighten the ch-3 at each tip, and pin the points firmly while blocking.
Motif cups. Your mesh chains are too tight. Loosen them, or go up a hook size for Rounds 7–8 only.
Motif ruffles. Your chains are too loose. Go down a hook size for Rounds 7–8.
Border waves. Recount Border Round 1. Extra sc on any side will make the edge ripple.
Four-way junctions pucker. Rework those joins so every corner sl st goes into one shared point.
Care
Hand wash cool and dry flat, then re-pin the star points if they need it. Don’t hang the curtain while it’s wet, because the cotton will stretch.
Final Notes
The measurement chain is simple: a 2.4 in (6.1 cm) center grows into a 6.25 in (15.9 cm) star, and then into an 8 in (20.3 cm) square. Twenty squares make a 32 in x 40 in (81.3 cm x 101.6 cm) panel. A 1.5 in (3.8 cm) scalloped border brings it to 35 in x 43 in (88.9 cm x 109.2 cm). Check each stage as you go and the finished panel will hang square.
Clip the rings along the top border about 4 in (10.2 cm) apart and hang it in a sunny window.
Happy crocheting!