

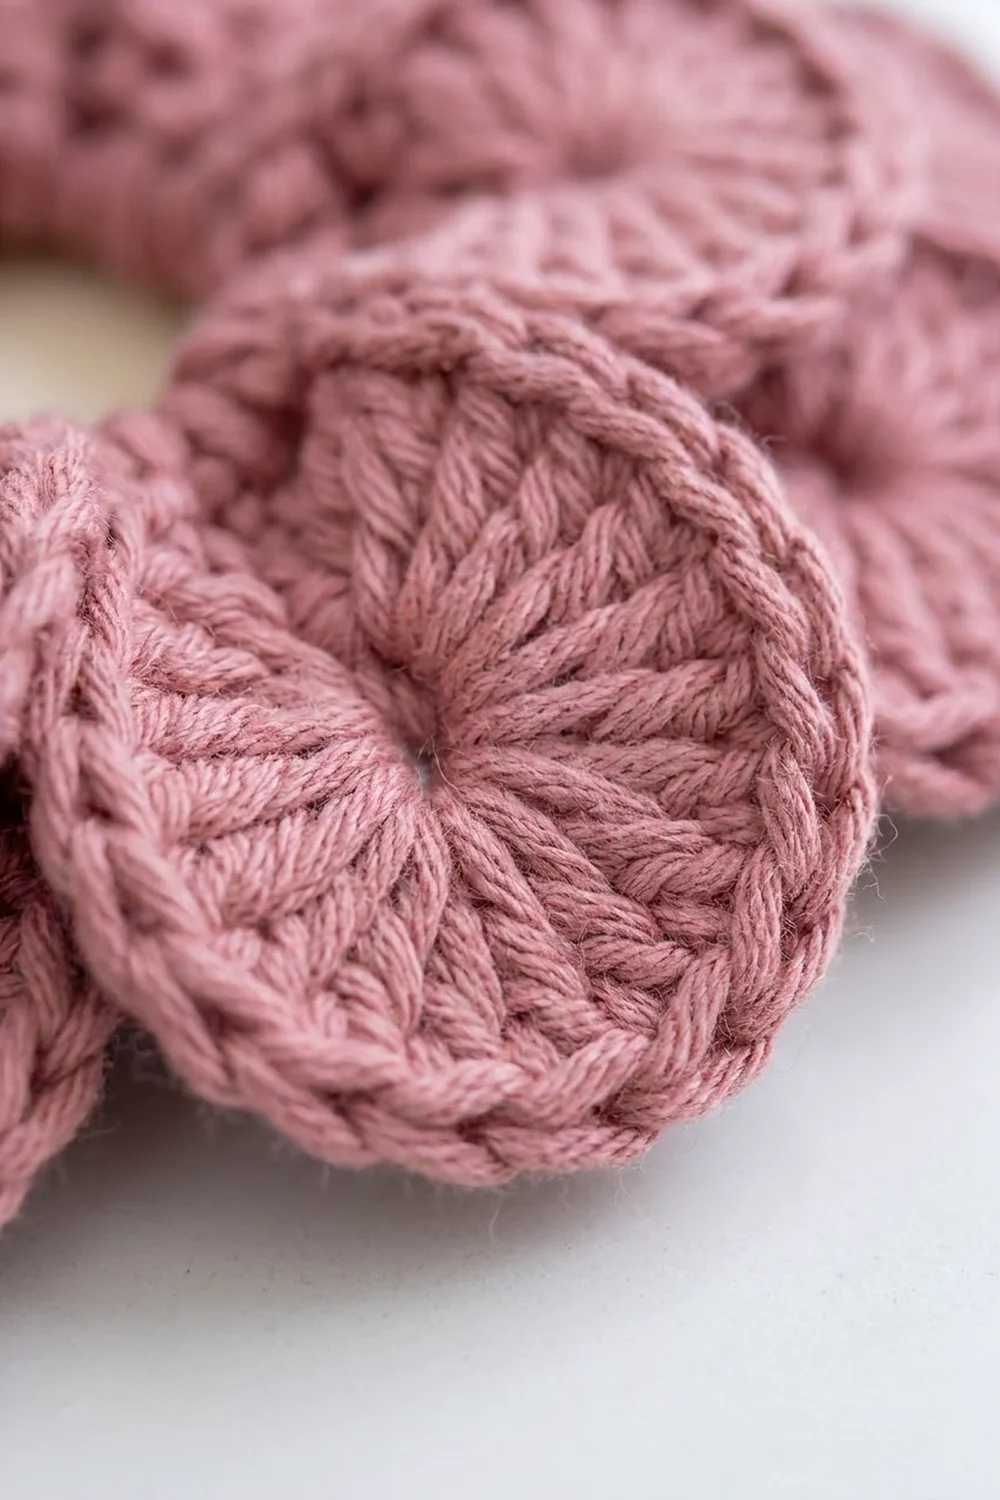
This soap saver starts as one flat square covered in overlapping rounded scales. Each scale has stitch lines radiating from its base and a firm curved edge, and the scales are staggered in rows like roof tiles. A crocheted cord runs through an eyelet border. Put a bar of soap in the center of the wrong side, pull the cord, and the square closes up into a round ball that looks like a full rose.
The sample is one solid color, a soft dusty rose. Smooth cotton shows the stitches clearly, scrubs gently and dries quickly between uses. The style is simple and spa-like, and paired with a bar of soap it makes an easy handmade gift.
This pattern uses US crochet terms. Laid flat with its border, the square measures 8.5 x 8.5 in (21.6 x 21.6 cm). Cinched around a standard bar of soap, it forms a ball about 4 in (10.2 cm) across.
Construction overview: you work a square of crocodile-style scales in rows and add a three-round border that includes an eyelet round. Then you crochet one long drawstring cord and add a small hanging loop at one corner. There is only one piece, so there is no joining.
Finished Size and Construction
- Finished size (flat): 8.5 x 8.5 in (21.6 x 21.6 cm)
- Cinched size: about 4 in (10.2 cm) across
- Skill level: Intermediate (you need to be comfortable working around posts)
- Terminology: US crochet terms
- Yarn weight: Worsted (#4) cotton
- Hook: 4.5 mm (US 7)
- Number of pieces: 1 square, plus 1 drawstring cord and 1 hanging loop
- Layout: one square with 6 rows of scales (5 scales per row, staggered)
- Piece size before border: 7 x 7 in (17.8 x 17.8 cm)
- Border depth: 0.75 in (1.9 cm) per side
Materials
Yarn: Use a smooth, tightly plied worsted-weight cotton or cotton blend. Cotton holds the scale shapes, survives hot water and won’t felt. Avoid acrylic here, because it squeaks against soap and dries slowly.
- Dusty Rose: 95 g, about 150 m (164 yd)
The scales use a lot of yarn, since each one contains 10 double crochet worked around posts. The amount above covers the square, border, cord and loop. It also includes a margin of about 15% so you have enough for a swatch and any rework.
Tools:
- 4.5 mm (US 7) crochet hook
- Tapestry needle
- Scissors
- 2 stitch markers
- Measuring tape
- Rust-proof pins and a blocking mat or towel
Abbreviations (US Terms)
- ch: chain
- sl st: slip stitch
- sc: single crochet
- dc: double crochet
- sk: skip
- sp: space
- st(s): stitch(es)
- RS / WS: right side / wrong side
- V: 2 dc worked in the same stitch or space
Special stitch: Scale. With RS facing, turn the work so the posts of the target V lie horizontally.
- Working around the post of the first dc of the V, from its top down to its base, make 5 dc.
- Ch 1.
- Working around the post of the second dc of the same V, from its base up to its top, make 5 dc.
One Scale = 10 dc + 1 ch. It forms a rounded scale with dc lines radiating from its base and a firm curved edge that lies over the row below.
Gauge and Checkpoints
Make the square before the cord, and use its first few rows as your gauge test.
- Row 1: 32 sc = 7 in (17.8 cm), about 4.6 sc per inch (1.8 per cm).
- After Row 1: 0.25 in (0.6 cm) tall.
- Each V-row and Scale-row pair: adds 1 in (2.5 cm) of height.
- After Row 5: 2.25 in (5.7 cm) tall.
- After Row 9: 4.25 in (10.8 cm) tall.
- After Row 13: 6.25 in (15.9 cm) tall.
- After Row 15: 7 x 7 in (17.8 x 17.8 cm).
Too big? Go down to a 4 mm (US G-6) hook. Too small? Go up to a 5 mm (US H-8) hook.
Width matters most at Row 1. If Row 1 is wider than 7.25 in (18.4 cm), start again with a smaller hook. Ruffled scales usually mean your post dc are too loose. Scales that cup usually mean they are too tight.
Pattern: The Scale Square
You always work Scale rows with RS facing, and every RS row starts at the right edge. V positions are counted from right to left as seen on the RS, so V1 is the rightmost V and V10 is the leftmost.
Foundation: Ch 33.
Row 1 (RS): Sc in 2nd ch from hook and in each ch across, turn. (32 sc)
Row 2 (WS, V-row): Ch 3 (counts as dc), sk 1 sc, V in next sc, sk 1 sc 10 times, dc in last sc, turn. (10 V + 2 edge dc = 22 dc)
This uses all 32 sc: 1 edge st, 10 groups of 3, and 1 edge st.
Row 3 (RS, Scale Row A): Ch 1, sl st in edge dc, Scale on next V, sl st between the 2 dc of the following V 5 times, sl st in top of turning ch, turn. (5 Scales on V1, V3, V5, V7 and V9; 5 sl sts on V2, V4, V6, V8 and V10; 2 edge sl sts)
Row 4 (WS, V-row): Ch 3 (counts as dc). Work across the row, alternating between sl sts and Scales:
- Make a V in each sl st.
- For each Scale, push it toward you and make a V in the gap between the 2 dc of the V it was worked on.
You will make 10 V in total. Dc in the last edge sl st, turn. (10 V + 2 edge dc = 22 dc)
Row 5 (RS, Scale Row B): Ch 1, sl st in edge dc, sl st between the 2 dc of V1, Scale on next V, sl st between the 2 dc of the following V 4 times, Scale on V10, sl st in top of turning ch, turn. (5 Scales on V2, V4, V6, V8 and V10; 5 sl sts on V1, V3, V5, V7 and V9; 2 edge sl sts)
Row 5 puts its Scales on the even positions, so they sit halfway between the Scales of Row 3. That offset creates the overlapping, tiled look.
Checkpoint: 2.25 in (5.7 cm) tall and still 7 in (17.8 cm) wide.
Row 6 (WS): Work as Row 4. (22 dc)
Row 7 (RS): Work as Row 3 (Scale Row A). (5 Scales)
Row 8 (WS): Work as Row 4. (22 dc)
Row 9 (RS): Work as Row 5 (Scale Row B). (5 Scales)
Checkpoint: 4.25 in (10.8 cm) tall.
Row 10 (WS): Work as Row 4. (22 dc)
Row 11 (RS): Work as Row 3. (5 Scales)
Row 12 (WS): Work as Row 4. (22 dc)
Row 13 (RS): Work as Row 5. (5 Scales)
Checkpoint: 6.25 in (15.9 cm) tall. You now have 6 Scale rows of 5 Scales each, 30 Scales in total.
Row 14 (WS): Work as Row 4. (22 dc)
Row 15 (RS, closing row): Ch 1, sc in edge dc, sc in each of the 2 dc of next V, sc in the gap after that V 10 times, sc in top of turning ch. The last gap falls just before the turning ch. Do not turn and do not fasten off. (1 + 30 + 1 = 32 sc)
Checkpoint: 7 x 7 in (17.8 x 17.8 cm). Rows 14 and 15 lie flat under the last Scale row, which hangs over them.
Border
Border gauge: The border keeps the body gauge of about 4.6 sc per inch (1.8 per cm). Each corner is a ch-2 space and is never counted as a side stitch.
Round 1 (RS): Ch 2 (first corner) and rotate to work down the left side. Work 32 sc evenly along the row ends, using this guide:
- 1 sc in the end of Row 15
- 3 sc in the end of each of the 7 V-rows (Rows 2–14), for 21 sc
- 1 sc in the end of each of the 6 Scale rows, for 6 sc
- 1 sc in the end of Row 1
- 1 extra sc in each of the ends of Rows 2, 8 and 14, for 3 sc
That gives 1 + 21 + 6 + 1 + 3 = 32. Then continue around:
- Ch 2, then sc in each of the 32 free loops of the foundation ch.
- Ch 2, then work 32 sc up the right side using the same guide.
- Ch 2, then sc in each of the 32 sc of Row 15.
- Sl st in the 2nd ch of the beginning ch-2.
(32 sc per side, 128 sc + 4 ch-2 corners)
Round 2 (eyelet round): Sl st into the beginning ch-2 corner sp. Ch 3 (counts as dc), (ch 2, dc) in same sp, [ch 1, sk 1 sc, dc in next sc] 16 times, ch 1, (dc, ch 2, dc) in next corner sp 3 times, [ch 1, sk 1 sc, dc in next sc] 16 times, ch 1, sl st to top of beginning ch-3.
(Per side: 18 dc including its 2 corner dc, plus 17 ch-1 eyelets. Total: 72 dc, 68 ch-1 sps, 4 ch-2 corners)
Round 3: Ch 1, sc in same st. Work 1 sc in each dc and each ch-1 sp, and 3 sc in each corner ch-2 sp, all the way around. Sl st to first sc and fasten off.
(Per side: 35 sc between corner groups, from 18 dc + 17 sps. Plus 3 sc at each corner. Total: 4 x 35 + 4 x 3 = 152 sc)
Why the math works:
- Round 1: 1 sc goes into each Row 15 st and each foundation ch, so the top and bottom stay at 32. The sides also get 32, which keeps the piece square.
- Round 2: Each pair of sc becomes 1 dc + 1 ch, so 32 sc become 16 dc + 16 ch-1 sps. The extra ch-1 before the corner and the 2 corner dc bring each side to 18 dc + 17 sps.
- Round 3: 1 sc goes into each st and sp (35), plus the 3-sc corners. Each side spans about 38 sc. At 4.6 sc per inch that is about 8.3 in, which blocks to 8.5 in (21.6 cm).
The border adds 1.5 in (3.8 cm) in total across the square, which is 0.75 in (1.9 cm) per side.
Hanging loop: With RS facing, join yarn in the center sc of any corner. Ch 10 and sl st in the same sc. Ch 1, work 14 sc into the ch-10 loop, and sl st in the same corner sc. Fasten off. The loop is about 1.25 in (3.2 cm) long.
Drawstring Cord
Chain until the chain measures 44 in (111.8 cm), about 150 ch. Sl st in the back bump of the 2nd ch from hook and in each back bump across. Fasten off. Tie an overhand knot 0.5 in (1.3 cm) from each end and trim close.
Threading:
- Start at the middle eyelet of any side.
- Working from the WS, weave the cord in and out of every ch-1 eyelet all the way around. Skip the ch-2 corner spaces.
- Bring the cord out through the eyelet next to your starting eyelet, so both ends exit together on the WS.
- Even out the tails to about 6 in (15.2 cm) each.
Final Blocking
- Weave in all yarn ends on the WS. Leave the cord untied.
- Soak the square in lukewarm water, then press out the water in a towel. Don’t wring it.
- Lay it RS up and pin the corners to 8.5 x 8.5 in (21.6 x 21.6 cm).
- Pin the midpoint of each side and check that all four sides match.
- Smooth each Scale with your fingertips so it curves downward over the row below.
- Let it dry completely, then unpin.
- Center a bar of soap on the WS, pull both cord ends and tie a bow. Arrange the Scales into an even rose shape.
Final Quality-Control Checklist
- Row 1 has 32 sc and measures 7 in (17.8 cm).
- Every V-row has 22 dc.
- Every Scale row has 5 Scales, and their positions alternate from row to row (30 in total).
- The square measures 7 x 7 in (17.8 x 17.8 cm) before the border.
- Border Round 1 has 32 sc per side.
- Border Round 2 has 17 eyelets per side.
- Border Round 3 has 35 sc per side plus 3-sc corners.
- The flat size is 8.5 x 8.5 in (21.6 x 21.6 cm).
- The cord is 44 in (111.8 cm) long with a knot at each end.
- The hanging loop is firmly anchored.
Troubleshooting
Scales ruffle: Your post dc are too loose. Tighten your tension, or work 4 dc per side of each Scale instead of 5.
Scales don’t overlap: Check that you alternate Row A and Row B. Two A rows back to back stack the Scales directly on top of each other.
V-row count is off: Count your V’s before working the edge dc. You need exactly 10. The most common mistake is missing the V in a sl st.
Border pulls in or flares: Redistribute the Round 1 side sc using the guide and keep each side at 32.
Pouch won’t close fully: Make sure the cord goes through every eyelet. Any skipped eyelet leaves a gap.
Edges are wavy after blocking: Wet the square again and pin the side midpoints more firmly.
Care
Rinse out the soap after each use and hang the pouch by its loop so it can dry. Machine wash warm in a mesh bag and lay flat to dry. Skip the dryer, because heat can flatten the Scales.

Final Notes
Every measurement follows from Row 1. Row 1 is 32 sc wide and measures 7 in (17.8 cm). Each V-row and Scale-row pair adds 1 in (2.5 cm), so after 15 rows the body measures 7 x 7 in (17.8 x 17.8 cm). The border adds 0.75 in (1.9 cm) on each side, for a flat square of 8.5 x 8.5 in (21.6 x 21.6 cm). Cinched around a bar of soap, the pouch becomes a ball about 4 in (10.2 cm) across. If Row 1 measures correctly and your counts match at every checkpoint, the finished pouch will gather into an even, round rose.
Happy crocheting!