

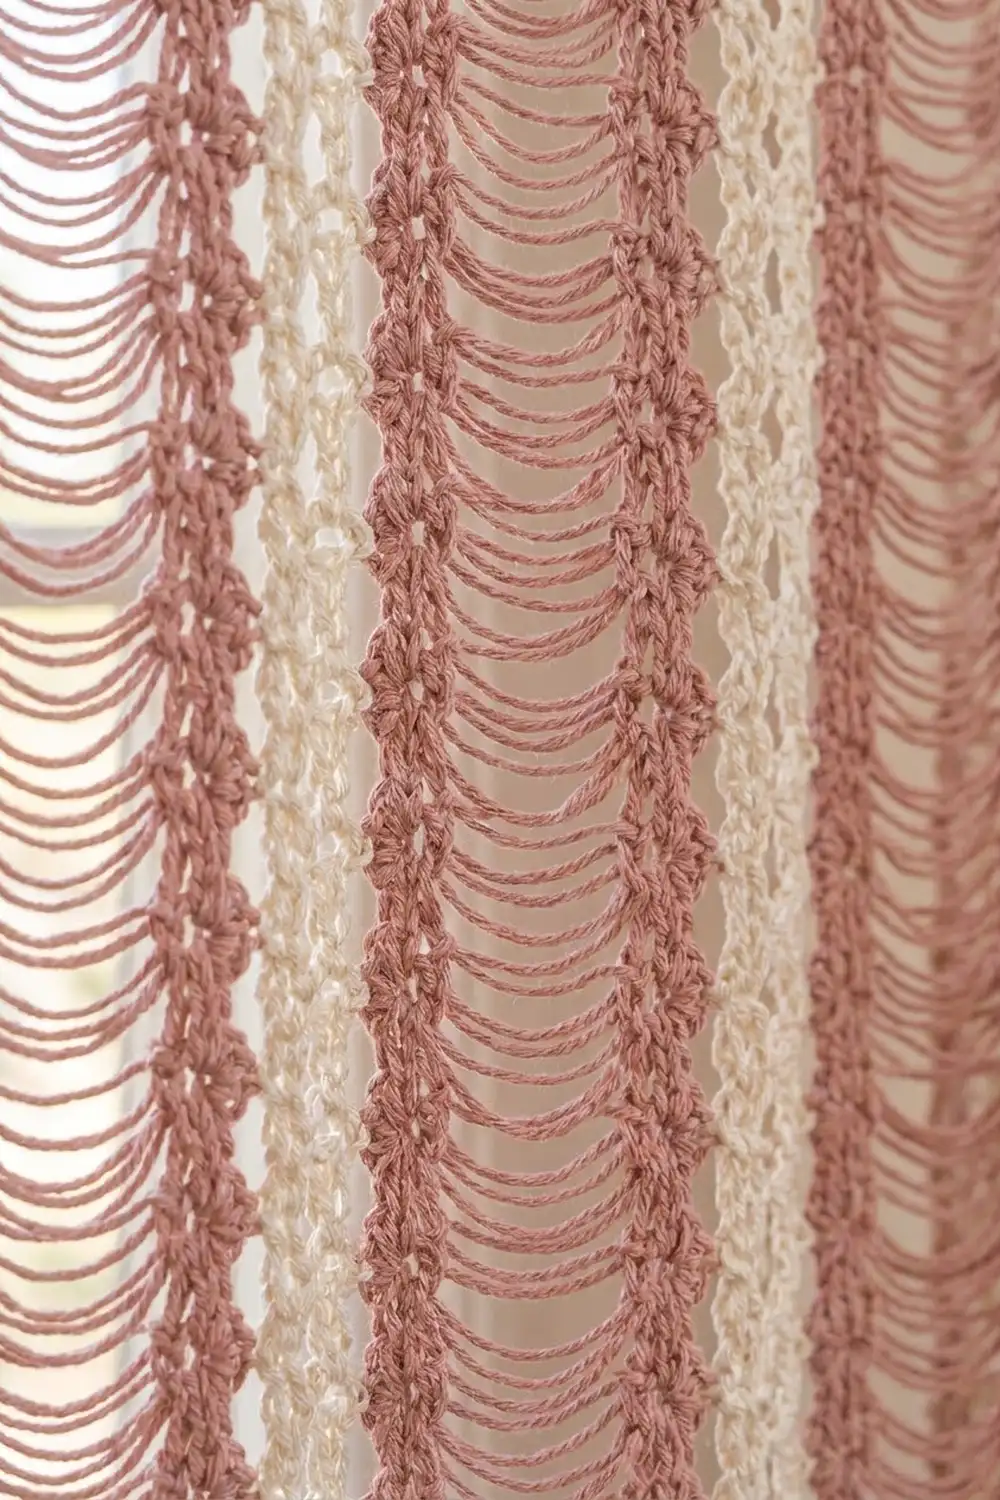
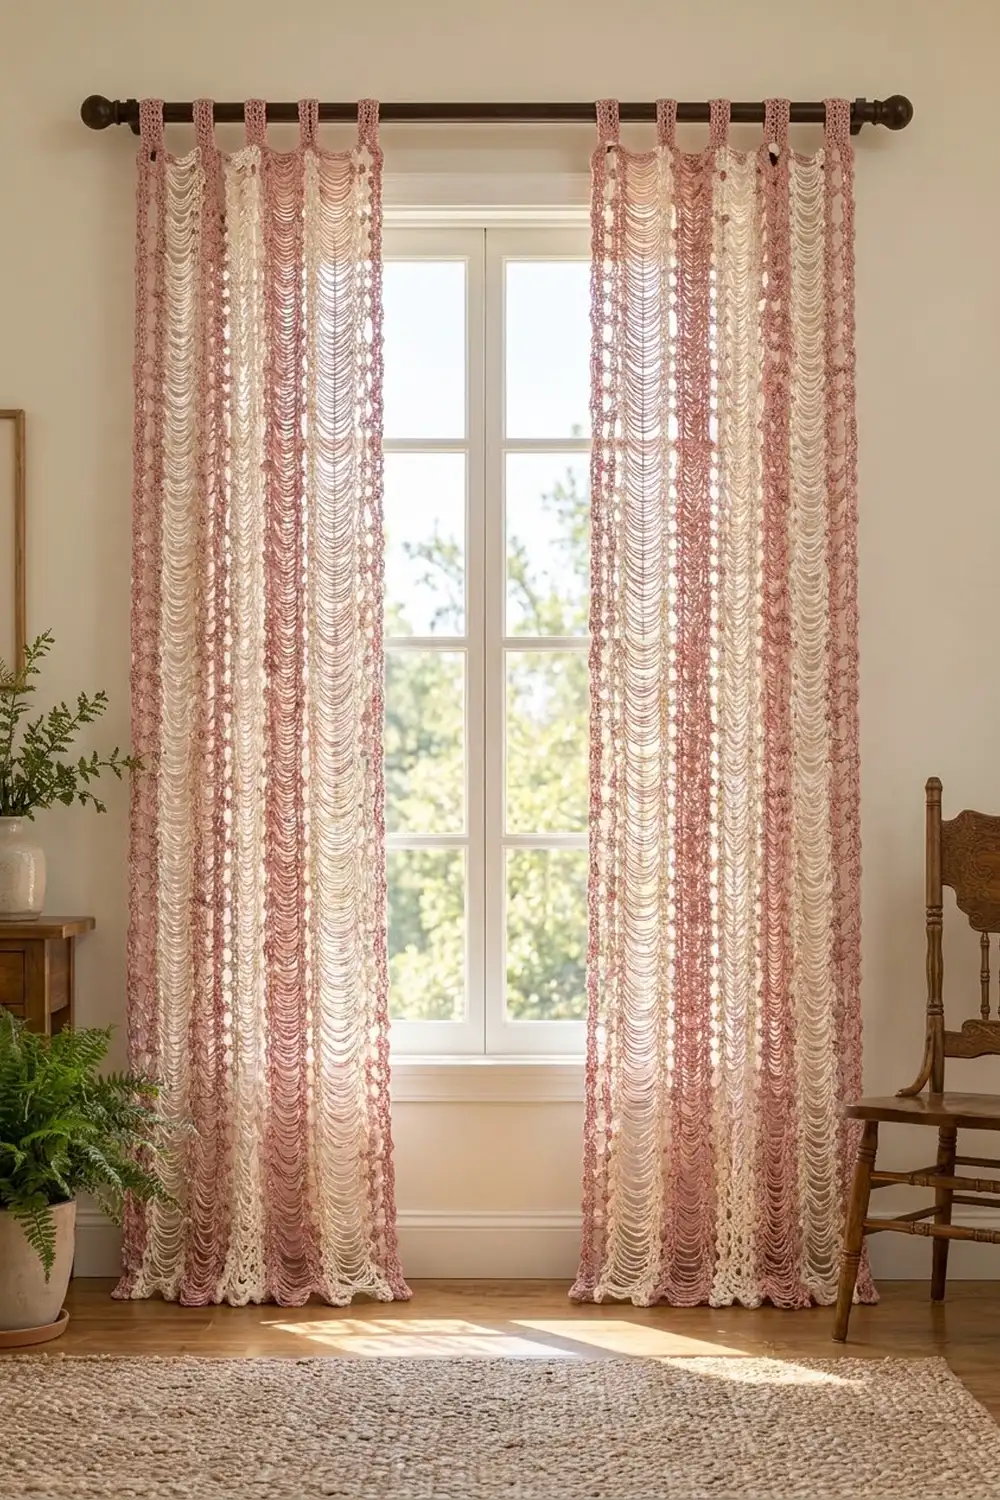
These airy curtains are made from classic hairpin lace strips. Each strip has a knotty center spine with long loops on both sides. The loops are gathered into a neat rib along each edge. Joined side by side, the strips form ladders of loops that soften daylight without blocking it.
The colors alternate between dusty rose and cream, so each panel reads as soft vertical stripes. The style is vintage cottage: open and light, with a little texture where the strips meet.
The pattern uses US crochet terms. One finished panel measures 32.5 in wide x 81 in long (82.6 cm x 205.7 cm), not counting the tabs.
Each panel has nine strips. You make each strip on a hairpin loom and add a rib along both long sides. Then you slip-stitch the strips together, work a two-round border, and add five hanging tabs. Make two panels for a pair, as shown.
Finished Size and Construction
- Finished panel size: 32.5 in x 81 in (82.6 cm x 205.7 cm), not counting tabs
- Skill level: Intermediate (some hairpin lace experience helps)
- Terminology: US crochet terms
- Yarn weight: DK / light worsted (#3) cotton or cotton blend
- Hook: US G/6 (4.0 mm)
- Loom: Hairpin lace loom set to 3 in (7.6 cm)
- Number of pieces: 9 hairpin strips per panel (18 for a pair)
- Layout: 9 strips side by side, alternating Rose and Cream, with Rose at both outer edges
- Strip size (with rib): 3.5 in x 80 in (8.9 cm x 203.2 cm)
- Size before border: 31.5 in x 80 in (80.0 cm x 203.2 cm)
- Border depth: about 0.5 in (1.3 cm) per side
- Tabs: 5 tabs, each 1.5 in (3.8 cm) wide
Materials
Choose a smooth cotton, either mercerized or matte. Cotton holds the twist of the loops and hangs straight. Avoid fuzzy yarns: the loops will tangle and you lose the open lace look.
Per panel:
– Color A – Dusty Rose: 250 g, about 575 m (629 yd)
– Color B – Cream: 150 g, about 345 m (377 yd)
For a pair: Rose 500 g / 1150 m (1258 yd); Cream 300 g / 690 m (755 yd).
These amounts include a margin of about 15–20% for gauge differences and swatching.
Tools:
– Adjustable hairpin lace loom, set to 3 in (7.6 cm)
– US G/6 (4.0 mm) hook with a slim head
– Smooth waste yarn in a contrast color, to hold loops in order
– Locking stitch markers (at least 20)
– Tapestry needle
– Scissors and tape measure
– Blocking pins, a spray bottle, and enough floor space to lay out a full panel
Abbreviations (US Terms)
- ch – chain
- sc – single crochet
- sl st – slip stitch
- st(s) – stitch(es)
- sp – space
- rnd – round
- RS / WS – right side / wrong side
Special stitch – Spine sc: Turn the loom so the newest loop is on the left prong. Insert the hook into the front strand of that left loop. Yarn over and pull up a loop, then yarn over and pull through both loops on the hook. This makes the knotty center spine.
Special stitch – Loop pair (lp pr): Two neighboring hairpin loops worked together, kept in their original twist.
Gauge and Checkpoints
Hairpin gauge: 16 loops per side = 4 in (10.2 cm) along the spine, measured relaxed.
Rib gauge: 16 rib sts = 4 in (10.2 cm).
Solid sc gauge (border and tabs): 16 sc x 18 rows = 4 in (10.2 cm).
Make a test strip first. Make a strip with 32 loops on each side and add the rib to both sides as described below. It should measure 8 in (20.3 cm) long and 3.5 in (8.9 cm) wide.
Checkpoints:
1. Test strip: 8 in x 3.5 in (20.3 cm x 8.9 cm).
2. Each finished strip: 80 in x 3.5 in (203.2 cm x 8.9 cm).
3. Joined panel: 31.5 in x 80 in (80.0 cm x 203.2 cm).
4. Panel with border: 32.5 in x 81 in (82.6 cm x 205.7 cm).
If the strip is too long: Your spine sc are loose. Snug each loop against the prong before you work the spine, or use a 3.75 mm hook.
If the strip is too short: Use a 4.5 mm hook for the spine.
If the width is off: Check the loom setting first. Then check the rib: a tight rib pulls the loops in, and a loose rib lets them flare.
Hairpin Strip (Make 9 per Panel)
Make 5 strips in Rose and 4 in Cream.
Setting Up the Loom
- Set the prongs 3 in (7.6 cm) apart.
- Make a slip knot and put its loop on the left prong.
- Slide the knot to the exact center between the prongs.
- Wrap the yarn front to back around the right prong, so the working yarn is at the back.
Working the Strip
Turn 1: Insert the hook under the front strand of the left loop. Yarn over and pull up a loop. Yarn over and pull through 1 loop on the hook (1 ch). You now have 1 loop on each prong.
Turn 2: Keep the loop on the hook and pass the hook handle through the prongs to the back. Turn the loom clockwise (from right to left), so the yarn wraps around the new right prong. Work 1 Spine sc into the front strand of the left loop. You now have 2 loops on each side.
Turns 3–320: Repeat Turn 2. Keep the spine centered and every wrap at the same tension.
When you finish, you have 320 loops on each side and the strip is about 80 in (203.2 cm) long. Fasten off and leave a 6 in (15.2 cm) tail.
Managing length: When the loom fills up:
1. Thread waste yarn through all the loops on each side.
2. Remove the bottom bar and slide the loops off, leaving the last 4 loops on the prongs.
3. Put the bar back on and keep working.
Every 40 loops, put a locking marker in the spine to make counting easier.
Checkpoint: Lay the strip flat without stretching it. The spine should measure 80 in (203.2 cm).
Edge Rib (Both Long Sides)
Use the same color as the strip, and work the loops held on waste yarn. Keep each loop twisted the way it came off the loom. These twisted loops give the edge its beaded, chain-like look.
Rib row: Join yarn in the first lp pr and ch 1 (this does not count as a st). Sc through the next lp pr held together, ch 1. Repeat from * to * 160 times in total. Fasten off.
Count: 160 sc + 160 ch = 320 rib sts per side.
Repeat on the second long side, starting at the same end, so both ribs run in the same direction.
Checkpoint: Each rib is 80 in (203.2 cm) long. The strip is 3.5 in (8.9 cm) wide: a 1.5 in (3.8 cm) loop on each side of the spine, plus about 0.25 in (0.6 cm) of rib on each side.
Counts for each strip: 320 rib sts along each long side, with no corner sts. The short ends get 14 sc each later, in border Rnd 1.
Make All Pieces
For one panel:
– Rose: 5 strips
– Cream: 4 strips
For a pair: 10 Rose and 8 Cream strips.
Layout (left to right, RS facing):
| R | C | R | C | R | C | R | C | R |
  1   2   3   4   5   6   7   8   9
Lay all the strips flat with their starting ends at the top. Check that each spine runs straight and that no strip is flipped over.
Joining
Method: Flat slip-stitch seam, using Rose for all seams.
- Place Strip 1 and Strip 2 side by side, RS up, with their ribs touching.
- Join Rose at the top of the ribs.
- Insert the hook through the back loop of rib st 1 on Strip 1, then through the back loop of rib st 1 on Strip 2, and sl st.
- Continue stitch to stitch, from rib st 1 to rib st 320. Do not add or skip any sts.
- Fasten off.
Join each remaining strip the same way, for 8 seams in total.
Tension advice: Keep the slip stitches as relaxed as the rib. A tight seam pulls the panel in and makes the stripes ripple. Before you join, put a marker every 40 sts on both strips to keep them lined up. Every 80 sts (20 in / 50.8 cm), check that the seam still measures true.
Size checkpoint: 9 strips x 3.5 in = 31.5 in wide x 80 in long (80.0 cm x 203.2 cm). The seams are worked in back loops and add no width.
Border
Work the border in Rose, RS facing.
Border gauge: 16 sc = 4 in (10.2 cm), the same as the rib.
Rnd 1: Join Rose at the top right corner.
– Top edge: Work 14 sc across the end of each strip: 1 sc in the rib row-end, 5 sc evenly across the loop ends, 2 sc in the spine end, 5 sc across the loop ends, and 1 sc in the other rib row-end. That is 9 strips x 14 = 126 sc.
– Corner: Ch 2. This is the corner space, not a st.
– Long side: 1 sc in each rib st of the outer strip. That is 1 strip x 320 = 320 sc.
– Corner: Ch 2.
– Bottom edge: Work the same as the top edge: 126 sc.
– Corner: Ch 2.
– Second long side: 320 sc.
– Corner: Ch 2. Sl st to the first sc.
Rnd 1 total: 126 + 320 + 126 + 320 = 892 sc, plus 4 ch-2 corner spaces.
Rnd 2: Ch 1. Work 1 sc in each sc, and (sc, ch 1, sc) in each ch-2 corner space. Sl st to the first sc.
– Top and bottom: 126 (1 per existing st) + 2 (1 corner sc at each end) = 128 sc each.
– Long sides: 320 (1 per existing st) + 2 (corner sc) = 322 sc each.
– Total: 128 + 322 + 128 + 322 = 900 sc, plus 4 ch-1 corner spaces. Each corner sc belongs to only one side, so nothing is counted twice.
Why the math works: At 16 sc per 4 in, 126 sts = 31.5 in (80.0 cm), which matches the joined width exactly. 320 sts = 80 in (203.2 cm), which matches the strip length. Because the border gauge matches the rib gauge, the edge doesn’t ruffle or pull in. The corner sc sit in the 0.5 in (1.3 cm) border depth, which brings the panel to 32.5 in x 81 in (82.6 cm x 205.7 cm).
Tabs (Make 5)
The tabs are worked in Rose along the 128 top sts of Rnd 2. Number those sts 1–128, starting from the top right corner sc. Work tabs on sts 2–7, 32–37, 62–67, 92–97, and 122–127.
Check: 1 + 6 + 24 + 6 + 24 + 6 + 24 + 6 + 24 + 6 + 1 = 128.
Each tab:
– Row 1: RS facing, join yarn in the first tab st. Ch 1, then sc in each of the 6 sts. Turn. (6 sc)
– Rows 2–20: Ch 1, sc in each sc. Turn. (6 sc)
– Fasten off and leave a 12 in (30.5 cm) tail.
Each tab measures 1.5 in x about 4.5 in (3.8 cm x 11.4 cm). Fold the tab to the WS and whipstitch Row 20 to the base of Rnd 1. The loop fits a rod up to 1.25 in (3.2 cm) across.
Final Blocking
- Weave in all ends along the ribs or the border, never across the open loops.
- Soak the panel in cool water with a little wool wash for 15 minutes. Press the water out gently; do not wring.
- Roll the panel in towels to remove extra water.
- Lay it flat on a clean sheet and pin the top edge straight at 32.5 in (82.6 cm).
- Ease the length to 81 in (205.7 cm). Pin every seam straight so the stripes run true.
- Even out the loops so each ladder looks the same, keeping the twists intact.
- Let it dry completely before you unpin it. You can also hang it on the rod while it’s still damp.
Final Quality-Control Checklist
- 9 strips in order R-C-R-C-R-C-R-C-R
- 320 loops per side on every strip
- 320 rib sts along every long edge
- 8 seams, each joined stitch to stitch from 1 to 320
- Border Rnd 1: 126 / 320 / 126 / 320
- Border Rnd 2: 128 / 322 / 128 / 322 = 900 sc
- 5 tabs, with 24-st gaps between them
- Panel measures 32.5 in x 81 in (82.6 cm x 205.7 cm)
- All loops twisted in the same direction
- All ends secure
Troubleshooting
- The spine drifts off-center: Recenter the knot at the start and always turn the loom the same way.
- Loops are different lengths: Your wrap tension is changing. Let the yarn flow around the prong instead of pulling it.
- The rib count is off: Recount the loops in groups of 40 using the markers, and add or remove turns before you work the rib.
- A loop lost its twist: Undo back to that loop and twist it again. Mixed twists look like holes from across the room.
- The panel narrows at the seams: The slip stitches are too tight. Redo the seam with a larger hook.
- The border ruffles: There are too many sc across the strip ends. Keep it to exactly 14 per strip.
- The curtain stretches after hanging: Cotton relaxes over time. Wash the curtain, dry it flat, and rehang it.
Care
Hand wash in cool water and dry flat, or hang it to dry while damp. Don’t tumble dry, because the loops can snag.
Final Notes
The measurement chain works like this. At 16 loops = 4 in, each strip is 80 in (203.2 cm) long. The rib turns 320 loops into 320 sts at the same gauge. Nine 3.5 in (8.9 cm) strips join to 31.5 in (80.0 cm) wide. Two border rounds bring the panel to 32.5 in x 81 in (82.6 cm x 205.7 cm). Check each step as you go, and your panels will hang straight and match.
Happy crocheting!