

This Irish-style lace curtain panel puts cream six-petal flowers in open chain mesh, with sage-green leaves trailing diagonally across the fabric. In a sunny window, light comes through the mesh and the flowers and leaves stand out against it.
The palette has only two colors. Cream is used for the flowers, mesh and edging, and sage green for the appliqué leaves and the ribbed hanging tabs. The style is cottage-romantic but still simple and calm.
All instructions use US crochet terms. One finished panel measures 26 in x 74 in (66.0 cm x 188.0 cm), not including the tabs. For a pair, make two panels.
Construction is modular. You crochet 48 square flower blocks and sew two leaves onto each one. Then you join the blocks in a 4 x 12 grid, work a three-round border and add five green tabs along the top edge.
Finished Size and Construction
- Finished size (one panel): 26 in x 74 in (66.0 cm x 188.0 cm), not including tabs
- Skill level: Intermediate
- Terminology: US
- Yarn weight: DK / light (#3) cotton
- Hook: 3.5 mm (E-4)
- Number of pieces: 48 blocks, 96 leaves and 5 tabs per panel
- Layout: 4 blocks wide x 12 blocks long
- Block size: 6 in x 6 in (15.2 cm x 15.2 cm)
- Size before border: 24 in x 72 in (61.0 cm x 182.9 cm)
- Border depth: 1 in (2.5 cm) on all sides
Materials
Use a smooth mercerized or combed DK cotton. Cotton gives crisp stitch definition, blocks well and keeps its shape on a curtain rod. Avoid fuzzy blends, which blur the mesh.
Per panel:
– Cream (Color A): 400 g, about 960 m (1,050 yd)
– Sage green (Color B): 200 g, about 480 m (525 yd)
For a pair, double these amounts: cream 800 g (about 1,920 m) and sage 400 g (about 960 m).
These quantities include a margin of about 15% for gauge swatches, tails and blocking adjustments.
Tools:
– 3.5 mm (E-4) crochet hook
– Tapestry needle
– Stitch markers
– Rust-proof pins and blocking mats
– Measuring tape
Abbreviations (US Terms)
- ch – chain
- sl st – slip stitch
- sc – single crochet
- hdc – half double crochet
- dc – double crochet
- tr – treble crochet
- sp(s) – space(s)
- st(s) – stitch(es)
- BLO – back loop only
- RS / WS – right side / wrong side
Special stitch – Picot: Ch 3, sl st in the 3rd ch from hook.
Gauge and Checkpoints
Gauge: 20 sc = 4 in (10.2 cm). That is 5 sc per inch, measured across the last round of a block.
Make one complete block and two leaves before you start the whole panel. Block them lightly and measure them.
Checkpoints:
– After Round 3 (flower): about 2.25 in (5.7 cm) across
– After Round 5: about 4.5 in (11.4 cm) square. Slight ruffling in the mesh is normal.
– After Round 7: 6 in x 6 in (15.2 cm x 15.2 cm), with 30 sc per side
– Finished leaf: 2.75 in x 1.25 in (7.0 cm x 3.2 cm)
If your block is too big: change to a 3.25 mm hook, or tighten your chain loops in Rounds 5 and 6.
If your block is too small: change to a 3.75 mm hook.
Being off by just 1/4 in (0.6 cm) per block adds up to 3 in (7.6 cm) over the 12-block length, so check carefully.
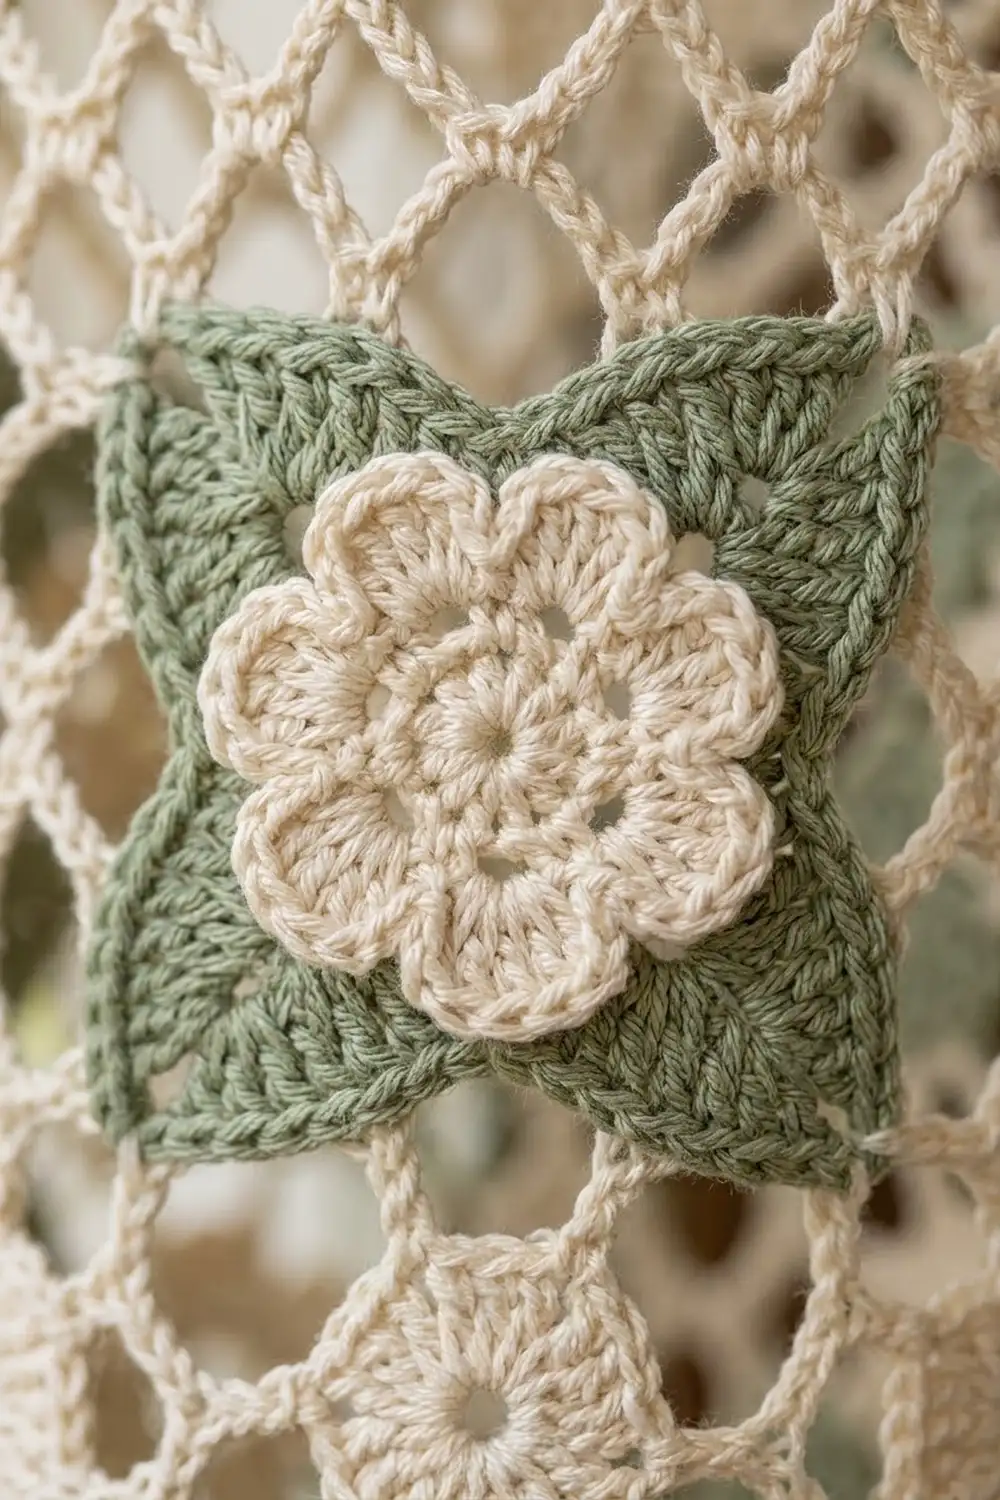
Flower Block (make 48 per panel)
Work in cream (Color A) throughout. Do not turn at the end of rounds; keep the RS facing you.
Round 1: Make a magic ring, ch 1, work 12 sc in the ring and sl st to the first sc. Pull the ring closed. (12 sc)
Round 2: Ch 1, sc in first st, ch 3, skip next st. Sc in next st, ch 3, skip next st; repeat from * 4 more times, then sl st to first sc. (6 sc, 6 ch-3 sps)*
Round 3 (petals): Sl st into first ch-3 sp. Work (sc, hdc, 3 dc, hdc, sc) in each ch-3 sp, then sl st to first sc. (6 petals, 42 sts)
Round 4 (back loops): This round sits behind the petals. Ch 1. Working from the back, sc around the post of the Round 2 sc between petals, ch 4, sc into the back of the center dc of the next petal, ch 4; repeat from * 5 more times, then sl st to first sc. (12 sc, 12 ch-4 loops)*
The petals now stand forward, which gives the flower its raised look.
Round 5 (mesh, conversion to square): Sl st into first ch-4 loop. Ch 1, then work (sc, ch 6, sc) in the same loop for the first corner. [Ch 6, sc in next loop] 2 times, ch 6, then (sc, ch 6, sc) in next loop for the corner; repeat from * 2 more times. Finish with [ch 6, sc in next loop] 2 times, ch 6, then sl st to first sc. (16 sc; 16 ch-6 loops = 4 corner loops + 12 side loops, 3 per side)*
Round 6: Sl st in the next 3 ch to reach the center of the corner loop. Ch 1, then work (sc, ch 3, sc) in the corner loop. [Ch 6, sc in next ch-6 loop] 3 times, ch 6, then (sc, ch 3, sc) in next corner loop; repeat from * 2 more times. Finish with [ch 6, sc in next ch-6 loop] 3 times, ch 6, then sl st to first sc. (20 sc; 4 corner ch-3 sps; 16 side ch-6 loops, 4 per side)*
Round 7 (solid edge): Sl st into corner ch-3 sp. Ch 1, then work (sc, ch 2, sc) in the corner sp. *Work 7 sc in each of the next 4 ch-6 loops, then (sc, ch 2, sc) in the next corner sp; repeat from * 2 more times. Work 7 sc in each of the next 4 ch-6 loops, then sl st to first sc. Fasten off and weave in the ends.
Round 7 count: each side has 1 corner sc + (4 loops x 7 sc) + 1 corner sc = 30 sc per side, with a ch-2 sp at each corner. Total: 120 sc and 4 ch-2 corner sps.
The 30 sc per side already include that side’s corner sc. The ch-2 corner sps are not counted as stitches.
Leaf (make 96 per panel)
Work in sage green (Color B).
Foundation: Ch 12.
Round 1: Sc in 2nd ch from hook (the skipped ch becomes the tip). Then hdc in next ch, dc in next 2 ch, tr in next 3 ch, dc in next 2 ch, hdc in next ch and 3 sc in last ch (base). Rotate and work along the other side of the foundation chain: hdc in next ch, dc in next 2 ch, tr in next 3 ch, dc in next 2 ch, hdc in next ch, sc in next ch, then sl st in the skipped tip ch. (23 sts)
The tr stitches leave small gaps between them, which gives the leaf its openwork look.
Round 2: Ch 1, sc in each of next 10 sts, 2 sc in each of next 3 sts (base) and sc in each of next 10 sts. Work (sc, picot, sc) in the tip, then sl st to first sc. (28 sc + 1 picot)
Vein: On the RS, work surface sl sts along the foundation chain line from base to tip (about 11 sl sts). Fasten off, leaving a 12 in (30.5 cm) tail for sewing.
Attaching the Leaves
Pin two leaves to the RS of each block. Place the rounded base of the first leaf against the flower petals, with the tip pointing toward the top-right corner. Place the second leaf the same way, pointing toward the bottom-left corner. Turn every block the same way so the leaves line up diagonally across the panel like a vine.
Sew around each leaf with small running stitches through the Round 2 sc and the mesh chains underneath. Don’t pull tight; the mesh should stay flat.
Make All Pieces
Per panel:
– 48 flower blocks in cream (Color A)
– 96 leaves in sage green (Color B), 2 sewn onto each block
– 5 tabs in sage green (Color B), made after the border
Layout grid (4 wide x 12 long, all blocks turned the same way):
Row 1:   B  B  B  B   <- top edge (tabs)
Row 2:   B  B  B  B
Row 3:   B  B  B  B
 ...     (repeat)
Row 12:  B  B  B  B   <- bottom edge
Block each block to 6 in x 6 in (15.2 cm x 15.2 cm) before joining so all the seams match.
Joining
Method: Slip-stitch join in cream, worked on the WS.
- Hold two blocks RS together with the edges matching.
- Insert the hook through both corner ch-2 sps and sl st.
- Sl st through the outer (back) loop of each pair of matching sc, stitch to stitch, for all 30 sc.
- Sl st through the next pair of corner ch-2 sps. (32 sl sts per seam)
Order: First join each horizontal row of 4 blocks (3 seams per row). Then join the 12 rows to each other with long seams across the full width, working straight through the seam intersections.
Tension: Keep the slip stitches as loose as the sc they sit on. Tight seams pucker the lace and shorten the panel. Use a hook one size larger for joining if needed.
Size checkpoint: Each joined row of 4 blocks should be 24 in (61.0 cm) wide. The full grid should be 24 in x 72 in (61.0 cm x 182.9 cm).
Border
Border gauge: Round 1 uses the same 5 sc per inch as the blocks, so the edge stays flat instead of ruffling or pulling in.
Round 1: With the RS facing, join cream in any outer corner ch-2 sp of the panel. Ch 1, then work (sc, ch 2, sc) in each outer corner sp. Along the sides, work 1 sc in each sc of each block. At each seam, skip the joined pair of corner ch-2 sps and go straight from the last sc of one block to the first sc of the next. Sl st to first sc.
- Short sides: 4 blocks x 30 sc = 120 sc, plus 1 corner sc at each end = 122 sc
- Long sides: 12 blocks x 30 sc = 360 sc, plus 1 corner sc at each end = 362 sc
- Total: 120 + 120 + 360 + 360 + 8 corner sc = 968 sc, plus 4 ch-2 corner sps
Round 2 (mesh): Sl st into the corner ch-2 sp. Ch 1, then work (sc, ch 5, sc) in the corner sp. *Ch 4, skip next 2 sc, sc in next sc; repeat from * along the side. End with ch 4, skip the last 2 sc, then work (sc, ch 5, sc) in the next corner sp. Repeat on all sides, then sl st to first sc.
- Short sides: 40 repeats x 3 sts + 2 final skipped sts = 122 sc used, giving 40 sc and 41 ch-4 loops
- Long sides: 120 repeats x 3 sts + 2 final skipped sts = 362 sc used, giving 120 sc and 121 ch-4 loops
Round 3 (picot edge): Sl st into the corner ch-5 loop. Ch 1. Work (3 sc, picot, 3 sc) in each corner loop and (2 sc, picot, 2 sc) in each ch-4 loop. Sl st to first sc and fasten off.
- Short sides: 41 loops x 4 sc = 164 sc and 41 picots
- Long sides: 121 loops x 4 sc = 484 sc and 121 picots
- Each corner: 6 sc and 1 picot
Why the math works: Each side count is a multiple of the block’s 30 sc plus its two corner sc. Both 122 and 362 equal 2 plus a multiple of 3. Each side starts with the 2 skipped sc of its first repeat and ends with 2 final skipped sc, so every side is symmetrical. The total border depth is 1 in (2.5 cm), which brings the panel to 26 in x 74 in (66.0 cm x 188.0 cm).
Hanging Tabs (make 5 per panel)
With sage green (Color B), ch 9.
Row 1: Sc in 2nd ch from hook and in each ch across, turn. (8 sc)
Rows 2–38: Ch 1, sc in BLO of each st across, turn. (8 sc)
The BLO rows make the ribbed texture. Each tab is about 7 in x 1.6 in (17.8 cm x 4.1 cm). Leave a long tail.
Placement: Fold each tab in half to make a 3.5 in (8.9 cm) loop. Sew one end to the front of the top border and the other end to the back, covering Rounds 1–3. Center one tab over each of the 3 vertical seams. Place the other 2 tabs with their outer edges flush with the side edges of the panel. The tabs end up 6 in (15.2 cm) apart, center to center.
Final Blocking
- Weave in all remaining ends for at least 2 in (5.1 cm); cotton ends can work loose.
- Soak the panel in cool water for 15 minutes. Press out the water gently; do not wring.
- Roll the panel in towels to remove extra moisture.
- Lay it flat on blocking mats, RS up, and pin it to 26 in x 74 in (66.0 cm x 188.0 cm).
- Pin at every block corner along the outer border to keep the edges straight.
- Open each picot and mesh loop with a pin, and smooth every leaf flat.
- Let the panel dry completely before unpinning, usually 24 hours.
Final Quality-Control Checklist
- Every block is 6 in (15.2 cm) square, with 30 sc per side
- All leaves point toward the top-right and bottom-left corners
- Every seam has 32 sl sts and lies flat
- Border Round 1 has 122 sc on each short side and 362 sc on each long side
- Border Round 2 has 41 loops on each short side and 121 on each long side
- The finished panel is 26 in x 74 in (66.0 cm x 188.0 cm)
- All five tabs are evenly spaced and securely sewn
Troubleshooting
Flower petals flop backward: Round 4 was worked in front of the petals. Anchor each sc behind the petals.
Block cups or ruffles: The chain loops are too short or too long. Adjust your tension in Rounds 5–6 and check again at the 4.5 in (11.4 cm) checkpoint.
Seams pucker: Rejoin with a larger hook and looser slip stitches.
Border waves: Recount Round 1. Extra sc at the seams is the usual cause.
Panel stretches longer over time: Cotton relaxes as it hangs. Re-block lightly and dry it flat.
Care
Hand wash in cool water with a mild detergent and dry flat, re-pinning if needed. Don’t hang the panel while it is wet, because the weight of the water stretches the lace.
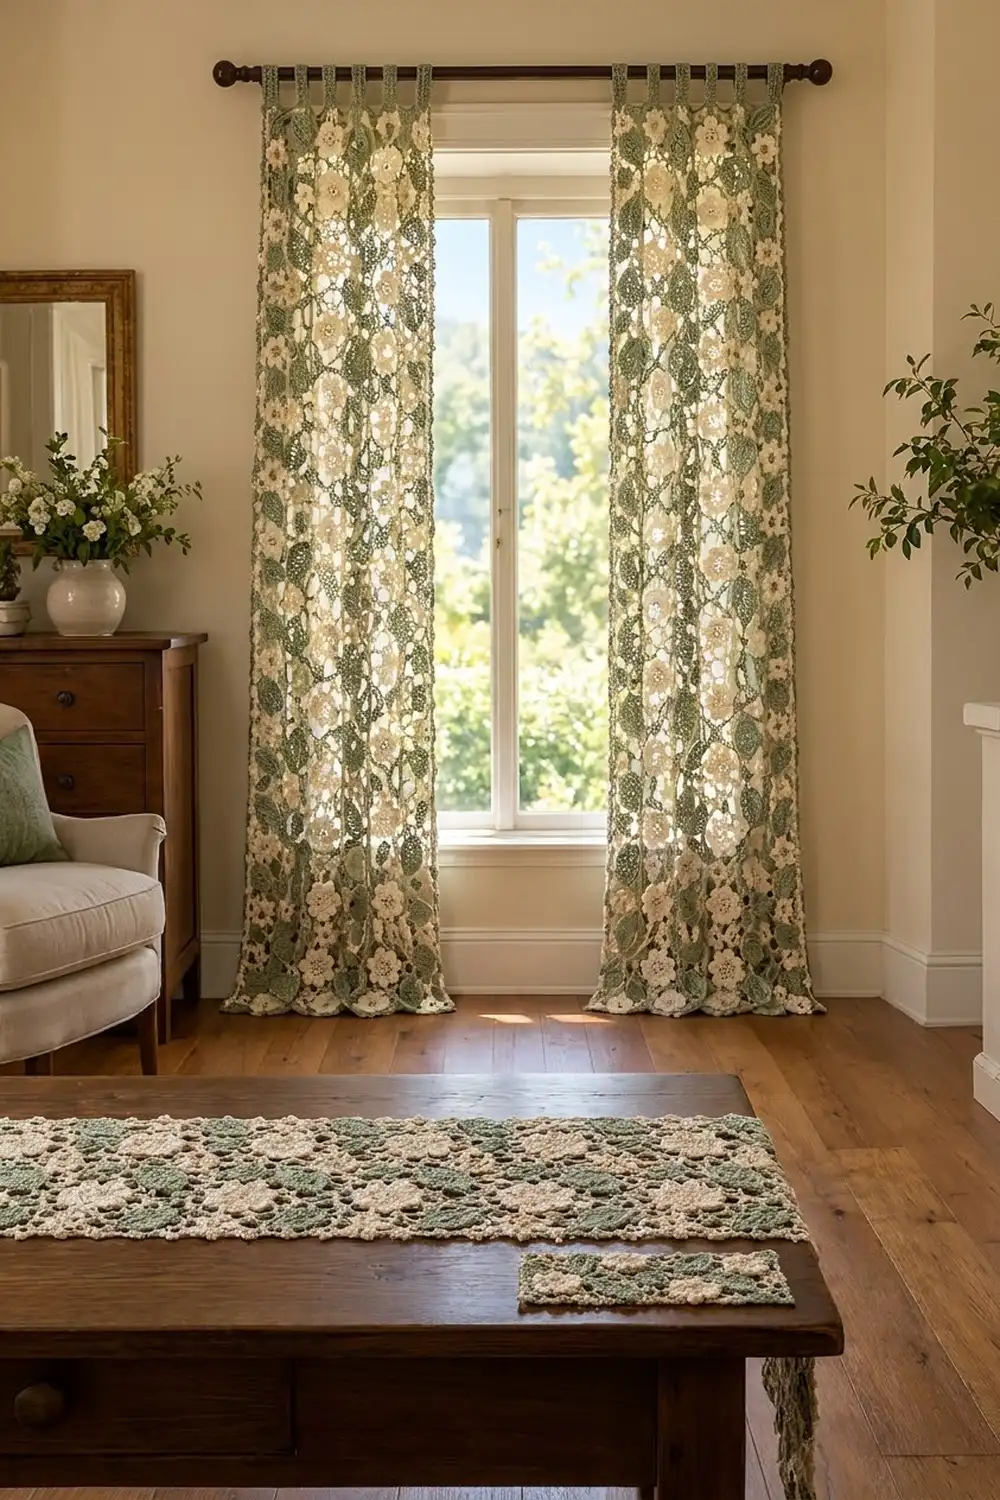
Final Notes
The measurements build in a simple chain. At 5 sc per inch, 30 stitches make a 6 in (15.2 cm) block. Four blocks across and twelve down make 24 in x 72 in (61.0 cm x 182.9 cm). A 1 in (2.5 cm) border brings the panel to 26 in x 74 in (66.0 cm x 188.0 cm). If the first block matches the gauge, the rest of the panel will too.
Happy crocheting!