

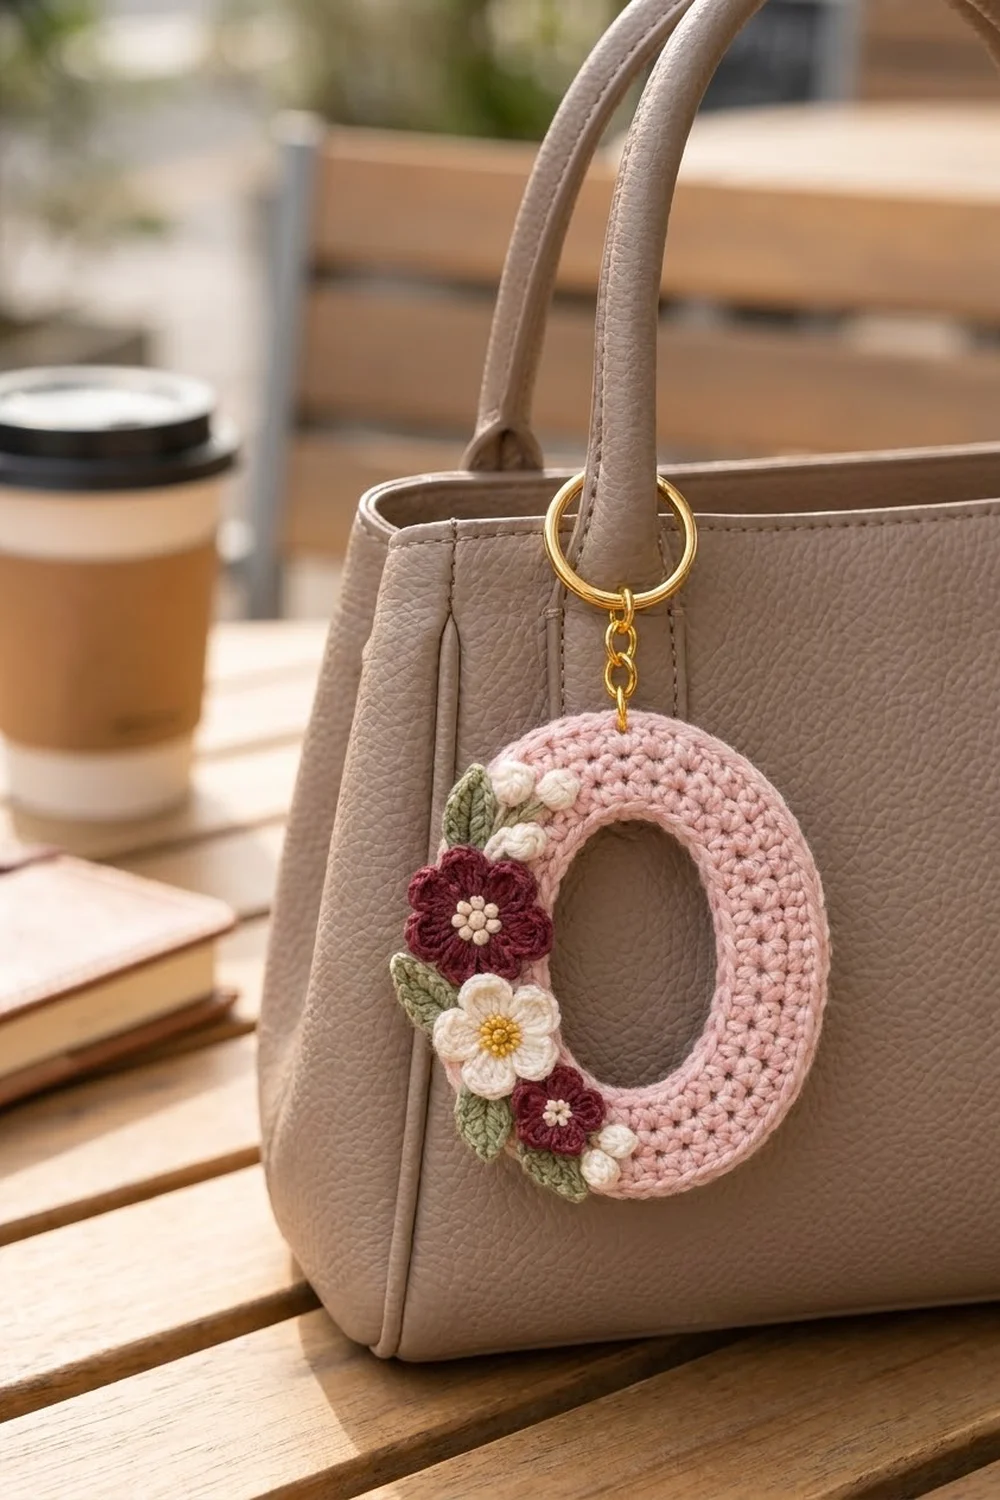
The Rosewood Bloom Letter O is a small, sweet bag charm. It is one oval letter “O” in soft blush pink, with a cluster of tiny flowers, buds and leaves stitched down its left side. A gold key ring hangs from a short chain at the top center, so the charm clips easily onto a purse handle, backpack zipper or set of keys.
The colors are soft and vintage. The letter is blush pink. The large and small flowers are deep burgundy with cream centers, one flower is cream with a mustard-yellow center, the round buds are cream, and the leaves are sage green. The look is neat and cottage-floral, with a dense, slightly pebbled single crochet surface.
This pattern uses US crochet terms. The finished letter measures 3 in wide x 4 in tall (7.6 cm x 10.2 cm), with an oval opening of about 1.25 in x 2.25 in (3.2 cm x 5.7 cm).
Construction is simple. You chain a ring, then work five rounds of single crochet outward. Increases go only in the top and bottom curves, so the letter stays a true oval. A slip stitch border tidies both edges. You make the flowers, buds and leaves separately and sew them on as layered appliqués. The hardware goes on last.
Finished Size and Construction
- Finished size: 3 in x 4 in (7.6 cm x 10.2 cm), letter only
- Skill level: Easy to intermediate
- Terminology: US crochet terms
- Yarn weight: Fine (#2, sport) cotton
- Hook: 2.5 mm (labeled US B/1 or C/2, depending on brand)
- Number of pieces: 1 letter body, plus small appliqués (3 flowers, 4 buds, 4 leaves)
- Layout: One oval letter, with the appliqués grouped on the left side from about 10 o’clock to 7 o’clock
- Piece size: 3 in x 4 in (7.6 cm x 10.2 cm)
- Size before border: 2.9 in x 3.9 in (7.4 cm x 9.9 cm)
- Border depth: about 0.05 in (0.1 cm) per edge, inner and outer
Materials
Choose a smooth mercerized cotton or cotton blend in sport weight. Cotton holds the oval shape well, shows the stitches clearly and does not pill when the charm rubs against a bag.
- Blush pink (letter): 8 g, about 20 m
- Burgundy (2 flowers): 4 g, about 10 m
- Cream (1 flower, buds, flower centers): 4 g, about 10 m
- Mustard yellow (cream flower center): 2 g, about 5 m
- Sage green (leaves): 4 g, about 10 m
All quantities include a comfortable margin for gauge swatching and sewing tails.
Tools:
- 2.5 mm crochet hook
- 4 stitch markers
- Tapestry needle with a sharp tip
- Scissors
- 1 in (2.5 cm) gold split key ring
- 0.75 in (1.9 cm) length of gold chain
- Two 6 mm gold jump rings
- 2 pairs of flat-nose pliers
- Blocking board, rustproof pins and a spray bottle
Abbreviations (US Terms)
- ch – chain
- sl st – slip stitch
- sc – single crochet
- hdc – half double crochet
- dc – double crochet
- inc – 2 sc in the same stitch
- st(s) – stitch(es)
- MR – magic ring
- FLO – front loop only
Special stitch – bobble (bob): Yarn over, insert the hook in the stitch, yarn over and pull up a loop, then yarn over and pull through 2 loops. Do this 4 times in the same stitch, leaving 5 loops on the hook. Yarn over and pull through all 5 loops.
Gauge and Checkpoints
Gauge: 6 sc and 6 rows = 1 in (2.5 cm) with a 2.5 mm hook.
Work a swatch of 12 sc x 12 rows. It should measure 2 in (5.1 cm) square. After that, use the letter body itself as your real test piece, since the oval is small and quick.
Checkpoints (laid flat, gently shaped):
- After Round 1: about 1.6 in x 2.6 in (4.1 cm x 6.6 cm) at the outside edge
- After Round 3: about 2.3 in x 3.3 in (5.8 cm x 8.4 cm)
- After Round 5: 2.9 in x 3.9 in (7.4 cm x 9.9 cm)
- After border: 3 in x 4 in (7.6 cm x 10.2 cm)
If your piece is too big: go down to a 2.25 mm hook. If it is more than 1/8 in (0.3 cm) too large after Round 3, start again, because the error grows every round.
If your piece is too small: go up to a 2.75 mm hook, or check that you aren’t pulling each sc tight.
If the piece cups: you need more room in the curves for your tension, so go up a hook size. If it ruffles: go down a hook size.
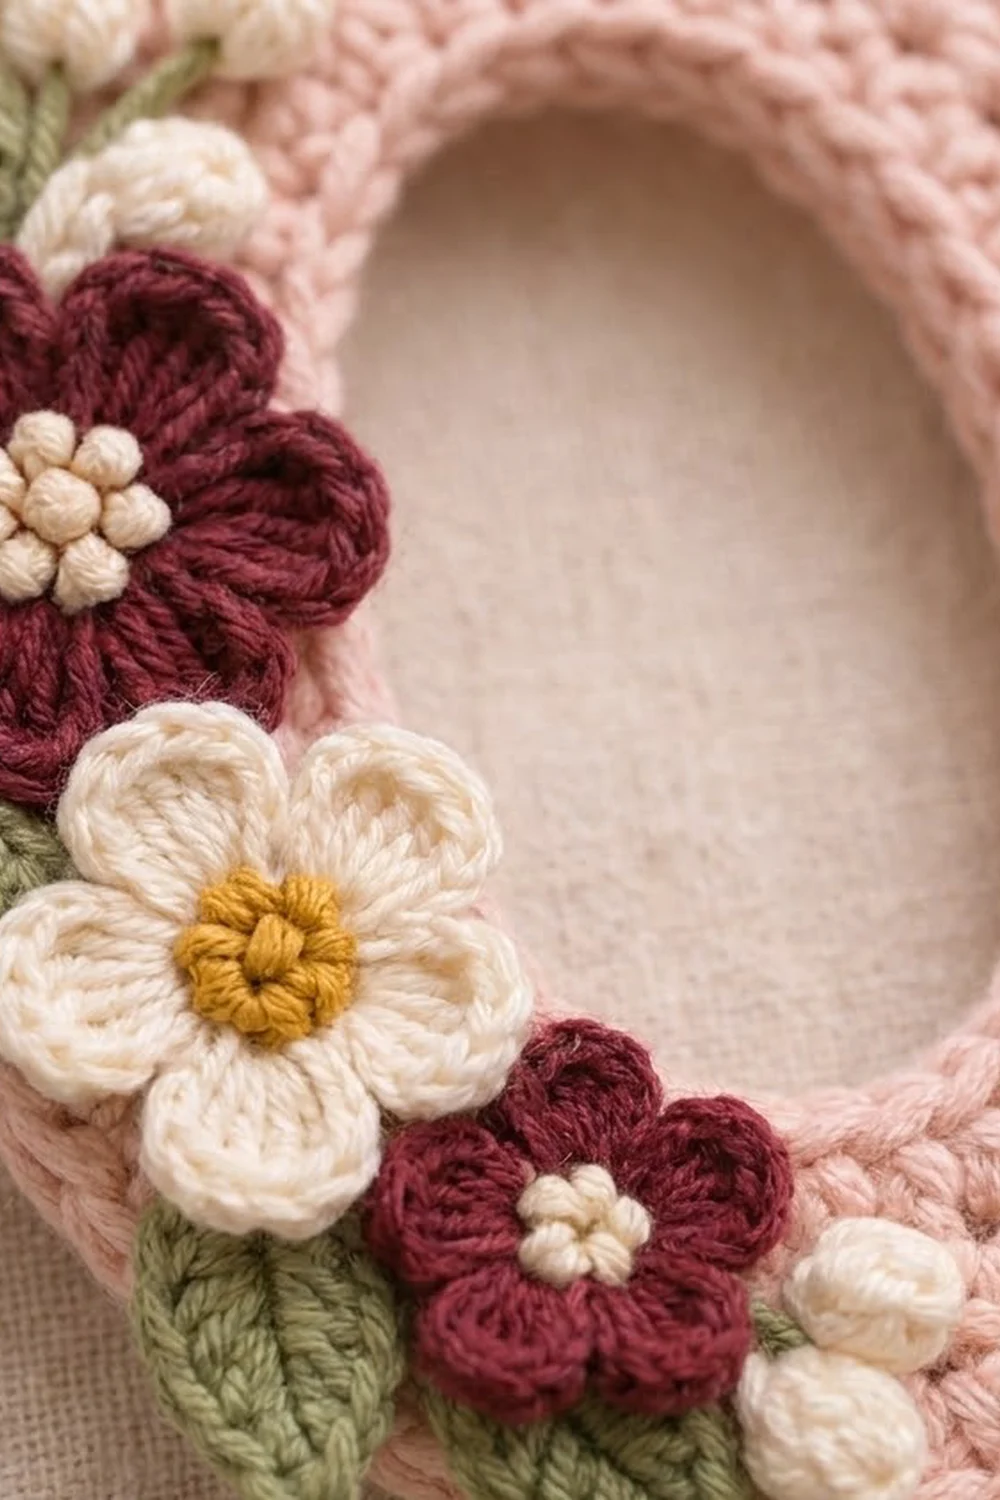
Letter Body
The ring is divided into 4 sections: right side, top curve, left side and bottom curve. The side sections never change. All increases go in the 2 curves, with 4 increases per curve each round. This keeps the sides straight and the ends rounded.
Work in joined rounds and do not turn. The ch 1 at the start of each round does not count as a stitch.
Foundation: With blush pink, ch 36. Join with a sl st to the first ch, taking care not to twist the chain.
Round 1: Ch 1, sc in the same ch as the join and in each ch around. Join with a sl st to the first sc. (36 sts)
Place the markers now:
- first st of the right side (st 1)
- first st of the top curve (st 7)
- first st of the left side (st 19)
- first st of the bottom curve (st 25)
Section counts: right 6, top 12, left 6, bottom 12. Move the markers up each round.
Round 2: Ch 1. Right side: sc in next 6 sts. Top curve: [sc in next 2 sts, inc] 4 times. Left side: sc in next 6 sts. Bottom curve: [sc in next 2 sts, inc] 4 times. Join. (44 sts: 6 + 16 + 6 + 16)
Round 3: Ch 1. Right: sc in next 6. Top: [sc in next 3, inc] 4 times. Left: sc in next 6. Bottom: [sc in next 3, inc] 4 times. Join. (52 sts: 6 + 20 + 6 + 20)
Round 4: Ch 1. Right: sc in next 6. Top: sc in next 2, inc, [sc in next 4, inc] 3 times, sc in next 2. Left: sc in next 6. Bottom: sc in next 2, inc, [sc in next 4, inc] 3 times, sc in next 2. Join. (60 sts: 6 + 24 + 6 + 24)
The offset start in Round 4 staggers the increases, so the curves stay smooth instead of forming points.
Round 5: Ch 1. Right: sc in next 6. Top: [sc in next 5, inc] 4 times. Left: sc in next 6. Bottom: [sc in next 5, inc] 4 times. Join. (68 sts: 6 + 28 + 6 + 28)
Check the size: it should be 2.9 in x 3.9 in (7.4 cm x 9.9 cm). The pink band is about 0.8 in (2.0 cm) wide all around. Do not fasten off.
Why the math works: Each sc round adds 1/6 in to the radius of each curve. A half circle then grows by pi x 1/6 in, about 0.52 in, which is about 3.1 sts per round. Four increases per curve is slightly generous. That extra room offsets the slight pull of the slip stitch border and lets the curves lie flat.
Border
Border gauge: Work the slip stitches 1 per stitch, at the same 6 sts per 1 in (2.5 cm) as the body. The border adds no width along the edges, only a neat corded finish.
Outer border: Continuing with pink, ch 1, then sl st loosely in each st around: right 6, top 28, left 6, bottom 28. Join to the first sl st. (68 sl sts) Fasten off and weave in the tail.
Inner border: Hold the piece with the right side facing. Join pink in the free loop of the foundation chain at the start of the right side. Sl st loosely in each free loop around: right 6, top 12, left 6, bottom 12. Join. (36 sl sts) Fasten off and weave in the tail.
These counts match Round 5 and Round 1 exactly, so neither edge draws in or flares. Keep the slip stitches as loose as your sc. If they tighten, the curves will pucker.
Flowers
Leave a 6 in (15.2 cm) tail on every appliqué for sewing.
Large burgundy flower (make 1): about 1 in (2.5 cm) across.
- Round 1: With burgundy, MR, 10 sc in ring. Pull the ring closed and join. (10 sts)
- Round 2: (Hdc, 2 dc, hdc) in next st, sl st in next st; repeat from * 4 more times. (5 petals, 25 sts) Join and fasten off.
- Center: With cream, work 1 French knot in the center and 5 French knots in a ring around it, one at the base of each petal.
Cream flower (make 1): about 1 in (2.5 cm) across.
- Round 1: With mustard, MR, 10 sc in ring. Join with cream and fasten off the mustard. (10 sts)
- Round 2: With cream, work as Round 2 of the large flower. (5 petals, 25 sts) Fasten off.
Small burgundy flower (make 1): about 0.7 in (1.8 cm) across.
- Round 1: With burgundy, MR, 5 sc in ring. Join. (5 sts)
- Round 2: (Hdc, dc, hdc) in each st around. Join to the first hdc. (5 petals, 15 sts) Fasten off.
- Center: With cream, work 3 small French knots in a cluster.
Buds and Leaves
Cream bud (make 4): about 0.3 in (0.8 cm) across.
With cream, ch 3. Work a bob in the 3rd ch from the hook, then ch 1 to close. Fasten off, keeping both tails. Tie the tails together behind the bud to puff it up.
Sage leaf (make 4): about 1 in (2.5 cm) long and 0.5 in (1.3 cm) wide.
With sage green, ch 7. Starting in the 2nd ch from the hook, work sc, hdc, dc, hdc, sc (5 sts), then 3 sc in the last ch. Working along the other side of the chain, work sc, hdc, dc, hdc, sc (5 sts). Join to the first sc. (13 sts) Fasten off.
The end with 3 sc becomes the rounded tip, and the starting chain end becomes the pointed stem end. For a vein, sl st in FLO down the center with a strand of green, or embroider a single straight stitch.
Assembly of the Appliqué Cluster
All the appliqués sit on the left side of the letter, layered from the bottom up. Lay them out and pin them before sewing.
- Leaves (bottom layer): Place 1 leaf at about 10 o’clock pointing up and out, 1 under the large burgundy flower pointing left, 1 under the cream flower pointing left, and 1 at about 7 o’clock pointing down.
- Large burgundy flower: Center it at about 9 o’clock, slightly overlapping the outer edge of the band.
- Cream flower: Place it just below the large burgundy flower, overlapping it by about 1/8 in (0.3 cm) and shifted slightly toward the opening.
- Small burgundy flower: Place it below and to the right of the cream flower, at about 7 o’clock.
- Buds: Tuck 3 buds above the large flower near the top leaf, and 1 bud at the bottom beside the last leaf.
Sew each piece on with its own tail. Use small stitches through the back loops of the edge so nothing shows on the front. Sew only into the top layer of the pink stitches, not through to the back, so the back stays clean. Weave the tails in behind the pink stitches.
Hardware: Open a jump ring and pass it through the top center of the outer edge, between st 14 and st 15 of the top curve. Catch both the Round 5 stitches and the border. Close the ring around one end of the chain. Use the second jump ring to join the other end of the chain to the split ring.
Final Blocking
- If your rings are not rustproof, remove the hardware before blocking and reattach it afterward.
- Lightly mist the letter body and appliqués with a spray bottle. Do not soak them.
- Lay the charm flat on the blocking board, flowers up.
- Pin the outside edge to a 3 in x 4 in (7.6 cm x 10.2 cm) oval. Place pins at the top, bottom, both sides and four diagonal points.
- Shape the opening to 1.25 in x 2.25 in (3.2 cm x 5.7 cm) with your fingers. Keep the sides straight and the curves even.
- Press each petal open with a fingertip and smooth the leaves.
- Let it dry completely, at least 6 hours, before removing the pins.
Final Quality-Control Checklist
- The outer size is 3 in x 4 in (7.6 cm x 10.2 cm).
- The opening is about 1.25 in x 2.25 in (3.2 cm x 5.7 cm).
- Round 5 has 68 sts and the inner border has 36 sts.
- Both side bands are straight and the same width.
- The top and bottom curves are smooth, with no points.
- The appliqué cluster sits only on the left side, from about 10 o’clock to 7 o’clock.
- No sewing stitches show on the front or back.
- The jump ring is centered at the top and fully closed.
- All tails are woven in and trimmed.
Troubleshooting
- The oval looks like a circle: You worked increases in the side sections. Check that each side has exactly 6 sts every round.
- The ends come to points: The increases are stacking. Use the Round 4 offset and work the increases loosely.
- The piece cups: Your tension is too tight. Go up a hook size or loosen the slip stitch border.
- The edges ripple: There are too many stitches for your tension. Go down a hook size.
- The petals are floppy: Pull the sl st between petals snug.
- The flower cluster lifts off: Add a few tacking stitches through the center of each flower.
- The chain twisted when you joined Round 1: Start again, because a twist can’t be fixed later.
Care
Hand wash in cool water with mild soap, press the water out in a towel and dry flat, reshaping to size. Remove plated hardware first.
Final Notes
The measurements are easy to check at each stage. A 36-chain ring gives an opening of 1.25 in x 2.25 in (3.2 cm x 5.7 cm). Five sc rounds grow it to 68 sts and 2.9 in x 3.9 in (7.4 cm x 9.9 cm). The slip stitch border, 68 sts outside and 36 sts inside, finishes it at 3 in x 4 in (7.6 cm x 10.2 cm). Keep each side section at 6 sts and put all the growth in the curves, and the letter will stay a clean oval every time.
Add the burgundy and cream flowers, buds and sage leaves, clip on the gold ring, and your charm is ready to hang.
Happy crocheting!