

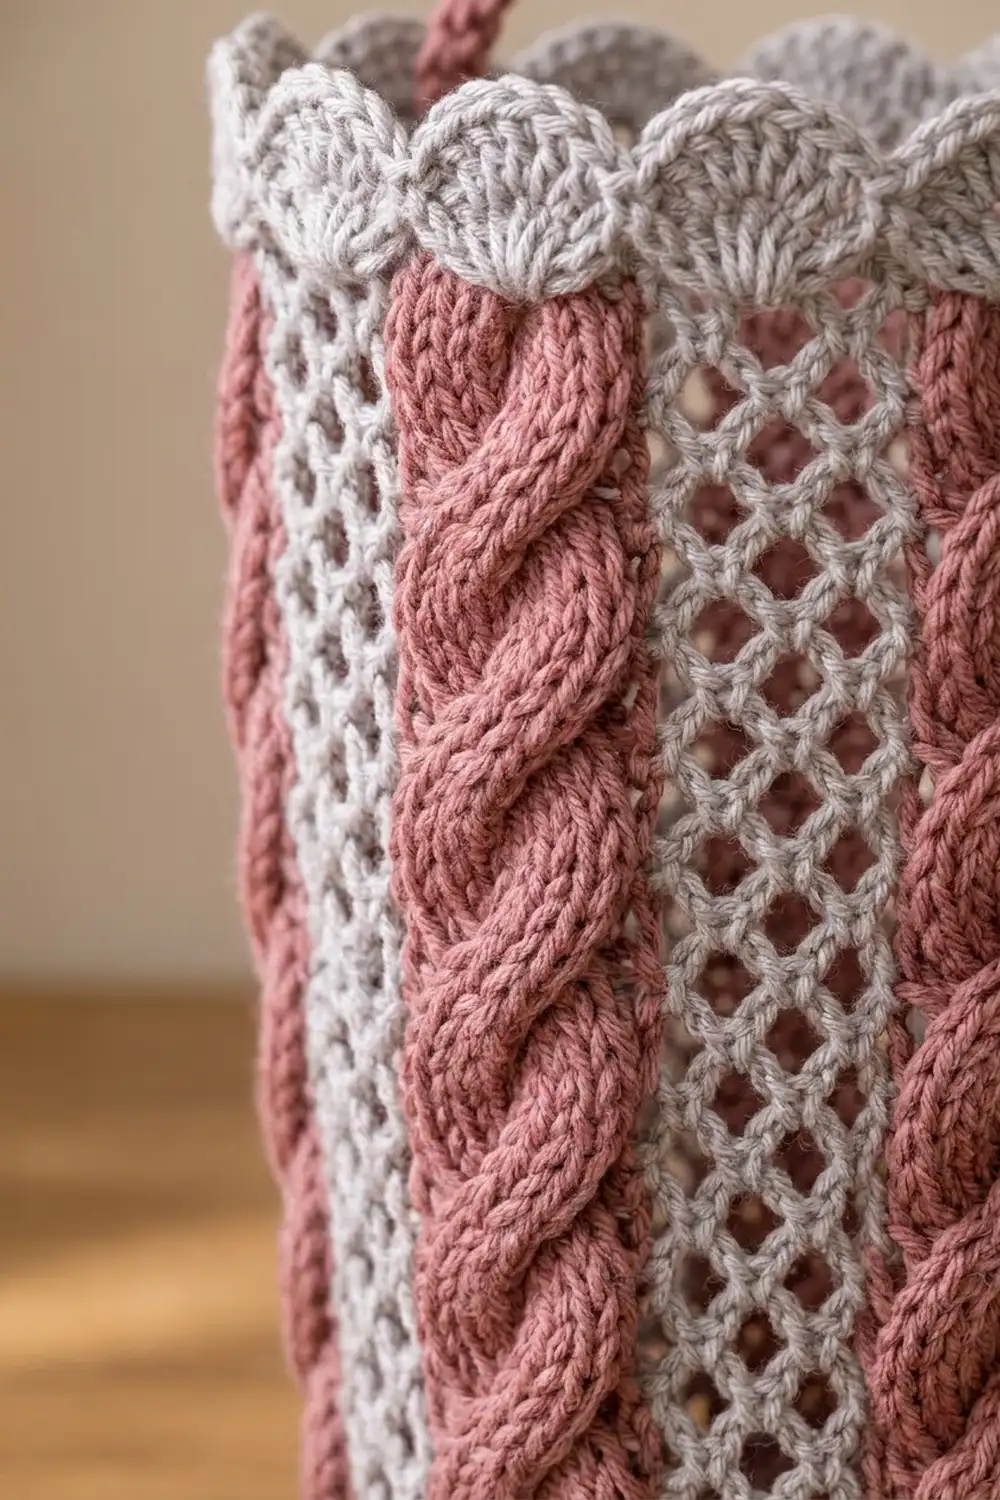
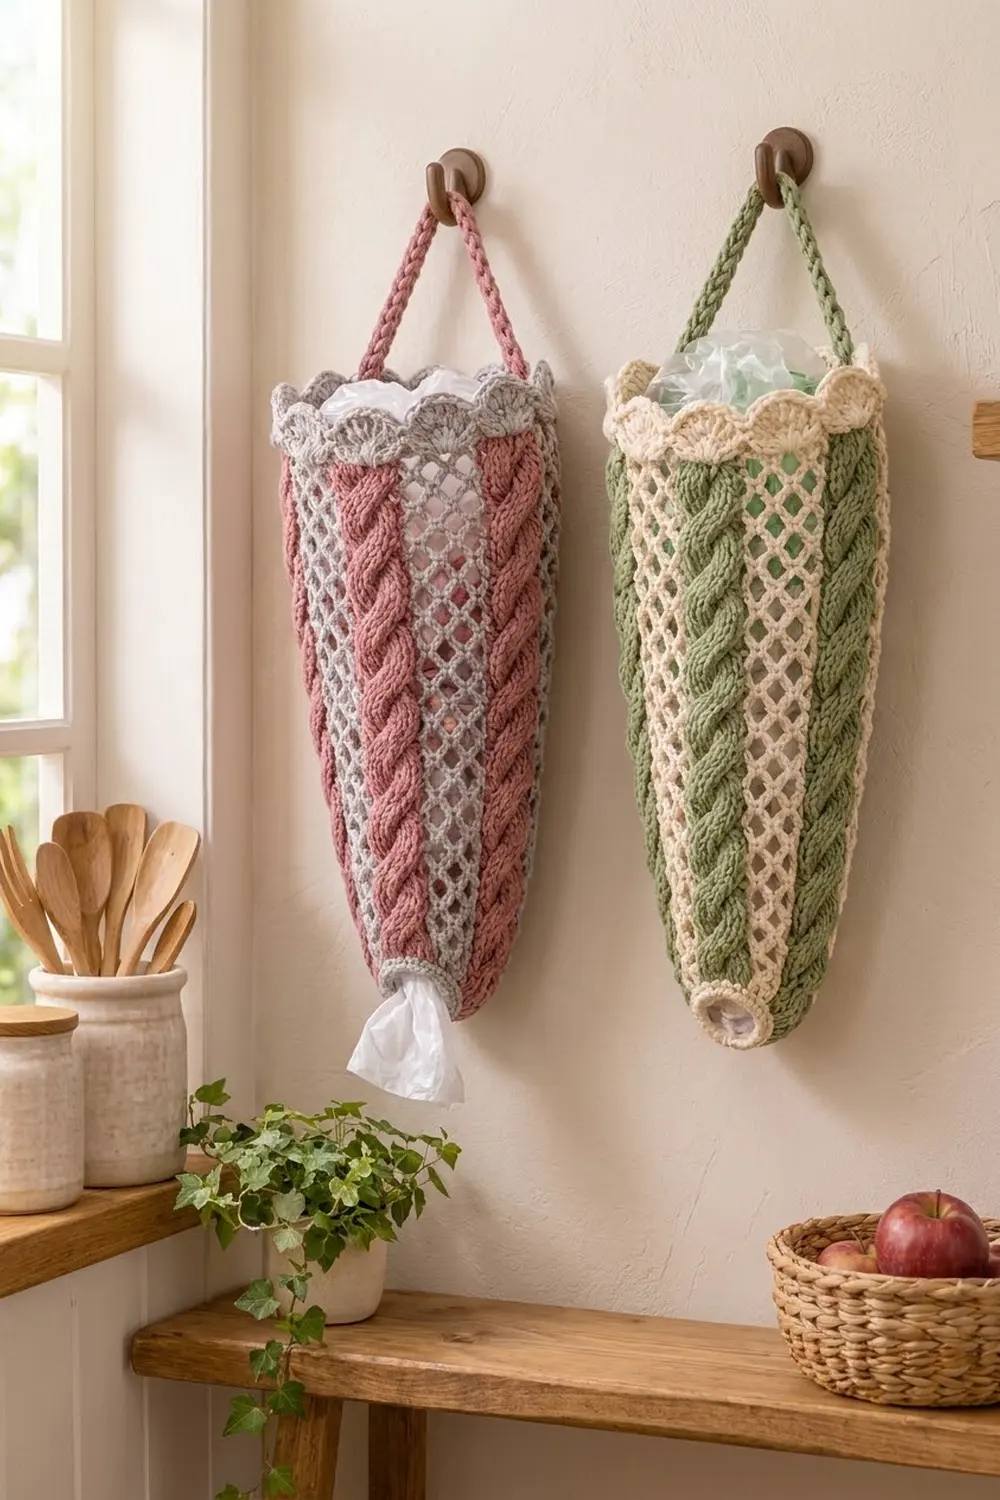
This hanging bag holder pairs chunky dusty-rose rope cables with airy light-gray lattice panels. It hangs from a single rose strap, stuffs easily from the wide scalloped top, and lets you pull bags out of the narrow gray ring at the bottom.
The look is cozy farmhouse kitchen: soft rose, warm gray, a scalloped shell rim, and deep twisted cables that stand out against the open mesh. The pattern uses US crochet terms throughout.
The finished holder is 20 in (50.8 cm) long from bottom ring to scalloped rim, not counting the strap. It is 8 in (20.3 cm) wide laid flat at the top and 4 in (10.2 cm) wide at the bottom.
You work it as one seamless tube from the bottom up. First comes a gray sc ring, then 36 turned rounds of intarsia with 4 rose cable panels and 4 gray lattice panels. The lattice panels widen at 4 increase rounds to make the cone. A gray shell edging finishes the top, and a rose strap goes across it.
Finished Size and Construction
- Finished size: 20 in (50.8 cm) long × 8 in (20.3 cm) wide at the top, 4 in (10.2 cm) at the bottom, laid flat
- Skill level: Intermediate (post-stitch cables, simple intarsia)
- Terminology: US
- Yarn weight: Worsted (#4)
- Hook: 5.0 mm (H-8)
- Number of pieces: 1 (the strap is worked directly onto the rim)
- Layout: Single tapered tube, 8 vertical panels alternating cable and lattice
- Piece size before border: 19 in (48.3 cm) long × 8 in (20.3 cm) wide at the top
- Border depth: 1 in (2.5 cm) of scalloped shell edging
- Strap: 14 in (35.6 cm) long, rising about 5.5 in (14.0 cm) above the rim
Materials
Use a smooth worsted cotton or cotton blend so the cables look crisp and the lattice holes stay open. Cotton holds its shape when the holder is stuffed. Plan on about 190 m per 100 g.
- Color A, dusty rose: 80 g / 155 m (cables and strap)
- Color B, light gray: 70 g / 135 m (bottom ring, lattice, shell edging)
These quantities include a margin of roughly 10 percent for swatching and the bobbins.
Tools
– 5.0 mm (H-8) crochet hook
– 8 yarn bobbins, or small butterflies of yarn
– 4 stitch markers
– Tapestry needle
– Scissors and measuring tape
– Blocking pins and a rolled towel
Abbreviations (US Terms)
- ch – chain
- sl st – slip stitch
- sc – single crochet
- dc – double crochet
- sp – space
- sk – skip
- FPtr – front post treble crochet
- BPdc – back post double crochet
- RS / WS – right side / wrong side
- E – edge dc (the dc at each side of a lattice panel)
Cable cross (4CR, worked over 4 cable stitches on RS rounds): Sk the next 2 stitches. FPtr around each of the next 2 stitches. Working in front of the stitches you just made, FPtr around each of the 2 skipped stitches. This uses 4 stitches and makes 4 stitches.
Lattice rule: Work into each lattice stitch between the E stitches. Over every dc, ch 1 and sk that dc. Into every ch-1 sp, work 1 dc. Each ch 1 counts as a stitch. This rule shifts the holes half a stitch every round, which builds the diamond lattice. It works in either direction, so it suits turned rounds.
Intarsia notes: Each panel uses its own bobbin: 4 rose (C1–C4) and 4 gray (M1–M4). To change color, work the last yarn over of the final stitch of a panel with the next panel’s yarn. Twist the two yarns once on the WS so no gap forms. All bobbins stay inside the tube.
Gauge and Checkpoints
Gauge: 16 stitches and 8 rounds = 4 in (10.2 cm) over the body pattern. That is 4 stitches and 2 rounds per inch (2.5 cm). In sc, 16 sc and 16 rounds = 4 in (10.2 cm).
The holder is the test piece. Work the bottom ring and the first 6 body rounds, then measure before you go on.
- After the bottom ring (32 sc): circumference 8 in (20.3 cm), so 4 in (10.2 cm) wide flat and 1 in (2.5 cm) tall.
- After Round 6: 4 in (10.2 cm) total height, still 4 in (10.2 cm) wide.
- After Round 14 (40 sts): 8 in (20.3 cm) tall, 5 in (12.7 cm) wide.
- After Round 22 (48 sts): 12 in (30.5 cm) tall, 6 in (15.2 cm) wide.
- After Round 30 (56 sts): 16 in (40.6 cm) tall, 7 in (17.8 cm) wide.
- After Round 36 (64 sts): 19 in (48.3 cm) tall, 8 in (20.3 cm) wide.
If your piece is too big, go down a half or full hook size. If it is too small, go up. The cables pull in a little until blocking, so judge width across the lattice.
Bottom Ring
With B, ch 32. Join with a sl st to the first ch, taking care not to twist the chain.
Rounds 1–4: Ch 1, sc in each st around, join with a sl st to the first sc. (32 sc)
This gray band is the pull-out opening, about 2.5 in (6.4 cm) across. Fasten off B.
Body
Every body round is a turned round. Begin each round with ch 2, which does not count as a stitch. End each round with a sl st into the first stitch, using the yarn already on your hook. Then ch 2 and turn. Because you turn, odd rounds (RS) begin with C1 and even rounds (WS) begin with M4.
Panel order on RS rounds: C1, M1, C2, M2, C3, M3, C4, M4. Put a marker in the first stitch of each cable panel.
Round 1 (RS): Join A with a sl st in the first sc, ch 2. With rose, dc in each of the next 4 sc (cable panel). With gray, dc in the next sc (E), dc in the next sc, ch 1, sk the next sc, dc in the next sc (E) (lattice panel). Repeat from * to * 3 more times, starting a new bobbin for each panel. Join. (32 sts: 4 cable panels of 4 sts and 4 lattice panels of 4 sts)
Round 2 (WS): Cable panels: BPdc around each of the 4 sts. Lattice panels: dc in E, work the lattice rule over the center sts, dc in E. (32 sts)
Round 3 (RS): Cable panels: 4CR. Lattice panels as Round 2. (32 sts)
Rounds 4–6: Repeat Rounds 2 and 3, then work Round 2 once more. (32 sts)
From here on, every RS round uses 4CR on the cables and every WS round uses BPdc around each cable stitch. That makes a cross every 2 rounds, which gives the tight rope twist.
Round 7 (RS, increase): Cables: 4CR. In each lattice panel, work the lattice rule, but in the ch-1 sp nearest the panel center, work (dc, ch 1, dc) in place of the single dc. That adds 2 stitches per panel. (40 sts: cables 16 + lattice 4 × 6)
Rounds 8–14: Work even, alternating WS and RS rounds. (40 sts)
Round 15 (RS, increase): Same as Round 7. (48 sts: cables 16 + lattice 4 × 8)
Rounds 16–22: Work even. (48 sts)
Round 23 (RS, increase): Same as Round 7. (56 sts: cables 16 + lattice 4 × 10)
Rounds 24–30: Work even. (56 sts)
Round 31 (RS, increase): Same as Round 7. (64 sts: cables 16 + lattice 4 × 12)
Rounds 32–36: Work even, ending with a WS round. (64 sts)
At the end of Round 36, join with rose and fasten off all 8 bobbins, leaving 6 in (15.2 cm) tails on the inside. The body is 19 in (48.3 cm) tall and 8 in (20.3 cm) wide flat.
The increase always uses a ch-1 sp, so the dc/ch alternation holds. A 6-stitch lattice panel reads E, ch, dc, ch, dc, E. The cable panels stay 4 stitches wide the whole way up, so all of the taper comes from the lattice.
Border: Scalloped Shell Edging
Border gauge: 4 sc = 1 in (2.5 cm). Each shell repeat is 4 stitches, so each scallop is 1 in (2.5 cm) wide.
Turn so the RS faces you. The border is worked in joined rounds without turning.
Round 37 (RS): Join B with a sl st in the first stitch of C1. Ch 1, sc in each dc, post stitch, and ch-1 sp around, join. (64 sc: 32 per flat side)
This is a trim round worked 1 per existing stitch, plus 0 added. It closes the lattice holes at the rim and gives the shells a firm base.
Round 38: Ch 1. Sc in the next sc, sk the next sc, 5 dc in the next sc, sk the next sc. Repeat from * to * 15 more times. Join to the first sc. (16 scallops: 16 sc + 80 dc. That is 8 scallops per flat side.) Fasten off.
Why the math works: 64 stitches ÷ 4 stitches per repeat = 16 repeats exactly, with no leftover stitch at the join. Each flat side has 32 stitches ÷ 4 = 8 scallops. The scallops sit at the same 4 stitches per inch as the body, so the rim stays 8 in (20.3 cm) wide and does not ruffle. The edging adds 1 in (2.5 cm), which brings the total length to 20 in (50.8 cm).
Strap
The valley sc of the first repeat (above the start of C1) and the valley sc of the 9th repeat (stitch 33) sit exactly opposite each other. These are the two side folds.
With A, join with a sl st in the first valley sc. Ch 56. Without twisting the chain, sl st in the opposite valley sc. Turn. Sc in each ch across (56 sc), then sl st in the first valley sc. Fasten off.
Weave the tails back along the strap to reinforce both ends. The strap is 14 in (35.6 cm) long and about 0.5 in (1.3 cm) wide.
Final Blocking
- Weave in all ends on the inside. Run each bobbin tail along its own color.
- Soak the holder in cool water for 10 minutes and gently squeeze it out. Do not wring it.
- Roll it in a towel to remove extra water.
- Stuff the tube loosely with a rolled towel or plastic bags to shape the cone.
- Lay it flat. Center the strap ends at the side folds, with C2 down the front center.
- Pin to 20 in (50.8 cm) long, 8 in (20.3 cm) wide at the top, and 4 in (10.2 cm) at the bottom.
- Pin each scallop into a neat curve and open the lattice diamonds with your fingers.
- Let it dry completely before you unpin it.
Final Quality-Control Checklist
- Body total is 64 stitches at Round 36, with 16 cable and 48 lattice stitches.
- Each cable panel crosses in the same direction on every RS round.
- No gaps show at the color changes from the RS.
- The lattice holes are offset and form diamonds, not straight columns.
- The bottom ring is 8 in (20.3 cm) around and lets bags slide out easily.
- There are 16 even scallops, 8 per side.
- The strap is attached at opposite valleys and is not twisted.
- Finished length is 20 in (50.8 cm) without the strap.
Troubleshooting
Holes at color changes: Twist the old and new yarns on the WS at every change, and tug the new yarn snug.
Cables look flat: You probably worked FP on a WS round. Use BPdc on WS rounds so the posts stay raised on the RS.
Lattice stacks in columns instead of diamonds: Recheck the lattice rule. A dc always goes into a ch-1 sp, and a ch 1 always goes over a dc.
Bobbins tangle: After every 2 rounds, turn the whole tube the opposite way to unwind the strands.
Rim ruffles: Your shell round is too loose. Go down one hook size for Round 38 only.
Bottom ring too tight: Rework the starting chain with a hook one size larger.
Visible seam line: The turned-round joins sit at a side fold. Keep the C1 side at the edge when you hang it.
Care
Hand wash in cool water with mild soap, reshape, and dry flat. Avoid the dryer, which can flatten the cables.
Final Notes
The measurement chain is simple: 4 stitches and 2 rounds per inch. The 32-sc ring gives 8 in (20.3 cm) around. Four increase rounds take the body from 32 to 64 stitches and from 4 in (10.2 cm) to 8 in (20.3 cm) wide over 19 in (48.3 cm). The 64-stitch shell round divides into 16 scallops and adds the last 1 in (2.5 cm), for a 20 in (50.8 cm) holder. Check your gauge at each checkpoint and the rest falls into place.
Happy crocheting!