

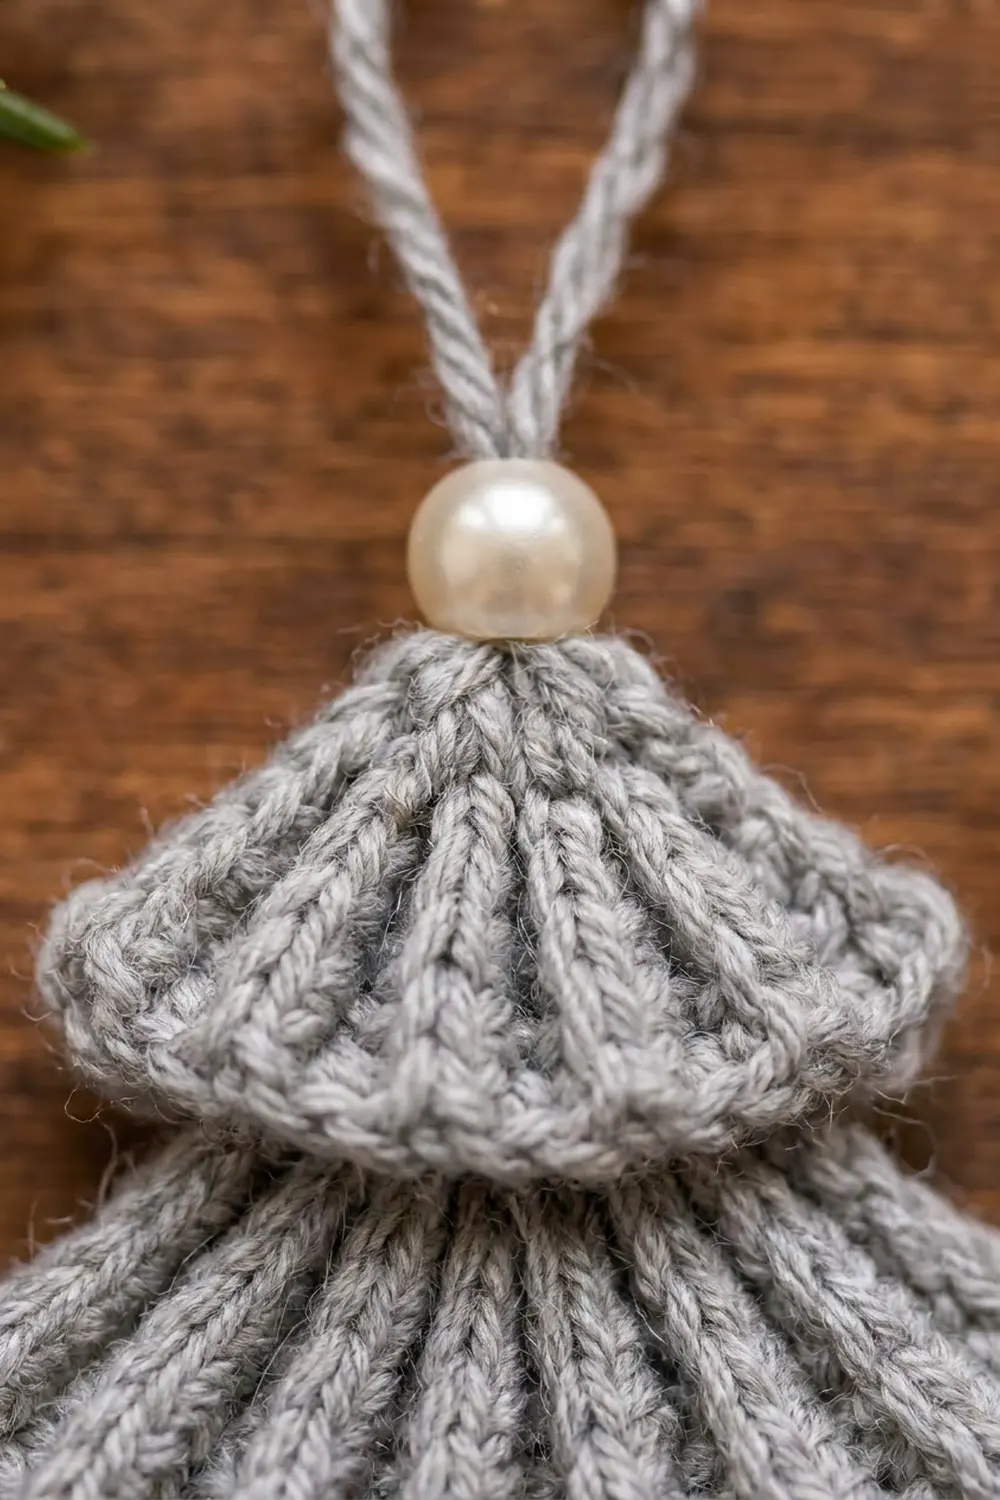
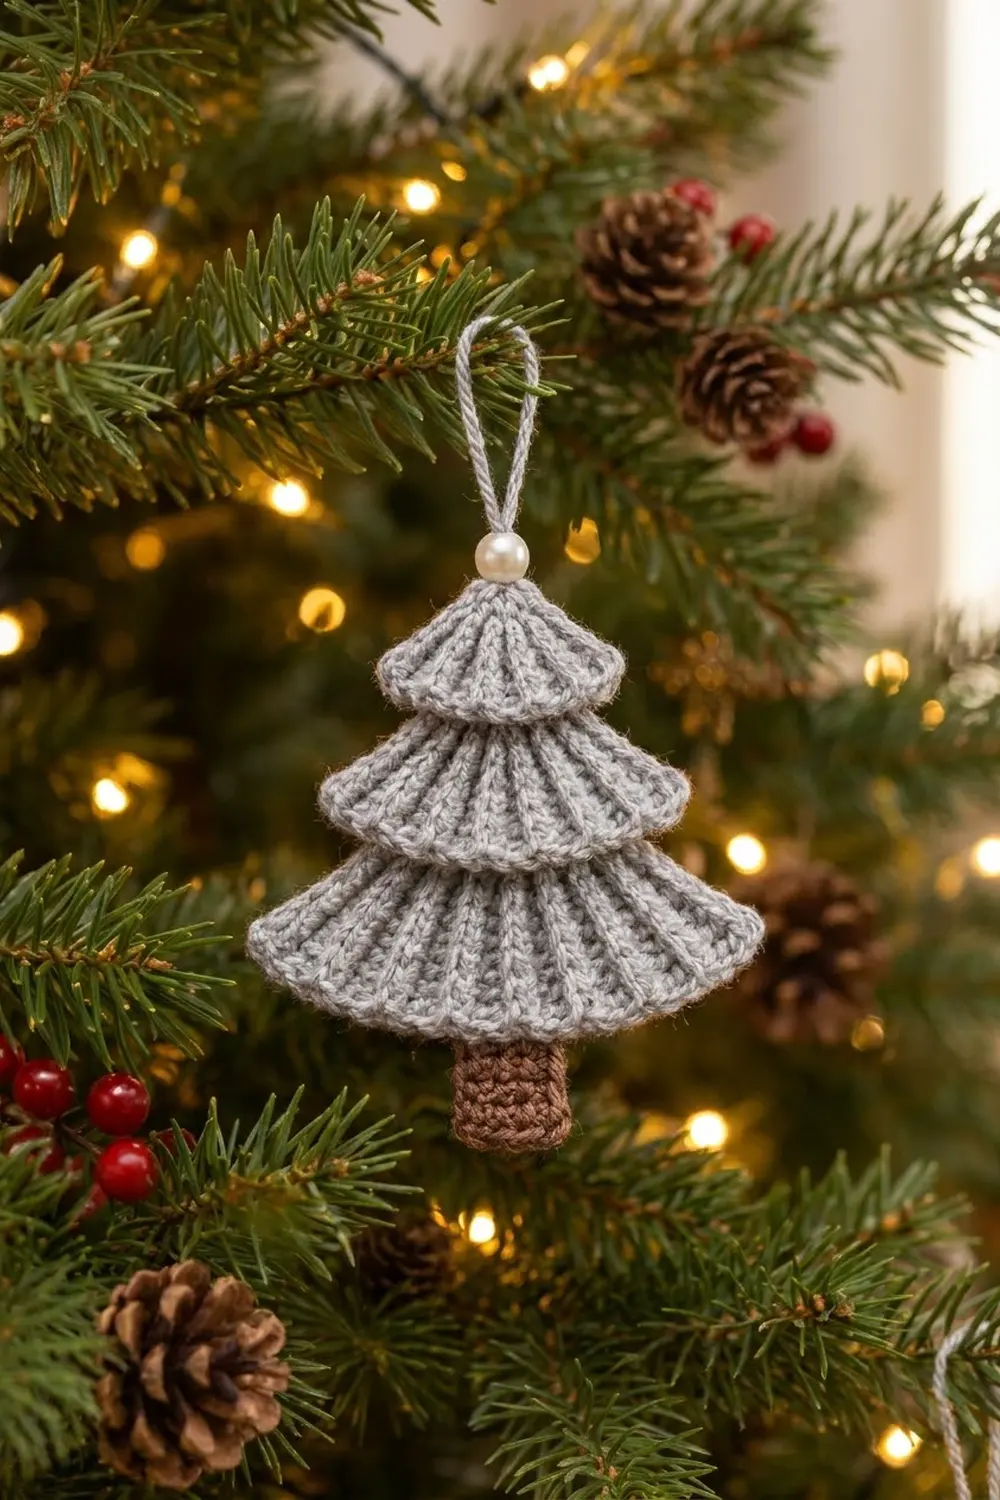
The Frosted Pine Tree Ornament is a small textured Christmas tree. It has three stacked fan-shaped tiers in soft heather gray, a short brown trunk, a pearl bead at the tip and a slim gray hanging loop. Fine raised ribs fan out from the top of each tier, so the tree looks like layered pine branches dusted with frost.
The style is quiet and Scandinavian-inspired. There is one neutral main color and one accent color, and the texture does most of the work. It looks just as good on a tree branch as it does tied to a gift or hung in a window.
This pattern uses US crochet terms. The finished ornament is about 4.2 in (10.7 cm) wide and 4.0 in (10.2 cm) tall, measured from the tip of the top tier to the bottom of the trunk. That size doesn’t include the bead and hanging loop.
The construction is simple. Each tier is worked sideways in short back-loop rows. The stitches go from a slip stitch at the top to half double crochets at the hem, which makes the ribs fan out. You gather the top edge into a point and add a single crochet hem edging. Then you stack the three tiers, sew on the trunk, and finish with the bead and loop.
Finished Size and Construction
- Finished size: 4.2 in (10.7 cm) wide x 4.0 in (10.2 cm) tall
- Skill level: Easy
- Terminology: US crochet terms
- Yarn weight: DK / light worsted (#3)
- Hook: 3.5 mm (E-4)
- Number of pieces: One finished ornament, built from 3 tiers + 1 trunk + 1 hanging loop
- Layout: Small tier on top, medium in the middle, large at the bottom, trunk centered under the large tier
- Tier size before edging (top point to hem): small 1.2 in (3.0 cm), medium 1.6 in (4.1 cm), large 2.0 in (5.1 cm)
- Tier size with edging: small 1.4 in (3.6 cm), medium 1.8 in (4.6 cm), large 2.2 in (5.6 cm)
- Border (hem edging) depth: 0.2 in (0.5 cm)
Materials
Choose a smooth, tightly plied DK or light worsted yarn. The ribs show best in a heathered or solid light color. A cotton blend or acrylic holds the fan shape better than a fuzzy yarn.
- Heather gray (MC): 10 g, about 23 m (25 yd)
- Brown (CC): 3 g, about 7 m (8 yd)
Tools:
- 3.5 mm (E-4) crochet hook
- Tapestry needle
- One 8 mm ivory pearl bead, plus a sewing needle and gray thread
- Scissors
- Stitch marker
- Pins and a small blocking surface
- Spray bottle of water
The yarn amounts include about 25% extra for testing your gauge and for longer sewing tails.
Abbreviations (US Terms)
- ch – chain
- sl st – slip stitch
- sc – single crochet
- hdc – half double crochet
- BLO – back loop only
- st(s) – stitch(es)
- MC / CC – main color / contrast color
Special stitch – graded BLO row: Each tier row is worked in back loops only. It goes from short to tall stitches: sl st at the top (point) end, sc in the middle and hdc at the hem end. The tall end grows faster than the short end, so the rows fan out. The unused front loops form the raised ribs.
Gauge and Checkpoints
Gauge: 5 sts = 1 in (2.5 cm) along a row, and 4 rows = 1 in (2.5 cm) measured at the hdc (hem) end. Work the gauge in BLO with a 3.5 mm hook.
Make the small tier first to test your gauge. It only takes a few minutes and tells you everything you need to know.
Checkpoints:
- Small tier, Row 1: the row of 6 sts measures 1.2 in (3.0 cm).
- Small tier, Row 12: the hem edge (hdc end) measures 3.0 in (7.6 cm) along the curve.
- Medium tier, Row 16: the hem edge measures 4.0 in (10.2 cm).
- Large tier, Row 20: the hem edge measures 5.0 in (12.7 cm).
- Trunk: 0.8 in (2.0 cm) wide x 1.0 in (2.5 cm) tall.
If your tier is too big: go down to a 3.25 mm hook, or check that you aren’t pulling your hdcs up too tall. If it is too small: go up to a 3.75 mm hook. Small differences are fine for an ornament. Make all three tiers at the same tension so the stack stays even.
Tiers
All three tiers use the same method. Only the length of the starting chain and the number of rows change. The turning ch 1 never counts as a stitch.
Small Tier (make 1, MC)
Ch 7.
Row 1: Sl st in 2nd ch from hook, sc in next 2 ch, hdc in last 3 ch, turn. (6 sts: 1 sl st, 2 sc, 3 hdc)
Row 2: Ch 1, working in BLO: hdc in first 3 sts, sc in next 2 sts, sl st in last st, turn. (6 sts)
Row 3: Ch 1, working in BLO: sl st in first st, sc in next 2 sts, hdc in last 3 sts, turn. (6 sts)
Rows 4–12: Repeat Rows 2 and 3 four more times, then work Row 2 once more. (6 sts in every row, 12 rows total)
You finish at the point (sl st) end. Fasten off, leaving a 6 in (15.2 cm) tail.
Gather the point: Thread the tail on a tapestry needle and weave it through the 12 row-ends along the sl st edge. Pull firmly so that edge closes into a point, then make 2 small stitches to lock it. The hdc edge now curves into a fan of about 143 degrees. Keep the tail for assembly.
Checkpoint: 1.2 in (3.0 cm) from point to hem, hem curve 3.0 in (7.6 cm).
Medium Tier (make 1, MC)
Ch 9.
Row 1: Sl st in 2nd ch from hook, sc in next 3 ch, hdc in last 4 ch, turn. (8 sts: 1 sl st, 3 sc, 4 hdc)
Row 2: Ch 1, working in BLO: hdc in first 4 sts, sc in next 3 sts, sl st in last st, turn. (8 sts)
Row 3: Ch 1, working in BLO: sl st in first st, sc in next 3 sts, hdc in last 4 sts, turn. (8 sts)
Rows 4–16: Repeat Rows 2 and 3 six more times, then work Row 2 once more. (8 sts in every row, 16 rows total)
Fasten off with a 6 in (15.2 cm) tail. Gather the 16 row-ends along the sl st edge into a point, the same way as the small tier.
Checkpoint: 1.6 in (4.1 cm) from point to hem, hem curve 4.0 in (10.2 cm).
Large Tier (make 1, MC)
Ch 11.
Row 1: Sl st in 2nd ch from hook, sc in next 4 ch, hdc in last 5 ch, turn. (10 sts: 1 sl st, 4 sc, 5 hdc)
Row 2: Ch 1, working in BLO: hdc in first 5 sts, sc in next 4 sts, sl st in last st, turn. (10 sts)
Row 3: Ch 1, working in BLO: sl st in first st, sc in next 4 sts, hdc in last 5 sts, turn. (10 sts)
Rows 4–20: Repeat Rows 2 and 3 eight more times, then work Row 2 once more. (10 sts in every row, 20 rows total)
Fasten off with a 6 in (15.2 cm) tail. Gather the 20 row-ends along the sl st edge into a point.
Checkpoint: 2.0 in (5.1 cm) from point to hem, hem curve 5.0 in (12.7 cm).
Every tier has twice as many rows as stitches per row: 12 rows for 6 sts, 16 for 8 and 20 for 10. Because of that, all three open to the same fan angle and look like matching layers.
Trunk (make 1, CC)
Ch 5.
Row 1: Sc in 2nd ch from hook and in each ch across, turn. (4 sc)
Rows 2–5: Ch 1, sc in each st across, turn. (4 sc)
Fasten off with an 8 in (20.3 cm) tail for sewing.
Checkpoint: 0.8 in (2.0 cm) wide x 1.0 in (2.5 cm) tall.
Hanging Loop (make 1, MC)
Ch 20, leaving a 6 in (15.2 cm) tail at both ends. The chain measures about 3.0 in (7.6 cm). Fold it in half to make a 1.5 in (3.8 cm) loop.
Assembly
First work the hem edging on all three tiers (see the Border section below) and block them lightly. Then put the tree together in this order:
- Lay out the large tier with the ribbed right side up and the point at the top.
- Place the medium tier on top, with its point 0.5 in (1.3 cm) above the large tier’s point. Its hem now sits 2.3 in (5.8 cm) below the top of the tree. Pin it.
- Place the small tier on top, with its point 0.5 in (1.3 cm) above the medium tier’s point. This is the top of the tree. Its hem sits 1.4 in (3.6 cm) below the top.
- Stitch the stack together: use the point tails to sew straight down the center line through all layers. Sew from the top point to just above each lower hem. Keep the stitches small and hidden in the ribs. Lightly tack the two hem corners of each tier to the tier below so they don’t flip up.
- Sew on the trunk: center it under the large tier. Tuck the top 0.2 in (0.5 cm) behind the large tier’s hem and whipstitch it to the back of the tier. About 0.8 in (2.0 cm) of trunk shows below the hem.
- Add the loop and bead: pull both loop tails through the top point to the back and knot them securely. Use gray thread to sew the 8 mm pearl to the top point, right at the base of the loop.
The large tier starts 1.0 in (2.5 cm) below the top and is 2.2 in (5.6 cm) long, so its hem sits 3.2 in (8.1 cm) below the top. The trunk ends 4.0 in (10.2 cm) below the top. Below each tier, the next tier down shows a 0.9 in (2.3 cm) band of ribbing.
Border: Tier Hem Edging
The hem edging gives each tier its soft, rounded lower edge and keeps the hdc row-ends from looking uneven. Work it along the curved hdc edge only, never along the gathered point edge.
Border gauge: 5 sc = 1 in (2.5 cm), the same as the body stitch gauge.
Small tier edging: With the right side facing, join MC in the first row-end at one hem corner. Ch 1, then sc in each row-end across the hem, working 1 extra sc in every 4th row-end. Fasten off and weave in.
Count: 12 sc (1 per row-end) + 3 extra sc = 15 sc.
Medium tier edging: Work the same as the small tier.
Count: 16 sc (1 per row-end) + 4 extra sc = 20 sc.
Large tier edging: Work the same as the small tier.
Count: 20 sc (1 per row-end) + 5 extra sc = 25 sc.
Why the math works: Each hdc row-end is 0.25 in (0.6 cm) tall, so 4 row-ends cover 1.0 in (2.5 cm). At border gauge, 1.0 in needs 5 sc. One sc per row-end gives 4 sc, and the extra sc in every 4th row-end makes it 5. So the edging is exactly as long as the hem: 15 sc = 3.0 in (7.6 cm), 20 sc = 4.0 in (10.2 cm) and 25 sc = 5.0 in (12.7 cm). The hem stays smooth, without ruffling or cupping.
With the edging added, the tiers measure 1.4 in (3.6 cm), 1.8 in (4.6 cm) and 2.2 in (5.6 cm) from point to hem. Measured straight across from one hem corner to the other, they are about 2.6 in (6.6 cm), 3.4 in (8.6 cm) and 4.2 in (10.7 cm) wide.
Final Blocking
- Weave in all ends except the ones you used for assembly.
- Mist the ornament lightly with water until it is damp, not soaked.
- Lay it face up on your blocking surface.
- Shape each hem into an even curve with your fingers. The large tier’s hem corners should be 4.2 in (10.7 cm) apart.
- Pin the trunk straight so it hangs centered under the large tier.
- Run a finger along the ribs from the point outward to straighten them.
- Let it dry completely, at least 6 hours, before you remove the pins.
Don’t press the ribs flat with an iron. The raised texture is the main design feature.
Final Quality-Control Checklist
- The small, medium and large tiers have 12, 16 and 20 rows.
- Every tier row has the correct stitch count: 6, 8 or 10.
- The hem edgings have 15, 20 and 25 sc.
- All three points are tightly gathered with no hole.
- The tiers are centered on one vertical line.
- Each lower tier shows an even 0.9 in (2.3 cm) band.
- The trunk shows 0.8 in (2.0 cm) below the large tier and sits straight.
- The pearl bead is firmly sewn and doesn’t wobble.
- The hanging loop is knotted securely on the back.
- The overall size is about 4.2 in (10.7 cm) wide x 4.0 in (10.2 cm) tall.
Troubleshooting
The tier cups into a cone instead of lying flat. Your sl sts or scs are too loose compared to your hdcs. Tighten the short end or loosen the hdcs slightly.
The hem ruffles. Your hdc rows are shorter than 0.25 in (0.6 cm). Leave out one of the extra sc in the edging, or work the tier with a slightly larger hook.
The hem pulls in. Your hdc rows are taller than the gauge. Add 1 more extra sc to the edging, spaced evenly.
There’s a hole at the point. Pull the gathering tail tighter and stitch a small cross through the center before locking it.
The ribs look flat. Check that you work in back loops only on every row after Row 1.
The tree leans to one side. Re-pin the tiers to a center line and redo the vertical stitches before you attach the trunk.
Care
Spot clean with cool water and mild soap, then reshape and lay flat to dry. Store the ornament flat or hanging, with nothing heavy resting on the tiers.
Final Notes
The measurements are easy to check at each step:
- Gauge: 5 stitches and 4 rows to the inch.
- Row lengths: tier rows are 1.2 in (3.0 cm), 1.6 in (4.1 cm) and 2.0 in (5.1 cm).
- Hem curves: 12, 16 and 20 rows give hems of 3.0 in (7.6 cm), 4.0 in (10.2 cm) and 5.0 in (12.7 cm).
- Edging: 15, 20 and 25 sc match those hems exactly and add 0.2 in (0.5 cm).
- Finished tree: stack the tiers 0.5 in (1.3 cm) apart and tuck the trunk under the bottom tier to get a 4.2 in (10.7 cm) x 4.0 in (10.2 cm) ornament.
Once you’ve made one, the rest go quickly. A small set in gray, cream and sage makes a lovely set of gift-tag ornaments.
Happy crocheting!